Posts

Concerned by the Privacy or Results of Google Search? Try These Other Search Engines

Google is big. Google Search generated $225 billion in revenue in 2022, thanks in part to being the default search engine on all Apple devices. To retain that position—and continue to reap the ad revenue that it generates—Google pays Apple about $18 billion every year. Along with Apple, Google pays billions to phone manufacturers like Samsung, LG, and Motorola; major wireless carriers such as AT&T, T-Mobile, and Verizon; and browser developers like Mozilla and Opera.

So is Google Search’s 90% market share because it’s the best search engine or because Google has enough money to pay distributors for top placement?

Along with concerns about whether Google is the best search engine, some people worry about Google collecting information about them to show targeted ads alongside search results. The more information Google has on users, the argument goes, the better that ads can be targeted, and the more likely it is that users will click the ads, which generates money for Google from advertisers. Others worry that Google’s results may reflect certain types of bias.

If you’re perturbed by the privacy implications of Google knowing everything you search for, or if you’ve found Google’s search results less helpful than you’d like, you can easily switch to another search engine to see if you prefer its results and privacy stance.

How to Switch Search Engines

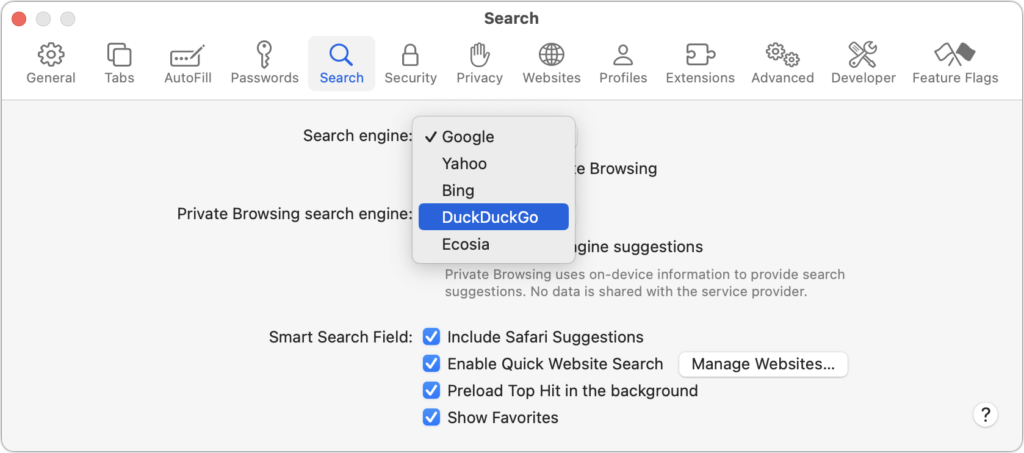
For many Apple users, the main place to choose a preferred search engine is in Safari’s settings. On the Mac, choose Safari > Settings > Search and choose the desired search engine from the Search Engine pop-up menu. You can choose a different one for Private Browsing windows if you want.

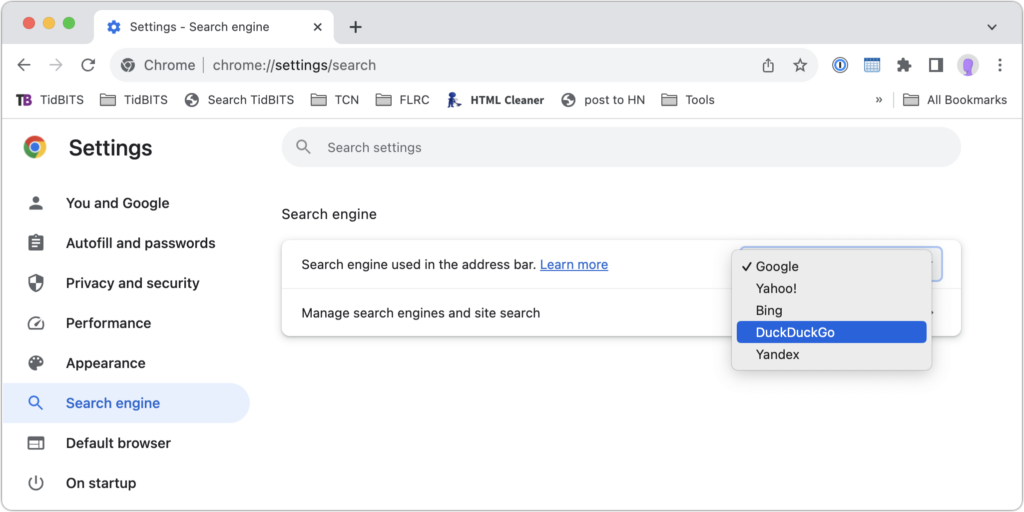
In Chrome-based browsers like Google Chrome, Arc, Brave, Microsoft Edge, and Opera on the Mac, open the settings and look for Search Engine. A pop-up menu lets you choose from some standard options, and additional choices let you add search engines like Brave Search that are too new (or not paying) to appear. Firefox offers similar options when you choose Firefox > Settings > Search.

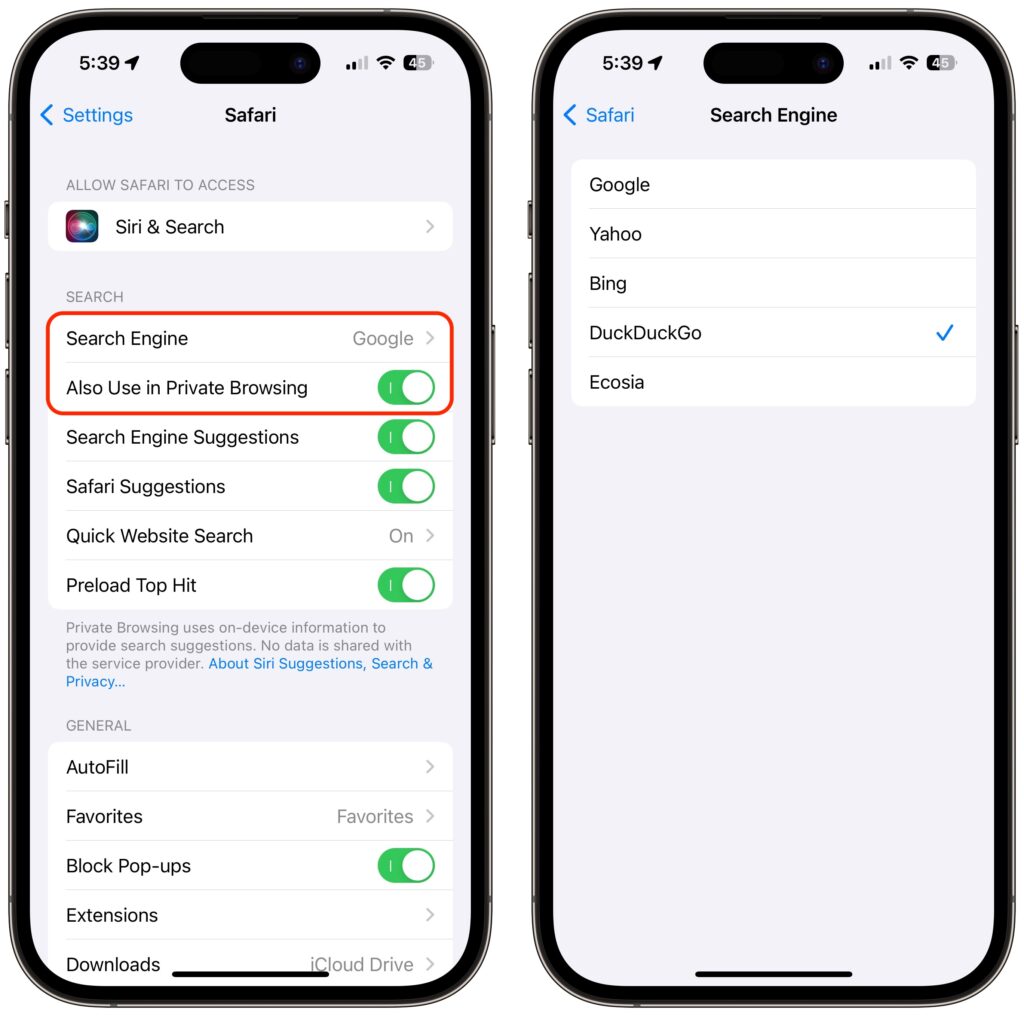
On the iPhone and iPad, go to Settings > Safari >  Search Engine. Again, if you want a different search engine in Private Browsing tabs, turn off Also Use in Private Browsing and choose another option.

Top Alternative Search Engines

Conceptually, what search engines do is simple—they search a set of Web pages for matching keywords and return a list of them in order of relevance to the user. The hard part is dealing with the number of pages—estimates suggest Google indexes 50 billion pages and Bing 4.5 billion—and scaling the service to respond instantly to tens or hundreds of millions of queries per day. (Google processes 8.5 billion searches per day; Bing handles 400 million.) Beyond Google, here are the main search engines and what sets them apart. (You will also likely see Yandex, sometimes called “the Google of Russia.” Avoid it. For so many reasons.)

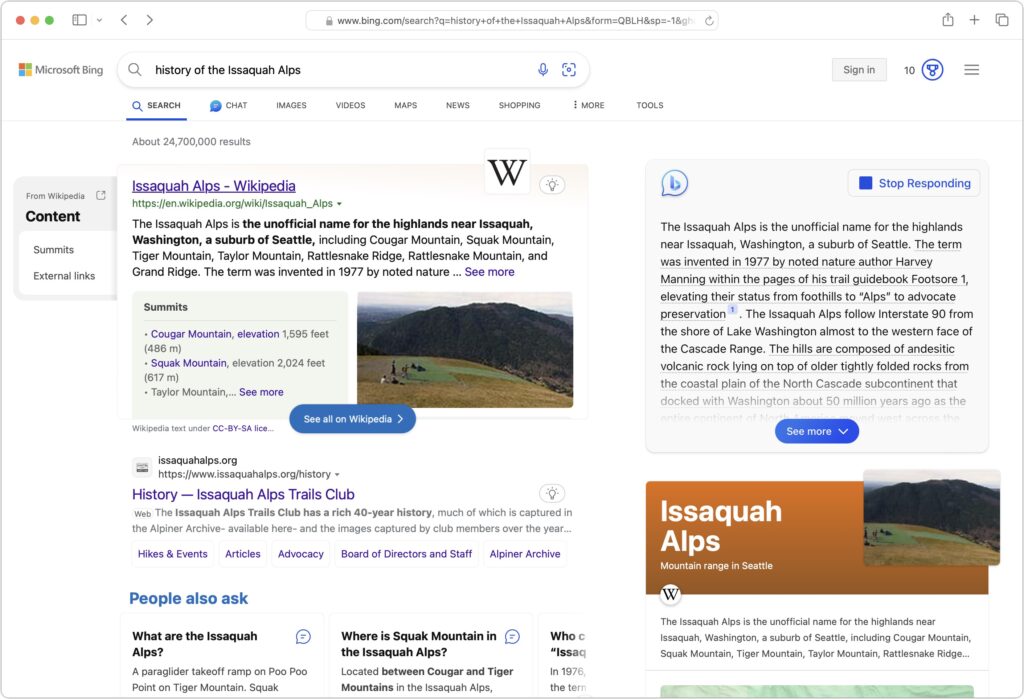
  • Bing: The second-most popular (though far, far behind Google) search engine in the world, Microsoft’s Bing sets itself apart with a busy, highly designed search results page that mixes a variety of results. It may work well for you, or you may find it overwhelming and difficult to parse. Microsoft is also putting a lot of effort into chat-based AI-powered results. Bing claims to offer more user privacy than Google, but it’s still tracking users to target ads better. If Bing has better privacy than Google, it may mostly be due to not being part of the larger Google data-collection empire.
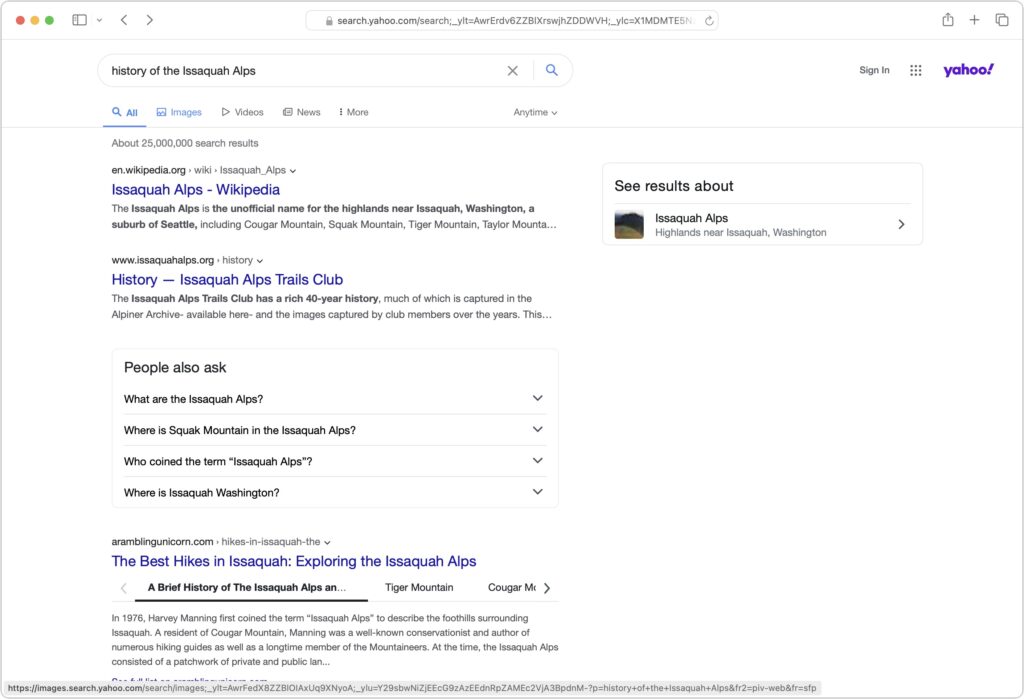
  • Yahoo: Though it was the first Web search engine, Yahoo hasn’t run its own index since 2009. Today, Yahoo’s search results are powered by Microsoft Bing, so while the look of the search results page may differ, the results should be identical to Bing’s. Yahoo’s privacy stance is also similar to Bing’s.
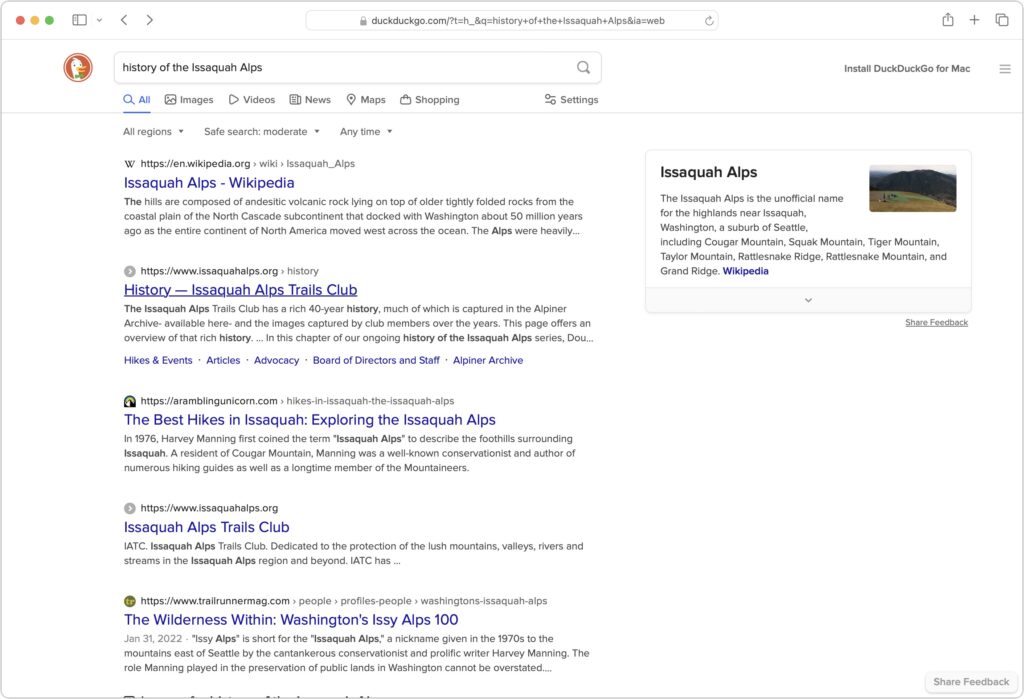
  • DuckDuckGo: If privacy is paramount, DuckDuckGo is worth a look because it does not track or store user information at all. Instead, it chooses ads to display only by matching with search keywords. Although it uses Bing for some of its results, DuckDuckGo also incorporates information from numerous other sources, so it won’t seem like an exact clone of Bing.
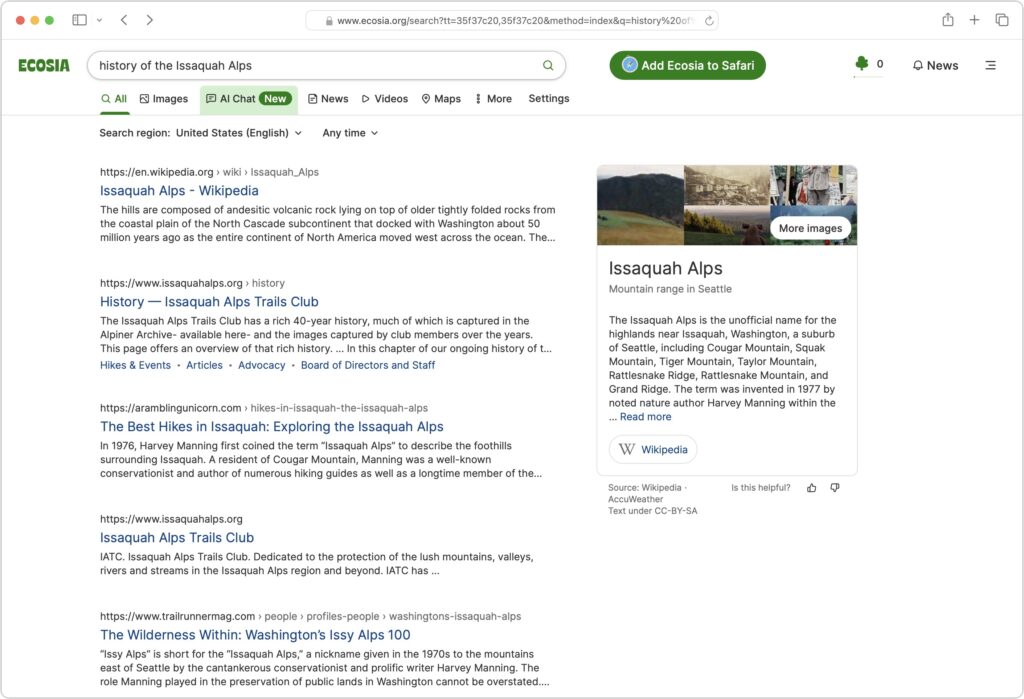
  • Ecosia: The main reason to use the Berlin-based Ecosia is if you like Bing’s results (but not its layout) and want to support a “social business” that claims to be carbon-negative, offers full financial transparency, and protects users’ privacy. Founded in 2009, Ecosia today relies entirely on Bing’s search results and ads (clicks on which are how Ecosia earns money), and it claims to have planted over 188 million trees in 35 countries since its inception. It’s hard to argue with Ecosia’s environmental results, but as a search engine, it doesn’t feel special.
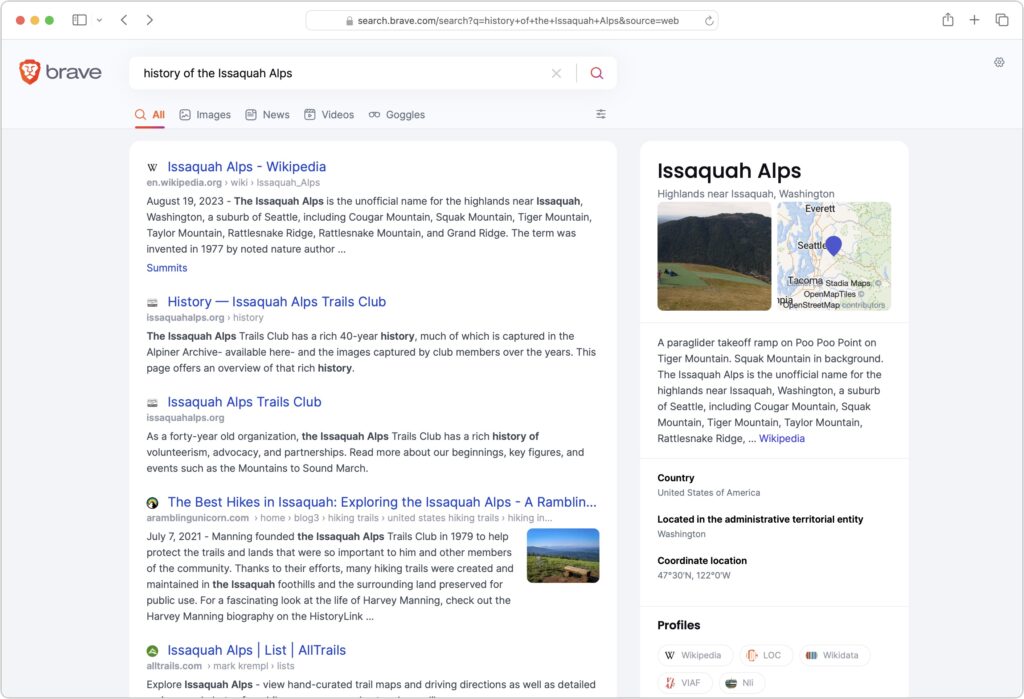
  • Brave Search: A truly independent search engine, Brave Search relies on its own created-from-scratch index (it leaned on Google and Bing for some results early on, but ceased in August 2023). It also emphasizes user privacy and doesn’t track users, searches, or clicks. Although Brave Search displays keyword-based ads by default, users can pay $3 per month for Brave Search Premium, which provides ad-free results pages. You’ll have to set Brave as the default search engine for most browsers manually; for Safari, all you can do is make a favorite to search.brave.com.
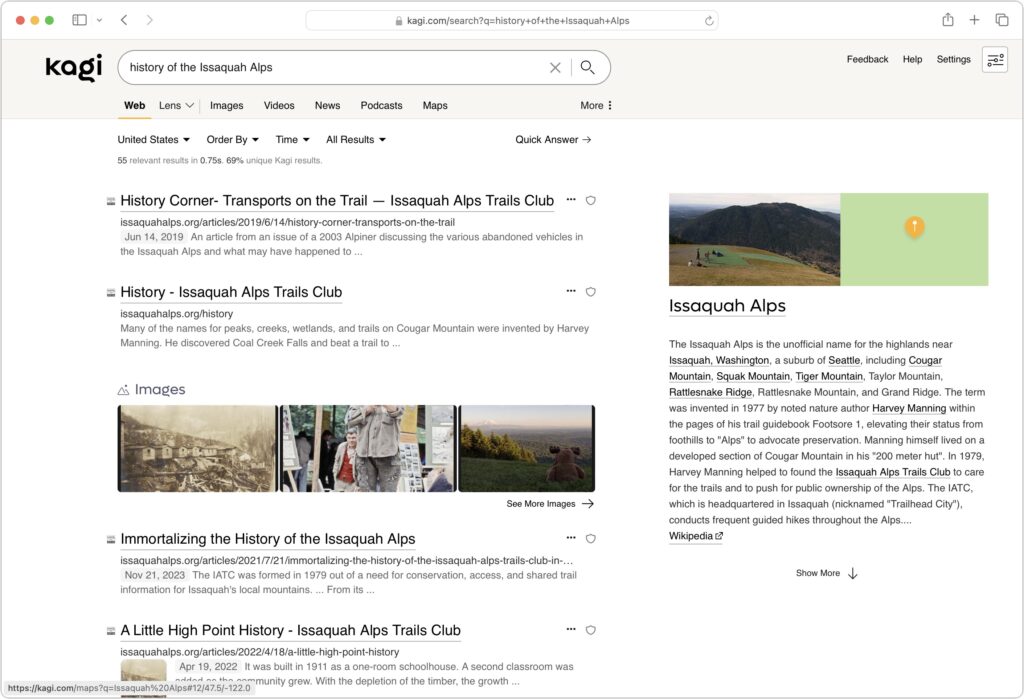
  • Kagi: Speaking of paid search engines, if you really want to avoid ads, Kagi is another independent search engine that rolls its own index and provides access only to subscribers, eschewing ads entirely. You can sign up for a 100-search test account, and if you like it, pay $5 per month for 300 searches or $10 per month for unlimited searches. As with Brave Search, you must manually set Kagi as the default search engine (there’s an extension for Safari).

The “best” search engine is the one that gives you the answers you want without triggering privacy worries or concerns about bias. If you want to see if something other than Google will work better for you, set it as your default search engine and try it for a few weeks.

(Featured image by iStock.com/Prykhodov)


Social Media: Have you become disillusioned by Google due to its search quality or how it tracks your activity to serve targeted ads? You can try other search engines that promise to protect your privacy and provide independent search results.

If Mail Fails to Send, Try, Try Again (Instead of Changing Servers)

Sometimes, something goes wrong, causing Mail on the Mac to have trouble sending a message. When it does, you may see an error like the one below, encouraging you with a default button to try another configured server. Don’t do it! Always click Try Later. If that still doesn’t work, contact your favorite tech support professional to troubleshoot the problem with the SMTP server associated with the account from which you’re sending. Attempting to send through another SMTP server is a recipe for trouble because various anti-spam checks may fail, causing your message to be filtered as spam or bounced back to you. Worse, if you select a different server and click Try With Selected Server, Mail remembers that choice going forward, so you will have to reset it manually later.

(Featured image by iStock.com/Marut Khobtakhob)


Social Media: If Mail on your Mac throws an error about being unable to send a message, always have it try again later rather than switching to a different server. Otherwise, your messages may look like spam and be blocked.

Lift Objects from Photos on the iPhone

Have you ever wanted to extract an object from a photo for use in another context? Starting with iOS 16 on a relatively recent iPhone, you can do that with many photos. In the Photos app, touch and hold the object, and if Photos can extract it, you’ll see a highlight run around its edges. Raise your finger, and a popover lets you copy the object, look up information about it, turn it into a sticker (in iOS 17), or share it. Or you can start dragging the object, switch apps with your other hand, and drop it into another app, like Messages. With Universal Clipboard, you can even lift an object on an iPhone, copy it, switch to Preview on your Mac, and choose File > New from Clipboard. File this one under Arthur C. Clarke’s Third Law, which states, “Any sufficiently advanced technology is indistinguishable from magic.”

(Featured image by Adam Engst)


Social Media: Starting with iOS 16, Apple made it possible to extract objects from photos. You can drag objects to other apps, copy them, turn them into stickers, and more.

Use This Hidden Setting to Stop Triggering Caps Lock Accidentally

There’s little more annoying than accidentally touching the Caps Lock key while typing and having your text suddenly TURN INTO CAPITAL LETTERS, which we all know is seen as shouting. Unless you have some reason to type in capital letters regularly, you can prevent this mistake by disabling the Caps Lock key or remapping it to another modifier key. In macOS 13 Ventura and later, choose System Settings > Keyboard > Keyboard Shortcuts > Modifier Keys, and choose from the pop-up menu next to Caps Lock. (In earlier versions of macOS, open System Preferences > Keyboard > Modifier Keys.)

(Featured image by Adam Engst)


Social Media: If you very seldom want to type in all caps, disable or remap the Caps Lock key so an errant key press doesn’t turn it on accidentally.

Locate a Featured Lock Screen Image in Photos

iOS’s Photo Shuffle wallpaper does a great job of identifying attractive photos for your Lock Screen. However, if you’re like us, you’ll sometimes wonder when or where you took a Lock Screen photo. Here’s how to figure that out. Touch and hold the Lock Screen when it’s displaying the photo in question, tap Customize, tap the Lock Screen wallpaper, tap the ••• button in the lower-right corner, and tap Show Photo in Library. Then you can swipe up to reveal more information about the photo, swipe left and right to see the photos on either side, or pinch to see it in the context of your entire photo library.

(Featured image by Apple)


Social Media: Do you sometimes wonder when or where you took a photo that iOS’s Photo Shuffle wallpaper is displaying on your Lock Screen? Us too, and here’s how to find out more.

Feel Free to Upgrade to macOS 14 Sonoma When You’re Ready

Although we’re cautious about recommending that people upgrade to the latest major release of macOS, we think Apple has done a good enough job with macOS 14 Sonoma that anyone who wants to upgrade can do so now. That doesn’t mean you have to upgrade immediately, but there’s no major reason most people need to delay.

Our confidence comes from our positive experience working with those who have upgraded to Sonoma and the fact that Sonoma has received only three updates so far.  None included significant bug fixes:

  • macOS 14.1 fixed two bugs that could reset the System Services settings within Location Services and prevent encrypted external drives from mounting.
  • macOS 14.1.1 came with generic release notes, but the community discovered that it fixed a bug introduced in 14.1 that affected Photoshop and another that could prevent a new M3 24-inch iMac that shipped with macOS 13 Ventura from upgrading to Sonoma.
  • macOS 14.1.2 focused on fixing two WebKit-related security vulnerabilities that were exploited in iOS.

Apple will likely release another update before the end of the year, probably macOS 14.2, with some promised features, a few more bug fixes, and the usual handful of security improvements. After that, the company will continue with an update every month or so to address newly discovered bugs and security vulnerabilities.

That said, you can put off the Sonoma upgrade as long as you’re running macOS 12 Monterey or macOS 13 Ventura and are staying current with Apple’s security updates. Earlier macOS versions no longer receive security fixes, rendering them more vulnerable to attack. Possible reasons to continue delaying include:

  • You’re too busy. The upgrade process will take a few hours, plus some additional time to configure everything properly afterward. When you are ready to upgrade, aim for when a little downtime will be convenient.
  • You rely on incompatible software. The jump from Monterey or Ventura to Sonoma isn’t a big one, so most modern apps should have been updated by now. But if you’re still running macOS 10.14 Mojave or earlier with 32-bit apps, you’ll lose access to them if you upgrade. There’s nothing new here—32-bit apps stopped working in macOS 10.15 Catalina in 2019. Rather than delaying, consider running Mojave and your 32-bit apps in a virtual machine using VMware Fusion or Parallels Desktop.
  • You need consistent versions for workflow reasons. We’re unaware of any examples here, but it’s conceivable that a coworker could be stuck on an older version of macOS and older versions of shared productivity apps. If your upgrade would force you to update those apps and introduce compatibility issues when collaborating with that coworker, you may have to wait until your coworker can upgrade as well.

Sonoma won’t transform your experience of using a Mac, but it has new features you might appreciate. The most noticeable is probably desktop widgets that provide updated information at a glance—you can even add widgets from your iPhone. Sonoma also lets you turn websites in Safari into standalone apps, enjoy aerial screensavers from the Apple TV, create a video overlay of yourself on video calls when sharing your screen, autofill PDF forms, and use the keyboard while dictating.

Before You Upgrade

Once you’ve decided to upgrade to Sonoma, you have three main tasks:

  • Update apps: Make sure all your apps are as up-to-date as possible. If you regularly put off updates, now’s the time to let them complete so you have Sonoma-compatible versions.
  • Clear space: Sonoma may need as much as 25 GB of free space to upgrade, and the Sonoma installer itself is about 12 GB, so we recommend making sure you have at least 37 GB free. Don’t cut this close—you should always have at least 10–20% free space for virtual memory, cache files, and breathing room. Check in Ventura by choosing System Settings > General > Storage; in earlier versions of macOS, choose About This Mac from the Apple menu and click Storage. System Settings provides quick ways to free up space. Another easy one for iCloud Drive users is to Control-click large folders and choose Remove Download to “evict” the local versions of those files temporarily; Box, Dropbox, and Google Drive have similar features.
  • Make a backup: Never, ever install an update to macOS without ensuring you have at least one current backup first. In an ideal world, you’d have an updated Time Machine backup, a duplicate, and an Internet backup. That way, if something goes wrong, you can quickly revert.

Upgrading

After completing those tasks, ensure you won’t need your Mac for a few hours. There’s no telling exactly how long the upgrade will take, so never start an upgrade if you need the Mac soon.

Initiating the upgrade is just a matter of opening System Settings > General > Software Update in Ventura (System Preferences > Software Update in previous versions of macOS), clicking the Upgrade Now button, and following the instructions. If you’d like more handholding, check out Joe Kissell’s ebook Take Control of Sonoma.

After You Upgrade

Part of the reason to set aside plenty of time for your Sonoma upgrade is that there are usually cleanup tasks afterward. We can’t predict precisely what you’ll run into, depending on what version of macOS you’re running now and what apps you use, but here are a few situations we’ve noticed in the past:

  • macOS may need to update its authentication situation by asking for your Apple ID password, your Mac’s password, and if you have another Mac, its password as well. Don’t worry that your Mac has been compromised by malware—it’s fine.
  • Some apps may have to ask for various permissions even though you previously granted them. Again, that’s fine and won’t happen again.
  • If you use your Apple Watch to unlock your Mac and apps (and you should, it’s great!), you may need to re-enable that in System Settings > Touch ID & Password (or Login Password on a non-Touch ID-enabled Mac (previously, it was in System Preferences > Security & Privacy > General).
  • If you use Gmail, Google Calendar, or other Google services, you may need to log in to your Google account again.
  • Websites that usually remember your login state may require that you log in again. If you’re using a password manager like 1Password, that’s easy.
  • You may have to re-enable text message forwarding to your Mac. You do this on your iPhone in Settings > Messages > Text Message Forwarding.

With all that housekeeping done, it’s time to check out all the new features in Sonoma!

(Featured image by Apple)


Social Media: When should you upgrade to macOS 14 Sonoma? There’s no need to install it today, but we think it’s now safe for those who want to take advantage of the new features and integration with Apple’s other operating systems.

Open the Mac’s Control Center with This Obscure Keyboard Shortcut

With macOS 13 Ventura, Apple brought Control Center from iOS to the Mac, providing a unified interface for features that users need to turn on and off regularly or that receive frequent adjustments, like screen brightness and audio volume. Clicking the Control Center icon in the menu bar brings it up, but it’s a small, hard-to-hit target. For faster and easier access to Control Center from within any app, press fn-C. (All current Apple keyboards have an fn key, but if you’re using a third-party keyboard that lacks one, you’re out of luck.)

(Featured image by Adam Engst)


Social Media: Control Center brings together controls for a collection of core macOS features, but its menu bar icon is small, making it hard for some to click. Luckily, there’s a hidden shortcut to bring it up quickly from the keyboard.

In Your Face App Guarantees That You Notice Appointment Alerts

It’s easy to get caught up in what you’re doing and miss an alert for a Zoom meeting or a reminder to leave for an appointment. The Mac app In Your Face ensures that will never happen again by taking over the entire screen for notifications and requiring that you click a button to dismiss or snooze it. It can also play sounds repeatedly, lets you pick which calendars and reminder lists to use, gives you single-click access to videoconference links in events, and shows ongoing and upcoming events in the menu bar. In Your Face costs $1.99 per month or $19.99 per year, or it’s available in the $9.99 per month Setapp bundle of over 230 Mac apps.

(Featured image by Blue Banana Software)


Social Media: Are you often late to online meetings or in-person appointments because you were too focused on your work to notice the time? The In Your Face app ensures you’ll never miss an important meeting again.

The “Hey” Part of “Hey Siri” Is Now Optional

If you use Siri, particularly on a HomePod, you’re probably accustomed to saying “Hey Siri” as the trigger phrase before your requests. In Apple’s new operating systems for 2023, you can now choose to invoke Siri using the traditional “Hey Siri” or just “Siri” (at least in Australia, Canada, the UK, and the US). You might appreciate being able to stop saying “Hey” every time, or you might find that using just “Siri” generates incorrect activations. (And if someone in your family’s name sounds like Siri, you may want to turn the feature off entirely!) There are four places to look:

  • iOS 17 and iPadOS 17: Settings > Siri & Search > Listen For
  • macOS 14 Sonoma: System Settings > Siri & Spotlight > Listen For
  • watchOS 10: Watch app > My Watch > Siri > Listen For
  • HomePod Software 17: Home app > long-press HomePod > Accessory Settings > Listen For “Siri” or “Hey Siri”

(Featured image based on an original by Apple)


Social Media: In Apple’s new operating systems for 2023, you can choose to invoke Siri with just “Siri” or the old “Hey Siri”—or turn the feature off entirely. We explain where to find the feature for each of your Apple devices.

watchOS 10.1 Brings Double Tap to the Apple Watch Series 9 and Apple Watch Ultra 2

Apple recently released watchOS 10.1, with support for the much-ballyhooed double-tap gesture that selects the primary action in many apps without requiring that you touch the screen! It’s available only on the new Apple Watch Series 9 and Apple Watch Ultra 2, where you activate it by raising your wrist and tapping your thumb and index finger together twice. On the main Apple Watch screen, a double tap opens the Smart Stack of widgets you would otherwise get by turning the Digital Crown, and subsequent double taps advance through the widgets. A double tap also activates the primary action in many apps, such as answering and ending phone calls, playing and pausing media, viewing and scrolling through messages, ending timers, stopping and resuming the stopwatch, snoozing an alarm, responding to reminders from the Workout app, and performing the primary action from notifications. Whenever you double tap, you’ll see this icon at the top of the screen. If you have a supported Apple Watch model, give it a try!

(Featured image by Adam Engst, article image by Apple)


Social Media: Apple’s promised double-tap gesture is now available in watchOS 10.1 for those with an Apple Watch Series 9 or Apple Watch Ultra 2. Give it a try to perform the primary action in a watchOS app without touching the screen.