Let’s be honest—text editing in iOS has never been anywhere near as good as it is on the Mac. We may be more accustomed to our mice and keyboards, but the Multi-Touch interface has always been clumsy when it comes to text. Apple keeps trying to improve iOS’s text editing features, and iOS 13 (and iPadOS 13) brings some welcome changes in how we go about positioning the text insertion point, selecting text, and performing the familiar options in the Mac’s Edit menu: Cut, Copy, Paste, and Undo/Redo. Has it caught up with the Mac yet? You’ll have to decide that for yourself, once you’ve learned the new techniques.
Note that these changes apply only to spots in iOS where you’re entering and editing text, not selecting and copying static, read-only text such as a Web page in Safari. And even when you are working on a Web page where you can enter and edit text, the site may override iOS’s text handling.
Insertion Point Positioning
Positioning the insertion point on the Mac is easy—you move the cursor to the right spot and click. In previous versions of iOS, you could tap to put the insertion point at the start or end of a word, or press and hold briefly to bring up a magnifying glass that let you put the insertion point anywhere, including within a word. It was slow and awkward, and made better mostly by trackpad mode, which you could invoke by long-pressing the Space bar.
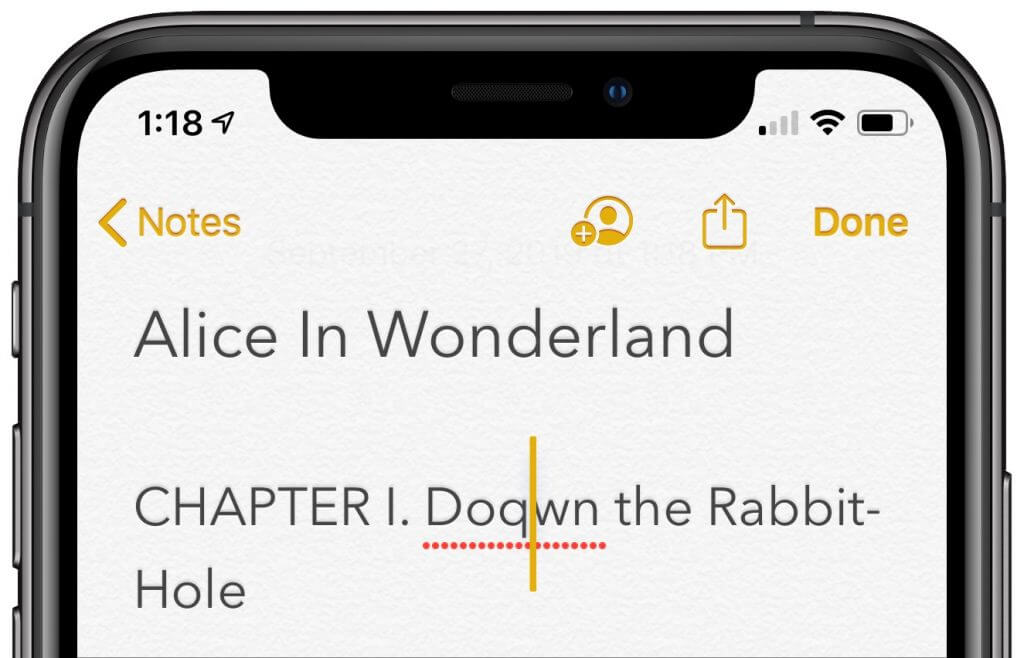
iOS 13 improves positioning by letting you press and hold the insertion point to pick it up and then drag it to where you want it. This approach is much easier and more sensible than the previous method.
Selecting Text
On the Mac, you can select text with multiple clicks, by clicking and dragging, or by using the keyboard. In iOS, however, text selection has always been tough—you could double-tap to select a word, but anything else required subsequent moving of start and end markers. (On an iPad with a keyboard, you could hold Shift and use the arrow keys too.)
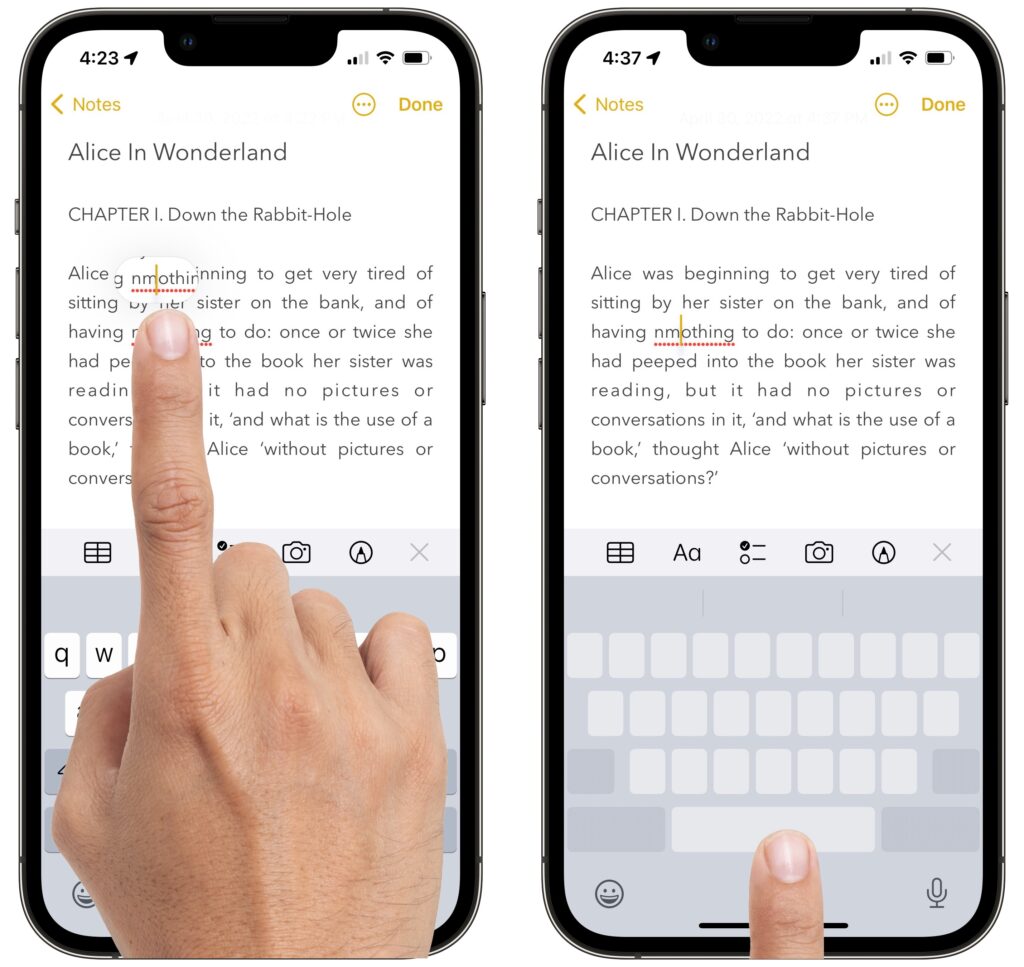
Happily, iOS 13 improves text selection. To start, you can still double-tap to select a word, but you can also triple-tap to select a sentence (shown below) and even tap four times in quick succession to select an entire paragraph. Unfortunately, these selection shortcuts may not work in all apps, but you can always fall back on the previous approach.
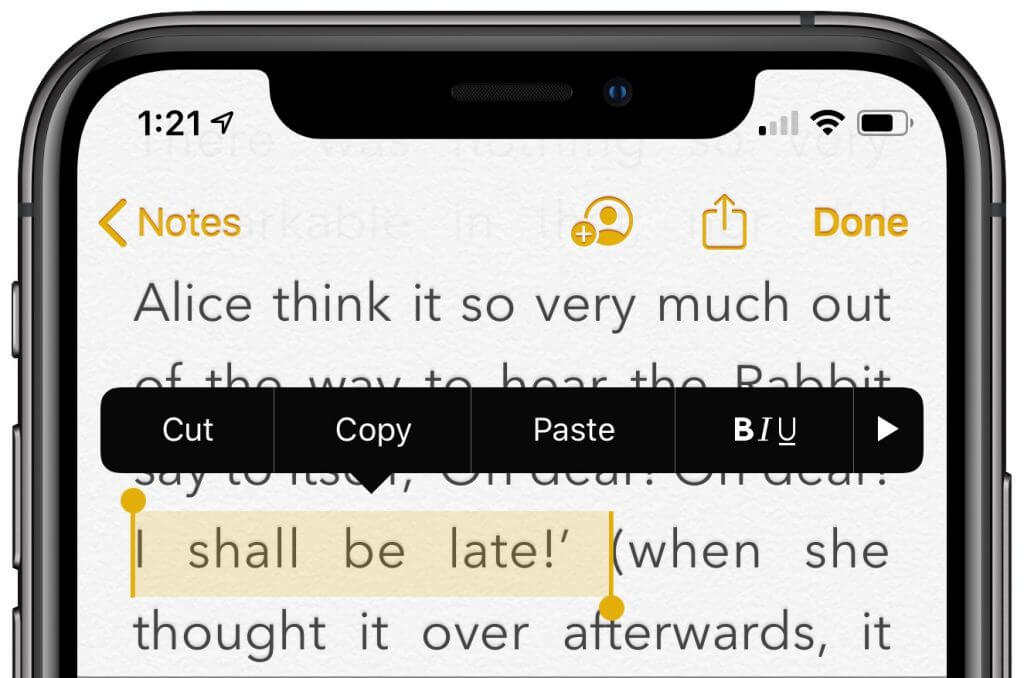
For selections of an arbitrary length, just press, pause ever so briefly to start selecting, and then drag to extend the selection. In other words, it’s as close to the Mac approach as is possible with the Multi-Touch interface. If the selection isn’t quite right, you can adjust the start and end markers.
Cut, Copy, Paste, and Undo Gestures
Everyone knows Command-X for Cut, Command-C for Copy, Command-V for Paste, and Command-Z for Undo on the Mac. In previous versions of iOS, those commands were available only from a popover that appeared when text was selected, or (for Paste) when you pressed and held in a text area. The only command with a gesture, so to speak, was Undo. At the risk of dropping it, you could shake your iOS device to undo your last action. Not good.
iOS 13 introduces a variety of three-finger gestures to make these commands quick and easy to invoke. Note that you can use the entire screen for these gestures—it’s OK to make them with one finger over the keyboard.
- Copy: To copy selected text, pinch in with three fingers, or, more likely, your thumb, index finger, and middle finger.
- Cut: To cut (copy and then delete) selected text, perform the copy gesture twice in quick succession.
- Paste: To paste the text you’ve copied at the insertion point, reverse the action—pinching out (spreading) with three fingers.
- Undo: To undo a mistake, immediately swipe left or tap twice with three fingers. You can keep swiping or double-tapping to undo more actions.
- Redo: To redo the action that you just undid, swipe right with three fingers.
Whenever you use one of these gestures, a little feedback badge appears at the top of the screen to reinforce what you just did.
If you can’t remember which direction to pinch or swipe, press and hold with three fingers anywhere for a second to see a shortcut bar at the top of the screen with icons for Undo, Cut, Copy, Paste, and Redo.

Finally, instead of using Cut and Paste to move a swath of selected text, try dragging it to the new position.
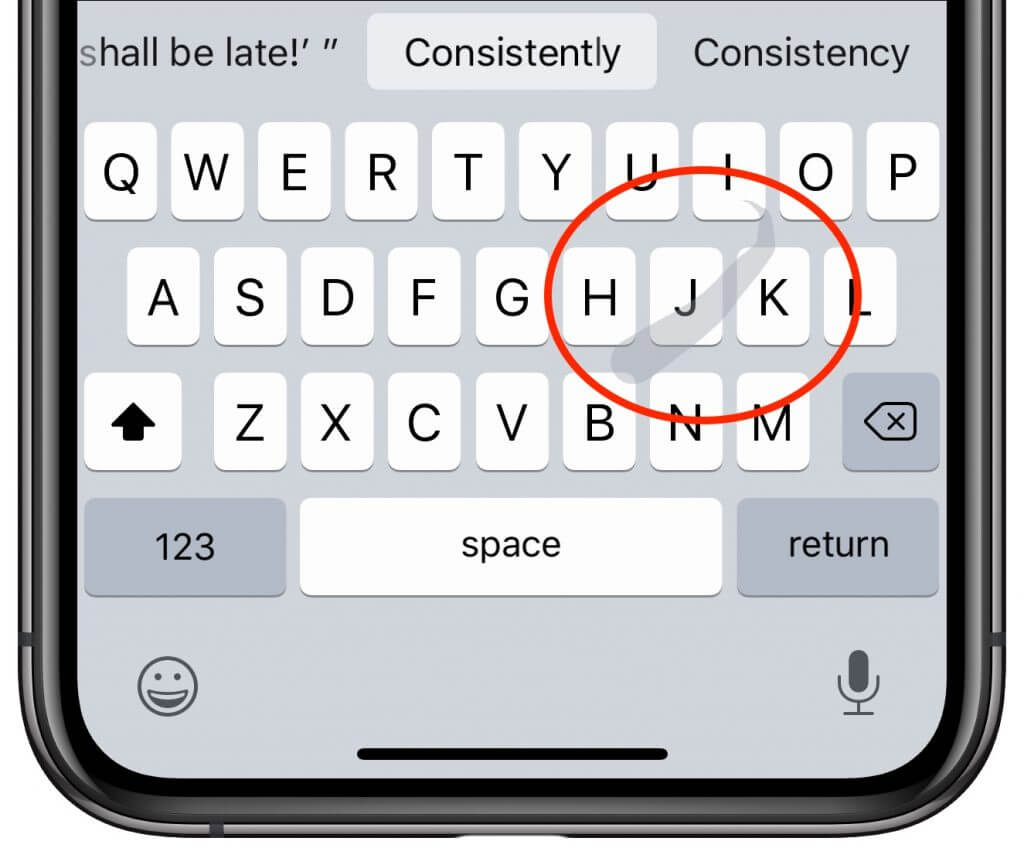
Slide to Type
Various third-party keyboards have provided “slide-to-type” over the years, letting you type a word by sliding your finger from letter to letter on the keyboard without lifting it up in between. But switching to a third-party keyboard meant that you often gave up useful other features, like Siri dictation, so most people stuck with Apple’s default keyboard.
On the iPhone, iOS 13 now lets you slide to type on its default keyboard, and it works surprisingly well. In iPadOS 13, slide-to-type works only on the new floating keyboard you can get by pinching with two fingers on the default keyboard (pinch out with two fingers to restore the default keyboard). When you get to the end of a word, lift your finger to insert it, and then start sliding again for the next word. If you make a mistake, the suggestions above the keyboard often provide the word you want. You can switch between tapping (best for unusual words) and sliding on a word-by-word basis.
Make a mistake with sliding? By default, tap Delete after inserting a slide-to-type word to delete the whole word, not just the final letter. If you don’t like that behavior, turn off Delete Slide-to-Type by Word in Settings > General > Keyboard.
(Featured image by Lorenzo Cafaro from Pixabay)
Social Media: Today’s article will make text editing in iOS 13 faster and more fun. Read about important new and improved techniques for selecting, copying, and moving text, plus a new slide-to-type option.