The Many New Lock Screen Customizations in iOS 16
iOS 16 has been out for a bit now, and it’s likely safe to upgrade as long as you don’t rely on obsolete apps that might not be compatible. When you take the plunge, the first new feature to check out is the capability to create, customize, and switch among multiple Lock Screens, each with its own wallpaper, clock font, and widgets. It’s reminiscent of how you customize Apple Watch faces. Plus, you can now link a Lock Screen to a Focus so you know when that Focus is active.
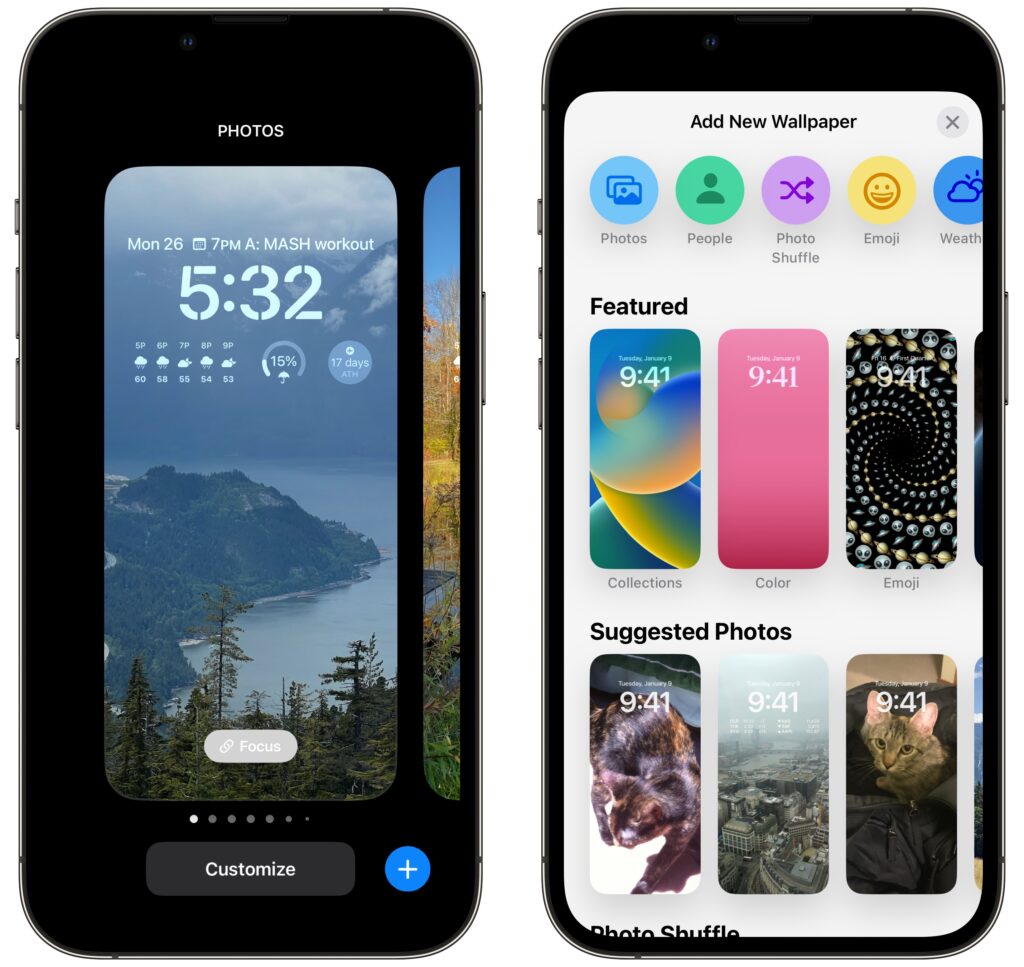
To get started, touch and hold the Lock Screen until the Lock Screen switcher appears. (Your iPhone must be unlocked at this point, which can be a bit tricky with a Touch ID-based iPhone—gently touch the Home button to authenticate, but don’t press it or you’ll open the Home Screen.)
Tap the blue plus button to create a new Lock Screen—see below for how to configure it. Once you have several Lock Screens, swipe left and right to pick one, and tap it to make it active. You can customize aspects of a Lock Screen after creating it by tapping the Customize button, and if you don’t like what you’ve done, delete it by swiping up and tapping the trash button.
Wallpapers
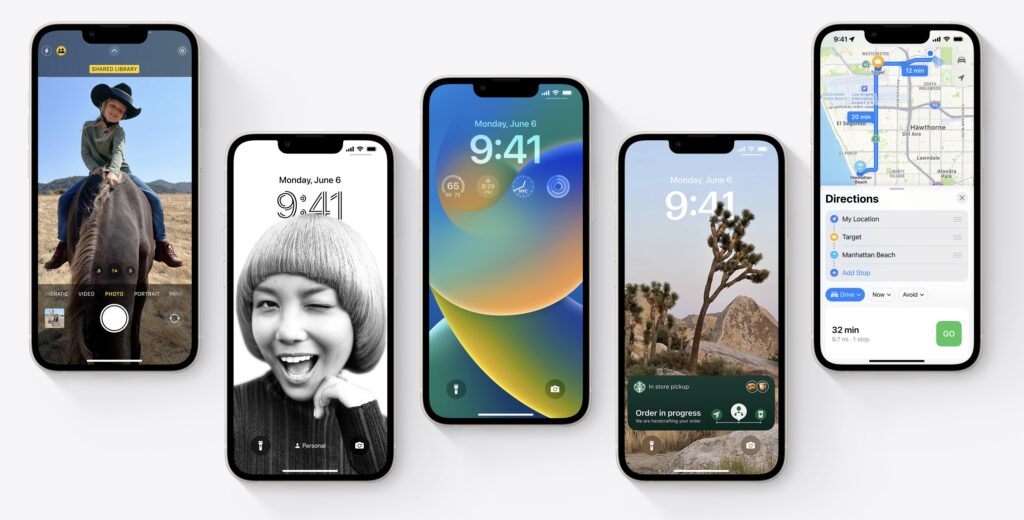
iOS 16 offers seven types of wallpapers, which you select while creating a Lock Screen by tapping buttons at the top or samples in a visual gallery below.
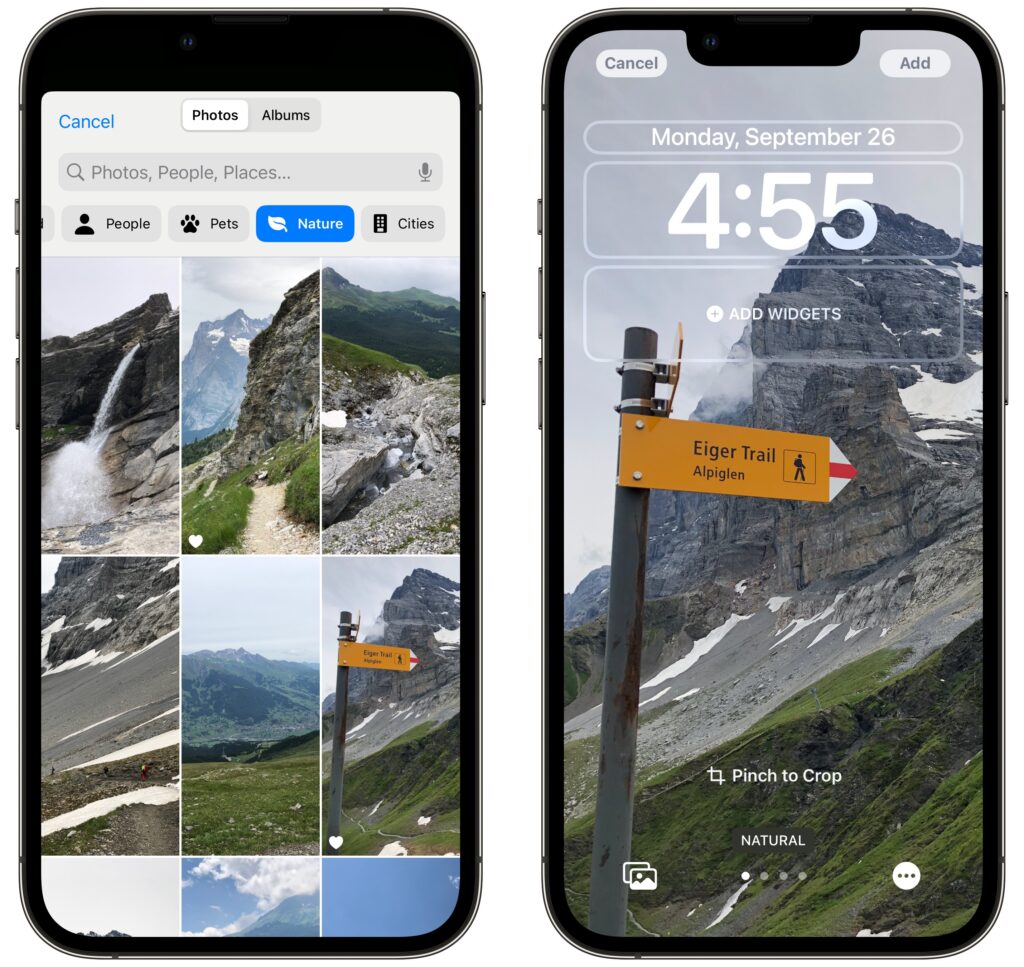
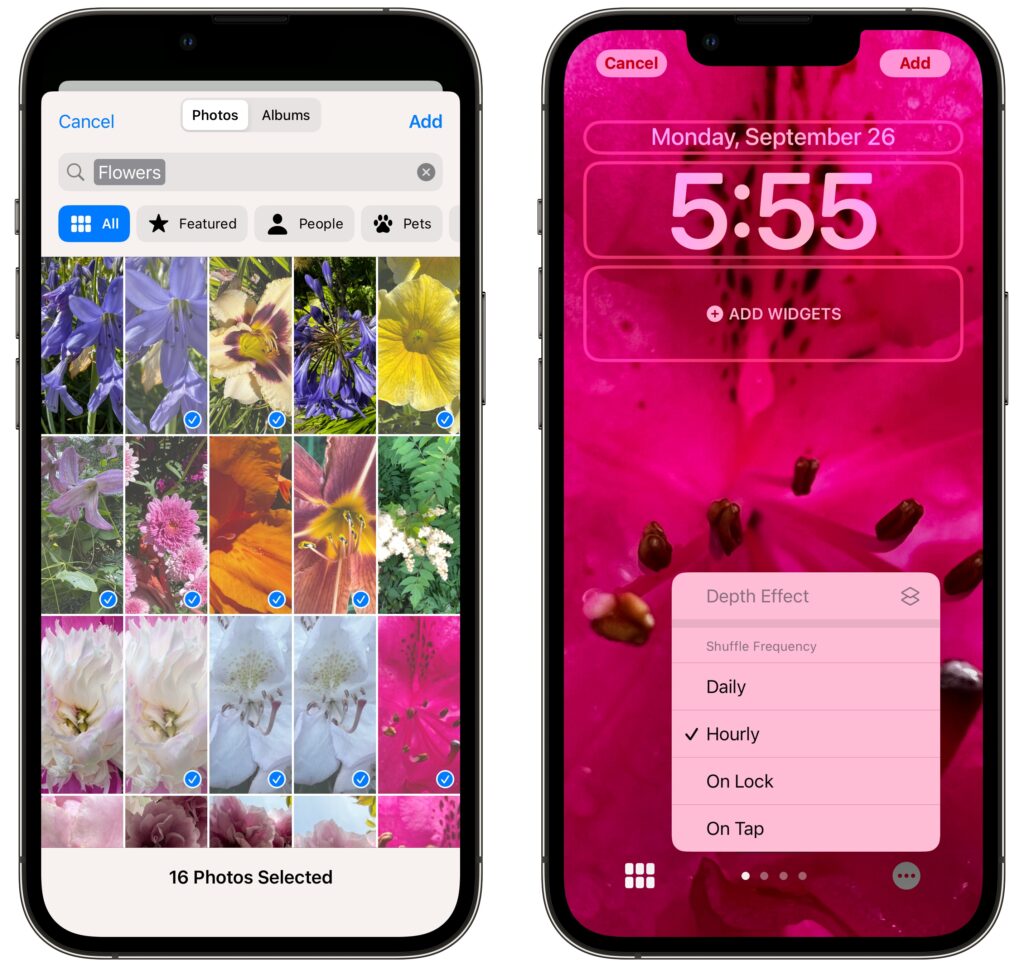
- Photos: Most people will choose a photo for their wallpaper. iOS 16 uses machine learning to identify images that are likely to work well, separating them with image-selection filters into four categories: People, Pets, Nature, and Cities. You can also scroll through all your photos or particular albums and search for photos. Some people and pets will float above the clock (unless you add widgets), but you can toggle that with the Depth Effect option accessible in the ••• button.

- Photo Shuffle: Having trouble deciding which photo you prefer? The Photo Shuffle wallpaper automatically selects and switches between photos for you, letting you specify which categories to use, which people to include, and even which individual photos to show or hide (tap the ••• button to remove a suggested photo from the rotation). You can set the photo to rotate with a tap on the Lock Screen, whenever you lock your iPhone, hourly, or daily.
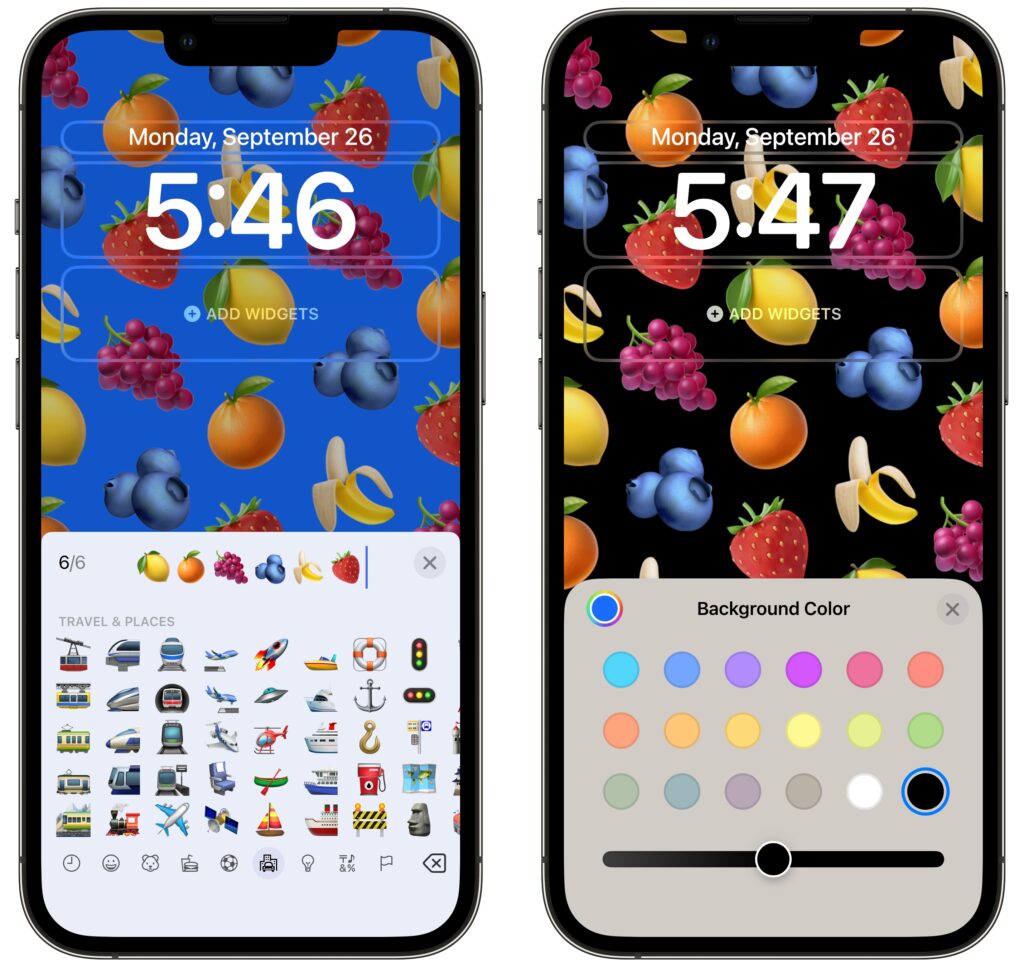
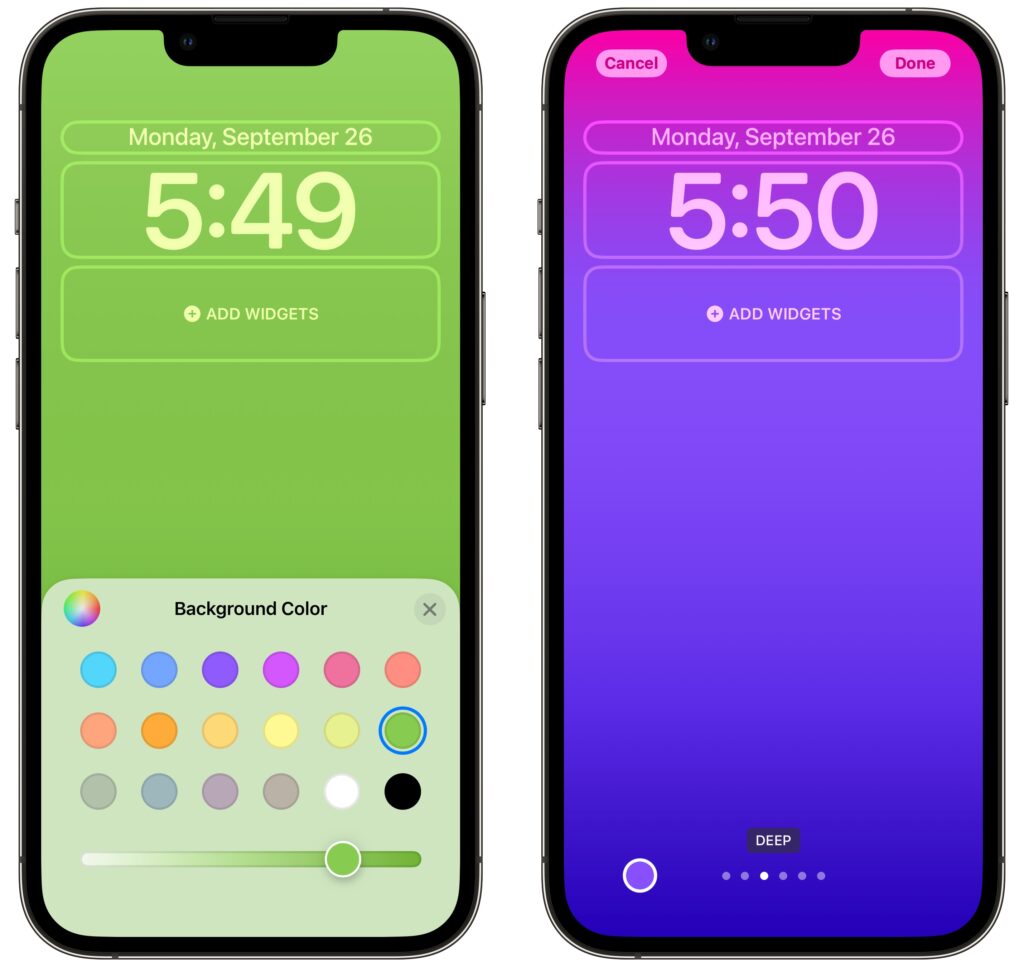
- Emoji: This wallpaper tiles up to six emoji in several different grid sizes and layouts, and you can change the background color by tapping the ••• button. Thanks to Apple’s quality emoji art, the Emoji wallpaper is surprisingly attractive.
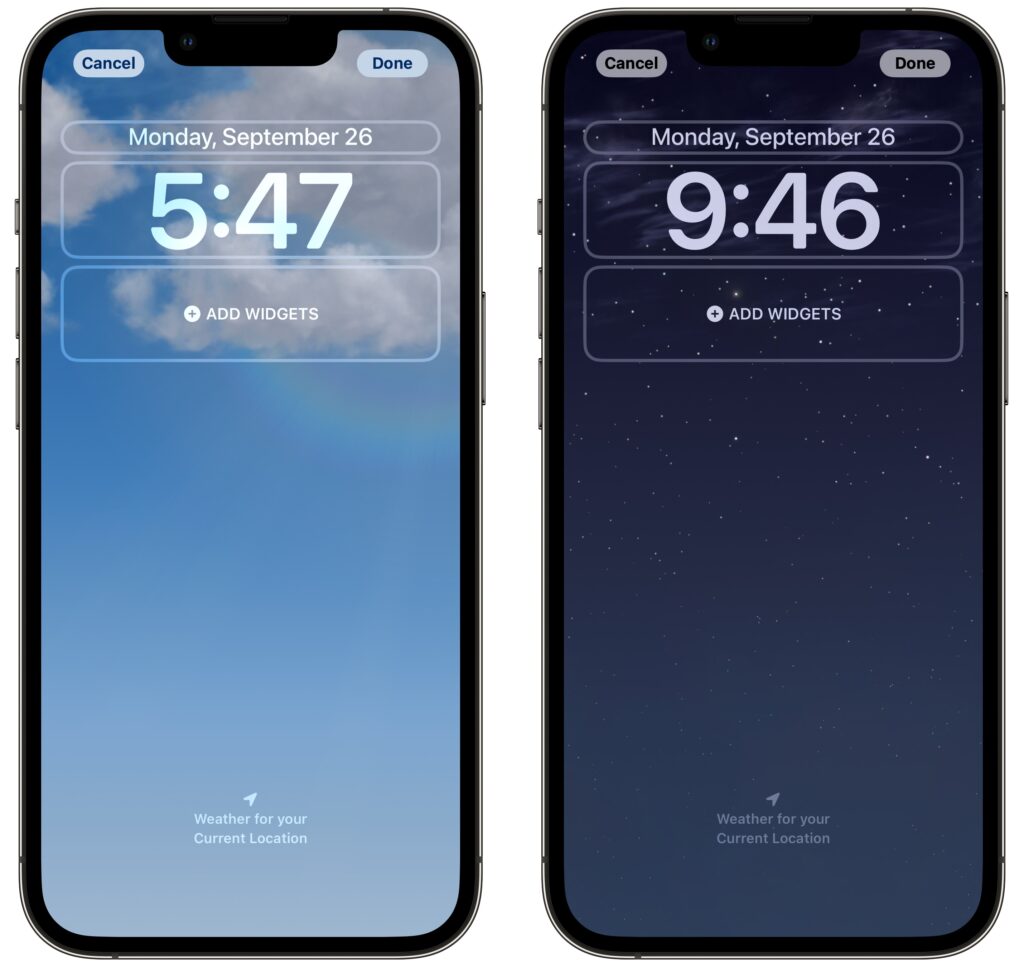
- Weather: Those who work in windowless offices might particularly appreciate the Weather wallpaper, which changes to reflect the current weather conditions (and time of day) in your location.
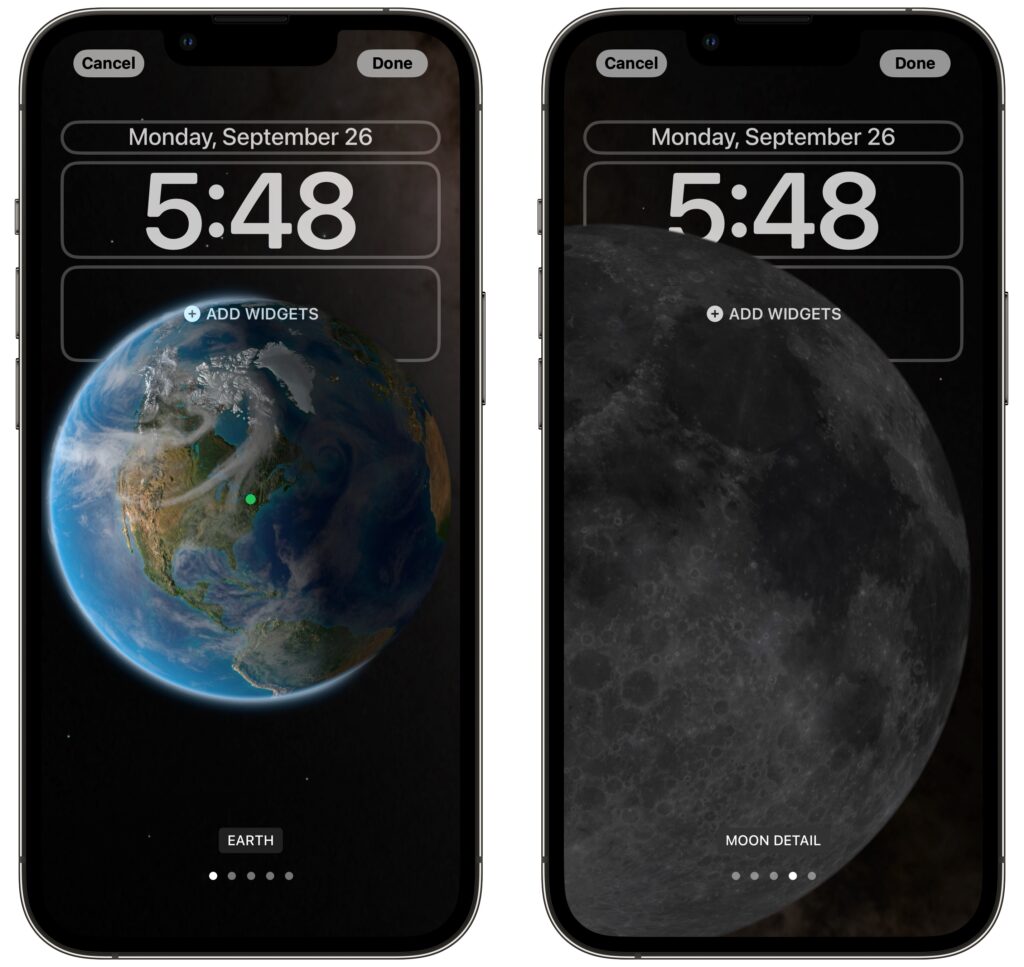
- Astronomy: For a broader perspective, the Astronomy wallpaper lets you look at the Earth, Moon, or solar system whenever you pick up your iPhone. Swipe to pick your preferred celestial body and zoom level.
- Color: Want something simpler? The Color wallpaper lets you choose a background color gradient from the color picker. Swipe to apply different effects.
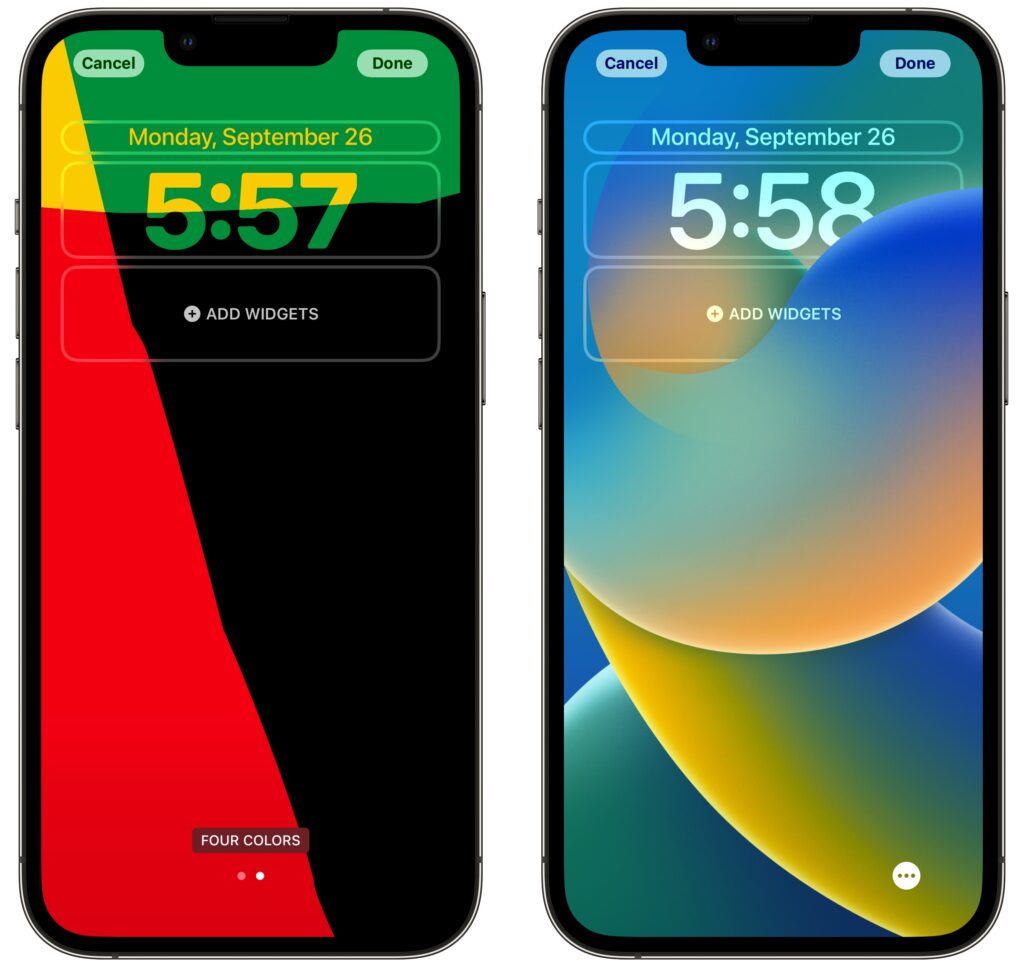
- Collections: This category, which appears only in the gallery, provides Apple-designed graphics such as Unity, Pride, and the clownfish wallpaper from the original iPhone.
Take some time to explore all the wallpaper types and their options—the combinations are nearly endless. There’s no downside to creating and switching among different Lock Screens as the mood strikes you.
Clock font and color
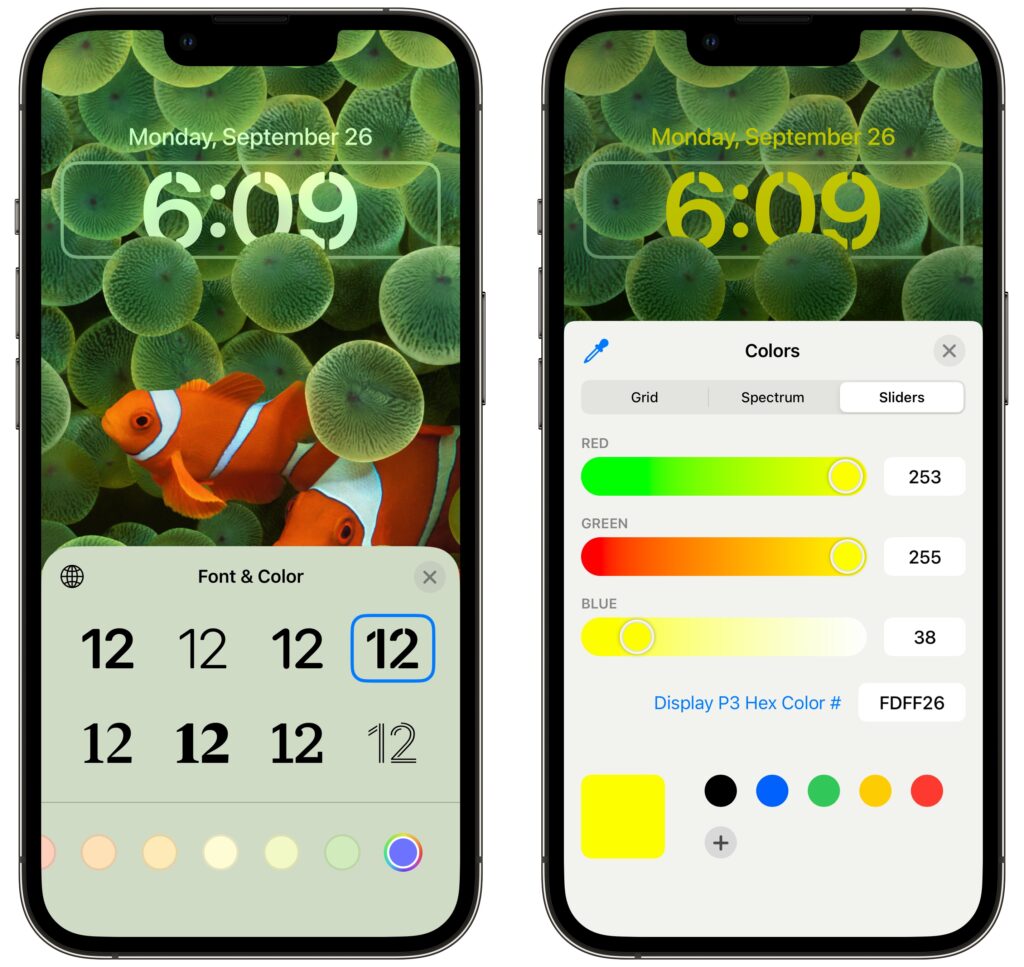
Once you decide on a wallpaper for a Lock Screen, you can customize the clock font and color by tapping the clock. There are only eight font options, but you should be able to find one you like. With color, Apple provides some suggestions below the font choices, but if you scroll all the way to the right and tap the color wheel, you can use iOS 16’s color pickers to select any color. The goal is to make sure it’s readable against the background image you’ve chosen.
Widgets
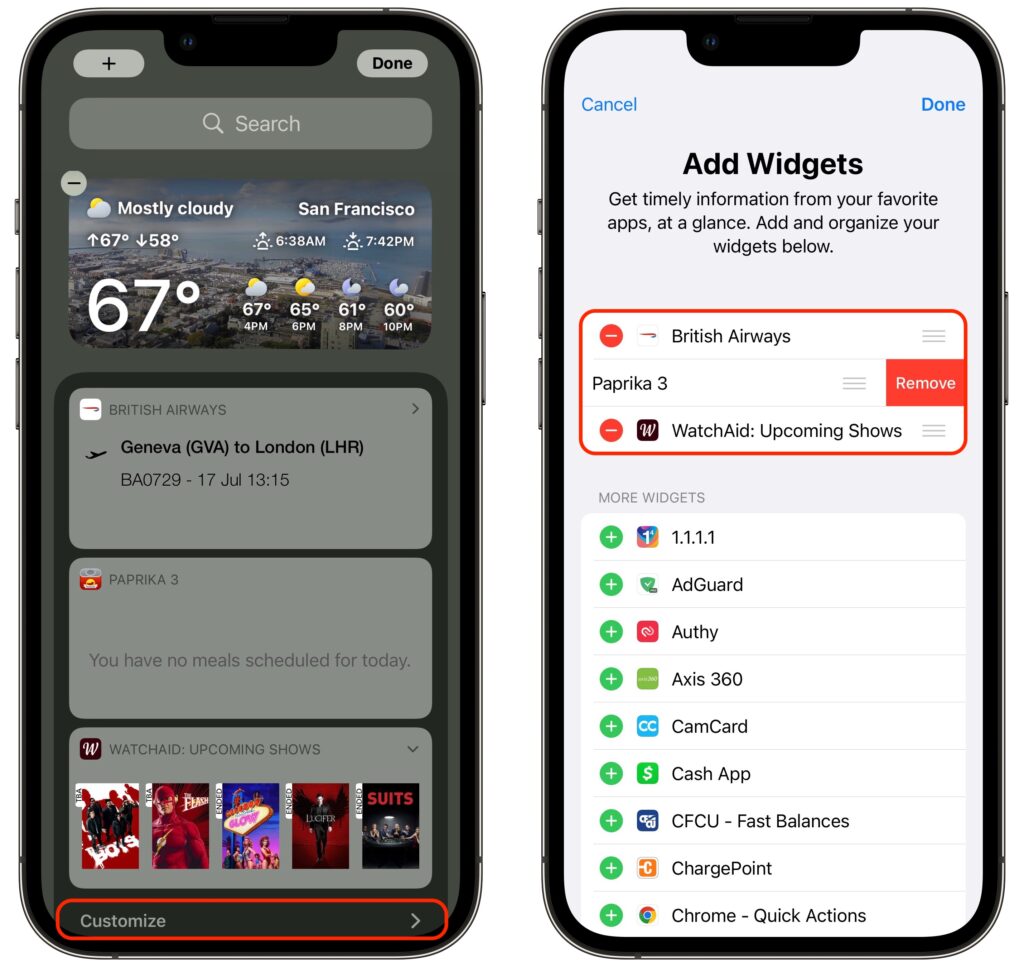
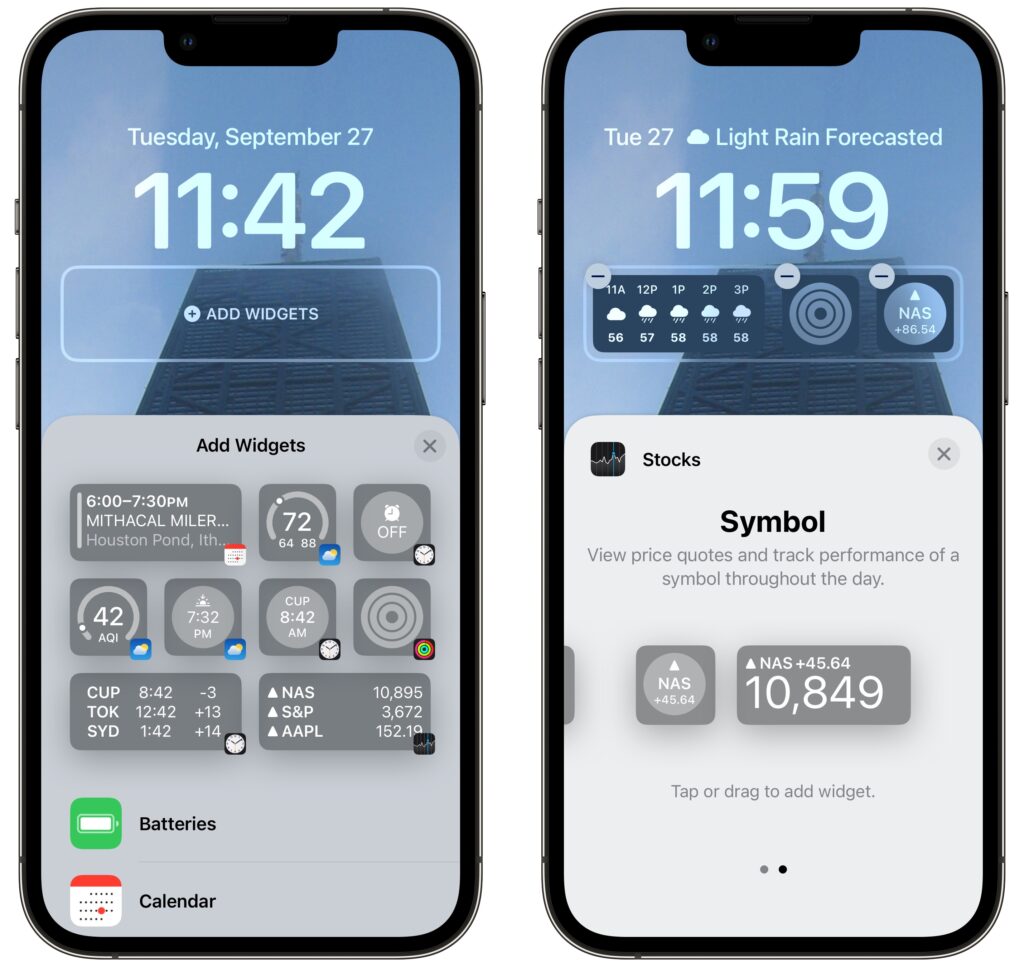
Beyond the eye candy of wallpapers and the customizable clock, widgets make the iOS 16 Lock Screen more useful than ever. Some iPhone users are accustomed to having flashlight and camera buttons on the Lock screen—everyone can now add widgets to two distinct zones on the Lock Screen, above and below the clock. The widget zone above the clock holds only a single line of text or other controls, and it always displays alongside the date, which shrinks if necessary. The zone below the clock is taller and can hold two sizes of widgets: small ones that occupy a single slot and large ones that take over two slots. You can mix and match small and large widgets to fill—or not—the four available slots.
To add widgets, tap the desired zone and tap widgets in the panel that appears. Suggestions appear at the top, but if you scroll down, you can see a list of all the apps that offer widgets. Tap an app to see its widgets—swipe to see the full set it offers. Once you’ve added a widget, you may be able to tap it again to configure it—such as by specifying tickers for the Stocks widget. To rearrange widgets, drag them but be aware that this works poorly at the moment; it may be easier to delete the widgets (tap the ⊖ button) and add them again in the desired order.
Focus
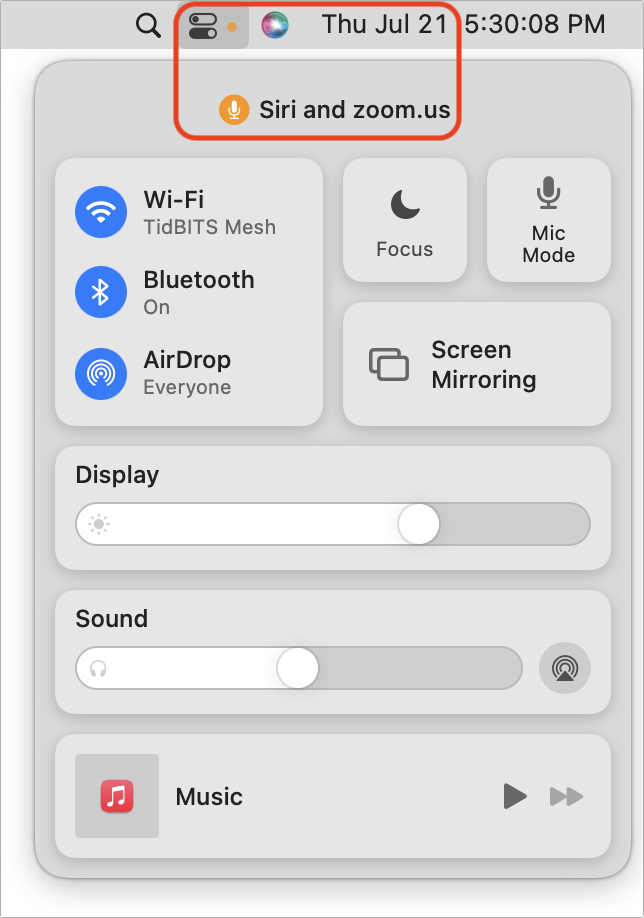
Focus subsumed Do Not Disturb in iOS 15. Although Focus is far more flexible and customizable than Do Not Disturb, that power also makes it hard to predict when notifications will be blocked, since it can be difficult to know when a Focus is active. With iOS 16, Apple has made Focus more obvious by letting you link a Focus to a Lock Screen.
When you’re in the Lock Screen switcher, a Focus button appears toward the bottom of each Lock Screen. Tap it and select a Focus to link them.
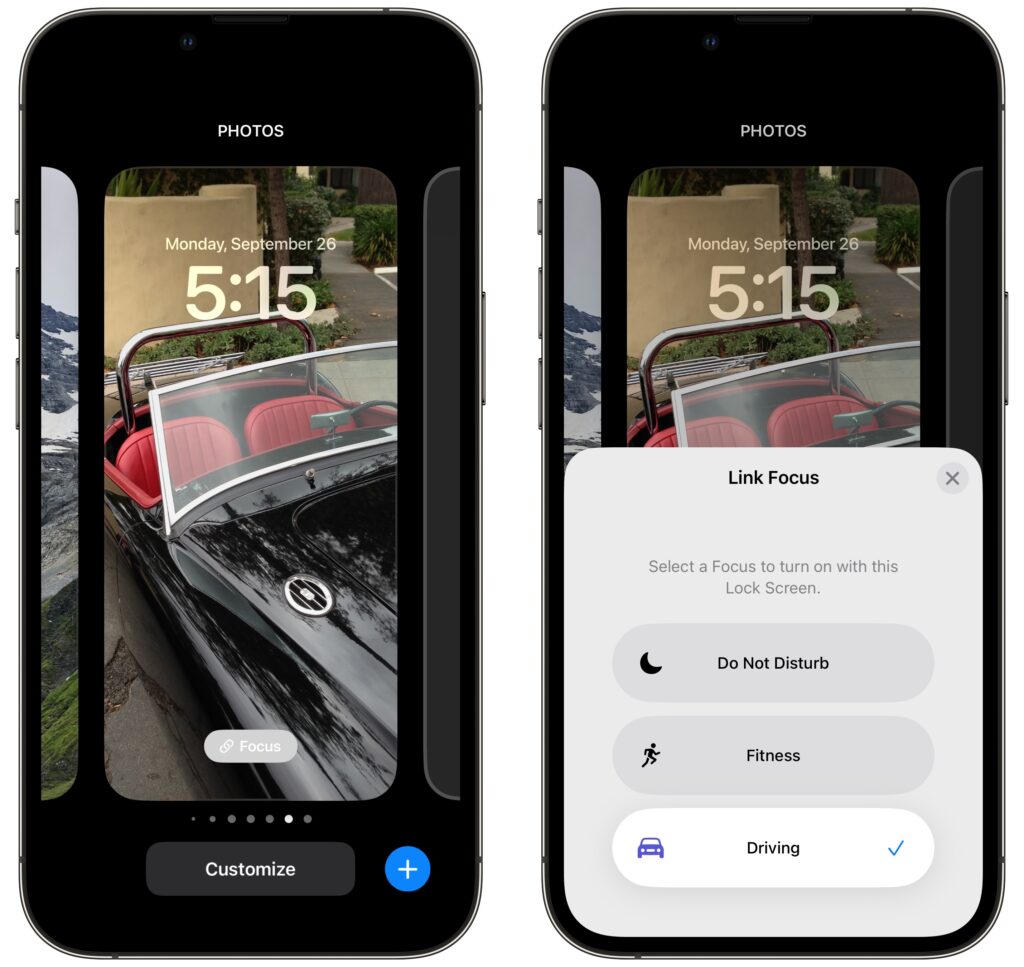
Two things become true once you’ve linked a Focus to a Lock Screen:
- When you activate that Focus in Control Center, or its settings cause it to activate automatically, iOS 16 switches to the linked Lock Screen. That’s handy if you have a manually triggered Focus for family time, for instance, or an automatically activated Focus for Driving.
- When you switch to a particular Lock Screen, its linked Focus activates and starts blocking notifications. It’s probably easier to activate a Focus in Control Center, but switching Lock Screens has the same effect.
It may take a few weeks to figure out what Lock Screens you prefer and customize them to your liking, but we think you’ll enjoy this new feature.
(Featured image by Adam Engst)
Social Media: iOS 16’s marquee feature is customizable Lock Screens—read on to learn how to make multiple Lock Screens, each with its own wallpaper, clock font and color, and interactive widgets.