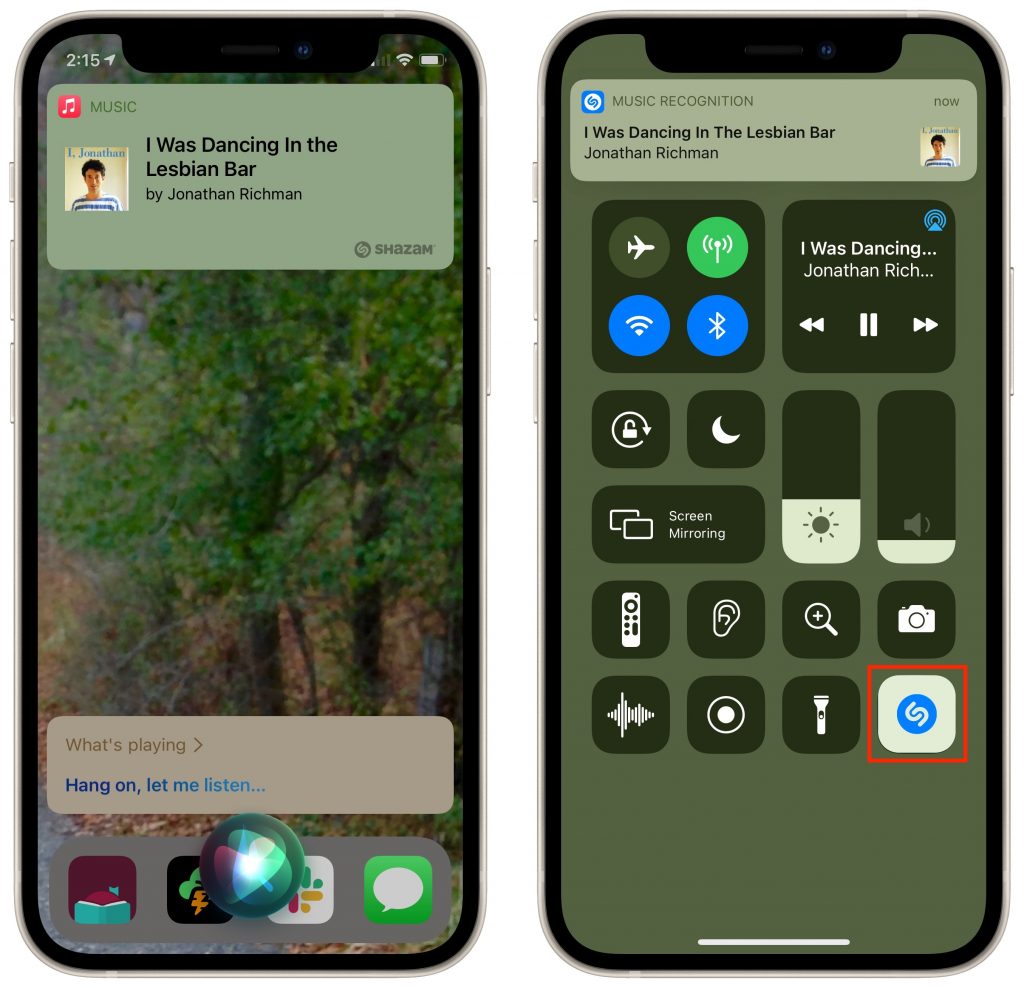
Historically, picking a new Wi-Fi network has required you to open the Settings app and tap Wi-Fi, forcing you to unlock your iPhone or switch away from what you were doing. In iOS 13, however, Apple added a better way to connect to a new Wi-Fi network. Open Control Center (swipe down from the upper-right corner on an iPhone X or later or an iPad; or up from the bottom on an earlier iPhone), press and hold on the network settings card in the upper-left corner to expand it, and then press and hold on the Wi-Fi icon to reveal a list of Wi-Fi networks. Tap one to switch to it.
https://f11photo.com/wp-content/uploads/sites/13/2020/02/Wi-Fi-network-switching-photo.jpg8001280F-11 Photohttps://f11photo.com/wp-content/uploads/sites/13/2023/06/PR-F11Photo-logo.jpgF-11 Photo2020-02-03 11:05:002023-06-27 20:11:29The Fastest Way to Change Wi-Fi Networks in iOS 13
For some Mac users, macOS 10.15 Catalina is no longer a choice. That’s because the new 16-inch MacBook Pro and the 2019 Mac Pro that Apple released late last year ship with Catalina installed and can’t run any previous version of macOS.
But for most people, it’s time to consider an upgrade to Catalina. Most backup software now works with Catalina’s bifurcated drive approach that puts the system on a separate, read-only volume from your data and apps. We’ve all had several months to come to terms with the fact that old 32-bit apps won’t even launch in Catalina. And Apple has shipped several updates that bring Catalina to version 10.15.3, addressing most of the complaints users had with the initial release.
If you are ready to try Catalina but still want to use 10.14 Mojave, we have some advice for how to make that happen. This could be the case for someone who has purchased a new Mac that does support Mojave but came with Catalina installed, for someone who wants to test Catalina while still using Mojave, or for someone who wants to move on to Catalina but has a 32-bit app that they aren’t ready to say good-bye to.
Downgrade from Catalina to Mojave on Some New Macs
Apple has started installing Catalina on new Macs other than the 16-inch MacBook Pro and 2019 Mac Pro, but since these older Macs can still run Mojave, it’s possible—if a bit tricky—to downgrade them to Mojave.
System engineer Armin Briegel has worked out a way of downgrading new Macs to Mojave. First, you create a Mojave Installer USB drive. To use that drive to boot a Mac with a T2 security chip, you must allow external booting from the Security Utility on the Recovery partition. Once you’ve booted from your Mojave Installer drive, use Disk Utility to erase the entire internal drive. Then install Mojave.
Use Virtualization to Keep 32-bit Apps Running
For some people, what’s keeping them on Mojave is a single 32-bit app that will never be updated in an appropriate fashion. Quicken 2007 falls into this category, as does the ScanSnap Manager app for the ScanSnap S1300, S1500, and S1500M scanners. Sure, you can get a current version of Quicken, but it may not do precisely what you want, and Fujitsu would be happy to sell you a new ScanSnap scanner that does come with 64-bit software, but then you’ll have to figure out what to do with your old scanner.
So if you’re ready to upgrade to Catalina in general but need to maintain access to one or two apps, one solution is virtualization software: either Parallels Desktop or VMware Fusion. Both apps let you run nearly any operating system—including older versions of macOS like Mojave—in a virtual machine. In essence, they fool the guest operating system, whether it’s Mojave or Windows, into thinking it’s running normally on a computer, when it’s actually running in a virtual environment.
These apps cost about $80, and while there’s a bit of work in setting them up (the screenshot below shows the option for installing Mojave in Parallels Desktop during setup), once you have them configured, it’s easy to run older apps alongside newer ones with little or no performance hit. This approach is also perfect for a 16-inch MacBook Pro or Mac Pro that can’t run Mojave in any other way.
Install Catalina and Mojave on Separate APFS Volumes and Switch Boot
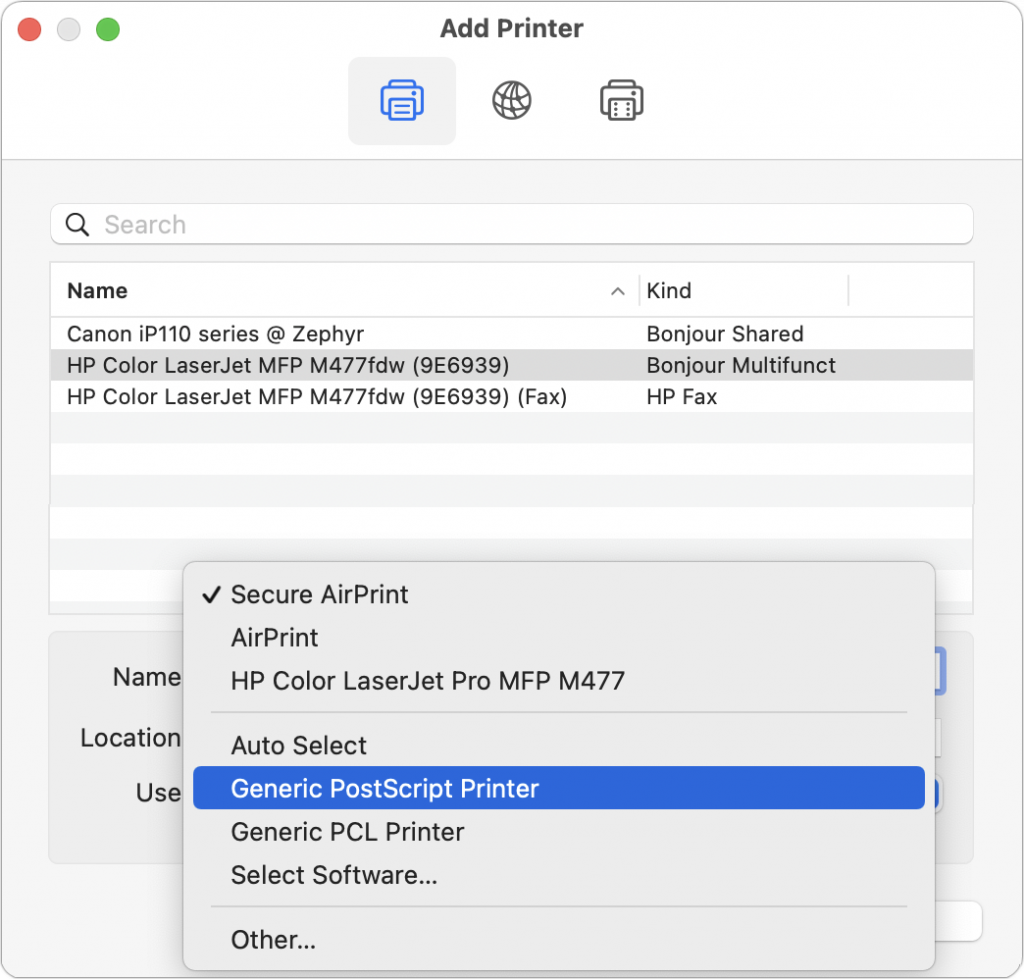
Finally, there’s one other option that lets you switch back and forth between Mojave and Catalina, assuming your Mac supports Mojave. You can create an APFS volume on your internal drive and install another version of macOS on that. It’s easy, and Apple provides full instructions. The only problem with this approach is that you’ll have to restart to switch operating systems, whereas both are available simultaneously with the virtualization solution.
First, make sure you have at least one current backup of your Mac, since it’s foolhardy to adjust your drive structure without one. Next, in Disk Utility, select your internal drive, choose Edit > Add APFS Volume, and click Add. We recommend naming the drive such that it will be clear what’s on it.
Command-R reinstalls the latest version of macOS that was installed on your Mac.
Command-Option-R upgrades to the latest version of macOS that’s compatible with your Mac.
Command-Shift-Option-R reinstalls the version of macOS that came with your Mac, or the closest version still available.
Choose Reinstall macOS from the macOS Utilities window and proceed from there.
Once the installation is complete, to switch from one version of macOS to another, open System Preferences > Startup Disk, choose the desired volume to boot from, and then click Restart. Or, press Option at startup and select the desired volume from the Startup Manager screen.
Needless to say, the decision about when and how to upgrade to Catalina isn’t a trivial one, so feel free to contact us to discuss your particular situation or to get help with any of the procedures that we’ve described in this article.
(Featured image by Apple)
Social Media: Considering upgrading to Catalina? Or maybe you have a new Mac that came with it already installed? Read on for strategies for downgrading to Mojave or running both Catalina and Mojave.
https://f11photo.com/wp-content/uploads/sites/13/2020/02/Catalina-photo.jpg8001280F-11 Photohttps://f11photo.com/wp-content/uploads/sites/13/2023/06/PR-F11Photo-logo.jpgF-11 Photo2020-02-03 11:04:002023-06-27 20:11:36Strategies for Moving from Mojave to Catalina
For many of us, voicemail replaced answering machines, so we don’t think of voicemail messages as being something we can save or share. But on the iPhone, every voicemail message is just an audio file. If you want to retain a message for posterity or share one with a friend or colleague, you can do that easily. While viewing a voicemail message, tap the share icon to bring up an activity sheet. In it, you can save the file to any app that can handle audio files, or share the file with AirDrop, Messages, Mail, or the like.
(Featured image by Travis Zimmerman from Pixabay)
https://f11photo.com/wp-content/uploads/sites/13/2020/01/Voicemail-desk-phone-photo.jpg8001280F-11 Photohttps://f11photo.com/wp-content/uploads/sites/13/2023/06/PR-F11Photo-logo.jpgF-11 Photo2020-01-02 14:08:002023-06-27 20:31:04Did You Know You Can Save and Share Voicemail Files from Your iPhone?
The next time you buy and set up a new Mac, make sure to migrate data and apps from your previous Mac to it right away during the initial setup. It can be tempting to see what it’s like to use it fresh from the factory or to delay migrating because doing so would force a macOS upgrade, but waiting is a mistake. The problem is that if you do real work in an account on the new Mac, when it comes time to use Migration Assistant to bring over data from your old Mac, there’s no way to merge the old and new accounts. The best workaround is to make sure all important data on the new Mac is also stored in a cloud service like iCloud Drive or Dropbox, and then replace the new account on the new Mac with the old account from your previous Mac. Bring all the data back down from the cloud afterward.
(Featured image built with images from Apple and Marc Mueller from Pexels)
https://f11photo.com/wp-content/uploads/sites/13/2020/01/Migration-Assistant-MacBook-photo.png8001280F-11 Photohttps://f11photo.com/wp-content/uploads/sites/13/2023/06/PR-F11Photo-logo.jpgF-11 Photo2020-01-02 14:07:002023-06-27 20:31:08Migrate to a New Mac Right Away, Rather Than Waiting
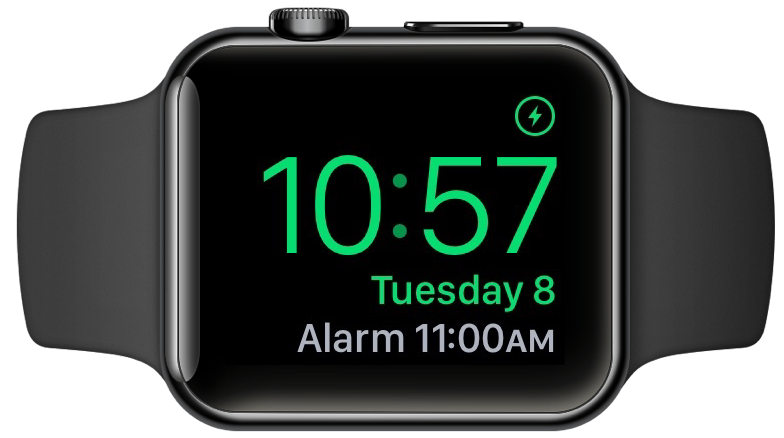
If you’ve resisted requiring a password on your Mac after it wakes up or comes out of the screen saver because it’s too much work to enter repeatedly, an Apple Watch can make authentication much easier. In previous versions of macOS, just wearing an unlocked Apple Watch is enough to enter your Mac’s password; in Catalina, the Apple Watch can also enter your password when prompted by apps. First, make sure your Apple Watch has a passcode (in Watch > Passcode), is on your wrist, and is unlocked. Then, in System Preferences > Security & Privacy > General, select “Use your Apple Watch to unlock apps and your Mac.” From then on, most of the time your Mac or an app wants your password, your Apple Watch will provide it automatically. (This feature requires that the Mac dates from mid-2013 or later, that all devices use the same iCloud account, and that the Apple ID uses two-factor authentication instead of two-step verification.)
https://f11photo.com/wp-content/uploads/sites/13/2020/01/Apple-Watch-unlock-photo.jpg8001280F-11 Photohttps://f11photo.com/wp-content/uploads/sites/13/2023/06/PR-F11Photo-logo.jpgF-11 Photo2020-01-02 14:06:002023-06-27 20:11:17Use Your Apple Watch to Unlock Your Mac, and Apps in Catalina
AirDrop has become a fast and reliable way to transfer data from one iPhone to another that’s nearby. Just tap the share icon and in iOS 13’s activity view, either tap an AirDrop shortcut in the top row or tap AirDrop in the second row and select choose a person or device in the subsequent AirDrop screen. But what if your iPhone doesn’t appear for the person who wants to share with you? Assuming Wi-Fi and Bluetooth are both on, the fix is generally to go to Settings > General > AirDrop and select Everyone. If you’re concerned about unwanted transfers, switch to Contacts Only afterward.
(Featured image by Günther Schneider from Pixabay)
https://f11photo.com/wp-content/uploads/sites/13/2020/01/AirDrop-parachute-photo.jpg8001280F-11 Photohttps://f11photo.com/wp-content/uploads/sites/13/2023/06/PR-F11Photo-logo.jpgF-11 Photo2020-01-02 14:05:002023-06-27 20:32:31AirDrop Reception Not Working? Here’s the Likely Fix
Let’s get one thing straight. You know that you should never, ever share your iPhone or iPad passcode with anyone you don’t trust implicitly, like a spouse or adult child, right? That’s because, with your iOS passcode, someone could change your Apple ID password, and if you use iCloud for email, completely steal or otherwise abuse your online identity. (Scared? Good. If you’ve given anyone your passcode, go change it right now. We’ll wait.)
So if sharing your passcode is such a terrible idea, how do you let someone else use your iPhone or iPad temporarily? Perhaps you want to let your kid play a game in the car while you focus on tricky winter driving. Or maybe you time running races with an iPhone app and want someone to do the timing without giving them full access to your iPhone. Whatever the reason you want to give someone limited access to a single app in iOS 13, the solution is Guided Access.
Enabling and Configuring Guided Access
To turn Guided Access on, navigate to Settings > Accessibility > Guided Access (it’s near the bottom), and flick the switch. While you’re here, check out the remaining settings:
Passcode Settings: Create a passcode for getting out of Guided Access here (it can be different than your normal one), and choose whether you can use Touch ID or Face ID to exit as well.
Time Limits: You don’t set time limits here, but you can set audio and spoken warnings before the time runs out.
Accessibility Shortcut: Enable this if you also use triple-click for another Accessibility Shortcut like Magnifier.
Display Auto-Lock: Choose how long the device can be inactive before the screen turns off. If the Guided Access user wakes up the device, they’ll still be in Guided Access.
With those settings configured, switch to the desired app and triple-click the side or Home button, and if necessary, tap Guided Access in the Accessibility Shortcut list. You can do five things:
Set session-specific options: Tap Options in the lower-right corner to access various switches. If they’re disabled:
Side Button or Sleep/Wake Button: The user can’t put the device to sleep.
Volume Buttons: The user can’t change the volume.
Motion: The screen doesn’t change from the orientation (portrait or landscape) it was in when you started Guided Access.
Touch: The user can’t do anything with the screen at all—probably most appropriate for letting a young child watch a video.
Dictionary Lookup: Prevents word lookups in some apps.
Set time limits: At the bottom of the Options list, tap Time Limit and set an amount of time after which the device can’t be used until you enter the Guided Access passcode.
Disable specific areas on the screen: Draw circles around parts of the screen you want to make off-limits to the user. After making a circle, you can move it by dragging it, resize it by dragging any of its handles, or remove it by tapping its X button.
Start/Resume Guided Access: In the upper-right corner, tap Start. If you haven’t yet set a passcode, you’ll be prompted to do that.
Exit the setup screen: In the upper-left corner, tap End.
Using Guided Access
Once you tap Start, iOS tells you it’s entering Guided Access and lets you use the current app with the restrictions you’ve applied. If you decide that the restrictions aren’t right, triple-click the side or Home button to return to the setup screen. When you’re done, tap Resume in the upper-right corner.
To leave Guided Access, triple-click the side or Home button, enter the passcode, and in the setup screen, tap End in the upper-left corner.
That’s it! Once you understand the various limitations of Guided Access, you’ll be able to turn it on and off quickly whenever you need to let someone use your iPhone or iPad for a while.
(Featured image by mohamed Abdelgaffar from Pexels)
Social Media: Never, ever share your iPhone or iPad passcode with anyone who you don’t trust implicitly. Instead, you can give people limited access to a single app with Guided Access. Learn more here:
https://f11photo.com/wp-content/uploads/sites/13/2020/01/Guided-access-kid-phone-photo.jpg8001280F-11 Photohttps://f11photo.com/wp-content/uploads/sites/13/2023/06/PR-F11Photo-logo.jpgF-11 Photo2020-01-02 14:04:002023-06-27 20:32:35Use Guided Access to Let Kids and Others Use Your iPhone Temporarily
That’s right! There’s still a bit of time for you’re to create adorable photo gifts and prints for your friends and family. Not sure what to gift? Here are a few solutions to help you choose.
The Gather Box
Our #1 MOST MEANINGFUL gift idea! The Gather Box is an easy way to have family photos, home movies and keepsakes digitized for use on today’s technology. Here are our favorite ways to gift it:
Wrap the empty box and allow the recipient to fill it with vintage photos and memorabilia. Instructions for filling the box are included.
You fill the box with meaningful photos and keepsakes for the recipient. Allow them to add some of their own items as well.
Plan ahead (at least 3 weeks before Christmas) and have a box full of family treasures digitized for the recipient (or the entire family)!
Prints
Give the gift of prints! Select a series of your favorite mobile snapshots and make fun-sized prints to package as a set. Tie a bow around them and you’re all set! Print sets can be ready for pick up in as fast as 1-day!
Ornaments
Start a new tradition and gift personalized ornaments to everyone in the fam. Children especially enjoy having their very own special ornaments and it’s fun to reminisce when decorating the tree each year.
https://f11photo.com/wp-content/uploads/sites/13/2019/11/Main-Graphic.jpg321845Natalie Gunnhttps://f11photo.com/wp-content/uploads/sites/13/2023/06/PR-F11Photo-logo.jpgNatalie Gunn2019-12-12 13:57:312019-11-25 15:09:13Last Minute Gift Ideas
Tradition starts with you — time to start planning your holiday cards! Who knew you could send a hug through the mail in the form of a holiday card? Don’t let creating the perfect card quickly fall off your radar – time to start making your plan now! Use these tips and suggestions for a killer holiday card:
– Invest in having a professional photograph taken of your family, kids or pets. Trust us, you’ll appreciate having that image in 10 years.
– If you’re sending cards on a budget, plan a time to get a great shot with your mobile phone camera. Add a subtle overall filter or lighting enhancement to give everyone a fresh look. If that fails, a well done selfie can work!
– Splurge a little on the card style. Try something new like foil imprinting, a uniquely shaped die-cut card or upgrade to textured cardstock. Your card is sure to stand out with any of these options.
– Order an extra 6-12 cards for the unexpected. You never know who you’ll receive cards from and it’s always a nice gesture to return the hello with a card of your own.
– Missed the Christmas and Hanukkah window? Send a Happy New Year style instead!
This year, resist the urge to order from an impersonal online source – try us instead! We have thousands of stunning designs to choose from and graphic experts to help you customize the perfect card the way you want it.
Did you know that the word for the irrational fear of Friday the 13th is paraskevidekatriaphobia? Neither did we, but what that supposedly unlucky day is good for—whenever it rolls around—is reminding us to test our backup systems. If something does go wrong, backups can save your bacon, but only if they’re actually working. So on Friday the 13th this month, take a few minutes to make sure you can restore files from Time Machine, see if you can boot from your bootable duplicate, and generally verify that your data really is being backed up successfully. And if you’ve already missed the 13th, today is a fine day to make up for it with a quick test.
(Featured image by Adam Engst)
https://f11photo.com/wp-content/uploads/sites/13/2019/12/Test-Backups-photo.jpg8001280F-11 Photohttps://f11photo.com/wp-content/uploads/sites/13/2023/06/PR-F11Photo-logo.jpgF-11 Photo2019-12-02 12:08:002023-06-27 20:11:03Make Sure to Test Your Backup System with Occasional Restores