Apple’s Worldwide Developer Conference keynote (full video or 2-minute recap) is primarily an opportunity for Apple to give developers a first look at new features coming in its operating systems, and this year was no exception. However, Apple sandwiched those feature reveals between announcements of new Macs and the unveiling of its mixed-reality Vision Pro headset, due next year. Here’s what you should know.
New Macs Complete the Transition to Apple Silicon
Apple introduced three new Macs, the 15-inch MacBook Air, Mac Studio models with faster chips, and the first Apple silicon Mac Pro, all of which are available to order now and start shipping on June 13.
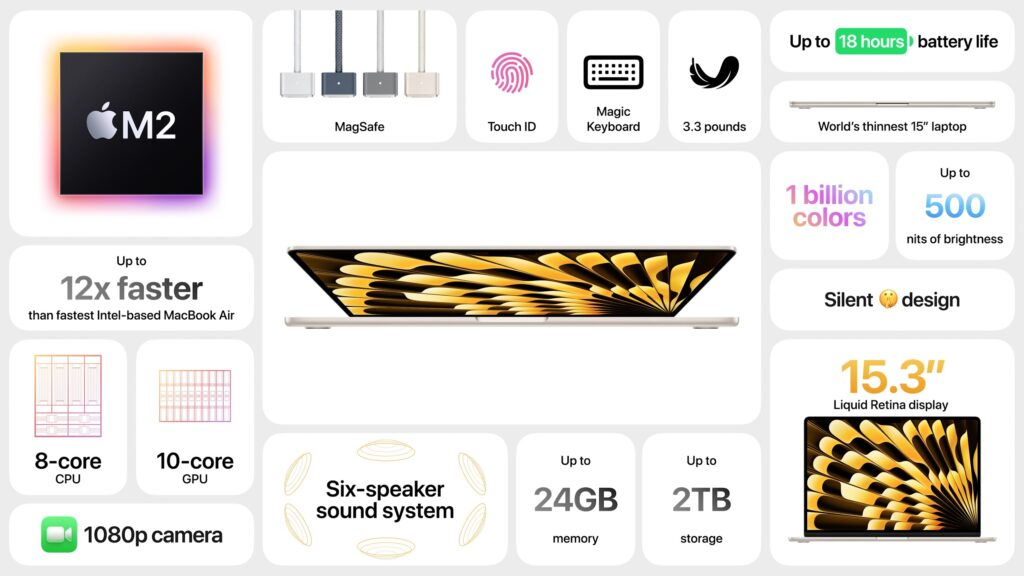
- 15-inch M2 MacBook Air: This new consumer-level laptop is nearly identical to the 13-inch M2 MacBook Air, apart from its 15.3-inch screen and array of six speakers. It starts at just $1299, and the 13-inch model drops $100 to start at $1099. It’s an excellent machine for students or anyone who wants a highly capable laptop with a larger screen for less than the 14-inch or 16-inch MacBook Pro.

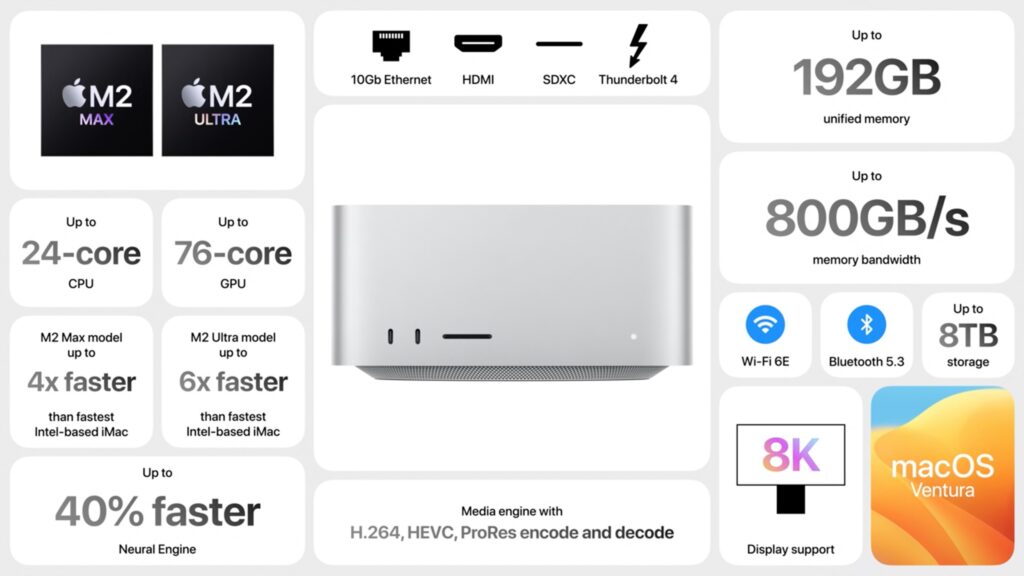
- Mac Studio: The new Mac Studio is unchanged other than swapping last year’s M1 Max and M1 Ultra chips for the higher-performance M2 Max and new M2 Ultra, which combines two M2 Max chips. The M2 Ultra boasts a 24-core CPU, lets you choose between 60-core and 76-core GPU models, offers a higher unified memory ceiling of 192 GB, and can drive up to eight displays. The improvements may not be worth replacing an M1-based Mac Studio, but the gains over an Intel-based iMac or Mac Pro are significant. Pricing starts at $1999 for the M2 Max and $3999 for the M2 Ultra.
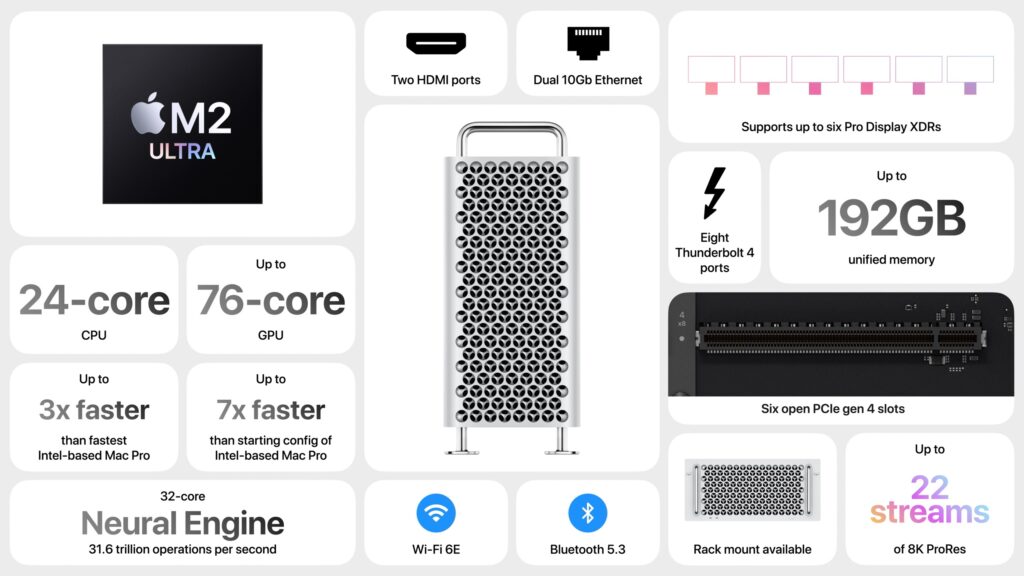
- Mac Pro: The long-awaited Mac Pro retains the form factor of the last Intel-based Mac Pro—complete with $400 optional wheels—but differs radically inside. It relies on the same M2 Ultra chip as in the Mac Studio but has open slots for six full-length PCI Express gen 4 cards and provides eight built-in Thunderbolt 4 ports. Apple claims it is 3–7 times faster than the Intel-based Mac Pro, but the details will likely vary by situation. For instance, the M2 Ultra reportedly provides the performance of seven of Apple’s $2000 Afterburner cards for accelerating ProRes and ProRes RAW video codecs. But the M2 Ultra maxes out at 192 GB of unified memory that’s faster and more efficiently used, whereas the Intel-based Mac Pro could accept up to 1.5 TB of traditional RAM. Pricing starts at $6999 for a tower enclosure and $7499 for a rack enclosure. It’s big iron for demanding workflows.
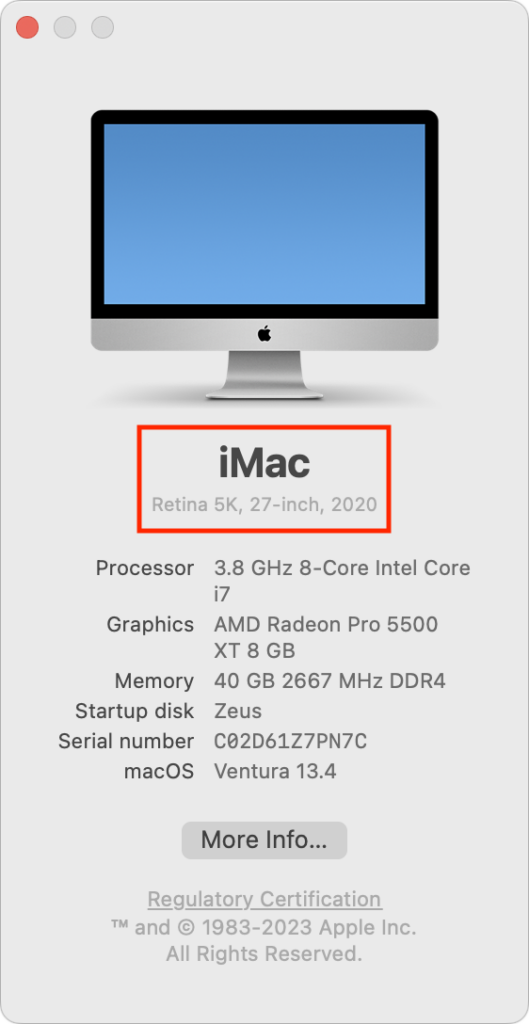
With the release of the Mac Pro, Apple dropped the last Intel-based Mac from its lineup. That doesn’t mean the company will stop supporting recent Intel-based iMacs in the next version or two of macOS, but that will happen sometime in the next few years. Plan to replace Intel-based Macs eventually—you’ll appreciate the significant performance gains from Apple’s M-series Macs.
Top New Operating System Features Coming in 2023
As always, Apple previewed oodles of new features while covering many more on its website. We’ll focus on those we think will make the biggest splash in your Apple experience, but take a moment to scroll through Apple’s pages for each operating system to see the full list of what’s coming. Those are linked below, along with their basic system requirements so you can see if your devices will be eligible to upgrade (not all features will be available on all devices):
-
- macOS Sonoma: iMac Pro from 2017. MacBook Air, MacBook Pro, and Mac mini from 2018 and later. iMac and Mac Pro from 2019 and later. Mac Studio from 2022 and later.
- iOS 17: Second-generation iPhone SE, iPhone XR, and later
- iPadOS 17: Sixth-generation iPad and later, fifth-generation iPad mini and later, third-generation iPad Air and later, and second-generation iPad Pro and later
- watchOS 10: Apple Watch Series 4 and newer, including the Apple Watch SE
- tvOS 17: Apple TV 4K, with fewer features on the older Apple TV HD
Here are some new features we think will most impact your Apple experience.
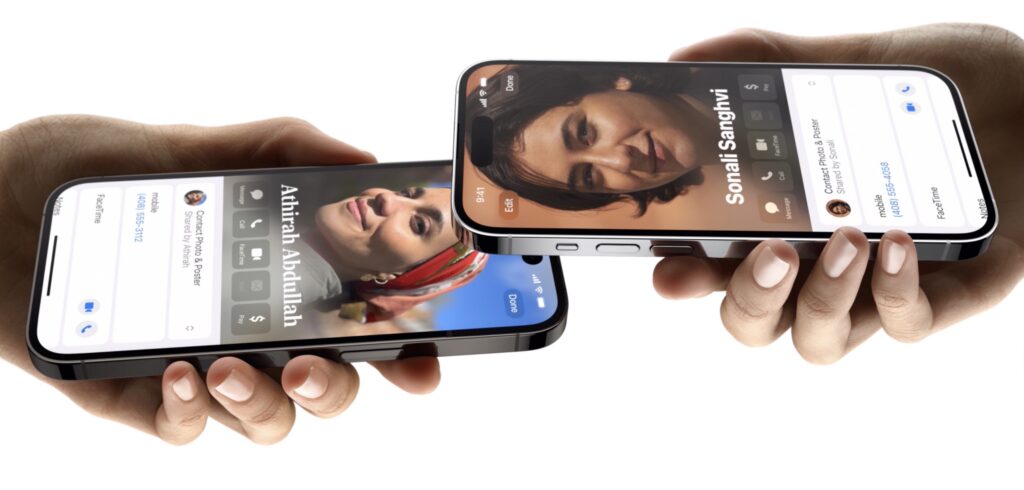
Contact Posters
Although you can share your preferred photo with others for use in Messages, Contacts, and Photos, when you call someone, all they see is your name. In iOS 17, Apple is introducing Contact Posters, which let you pick a photo or Memoji, along your preferred font. Then the Contact Poster will appear whenever you call someone, making it easier for them to identify who’s calling at a glance.
FaceTime Support on Apple TV
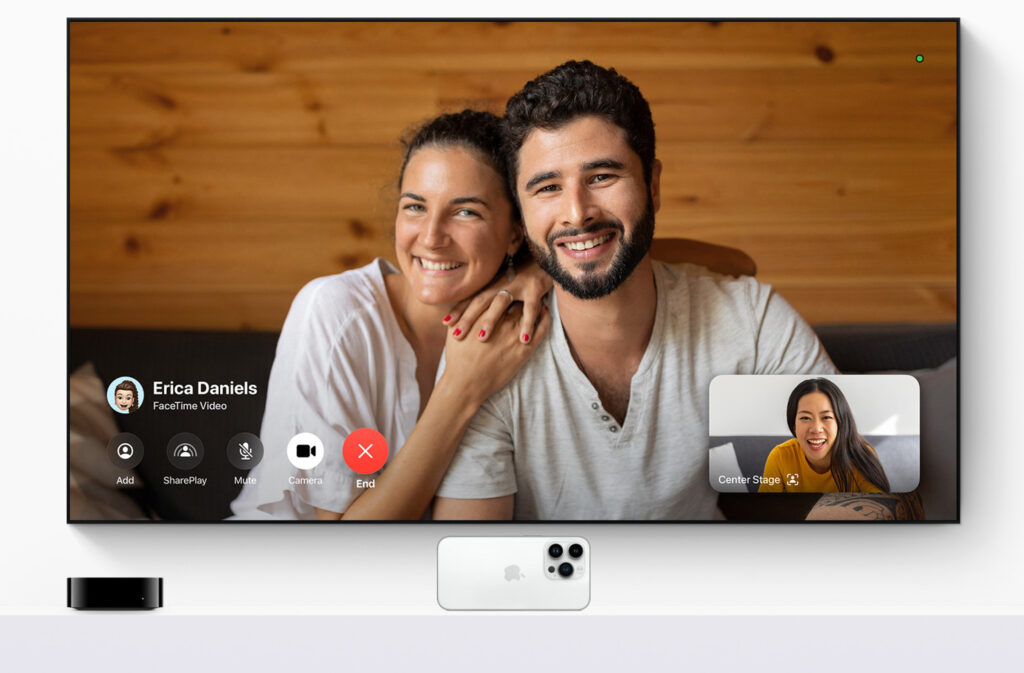
Wouldn’t it be nice if you could take a FaceTime call on your living room TV? It wasn’t impossible before, but Apple didn’t make it easy. With tvOS 17 on an Apple TV 4K, you’ll be able to leverage your iPhone or iPad camera and microphone through Continuity Camera to bring FaceTime conversations to the biggest screen in the house. Center Stage will let you move around the room while staying framed onscreen, and gesture-based reactions let callers create onscreen effects. These capabilities will also arrive later this year for other videoconferencing systems like Zoom or Webex, creating another reason to put an Apple TV in the conference room.
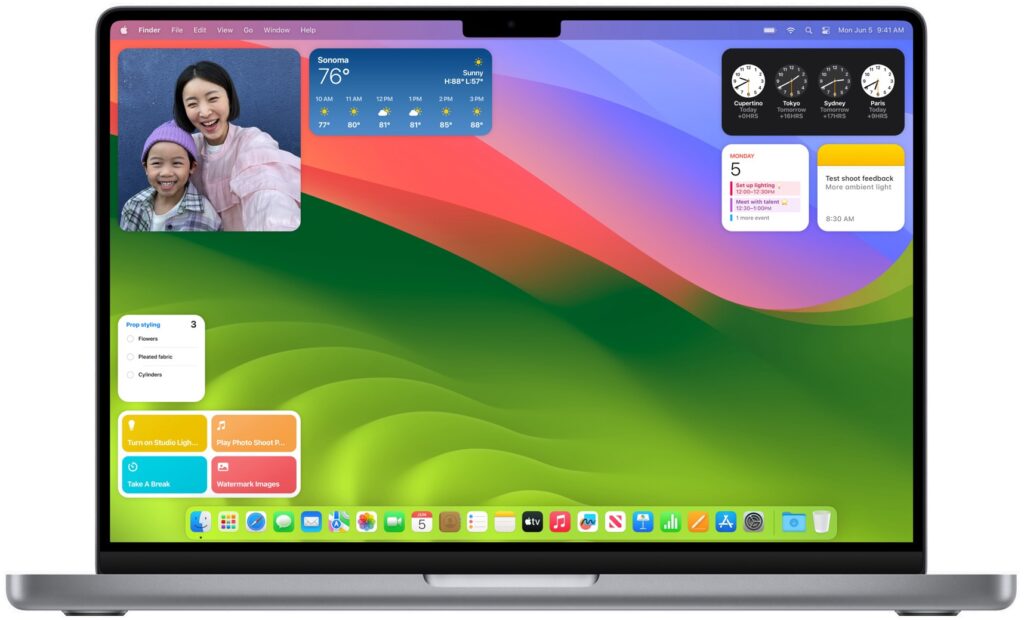
Desktop Widgets on the Mac
Widgets have become commonplace on iPhone and iPad Home screens, but on the Mac, they’ve been relegated to Notification Center. With macOS Sonoma, widgets can now migrate to the desktop, where you can position them anywhere. They’re also interactive, enabling you to control music, toggle the lights, and mark reminders as done. Thanks to Continuity, you can add your iPhone widgets to the Mac desktop, even when there’s no Mac app. Your iPhone has to remain nearby or on the same Wi-Fi network. Remember that you can use a hotkey or hot corner to slide all your windows aside to reveal your desktop at any time.
NameDrop for Sharing Phone Numbers
Sharing phone numbers has never been easier with the new NameDrop feature. Just hold your iPhone near someone else’s iPhone or Apple Watch (Series 6 or later, sometime after the initial watchOS 10 release) to exchange contact information—which you select—along with your Contact Poster. Alas, you’ll still have to type in phone numbers for Android users manually.
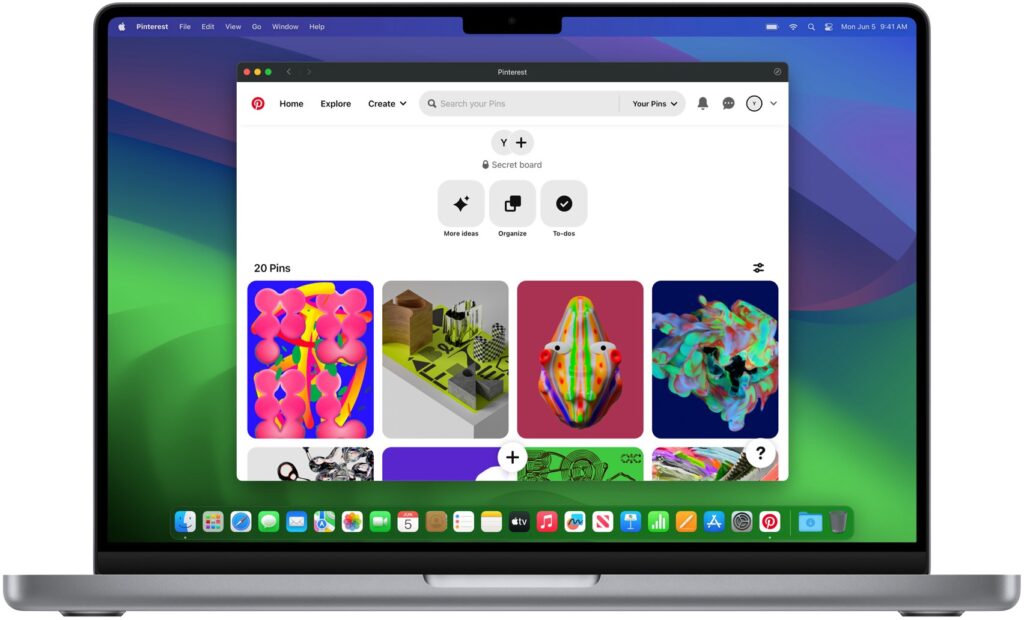
Web Apps in Safari
We all have websites that we use heavily, just like a native Mac app. If there’s no Mac version of the app, Safari in macOS Sonoma will let you add the website to your Dock, where it will look and work like a standalone app with its own window, toolbar, and notifications. (If you’re longing for this capability now, check out Unite from BZG.)
Five More Welcome Features
For more reasons to upgrade once these new operating systems are out and stable, consider the following additional features:
- Live Voicemail: While someone is leaving you a message, Live Voicemail transcribes it and displays it onscreen so you can decide if you want to pick up or not.
- AirTag sharing: No more awkward notifications when one family member has an AirTag that ends up traveling with other family members.
- No more “Hey” with Siri: We can hope Siri becomes better at listening, but at least Apple’s letting us invoke Siri with a single word now.
- Simultaneous dictation and keyboard use in macOS: Being able to dictate and edit text with the keyboard simultaneously has been great in iOS 16, and with macOS Sonoma, you’ll be able to enter text on your Mac just as fluidly.
- PDF form filling: It will get easier to fill forms in PDFs, with iOS 17, iPadOS 17, and macOS Sonoma automatically filling in your contact information. It’s supposed to work even with scanned PDFs.
Apple usually releases its new operating systems in September or October, and we’ll be writing more about them as we have a chance to test them. Generally speaking, it’s OK to upgrade to everything but macOS shortly after release; with macOS, we recommend caution to ensure all your existing apps and workflows won’t be impacted.
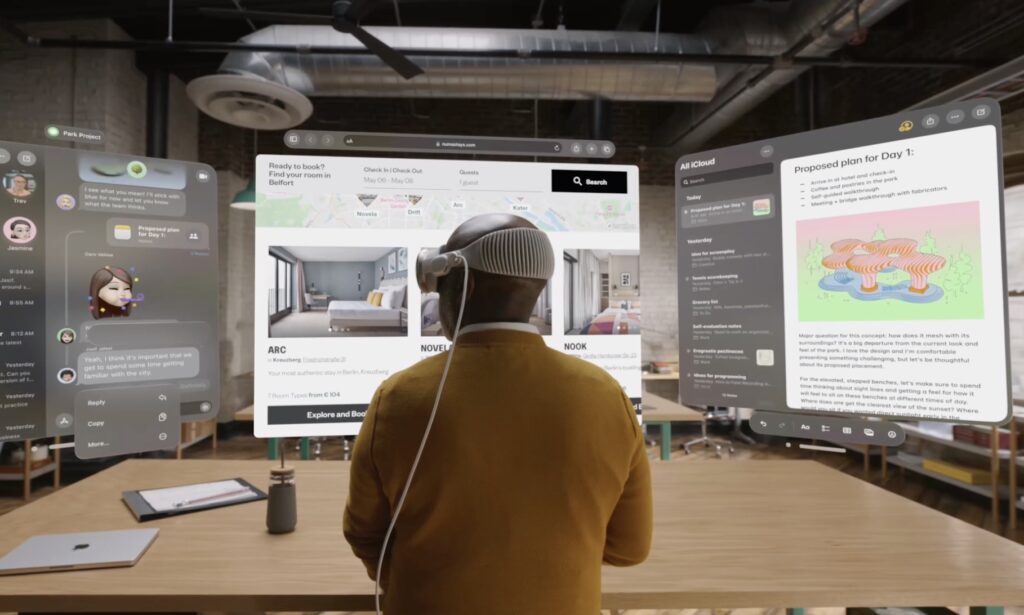
Apple Unveils Vision Pro “Spatial Computer”
And now for something completely different. Apple devoted the final third of its keynote to unveiling a mixed-reality headset it calls Vision Pro. Even though it fits on the user’s head like bulbous ski goggles, Apple prefers to call it a spatial computer. That’s probably to avoid charged terms like metaverse, although the Vision Pro does provide both augmented reality, where digital objects are superimposed on a view of the real world, and virtual reality, where an immersive digital environment blocks out the real world.
Apple said the Vision Pro would ship early next year, starting at $3499. The high price accurately reflects the impressive amounts of technology Apple has shoehorned into the device but puts it out of reach for all but the most inquisitive and flush early adopters. What will the Vision Pro make possible for that money?
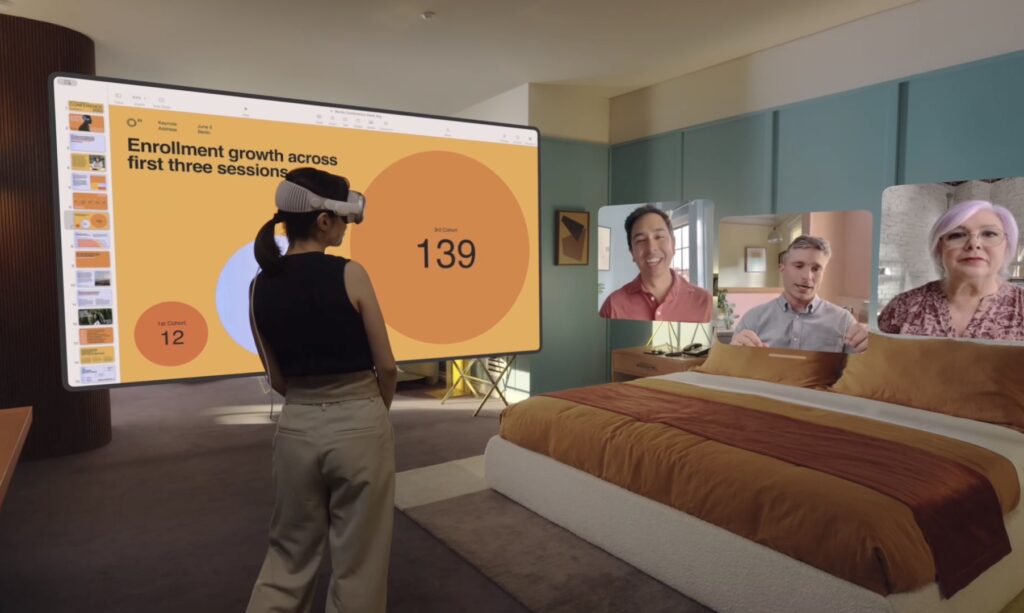
The Vision Pro blends digital content with the physical world, providing a three-dimensional interface controlled by the user’s eyes, hands, and voice. Users can display apps as floating windows or bring a Mac’s screen into Vision Pro as an enormous 4K display. Along with controls triggered by eye tracking and hand gestures, plus a virtual keyboard, users can use the Magic Trackpad and Magic Keyboard for faster interaction.
FaceTime calls using the Vision Pro take advantage of the space, putting other callers in life-size tiles and providing a shared screen. Speakers in the headset provide spatial audio, so it sounds like people are speaking from where their tiles are positioned. Vision Pro users don’t show up looking like they’re wearing the headset; instead, they’re represented by a digital avatar Apple calls a Persona. Will it escape the uncanny valley?
The Vision Pro is an easier sell for entertainment, where many people prefer immersive experiences, whether watching a movie on what seems like a 100-foot screen or playing a game where you see nothing but its virtual world. A Digital Crown lets the user control how much of the physical world seeps through around the edges.
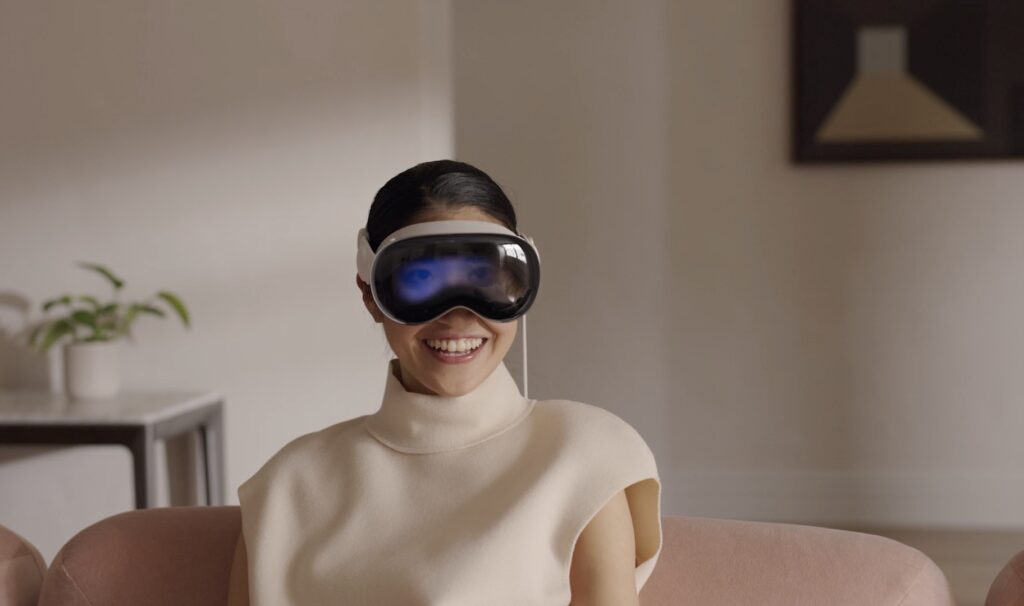
If you’re thinking it would be unsettling to be in the same room with someone wearing a Vision Pro, you’re not alone. In an attempt to reduce that sense, a technology called EyeSight makes the device seem transparent—it shows an image of the user’s eyes on a front-facing display for others to see. How effective this will be remains to be seen, but it’s hard to imagine the Vision Pro becoming a fashion accessory.
There’s a great deal more to the Vision Pro, such as its ability to record and play back 3D movies with spatial audio, wrap panorama photos around the user, and use familiar iPhone and iPad apps. Despite the incredible hardware and software that Apple has invented to bring the Vision Pro to fruition, it feels like a technology demo. And it does demo well, judging from reports from people like tech analyst Ben Thompson.
But the Vision Pro is at least 6 months from emerging from Apple’s reality distortion field, and many people are already highly dubious that the company’s vision for the future of computing will do a better job with the real-world tasks we already do with today’s digital devices.
(Featured image by Apple)
Social Media: At WWDC, Apple announced new Macs and new features in the upcoming macOS Sonoma, iOS 17, iPadOS 17, watchOS 10, and tvOS 17. It also unveiled the Vision Pro mixed-reality headset, which offers a glimpse at Apple’s vision for the future of computing.