With the recent release of macOS 12.3 Monterey and iPadOS 15.4, Apple shipped Universal Control, the last major technology promised in its 2021 operating system upgrades. Universal Control enables you to use the keyboard and mouse or trackpad attached to one Mac to control up to three other Macs or iPads—you can even copy and paste or drag items between devices. It’s a great way to make more of your Apple devices while staying on task—no longer do you need to stop using your Mac to accomplish something on your iPad, and if you have both an iMac and a MacBook Air, it becomes trivially easy to use them simultaneously.
Universal Control can simplify grabbing a file from your MacBook Air while using your iMac, or it might make it easy to check something in an iPad-only app without switching from your familiar Mac keyboard and trackpad. For those who would benefit from more screen space, Universal Control simplifies keeping a Web browser window open on one Mac while you’re writing about it on another.
First, make sure all the Macs and iPads you want to use with Universal Control meet its system requirements. macOS 12.3 and iPadOS 15.4 are essential, and most (but not all) Macs and iPads that can run those versions are compatible. All the devices must be signed in to the same iCloud account, that account’s Apple ID must have two-factor authentication enabled, and no device can be sharing its Internet or cellular connection. Bluetooth and Wi-Fi must be turned on, and Handoff must be enabled in System Preferences > General on the Mac and in Settings > General > AirPlay & Handoff on the iPad. That may sound like a lot, but most of those are defaults.
Apple says everything must be within 30 feet (10 meters), but in nearly all cases, you’ll want the devices to sit next to one another so you can easily see what you are doing on all the screens.
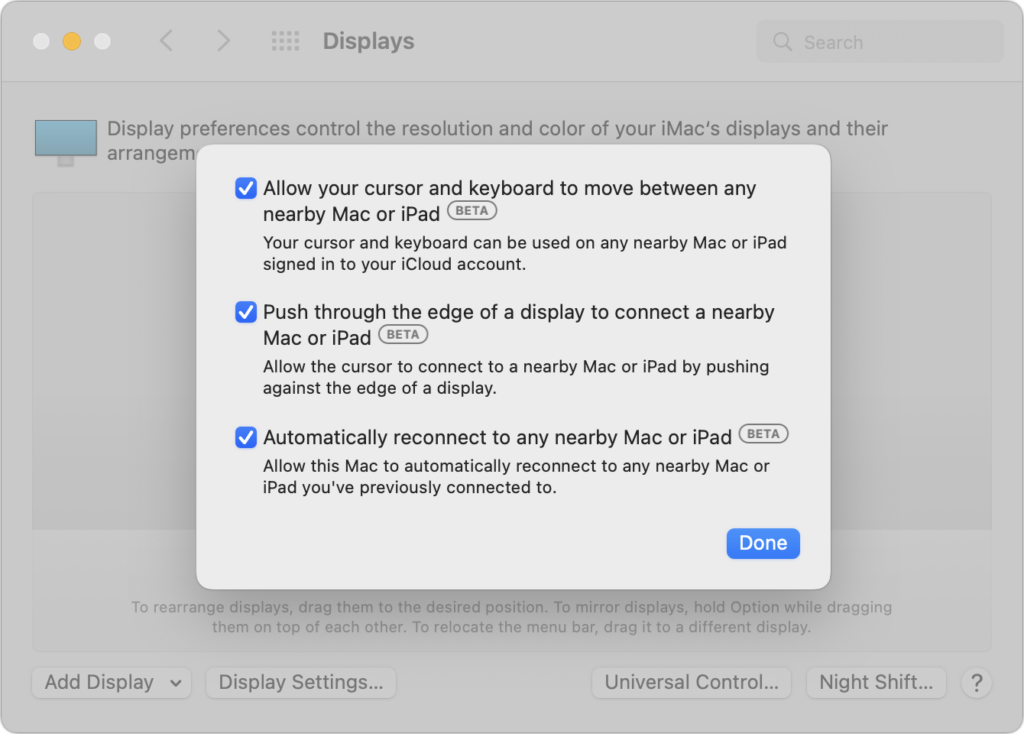
The only trick with setting up Universal Control is that it must be initiated from a Mac. Open System Preferences > Displays, click the Universal Control button, and in the dialog that appears, enable all three switches. Only the first one is necessary; the other two make connecting in the future easier.

After you click Done, you’ll return to the Displays preference pane, where any available Macs and iPads should appear, much like they were external monitors. If they don’t show up, click the Add Display pop-up menu and select the device you want to control under “Link Keyboard and Mouse.” You can also select them in Control Center, after clicking Displays. As long as you’ve selected “Automatically reconnect to any nearby Mac or iPad,” you shouldn’t have to repeat this step.
(The “Mirror or Extend to” section of the Add Display pop-up menu is where you select devices to use as external displays for your Mac. Macs running Monterey appear here courtesy of AirPlay, as do Apple TVs; iPads appear thanks to Apple’s Sidecar technology.)
Drag the device screen icons to match where they sit on your desk. The screenshot above indicates that you’d move the pointer from the double-screen iMac to the right to control the MacBook Air and down from the middle of the iMac screens to control the iPad.
When your pointer moves to another device’s screen, everything you do from then on will affect apps on that Mac or iPad, with one caveat. After the pointer moves to another device, you usually need to click once to create “focus,” which means specifying which window should receive subsequent clicks and keystrokes. If you forget to do this (it will become second nature quickly) and start typing, keystrokes will go to the previous device.
To help you move data between your devices, Universal Control offers two additional features beyond clicking and typing:
- Copy and paste: As you might expect, you can copy data on one device with Command-C, move the pointer to another device, and paste it into an app on the second device with Command-V.
- Drag and drop: Alternatively, you can drag files and other types of data from one device to another. This works well between Macs, and you can also move data between Macs and iPads in many situations, such as dragging an Apple Pencil sketch from an iPad and dropping it in a graphics app on the Mac. If a drag doesn’t work, try copy and paste or fall back on sharing the data via AirDrop or iCloud Drive.
Keep in mind that once you’ve turned it on, Universal Control has no concept of primary and secondary devices. In practice, you’ll probably use one keyboard and pointing device to control everything, but that’s not necessary. You can use a trackpad and keyboard connected to any device to control any other device, switching whenever you’d like.
Since Apple labels Universal Control as a beta, you may experience occasional dropouts or rough edges. If it loses track of a device, try putting the device to sleep and waking it again, and if that doesn’t work, open the Displays preference pane and select the device from Add Displays again.
Controlling one Mac from another is extremely fluid because the pointer and keyboard act exactly as expected. However, if you haven’t previously used a trackpad and hardware keyboard with an iPad, you may find its approach somewhat surprising. It’s a hybrid between a traditional pointer and a touchscreen, so the pointer is attracted to Home screen icons and many other controls, transforming it into a selection highlight. Either way, Universal Control just works. Give it a try!
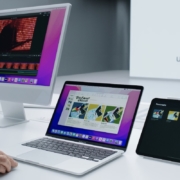
(Featured image by Apple)
Social Media: With macOS 12.3 Monterey and iPadOS 15.4, you can now use your Mac’s keyboard and pointing device to control up to three other Macs or iPads with Apple’s new Universal Control. Learn more at: