How to discover the shutterbug inside a six-year-old

How to discover the shutterbug inside a six-year-old.

How to discover the shutterbug inside a six-year-old. Like most grade school aged children, mine own tablets and can swipe my phone faster than a New York City pickpocket. But they rarely use the devices’ cameras. The most recent photo in either child’s camera roll? A series of 38 selfies with a blurry dog-looking thing from over four months ago. Other parents I’ve surveyed tell me this evidence is typical. We assume they haven’t yet developed an interest in photography. When they do, the device with a camera is ready and waiting.

But if you’ve ever handed an actual camera to a kindergartner, for example, you know there’s more to it. And the older the camera, the better. One with a viewfinder and no screen really gets the gears turning. After they realize what it is (and that there are no games on it), the purpose sinks in. They discover a different tool that invokes a whole different curiosity.

Here’s how I spawned the shutterbug inside a six-year-old boy. I’d keep an old digital camera handy and anytime we left the house, I’d set it in the back seat. He couldn’t not pick it up and within a couple weeks he was taking it out of the house of his own accord. Sure, that was usually when his other device was off limits, but I say any interest counts. Sometimes, he’d take 38 pics of the seatback out of boredom. But often he’d take real pictures. And he got better fast. I’d watch as he would stop, compose, capture, and retake until he found an angle he liked. The results were far more thoughtful than anything he’d shot with an iPad. I didn’t try to explain the menu or functions unless he asked so he discovered most on his own and now frequently uses exposure compensation to improve a shot.

Since then, I’ve let him wrangle my DSLR, complete with a gigantic vertical grip attached. It’s obviously cumbersome but he knows what he’s doing and, more importantly, why he’s doing it. The pictures he takes are important to him and although most are viewed on his device and shared between family, a select few have found fame on his older brother’s blog. I think we’ll venture into printing soon.

I’m not surprised that he’s become a pretty good photographer. I’m surprised that maybe he already was. Sometimes all it takes is the right tool.

Fb/Insta

How to discover the shutterbug inside a six-year-old.

#kidsneedcameras #youngphotog #camerakiddo

why metadata matters for preserving old family photos

Why Metadata Matters for Preserving Old Family Photos

Why Metadata Matters for Preserving Old Family Photos

Have you ever discovered a loved one’s handwritten notes on the back of an old photo? My grandmother often noted her memories, in beautiful script, on the back of black-and-white snapshots. Although she didn’t know it when she was writing, she was creating metadata about our family pictures. Metadata is one of those technical terms you may hear people talk about from time to time. It’s just a fancy word for memories. And just like your grandmother’s notes on the back of old photos, metadata is how your grandchildren will learn about you and your legacy. Even though it may sound like technical jargon, metadata is actually super simple and key to preserving family history. Let’s dive in and learn why metadata matters for preserving old family photos.

So, what is metadata anyway?

Metadata is data about data. In this case, the data is simply describing photographs. Metadata provides key information about the photos, which is useful because it adds context and backstory. Metadata also makes finding photos faster, even years down the road when most of the people depicted in the photos are no longer living.

If you carefully add metadata to your photos now, future generations will be able to locate and enjoy photos. Metadata makes your pictures searchable. No more sifting through folders, hard drives and emails when you’re in a rush to find a photo to send to a family member! When it comes to search and rescue, metadata is like the lifeboat of family history! Without it, your family photos may become anonymous artifacts.

 How do I add metadata to my family photos?

After you’ve digitized (scanned) your family photos, you can begin adding metadata to the digital files. Remember, scanning doesn’t actually archive information about your photo. Have you scanned dozens of family pictures, but never actually attached any information to the files? Don’t worry, lots of people make this mistake. The good news is, this is an easy-fix! You just need to add some basic info to your photos. That info is called metadata. The metadata you add will be embedded in the JPEG or TIFF file, so the information actually sticks with the photos!

Peter Krogh, the leading authority on digital asset management for pro photographers, says it’s easier to think of metadata as tags. Many of us are already familiar with tags; we use them daily on social media. They’re manageable, logical and extremely powerful.

There are specific standards for image metadata, which have been developed by news organizations over the last 25 years. This standard is called IPTC. It defines a series of text-based fields that standardize the way different aspects of a photo are described. While there are many fields in the IPTC standard, family historians only need to focus on three:

1) Headline: a short phrase that describes the photo. For example, “Ed and Joe fish at Grandaddy’s Farm” would be a great headline for a family photo.

2) Caption (description): This is a sentence or short paragraph describing the photo. The Associated Press has a specific format for writing captions so that basic information is answered about every photo. While you don’t have to write captions to a strict standard, it’s smart to add as much info as you possible into the caption so details are preserved. As you’re writing captions, think like a reporter. Your caption should answer these basic questions, “Who? What? When? Where? Why? And How?” For example, you should include first and last names of people pictured, what they are doing, a date or approximate date, location, the reason for what they are doing.

3) Keywords: These are like breadcrumbs; they enable searchers to find photos faster. Keywords are words or short phrases that describe the photo. Think of what you would type into Google to find the photo. These are the keywords you should apply. You can use names of people pictured as keywords, locations, activities pictured, events, and other descriptors. It’s also good to standardize a list of keywords to apply to photos so you use the exact same terms to refer to the same concept in different photos. This is called a controlled vocabulary, which sounds like jargon, but is just a way for you to be consistent when describing photographs.

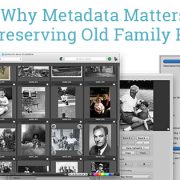
An easy way to add these vital pieces of information to photos is by right-clicking on its thumbnail. But if you’d like to take it a step farther and archive your photos like a pro, you should consider investing in some software that will make metadata a breeze! For my own family archives, I rely on Photomechanic for adding metadata to photos. Here’s a helpful screenshot of the metadata fields within Photomechanic. With a few fast tutorials, you’ll be a whiz at adding metadata to your photos.

Tip for mobile device photos: The simplest way to use PhotoMechanic to manage the library of images you create with mobile devices is to utilize Google Photos’ cloud-based storage service. Google Photos will synchronize the photos from your phones and tablets via mobile apps you install on your Android or Apple devices, and then use a sync app you can download for your computer. By synchronizing mobile photos up to Google Photos, and then down to your computer, you will have the files locally and can add metadata using Photo Mechanic.

Unless you add metadata to your image files (whether they are from your iPhone or scanned from an original print), you don’t have permanent information attached to your photos. And that’s tragic for future generations who want to get to know their ancestors! So take steps now to add as much metadata to your family photos as you can. After all, future generations of loved ones will get to know you through the information you add now.

How to Create a Killer Slideshow Your Family Will Enjoy

Gather your family, grab some popcorn and have a box of tissues ready. Creating a beautiful, impactful slideshow is a fun project for anyone who loves photography! But deciding which photos to include, and how to sequence pictures for maximum impact, can be a time-consuming challenge. As you choose and arrange photos for a slideshow, imagine you’re writing a story. But instead of using words to tell the story, you’re using pictures to tell your story. Look through your photo library and try to find the following eight types of pictures. As you make your selections, ask yourself, “does each of these photos work together to tell the story? So now let’s dive in and learn how to create a slideshow that will make your family cry – tears of joy!


  • Portraits: these pictures introduce key characters in the story. For example, be sure you include a portrait of each key family member in your album or slideshow. When your family traveled to New York City for a holiday gathering, did grandma and grandpa come along too? Then, by all means, include snapshots of their grinning faces watching the kiddos ice skate at Rockefeller Center!
  • Scene Setters: these are typically wide-angle, sweeping shots that give viewers a sense of place. For example, did you include a dramatic shot of your family trip to Niagra Falls?
  • Interaction: these photos capture the close relationships between your loved ones. Select pictures of family members sharing fun or memorable experiences. Don’t just choose posed pictures of family members standing in front of big landmarks. (Those tend to be pretty boring!) Try to find a series of candid photos of the family hanging out, adventuring and laughing! The more natural the shot, the more impact it has in your slideshow.
  • Honest Emotion: these types of photos showcase unique personalities and traits. Often, these are shots of family members reacting to something happening. Did Uncle Bob tell a hilarious joke at dinner that made your mom LOL? If you captured your mom’s expression, make sure to include it in your slideshow! It will inspire wonderful reactions from your family when they watch the finished slideshow.
  • People without People: This is my favorite type of photo to include in slideshows! These are photos of objects or details that show viewers something about the characters in the story. For example, pictures of your grandma’s childhood home help add context and emotion to your slideshow. Find a few fun ones to enhance your slideshow!
  • Transitions: these photos show characters going from one “chapter” of the story to the next. For example, you could include a snapshot of your family boating through the Hawaiian islands. Try to pick photos that show your group moving from one place to another! It helps your slideshow make sense chronologically.
  • Decisive Moment or “Hero Shot:” These pictures are often the most dramatic ones in your slideshow. It’s a type of photo that makes everyone smile because it sums up your entire vacation/trip/experience. For example, this could be a snapshot of everyone gathering around your parents cheering them on at their 50th wedding anniversary.
  • Closing Shot: A closing shot is a picture that conveys the end of the story. For example, this type of photo could show your family members walking down a path at the end of a hike, or seaside sunset at the end of a fun day.


Pro tip: consider dividing photos up into chapters or themes. This will make the task of sequencing much more intuitive. As you group photos together, the best sequence for maximum emotional impact will become clear. Just make sure to bring a box of Kleenex when you debut your slideshow to your family!


Now that you’ve learned the eight types of photos to include in an album or slideshow, you’re ready to tackle creating a slideshow for your family.

holiday shots worth saving

Share-worthy shots for the holidays

The pictures we take during the holidays can be a bit mundane. We snap a couple of the family around the dinner table and a few during gift opening. But do you share those pictures? Do you look at them later? This year, get guaranteed share-worthy shots. Aim to capture the making-of moments and the craziness leading up to the actual holiday events. With a keen eye, you’ll be sharing photos over Christmas dinner instead of snapping the same old grins.

Insider Tip: Stage the scene by laying out albums and prints from holidays past. Capture new photos of the smiles they bring. Boom. You just started a new tradition.

Common holiday photo fails and where to point your camera instead:

THE INFAMOUS FAMILY SHOT
FAIL: We all line up for the firing squad and painfully hold a pose long enough for 41 clicks where everyone’s eyes are open in exactly none of them. Babies cry. Your brother’s rude gestures go unnoticed… for now. No one ever sees the photo.

WIN: Same as before except you also prop your phone up in the corner, out of frame, to video the whole ordeal. Maybe in time lapse if your photo sessions tend to run a little long. You know your family; bloopers are guaranteed. And this one, everyone wants to see.


THE BIG DINNER
FAIL: Everyone sits down. Half of us already have mouths full of food when you stand up to snap a few shots of togetherness. Mom is still in the kitchen. You can’t see your sister behind the turkey. Three cousins hide under the table. No one ever sees the photo.

WIN: Head into the kitchen 30 minutes before and start snapping. Heartwarming? Possibly. Hell broken loose? Maybe. Blackmail material for Easter? Hopefully. Who knows what really goes on in there? Now you do!


THE DECOR
FAIL: The tree is up and the house it lit. You wait until dusk to get the perfect shot and… what? The lights are too bright and the sky is too dark. It looks like a glowing blob in a sea of black. Try again tomorrow? Not likely.

WIN: Don’t wait until the decorations are up. If dad’s putting lights on the roof, there’s a 100% chance of a golden photo opportunity. It might be corny, heartwarming, hilarious, or just good documentation for the medics. Either way, you’ll get something worth sharing. Back inside, you know what happens when mom unpacks the ornaments you made in grade school: She cries. First photograph it. Next hug. Later, share. Cry, hug, repeat.


The good stuff happens where no one’s looking. Shoot behind-the-scenes and you’ll have the shots worth sharing. Happy Holidays!

Gift of photos

Three ways to win Christmas with photos

This could be the best gift you’ll give this year. It will definitely be the most meaningful. This isn’t another “Best Gifts of 2017” list. It’s THE Best Gift of 2017 and it’s not a list. It’s just one thing and you already own it. It might even be in your pocket right now. Best […]

custom holiday ornaments

Love holiday traditions? Here’s a great one!

We all have them – those meaningful family traditions that we replicate each Christmas season. Maybe it’s watching the big game together, baking from family recipes, decorating the tree or driving through the neighborhood to look at Christmas lights.

When my children were younger, I used to dress them in matching holiday themed pajamas and pose them for a picture under the tree. But as they grew older, I started thinking about finding something more meaningful and lasting to do for them. Something that makes the holiday season special after they leave the house and begin starting their own traditions.

Since I work in the photo industry, I had access to all sorts of options for creative ideas, but one stood out as something that had the lasting power and sentimental value I was looking for – so I landed on personalized holiday ornaments.

These custom ornaments feature an image of our family or the kids, the year and their ages – making reminiscing fun as we decorate the tree. I order multiple copies of our annual family ornament each year – one for each child to keep and one day take with them – plus one that will stay on the family tree at our house.

Now, that my kids are a little older, they love to look for their special photo ornaments while we’re decorating the tree and I love knowing that this tradition will live on for years to come.

#holidaytraditions, #personlizemytree, #lovemyPRproject, #theprintrefinery

The Gather Box

What is archiving and why is it so important?

When it comes to organizing and preserving your family’s photography history, many of us struggle to get this accomplished. Whether it’s photos stuck in drawers, VHS tapes in boxes, old slide carousels or piles of home movie reels – most of us don’t even know where to begin. Time out! You do know how important preserving these memories is – don’t you? Over time, these precious mementos from our past, our parents’ past and our grandparents’ past are at risk for damage, deterioration and they are mostly likely forgotten and neglected.

What is Archiving? It’s the process of storing data and information of historical importance – and what’s more important that your own family history!?
Here’s why archiving is important:

• Protection – Getting those photos and movies out of damp basements and grungy garages ensures longevity. It also protects them from catastrophic weather or environmental damage.

• Preservation – The best way to preserve these moments and memories is through a process called digitization. The prints, slides and home movies are scanned and turned into digital files – making them accessible by today’s technology.

• Storage – Once your memorabilia is digitized, it becomes far easier to store because it takes up far less physical space. Thousands of digital files can fit on DVDs, Blu-Ray discs, USB drives and hard drives – meaning those 4 large boxes full of photographs are now on a device that can fit in the palm of your hand. Taking it a step further, you can also store those digital files in the cloud for even deeper storage and back up protection.

• Duplication/Sharing – A common problem for families is deciding who gets to keep all of that rich history, often resulting in frustration over who gets what photographs. The beauty of digitizing those files means no more arguing on the subject. Every single family can have their very own copy of the family’s memorabilia – and we think that’s pretty awesome.

• Accessibility – Once these items are safely stored on digital media, it becomes much easier to locate specific images or movies quickly. Much faster than digging through boxes in search of mom and dad’s wedding photo.

We love helping our customers get started archiving, but so many don’t even know where to begin. Fear not! We have the perfect solution to let you test the waters with archiving. We’ve developed a step by step kit that simplifies the process – it’s called The Gather Box. This take-home, DIY archiving kit simplifies the sometimes-daunting task of organizing personal effects and helps get your photo closets, drawers, garages, basements and attics in order!

You won’t believe what this box can do! Here’s how it works:
STEP 1: GATHER Purchase the box for yourself or a loved one. Inside, find instructions and tips to guide you through the sorting and gathering process.

STEP 2: FILL THE BOX Fill it with memorabilia, photos, slides and home movies, then drop it off at our store. If you have things that won’t fit in the box, bring them along so we can address those items separately.

STEP 3: MAGIC! Return to find that everything in your box has been magically transformed into digital format. Now you can relax in confidence knowing those precious relics from the past are now protected and easily accessible.

If The Gather Box sounds like the solution for you, stop by and pick one up today! www.theprintrefinery.com

#archiveitall, #lovemyPRproject, #savefamilyphotos, #theprintrefinery