Apple’s Worldwide Developer Conference keynote was a lightning-fast (even in the full 1:44-long video—or try the 3-minute recap) look at what Apple is bringing to the software side of the Apple experience in the next year. Although some past keynotes have introduced hardware like new Macs and the Vision Pro, this year’s keynote stuck to new operating system features before previewing a suite of AI features collected under the umbrella term “Apple Intelligence.”
Apple previewed a boatload of new features and listed even more on its website. We’ll focus on those we think will make the biggest splash in your Apple experience, but we recommend that you scroll through Apple’s pages for each operating system to see more of what’s coming. Those are linked below, along with basic hardware requirements so you can see if your devices will be eligible to upgrade (not all features will be available on all devices):
- macOS 15 Sequoia: iMac Pro from 2017, MacBook Pro and Mac mini from 2018 and later, iMac and Mac Pro from 2019 and later, MacBook Air from 2020 and later, and Mac Studio from 2022 and later
- iOS 18: Second-generation iPhone SE, iPhone XR, and later (same as iOS 17)
- iPadOS 18: Seventh-generation iPad and later, fifth-generation iPad mini and later, third-generation iPad Air and later (including M2 models), first-generation 11-inch iPad Pro and later, and third-generation 12.9-inch iPad Pro and later, and all M4 iPad Pro models
- watchOS 11: Second-generation Apple Watch SE, Apple Watch Series 6 and later, and Apple Watch Ultra and later
- tvOS 18: Apple TV HD (with fewer features), Apple TV 4K
- visionOS 2: All Vision Pro headsets
Here are a handful of new features we think Apple users will find most interesting. Then we’ll look at Apple Intelligence.
Personalize Your iPhone and iPad Home Screen
iOS 18 and iPadOS 18 introduce significantly enhanced Home Screen customization options aimed at letting your creativity shine through. You can leave blank spaces between icons and arrange icons and widgets however you like. Additionally, you can change the size of icons and widgets and apply color tints.

Screenshot
Tile Windows Automatically in Sequoia
macOS has long had a subtle window alignment effect that makes it easy to line up windows, but in macOS 15 Sequoia, when you drag a window to the side of the screen, macOS suggests a tiled position on your desktop, intelligently sizing it for the window’s content. Window tiling makes it easy to put windows side-by-side and fill the screen without wasting space. Keyboard jockeys will appreciate new keyboard shortcuts for window tiling as well. (If you don’t want to wait for Sequoia, numerous utilities offer similar features now, including Amethyst, BetterTouchTool, Magnet, Moom, Rectangle, and Yabai.)

Notes and Phone Gain Audio Recording and Transcription
If you find yourself wanting to revisit what was said in a lecture, appointment, or phone call, a pair of upcoming features can boost your recall. The Notes app on all platforms will record audio and create live transcriptions, allowing you to pay attention during a talk rather than furiously taking notes. Plus, the Phone app in iOS 18 will let you record and transcribe a live call—when you start recording, participants are automatically notified so everyone knows it’s happening.

Mirror Your iPhone on Your Mac
If you frequently pull out your iPhone while working on your Mac, you’ll appreciate Sequoia’s new iPhone mirroring feature. It lets you use your Mac’s pointing device and keyboard to interact with all your iPhone apps in a window on your Mac while the iPhone remains locked or in StandBy. Audio from the iPhone plays through your Mac, and you can share data between devices with drag and drop. A related Continuity feature displays iPhone notifications on your Mac—when mirroring your iPhone, clicking those notifications opens the associated iPhone app.

Passwords Breaks Free of Settings
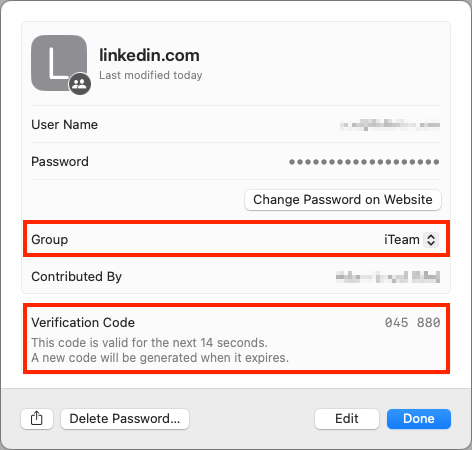
At long last, Apple has given us a dedicated Passwords app in Sequoia, iOS 18, iPadOS 18, and visionOS 2. The company’s password management features have become quite good over the past few years, but they are awkward to access in Settings on the iPhone and iPad and System Settings on the Mac. We don’t anticipate significant feature changes beyond the addition of categories, but the Passwords app should make managing your logins even easier. Passwords still won’t fully match up to the likes of 1Password, but you won’t go wrong with Apple’s built-in solution. Remember that if you use a Web browser other than Safari, you’ll need the iCloud Passwords extension we’ve mentioned previously. You can also share your passwords with a Windows PC using iCloud for Windows.

Five More Welcome Features
For more reasons to upgrade once these new operating systems are out and stable, consider the following additional features:
- Customize Control Center: iOS 18 and iPadOS 18 feature a thoroughly revamped Control Center, accessible with a continuous swipe down on the Home Screen. You can create custom groups of controls—some from third-party apps—with resizing and mixing options.
- iPad Calculator app and Math Notes: Not only does the iPad finally get a Calculator app, but it also introduces Math Notes. You handwrite an equation with an Apple Pencil, and when you write an equals sign, Calculator solves the equation. Math Notes works with keyboards, too, and you can also find it in the Notes app.
- Lock and hide iPhone apps: New privacy features in iOS 18 and iPadOS 18 let you lock apps with Face ID or Touch ID so the friend who’s scrolling through your vacation photos can’t also read your journal. You can also move apps to a hidden folder in the App Library that can’t be opened without biometric authentication.
- More tapbacks: In Messages, when you want to use a tapback to acknowledge a message without typing out a reply, you’ll be able to use any emoji or sticker, or a new AI-powered Genmoji.
- Vitals app collects overnight data: When you wear your Apple Watch to sleep, a new Vitals app in watchOS 11 collects and displays your overnight health metrics on your wrist, including heart rate, respiratory rate, temperature, blood oxygen, and sleep duration. It might help you rest up to fight off that cold that’s going around.
Apple usually releases its new operating systems in September or October; we’ll write more about them as we get closer. Generally speaking, it’s OK to upgrade to everything but macOS shortly after release; with macOS, we recommend caution to ensure your existing apps and workflows won’t be impacted.
Apple Intelligence
Apple devoted a large chunk of the keynote to introducing Apple Intelligence, a collection of AI-powered features coming to the Apple ecosystem over the next year. These features will enable your iPhone, iPad, and Mac to understand language and create both text and images, plus take actions aimed at simplifying your interactions with apps. What sets Apple Intelligence apart from AI efforts from other companies is its focus on—and understanding of—your personal context. Apple Intelligence will know about your contacts, schedule, email, messages, photos, and much more.

The most significant use of Apple Intelligence will come with Siri, which will let us speak more naturally and understand what we mean if we make mistakes. We’ve trained ourselves to say only things Siri is likely to be able to handle, but that won’t be necessary when Siri gains Apple Intelligence capabilities. You’ll be able to search for photos of your child holding a fishing rod, for instance, or ask Siri to find something when you can’t remember if it was in Mail or Messages. Siri will also gain context awareness, so you can ask what the weather will be like at the beach tomorrow, and if the response is good enough, have it schedule a trip there. Siri will even know a lot more about your Apple devices and can help you use them. For the most part, though, Siri won’t have global knowledge. If Siri can’t answer your query directly, it will offer to send it to ChatGPT for free.

Apple Intelligence also includes writing tools, but unlike ChatGPT, it’s not aimed at creating text from scratch. Instead, it can rewrite text you’ve written to help you fine-tune the wording or adjust the tone to be more appropriate. It can also proofread text, helping you with grammar, word choice, and sentence structure (if you need this now, check out Grammarly). Even when Apple Intelligence does create text, such as the Smart Reply feature coming to Mail, it asks you questions to guide its response.
Text summarization powered by Apple Intelligence shows up repeatedly. In Notes, you’ll be able to summarize a transcription. If you save a long article to Safari’s Reader, it can provide a table of contents and summary. In Mail, instead of the first few sentences appearing in the message list, you’ll get a short summary. Apple Intelligence can even prioritize and summarize notifications.
Unsurprisingly, Apple Intelligence lets you create and edit images, but it’s a far cry from the AI artbots that let you create photo-realistic images. Instead, Apple Intelligence lets you create custom emoji, called Genmoji, which let you express yourself graphically in ways that standard emoji can’t support. Image Playground lets you create images for inclusion in conversations and documents, but it limits you to three styles: Sketch, Illustration, and Paint. Apple doesn’t want anyone making deepfakes with Apple Intelligence. A new Image Wand feature in Notes even turns your rough sketches into polished images.

Apple took great pains to emphasize the privacy aspects of Apple Intelligence. Most Apple Intelligence tasks will take place entirely on your device, hence the need for powerful Apple silicon chips with their Neural Engines and Secure Enclaves. Some tasks require more processing power; to handle those, Apple has developed a highly secure system called Private Cloud Compute. It relies on Apple silicon servers, transfers only the data necessary to the task, and stores nothing.
Apple Intelligence features will start arriving in the fall and continue to roll out in feature-release updates over the next 6–8 months. They will run only on the iPhone 15 Pro, iPhone 15 Pro Max, and iPads and Macs with M1 or later chips. Intel-based Macs and less-powerful iPads and iPhones need not apply. Apple Intelligence will also require Siri and the device language to be set to US English in the early releases, with other languages to follow.
Overall, Apple appears to have put a great deal of thought and effort into integrating AI into the Apple experience in focused, helpful ways that offer new capabilities while preserving user privacy. We won’t know how well these features will work until they ship, but we look forward to seeing how they can improve interactions with our Apple devices.
(Featured image by Apple)
Social Media: At yesterday’s Worldwide Developer Conference, Apple announced a treasure trove of new features in its upcoming operating system upgrades, including practical, everyday improvements and impressive AI-based capabilities.


