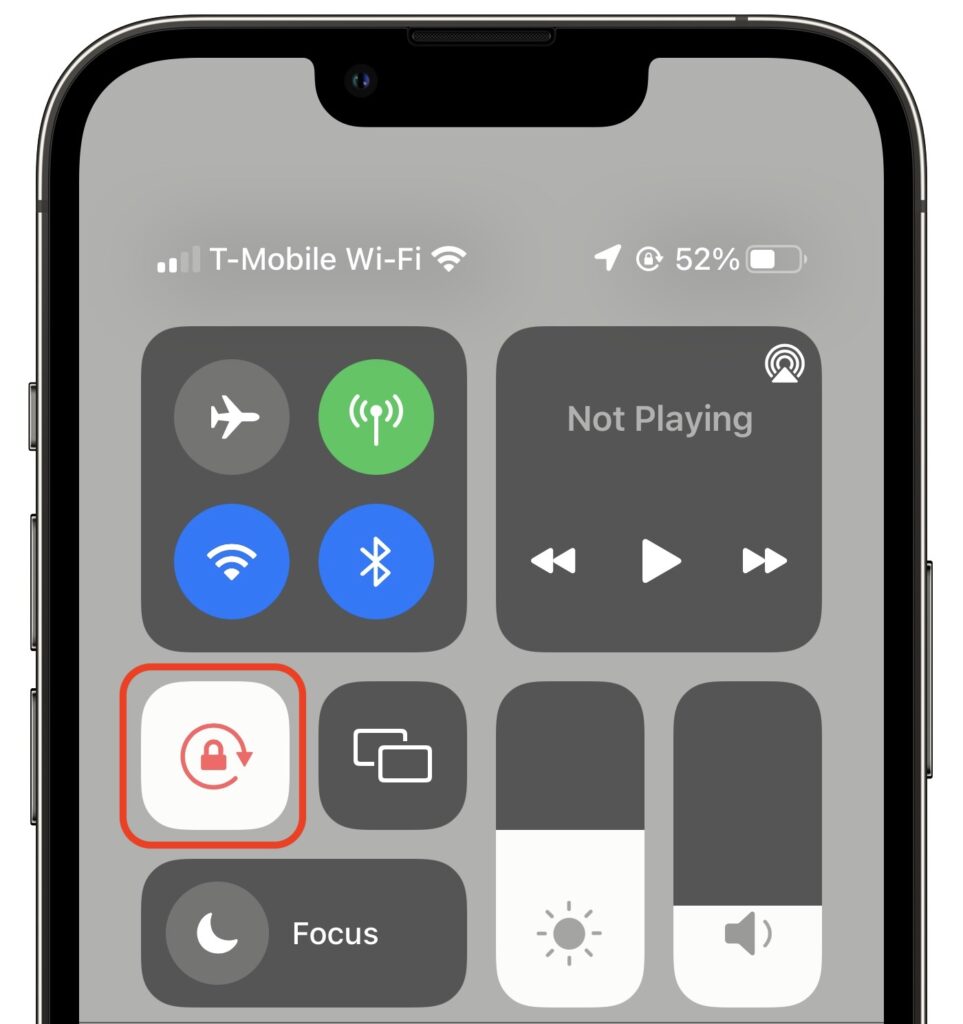
We’re all accustomed to the Do Not Disturb feature on our iPhones since they’re with us for most of the day and often spend the night next to the bed. But Apple long ago added Do Not Disturb to the Mac as well, and it’s useful for muting your Mac at night to eliminate unnecessary noises and for preventing unwanted notifications during presentations. In System Preferences > Notifications > Do Not Disturb, you can tell macOS to turn the feature on during specific times, when the display is sleeping or locked, and when mirroring to another screen. Or, you can turn on Do Not Disturb manually—you might want to do this when giving a presentation with Zoom or another videoconferencing app. In macOS 10.15 Catalina and earlier, do this in Notification Center by clicking it at the far right of the menu bar, scrolling up, and enabling the Do Not Disturb switch. In macOS 11 Big Sur, you find Do Not Disturb in Control Center.
(Featured image by Andrea Piacquadio from Pexels)
https://f11photo.com/wp-content/uploads/sites/13/2021/02/Do-Not-Disturb-shush-photo.jpg8001280F-11 Photohttps://f11photo.com/wp-content/uploads/sites/13/2023/06/PR-F11Photo-logo.jpgF-11 Photo2021-02-01 12:05:002023-06-27 20:34:07Keep Your Mac Quiet at Night and During Presentations with Do Not Disturb
We regularly hear from people who think they need Adobe Acrobat DC to manipulate PDFs. Don’t misunderstand: Adobe Acrobat is the gold standard, but it’s complicated and expensive—$14.99 per month or as part of Creative Cloud for $52.99 per month. In contrast, Apple’s Preview is easy and free with macOS. Here are six tasks that people may think require Acrobat but can easily be accomplished in Preview.
Remove and Rearrange or Export Pages
Have a PDF with unnecessary pages? You can delete them in Preview. First, make sure page thumbnails are showing in the sidebar by choosing View > Thumbnails. Then select the pages you want to remove and press Delete. Choose File > Save when you’re done—you’ll need to do that after all the rest of these tasks too.
Rearranging pages also happens in the sidebar—just drag the thumbnails as needed. If you drag a thumbnail to the Finder, Preview exports the page as its own PDF file.
Merge and Add Pages
What about putting pages from one PDF into another? Preview has your back there too. Open both PDFs, make sure their sidebars are showing page thumbnails, and then drag one or more thumbnails from one sidebar to the other, dropping them between the desired pages in the destination.
You can also drag a PDF from the Finder into the sidebar to add all its pages. Or, to take a photo or scan a document and insert it into the document, Control-click in the sidebar and choose Import from iPhone or iPad.
Annotate Text
Let’s say someone asks for edits or comments on a PDF. Although you can’t change the text with Preview, you can mark up the document.
Highlight text: They may give you flashbacks to high school, but Preview provides a handful of colored highlighters, along with underline and strikethrough styles. Choose one from the Highlight menu in the toolbar and then select the desired text.
Add highlight notes: To ensure that your highlights make sense to others, add notes to them. Control-click the highlighted text and choose Add Note. Then enter your note in the colored box that appears. It shrinks when you click away from it and expands when you click it again.
Add general notes: You can also place faux sticky notes anywhere on a PDF page. Reveal the Markup toolbar by clicking the Markup button, and then click the Note button. Dag the closed note box to position it on the page. See all your notes in the sidebar by choosing View > Highlights and Notes.
Add shapes and text boxes: The Markup toolbar also contains controls for creating various shapes (including lines with arrows) and text boxes. At times, the best way to show what you mean is to put a box, line, or text directly on the page. Click a shape to add it—text you type while it’s selected sticks with the shape, like the speech balloon below and the arrows above.
If you do need to edit the text of a PDF, that’s a job for Adobe Acrobat or another PDF tool like Smile’s PDFpen.
Redact Text
Sometimes, when you’re sharing a PDF, you want to redact sensitive information so it can’t be read. macOS 11 Big Sur’s version of Preview can permanently obscure and delete selected text from the document. Choose Tools > Redact and select the text you want to hide.
In earlier versions of macOS, you can simulate redaction by covering text with a colored rectangle. Unfortunately, recipients could delete your rectangle or copy the text underneath it. Don’t depend on this workaround to protect confidential information. For true redaction in older versions of macOS, use Acrobat or PDFpen.
Fill PDF Forms
Although Preview cannot create fillable PDF forms (again, turn to Acrobat or Smile’s PDFpenPro), it works fine for entering information into such forms. If you have to fill out an IRS form for your employer, for instance, Preview should work fine. Just click in a field and type, or click a checkbox to select it.
One warning. We’ve heard occasional reports that Windows users reading PDFs with forms filled out in Preview sometimes don’t see the entered text. When returning an important form, it’s always best to ask the recipient to confirm that it worked. If it doesn’t, fall back on the free Adobe Acrobat Reader DC.
Sign Documents
Now that so much paperwork has gone digital, we often need to sign PDFs. The most important documents will probably use a service like SignEasy that’s designed for collecting legally binding, secure signatures. But for something like a simple permit application, you can add your signature in Preview by clicking the Signature button in the Markup toolbar and choosing it.
Inserting (and resizing) an already created signature is easy, as is the one-time process of making one. Click the Signature button, and then click Create Signature. If your Mac has a trackpad, write on it with your finger or a rubber-tipped iPad stylus. Or use a marker to write your signature on paper and take a picture of it with the camera. In macOS 10.15 Catalina and later, you can also create a signature on an iPhone or iPad. Once created, the signature sticks around in Preview and even syncs to your other Macs through iCloud.
Note that Preview’s signature is just a graphic that could be copied, so it’s no more protected than a handwritten signature that could be scanned or photocopied.
Useful as all these features are, they’re just the tip of the iceberg when it comes to what Preview can do, particularly with graphics. For a complete look at Preview’s features, check out the 178-page ebook Take Control of Preview.
(Featured image by Cytonn Photography from Pexels)
Social Media: If you think you have to pay for a pricey copy of Adobe Acrobat DC just to add and remove pages from PDFs, annotate documents, redact text, fill PDF forms, and sign documents, think again. Preview can do all that and more for free.
https://f11photo.com/wp-content/uploads/sites/13/2021/02/Preview-sign-document-photo.jpg8001280F-11 Photohttps://f11photo.com/wp-content/uploads/sites/13/2023/06/PR-F11Photo-logo.jpgF-11 Photo2021-02-01 12:04:002023-06-27 20:34:11Forget Adobe Acrobat: Preview May Be All You Need to Work with PDFs
Happy New Year! For many of us, the start of a new year is an opportunity to reflect on fresh habits we’d like to adopt. Although we certainly support any resolutions you may have made to get enough sleep, eat healthy, and exercise, could we suggest a few more that will improve your digital security?
Keep Your Devices Updated
One of the most important things you can do to protect your security is to install new operating system updates and security updates soon after Apple releases them. Although the details seldom make the news because they’re both highly specific and highly technical, you can get a sense of how important security updates are by the fact that a typical update addresses 20–40 vulnerabilities that Apple or outside researchers have identified.
It’s usually a good idea to wait a week or so after an update appears before installing it, on the off chance that it has undesirable side effects. Although such problems are uncommon, when they do happen, Apple pulls the update quickly, fixes it, and releases it again, usually within a few days.
Use a Password Manager
We’ve been banging this drum for years. If you’re still typing passwords in by hand, or copying and pasting from a list you keep in a file, please switch to a password manager like 1Password or LastPass. Even Apple’s built-in iCloud Keychain is better than nothing. A password manager has five huge benefits:
It generates strong passwords for you. Password1234 can be hacked in seconds.
It stores your passwords securely. An Excel file on your Desktop is a recipe for disaster.
It enters passwords for you. Wouldn’t that be easier than typing them in manually?
It audits existing accounts. How many of your accounts use the same password?
It lets you access passwords on all your devices. Finally, easy login on your iPhone!
A bonus benefit for families is password sharing. It allows, for example, a married couple to share essential passwords or for parents and teens to share certain passwords.
In short, using a password manager is more secure, faster, easier, and just all-around better. If you need help getting started, get in touch.
Beware of Phishing Email
Individuals and businesses alike frequently suffer from security lapses caused by phishing, forged email that fools someone into revealing login credentials, credit card numbers, or other sensitive information. Although spam filters can catch many phishing attempts, it’s up to you to be on your guard at all times. Here’s what to watch for:
Any email that tries to get you to reveal information, follow a link, or sign a document
Messages from people you don’t know, asking you to take an unusual action
Direct email from a large company for whom you’re an anonymous customer
Forged email from a trusted source asking for sensitive information
All messages that contain numerous spelling and grammar mistakes
When in doubt, don’t follow the link or reply to the email. Instead, contact the sender in some other way to see if the message is legit.
Avoid Sketchy Websites
We won’t belabor this one, but suffice it to say that you’re much more likely to pick up malware from sites on the fringes of the Web or that cater to the vices of society. To the extent that you can avoid sites that provide pirated software, “adult” content, gambling opportunities, or sales of illicit substances, the safer you’ll be. That’s not to say that reputable sites haven’t been hacked and used to distribute malware too, but it’s far less common.
If you are concerned after spending time in the darker corners of the Web, download a free copy of Malwarebytes or DetectX Swift and scan for malware manually.
Never Respond to Unsolicited Calls or Texts
Although phishing happens mostly via email, scammers have also taken to using phone calls and texts. Thanks to weaknesses in the telephone system, such calls and texts can appear to come from well-known companies, including Apple and Amazon. Even worse, with so much online ordering happening, fake text messages pretending to help you track packages are becoming more common.
For phone calls from companies, unless you’re expecting a call back from a support ticket you opened, don’t answer. Let the call go to voicemail, and if you feel it’s important to respond, look up the company’s phone number elsewhere, and talk with someone at that number rather than one provided by the voicemail.
For texts, avoid following links unless you recognize the sender and it makes sense that you’d be receiving such a link. (For instance, Apple can text delivery details related to your orders.) Regardless, never enter login information at a site you’ve reached by following a link because there’s no way to know if it’s real. Instead, if you want to learn more, navigate manually to the company’s site by entering its URL yourself, then log in.
Let’s raise a glass to staying safe online in 2021!
Social Media: Have a safer 2021 with New Year’s resolutions that will help you secure your devices, avoid email and text scams, and stay safe from malware, as well as benefit from the security and ease-of-use of password managers, which can even fill in passwords for iPhone apps.
https://f11photo.com/wp-content/uploads/sites/13/2021/01/2021-security-resolutions-photo.jpg8001280F-11 Photohttps://f11photo.com/wp-content/uploads/sites/13/2023/06/PR-F11Photo-logo.jpgF-11 Photo2021-01-04 12:05:002024-09-13 09:40:355 New Year’s Resolutions That Will Improve Your Digital Security
In July 2017, Adobe announced that it would stop distributing and updating Flash Player on December 31st, 2020. Web standards like HTML5 provide a viable alternative to Flash content, and organizations that relied on Flash have had three years to replace it. Because Adobe will no longer be addressing security vulnerabilities in Flash with updates, Flash Player now prompts users to uninstall. We strongly recommend doing so—just click the Uninstall button if you get this alert. If you don’t, a Flash Player Install Manager app in your Utilities folder should be able to remove Flash Player as well. Adobe also provides instructions to uninstall manually.
https://f11photo.com/wp-content/uploads/sites/13/2020/12/Flash-is-dead-photo.jpg8001280F-11 Photohttps://f11photo.com/wp-content/uploads/sites/13/2023/06/PR-F11Photo-logo.jpgF-11 Photo2020-12-01 12:08:002024-09-13 09:40:34Flash Is Dead—Uninstall Flash Player to Keep Your Mac Secure
Several years ago, Apple bought a company called Shazam, which made an app that identified songs by listening to the music playing nearby. Since then, Apple has built Shazam into Siri in iOS, iPadOS, macOS, and watchOS. Most recently, Apple added it to Control Center in iOS 14 and iPadOS 14 as well, so you can invoke it without speaking. To use Shazam, whenever you want to identify a song that’s playing nearby, just ask Siri, “What’s playing?” or tell it “Name that tune” or have some fun and say “Shazam!” To add Shazam to Control Center, navigate to Settings > Control Center, and tap the green + button next to Music Recognition. Then, from Control Center, tap the button to start it listening—you can return to whatever you were doing. When the song is identified, a notification appears with its name. Tap the notification to open the song in the Music app.
(Featured image by Karolina Grabowska from Pexels)
https://f11photo.com/wp-content/uploads/sites/13/2020/12/Name-that-Tune-photo.jpg8001280F-11 Photohttps://f11photo.com/wp-content/uploads/sites/13/2023/06/PR-F11Photo-logo.jpgF-11 Photo2020-12-01 12:07:002023-06-27 20:33:12Did You Know That Your iPhone Can “Name That Tune”?
Photos in iOS 14 provides four views of your library: Years, Months, Days, and All Photos. For the first three, Photos picks representative images that may not include particular shots you’re looking for. The All Photos view shows everything, but it can be overwhelming. What’s not apparent is that you can navigate All Photos more easily by pinching in to shrink the thumbnails and then pinching out to make them larger again. At the largest size, a single photo takes up the entire width of the screen.
(Featured image by Adam Engst)
https://f11photo.com/wp-content/uploads/sites/13/2020/12/Pinch-to-zoom-photo.jpg8001280F-11 Photohttps://f11photo.com/wp-content/uploads/sites/13/2023/06/PR-F11Photo-logo.jpgF-11 Photo2020-12-01 12:06:002021-01-03 13:02:09Pinch to Zoom in All Photos View in iOS 14
You probably know that you can select an image in the Finder and press the Space bar to preview it in a Quick Look window. And you may know that you can use the arrow keys to preview other files in the same folder without closing and reopening the Quick Look window. But did you know that if you select multiple images in the Finder and hold down the Option key when pressing the Space bar, the Finder will run a full-screen slideshow with a 5-second interval between images? Move the cursor to display slideshow controls, including a button to bring up an index sheet. This feature isn’t something most people need every day, but it can be a lifesaver when you need to run a quick slideshow at a party or presentation.
(Featured image by 祝 鹤槐 from Pexels)
https://f11photo.com/wp-content/uploads/sites/13/2020/12/Finder-slideshow-photo.jpg8001280F-11 Photohttps://f11photo.com/wp-content/uploads/sites/13/2023/06/PR-F11Photo-logo.jpgF-11 Photo2020-12-01 12:05:002023-06-27 20:33:16A Quick Shortcut to Create an Instant Slideshow from a Folder of Images
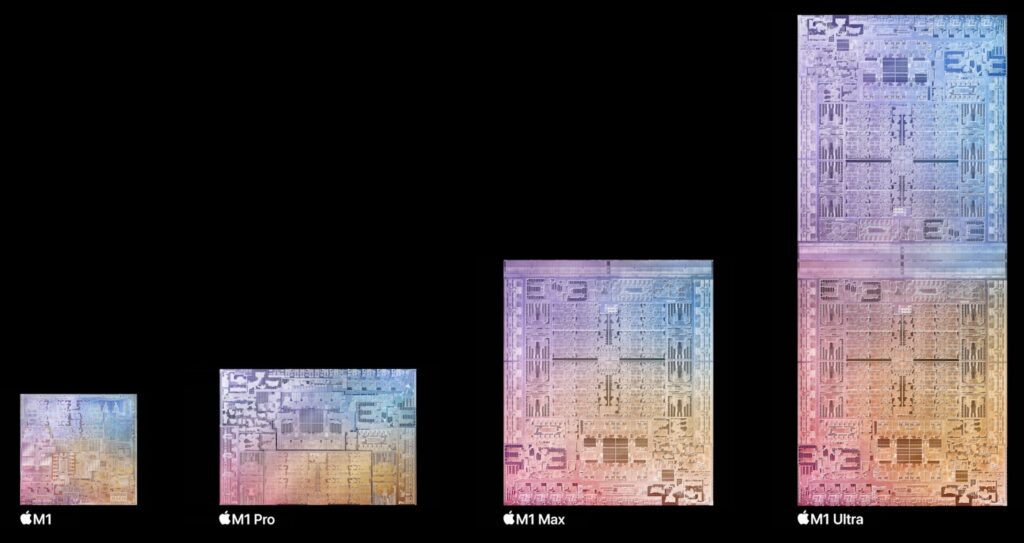
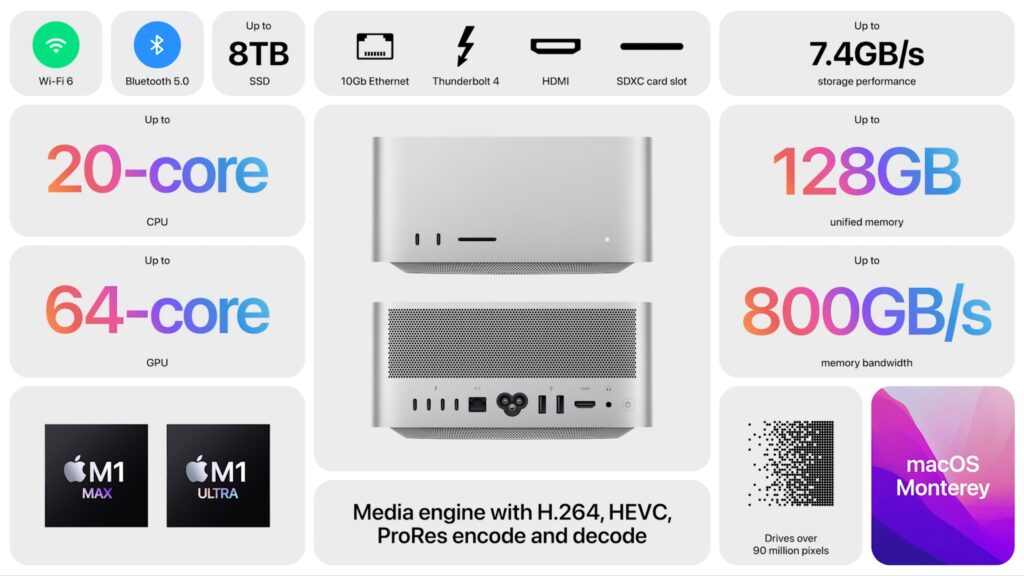
In November, Apple unveiled its new M1 chip and three new Macs that use it: the MacBook Air, 13-inch MacBook Pro, and Mac mini. The M1-based MacBook Air replaces the previous Intel-based MacBook Air, but with the 13-inch MacBook Pro and the Mac mini, Apple continues to sell some Intel-based models with beefier specs—most notably a higher memory ceiling.
Even though Apple makes impressive performance claims for the new Macs, the community was still somewhat skeptical. Were these new Macs as fast as Apple said? Would they be limited in some other way? And the biggest question of all, should we be buying untested M1-based Macs or tried-and-true Intel-based models? Now that these new Macs are shipping and people have had a chance to try them, let’s address these and other questions so you can plan your future Mac purchases appropriately.
Are these new Macs fast?
It’s hard to overstate just how astonishing the performance benchmarks for these new Macs are. In single-core GeekBench 5 tests, the M1-based Macs beat every existing Mac by a lot: the most recent 27-inch iMac clocked in at a benchmark score of 1250, whereas the M1 Macs hovered around 1700. (The Mac Pro and iMac Pro are tweaked for faster multi-core performance instead, so they fare even worse on the GeekBench 5 single-core benchmarks.) For many everyday apps, single-core performance is what you’ll notice.
Of course, the top-of-the-line 28-core Mac Pro and its siblings outperform the 8-core M1-based Macs in the GeekBench 5 multi-core benchmarks, but if you focus on the new M1 Macs in the multi-core rankings below, you can see that they’re just behind the fastest 27-inch iMacs and low-end Pro models. That’s doubly impressive when you remember that the Mac Pro in the screenshot below costs $6000, compared to $700 for the Mac mini.
Benchmarks don’t lie, but they also don’t tell the whole story. These new Macs feel fast. Apps launch with only a bounce or two of the icon on the Dock. The MacBook Air and MacBook Pro wake from sleep and unlock with an Apple Watch so quickly that they’re ready to use by the time you’ve finished opening the screen. We can’t promise you’ll never see the spinning beachball wait cursor, but we haven’t so far. In some ways, using these new Macs feels more like using a fast iPad or iPhone, where everything happens nearly instantly.
Finally, note that only apps that have been rewritten to support the M1 chip receive the full speed boost. Older apps must be “translated” by Apple’s Rosetta 2, which converts apps from Intel instructions to the Arm instructions needed by the M1. That happens at launch, after which macOS launches the translated app. The first launch might be slow, but subsequent launches are faster. Although emulation environments are generally quite slow, early tests show apps translated by Rosetta 2 as running at about 80% of native speed. The upshot of that is that even translated apps might run faster than the equivalent app running on an Intel-based Mac.
What’s the deal with the new M1-based Macs having only 8 GB or 16 GB of RAM?
With the new M1-based Macs, you can choose between 8 GB and 16 GB of RAM, and that’s it. In contrast, the current Intel-based 13-inch MacBook Pro lets you go up to 32 GB, and the Intel-based Mac mini can take up to 64 GB.
Although 16 GB of RAM sounds limiting, that doesn’t seem to be nearly as concerning as one might think. The reason is that the M1 chips use what Apple calls “unified memory,” which is built onto the M1 chip itself and shared by the CPU, GPU, and Neural Engine. A significant performance bottleneck in modern computers is moving data around in memory. Benchmarks suggest that the memory bandwidth on the M1 chip is about 3x faster than on a 16-inch MacBook Pro. The faster that data can be moved around in memory and shared between the processing cores, the less memory is needed.
The speed of their SSDs also lets the M1-based Macs get away with less memory. When macOS uses all its physical RAM, it falls back on virtual memory, which effectively involves moving data on and off the SSD as needed. When Macs used hard drives, swapping memory to and from disk was very slow, but modern SSDs are fast enough to hide swapping delays.
To be fair, there are still memory-intensive tasks that will run better on Macs with lots of physical RAM. That’s a big reason Apple kept the Intel versions of the 13-inch MacBook Pro and Mac mini for sale. On the very high end, you can put a whopping 1.5 TB of RAM in a Mac Pro, and if you need that kind of RAM for your work, you’ll need to stick with Intel-based Macs for now.
How will the M1-based Macs fit into a workflow?
Here’s where things get tricky. If you have an office full of Macs, there are some good reasons why you might want to stick with Intel-based Macs for a while.
Big Sur: The M1-based Macs require macOS 11 Big Sur. In general, we recommend that people hold off on upgrading to Big Sur until Apple has released maintenance updates to solidify stability and compatibility. Plus, mixing versions of operating systems and apps can lead to interoperability problems.
Apps: Although Rosetta 2 appears to do a good job translating older apps, there may still be quirks or performance hits, particularly for complex apps.
Memory: As mentioned above, there are some tasks where lots of physical RAM is essential, and there’s currently no way to go above 16 GB on an M1-based Mac.
But here’s the thing. Apple very intentionally focused its initial M1-based Mac models on the low end of the Mac product line. These Macs are ideal for students and individuals, or as auxiliary or traveling Macs for office workers, particularly given the startlingly good battery life in the laptops. They won’t be replacing a Mac Pro or even a 27-inch iMac right now, but no one would have replaced such a machine with a MacBook Air, 13-inch MacBook Pro, or Mac mini before either.
In the end, we’re bullish on these new M1-based Macs. They’ve redefined what the most inexpensive Macs can do, making them compelling for those who don’t require more than 16 GB of physical RAM or need to slot them into highly specific workflows.
(Featured image by Apple)
Social Media: Apple’s new M1-based Macs are getting rave reviews for their stunning performance and battery life. Should you buy one for your next Mac or stick with a tried-and-true Intel-based Mac? We look into that question in this piece.
https://f11photo.com/wp-content/uploads/sites/13/2020/12/Apple-MacBook-Pro-photographer-photo.jpg8001280F-11 Photohttps://f11photo.com/wp-content/uploads/sites/13/2023/06/PR-F11Photo-logo.jpgF-11 Photo2020-12-01 12:04:002021-01-03 13:02:10So, Are Apple’s New M1-Based Macs Any Good?
We wanted to make sure that those of you who work on a Mac laptop with an external display know that you can close your laptop’s screen and keep working. Apple calls this closed-clamshell or closed-display mode. Of course, it requires that you connect an external keyboard and mouse or trackpad, via either USB or Bluetooth, and the laptop should be connected to power as well. Apple also recommends putting the Mac to sleep before disconnecting the external display. Why would you want to use closed-display mode? Mostly to conserve desk space when you have another preferred keyboard and pointing device, although it might also help graphics performance by allowing the Mac to focus on driving only the external display. There are lots of stands that hold a MacBook in a vertical orientation so it takes up less desk space.
https://f11photo.com/wp-content/uploads/sites/13/2020/09/MacBook-closed-display-photo.jpg8001280F-11 Photohttps://f11photo.com/wp-content/uploads/sites/13/2023/06/PR-F11Photo-logo.jpgF-11 Photo2020-09-01 13:06:002020-09-30 22:09:35Did You Know You Can Close a Mac Laptop When It Has an External Display?
Whether for work or socializing, we’re all spending a lot more time in video calls these days. But—surprise!—it turns out that many of our group video calls could be more pleasant, less embarrassing, and overall better if we follow a few basic audiovisual tips.
Make Sure You Have Decent Lighting
Natural light is best, but room light is generally fine too, especially if it’s coming from the side. Overhead light isn’t quite as flattering, but whatever you do, avoid light that comes from underneath your face or you’ll look like an old-time movie villain. Also, avoid sitting in front of a window because the bright light behind you will make you look way too dark. Pull a shade or try to put your computer against the window so the light hits your face instead.
Arrange for a Decent Background
You may not have many choices for where your computer is located, and thus for what’s behind you when you’re on a video call. If you’re using Zoom or Skype, you can employ a virtual background (pick one that’s appropriate for the context, and for goodness sake, don’t use an animated background). Otherwise, make sure that what’s behind you is tidy and wouldn’t embarrass you if the people on the call were to visit in person. Or, take it up a level and put a pleasing arrangement of art or photos on the wall behind you. Even if they are too small to be seen well, they will break up a monotonous blank wall.
Wear Appropriate Clothing
Yes, it’s tempting to schlub around all day in pajamas or ratty old sweats. Resist the urge and wear the same type of clothes you’d put on if you were meeting with these people in person. That includes pants—if you get up in the middle of the call without thinking, you don’t want to advertise your taste in boxers. You don’t want your boss and colleagues to have a mental image of you as a total slob. For bonus points, avoid tops that are bright white, black, or have distracting patterns.
Think Like a Movie Director
Particularly if you need to use a phone, tablet, or laptop to participate in a video call, think about your camera angles. It’s best to have the camera at roughly the same height as your face, if possible, so if you can avoid it, don’t put your laptop in your lap or hold your phone at your waist. And if you’re using a phone, don’t walk around such that the changing background distracts everyone else.
And Like a Movie Star
It’s sometimes hard to remember that everyone can see you even though they’re not in the room, but you’ll come off as more alert, confident, and engaged if you sit up straight, get close enough to the camera so your face fills the screen, and smile. Seriously, you’re on Candid Camera, so act like it. You’ll almost always have a thumbnail that shows what you look like, so make sure you like what you see. Oh, and don’t touch your face repeatedly.
Look at the Camera, Not the Other Participants
This one is tough. The camera is usually at the top center of your screen, so if you look anywhere else, it seems like you’re avoiding eye contact. It can make you look shifty or inattentive. But it’s hard not to look at the other people or at your own video thumbnail. The best trick is to resize and position your video window so the person you’re most likely to look at is right under the camera.
Pay Attention and Don’t Multitask
Look, we get it—a lot of meetings are boring. But it’s both rude and distracting to the speakers if you are clearly doing something else or worse, leaving and coming back. Focus on the screen, and show that you’re paying attention by nodding your head, smiling, and all the other little things you’d do if the meeting were taking place in person. If you truly can’t stay engaged, turn off your audio and video so no one has to see and hear you. If you need an excuse for that, say that your Internet connection is being a little wonky, so you want to cut down on bandwidth usage.
Mute Your Mic When Not Talking
The more people on a call, the more important this tip is. All videoconferencing apps have a Mute button you can click so others in the call aren’t distracted by you coughing or sneezing, your children playing in the other room, or other extraneous noise. Just remember to unmute before you start talking. It’s hard to remember at first, but you’ll get good at it.
All this may seem like a lot to think about, but once you get your environment set up properly, you’ll be a bright spot in the video grid at your regular meetings. And then maybe you can forward this article to your family, friends, and colleagues so they can up their video game too.
(Featured image by Marcus Aurelius from Pexels)
Social Media: On your video calls, do you look like a shifty character in a low-budget horror flick? With our audiovisual tips, you can level up and make your calls more pleasant, less embarrassing, and more productive.
https://f11photo.com/wp-content/uploads/sites/13/2020/05/Videoconferencing-tips-photo.jpg8001280F-11 Photohttps://f11photo.com/wp-content/uploads/sites/13/2023/06/PR-F11Photo-logo.jpgF-11 Photo2020-05-01 11:04:002023-06-27 20:33:00Audiovisual Tips for Better Videoconferencing