Apple Invites Simplifies Social Event Planning
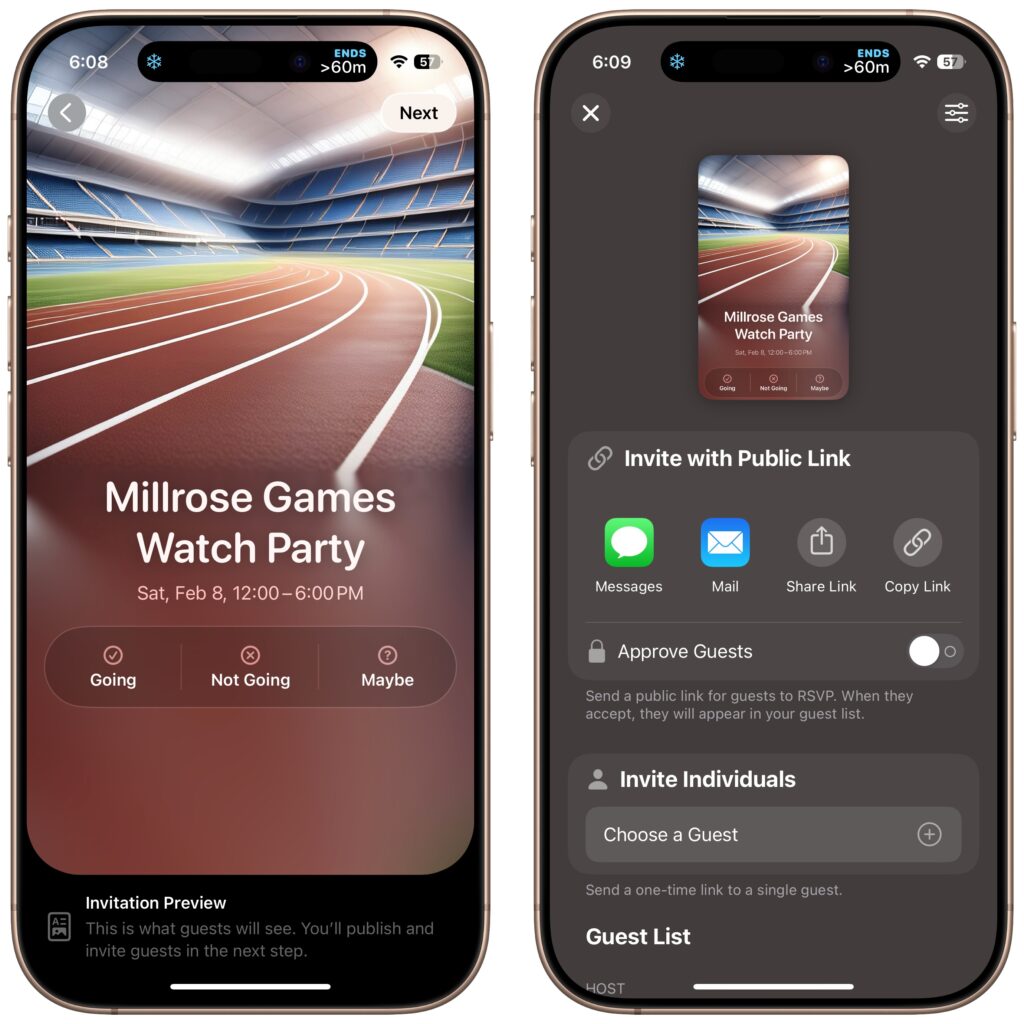
Apple has launched the new Apple Invites iPhone app for planning social events with friends and family. Apple Invites requires iOS 18 on the iPhone, and you can also use it at iCloud.com/invites on the Mac and iPad. Event creation is limited to iCloud+ subscribers (those who pay for extra iCloud storage), but anyone can RSVP for an event, even if they don’t have the app, an Apple Account, or an Apple device. Creating an event is straightforward: simply name the event, set a date and optional time, specify a location, add a description, and pick a background. You can then invite people directly or by sharing a public link. Guests can RSVP whether they’re attending, not attending, or are unsure, and they can change their name and provide a custom response. Apple Invites may not change the world, but it’s a nice alternative to ad-infested invitation services.
(Featured image by iStock.com/Jacob Wackerhausen)
Social Media: The new Apple Invites app for iPhone simplifies inviting friends and family to social events for iCloud+ subscribers. Anyone can RSVP, even if they don’t use Apple devices.