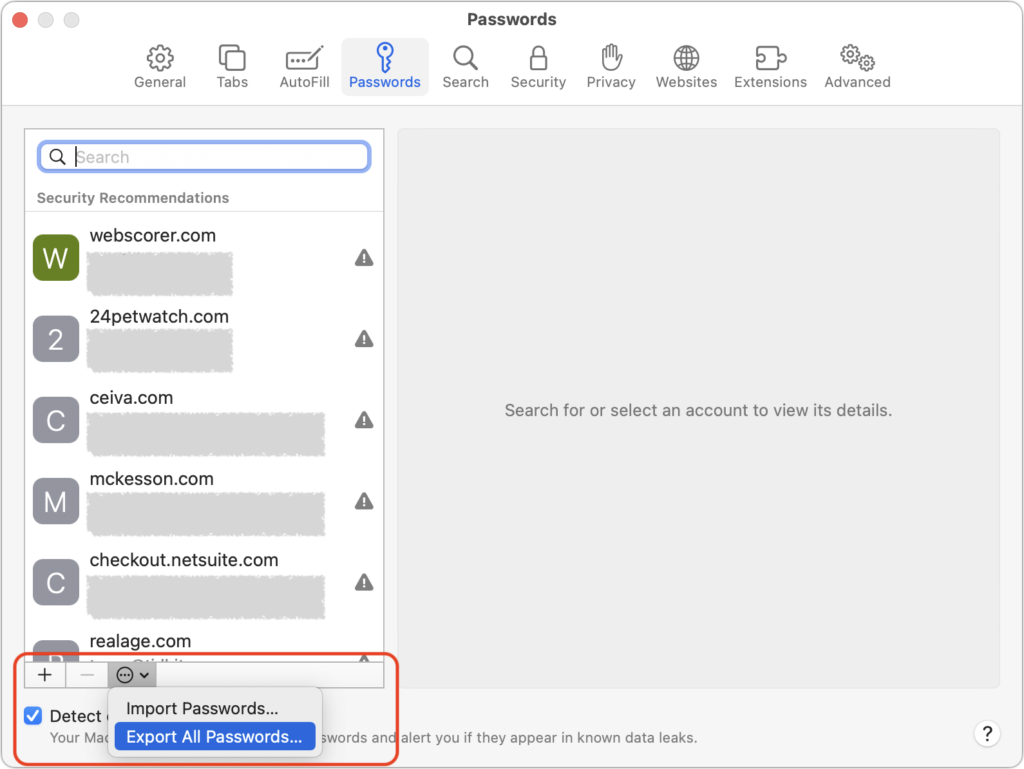
The Best Characters to Use When Naming Files and Folders
Back in the early 1980s, DOS filenames couldn’t be more than 8 characters long with a period and a 3-character extension. That was limiting, so when Apple developed the Mac operating system in 1984, it allowed longer names and eliminated the need for an extension, although Mac OS X’s Unix roots meant a return of the filename extension in 2001. Since then, filename restrictions have loosened to the point where it’s easy to think that they no longer exist.
If only that were true! In some ways, the situation has become even cloudier, thanks to additional limitations from file-sharing services like Dropbox, OneDrive, and Box. (Google Drive’s native Web interface reportedly has no naming limitations, but files whose names contain Windows or macOS forbidden characters may not sync via Google Drive’s desktop software.) Plus, people tend to move files between operating systems more than ever before—if you’re sending a file from your Mac to a Windows user through Dropbox, you need to make sure that all three can deal with the filename.
At least length isn’t something that you generally have to think about these days, since both macOS and Windows—and the cloud services—accept filenames up to 255 characters in length. Technically speaking, Windows limits directory paths (the enclosing folder names along with the filename) to 255 characters, but even still, that shouldn’t be difficult to avoid.
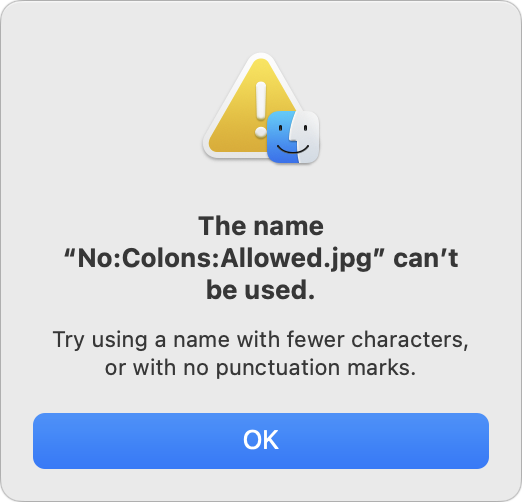
What could go wrong if you run afoul of a naming restriction? macOS and Windows may simply not let you type the character—for example, you can’t put a colon in a Mac filename. Putting a period at the start of a Mac or Unix filename will hide the file. Cloud sharing services might rename the file, or you might encounter syncing issues where files don’t appear where they should. Certain characters can also cause trouble when files are used at the command line.
Here are the characters to avoid and the operating systems and services that prohibit them:
- : (colon): macOS, Windows, Dropbox, OneDrive, Box
- . (period): macOS (at the start of a name), Dropbox
- / (forward slash): macOS, Windows, Dropbox, OneDrive, Box
- (backslash): Windows, Dropbox, OneDrive, Box
- < (less than): Windows, Dropbox, OneDrive, Box
- > (greater than): Windows, Dropbox, OneDrive, Box
- ” (double quote): Windows, Dropbox, OneDrive, Box
- | (vertical bar or pipe): Windows, Dropbox, OneDrive, Box
- ? (question mark): Windows, Dropbox, OneDrive, Box
- * (asterisk): Windows, Dropbox, OneDrive, Box
- ^ (caret): Windows (using FAT-formatted drives)
In addition, avoid using special characters like the © (copyright) symbol or emoji 🤷🏽♂️ in filenames. They might work locally, but all bets are off if you share the files in any way.
A few other recommendations:
- Avoid unusual punctuation; in particular, note that OneDrive renames filenames containing:
- , (comma) to ^J
- # (number sign) to ^N
- & (ampersand) to ^O
- ~ (tilde) to ^F
- Never start or end file or folder names with a space, and avoid spaces in filenames that will be uploaded to a Web or SFTP server.
- Avoid putting more than one period in a filename, and don’t put a period after a filename extension.
- Never assume that names are case sensitive—always make sure that similarly named items differ by more than just case.
If all that seems like a lot to keep in mind, here’s the simple rule that will ensure your filenames will work everywhere:
Name files only with uppercase (A-Z) and lowercase (a-z) letters, digits (0-9), and the hyphen (-) and underscore (_), plus a single period (.) and extension.
(Featured image by iStock.com/cosmin4000 and smartstock)
Social Media: You might think that you can name a file or folder any way you want, but macOS and Windows have restrictions on which characters you can use, and the prevalence of cloud sharing services makes it all the more important to avoid prohibited characters.