Posts

Here’s How to See Full URLs in Safari’s Smart Search Field

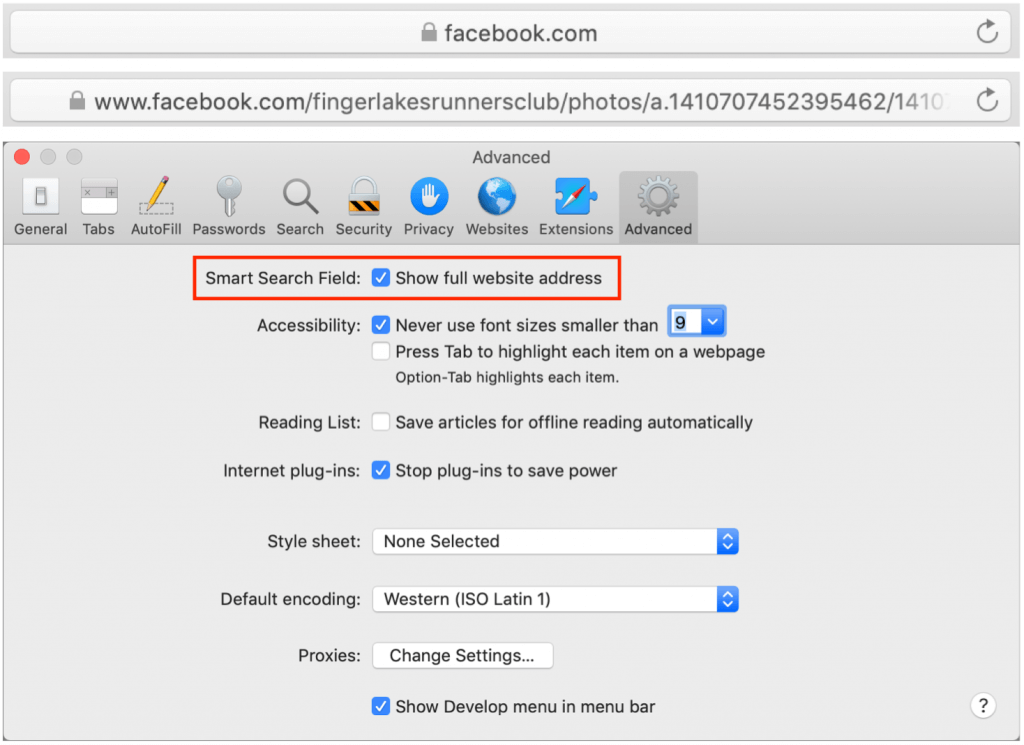
By default, Safari on the Mac hides full Web addresses—technically known as URLs—from you, showing just the site name in the Smart Search field at the top of the window. If you click in the field or press Command-L, the full URL appears, which is good for checking that you’re really where you think you should be and not on some dodgy site. It’s also useful if you need to copy just a portion of the URL to share or otherwise work with. To make that check easier, go to Safari > Preferences > Advanced and next to Smart Search Field, select “Show full website address.” Then you can verify that the URL looks right with a glance.

(Featured image by Matthew T Rader from Pexels)

Beware Microsoft Office 365 Phishing Attacks!

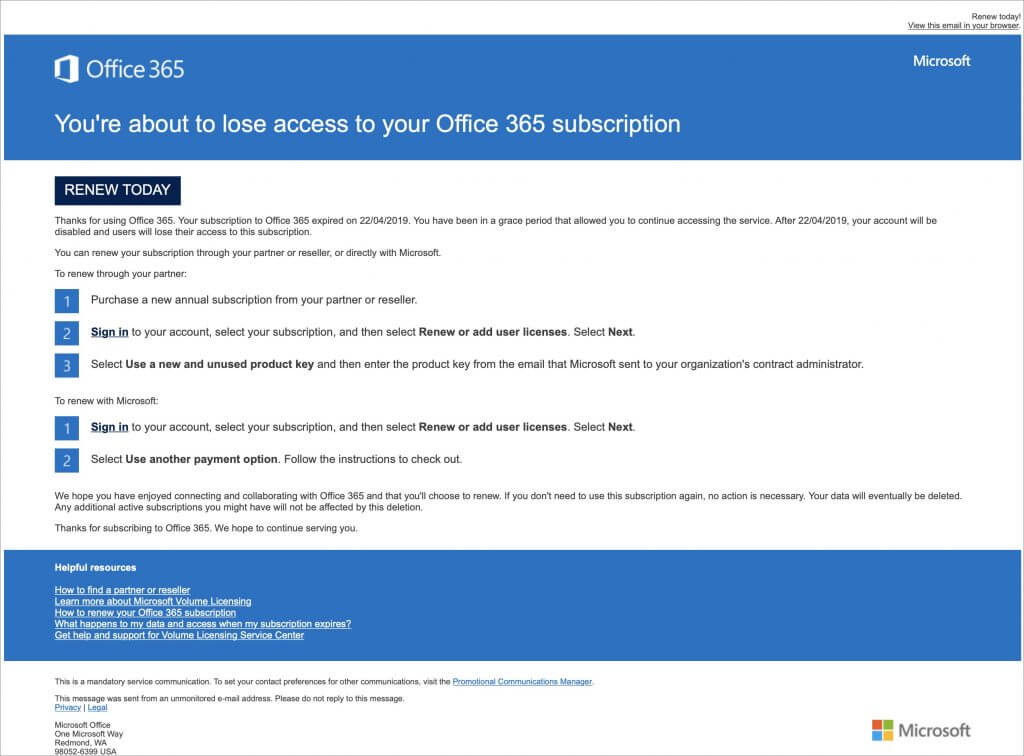
We’re seeing an uptick in email phishing attacks purporting to come from Microsoft about Office 365. They’re quite convincing messages that tell users that their credit card payment has failed, that an account needs renewing, or that a password needs to be confirmed. Needless to say, they’re all complete scams, and clicking a link in them takes you to a malicious Web page that will try to steal your password or credit card details. As we noted in “Gone Phishing: Five Signs That Identify Scam Email Messages,” large companies never send email asking you to click a link in order to log in to your account, update your credit card information, or the like. Hover over links to see where they go before clicking anything, and stay safe out there!

Look before You Leap with Safari’s Link Preview

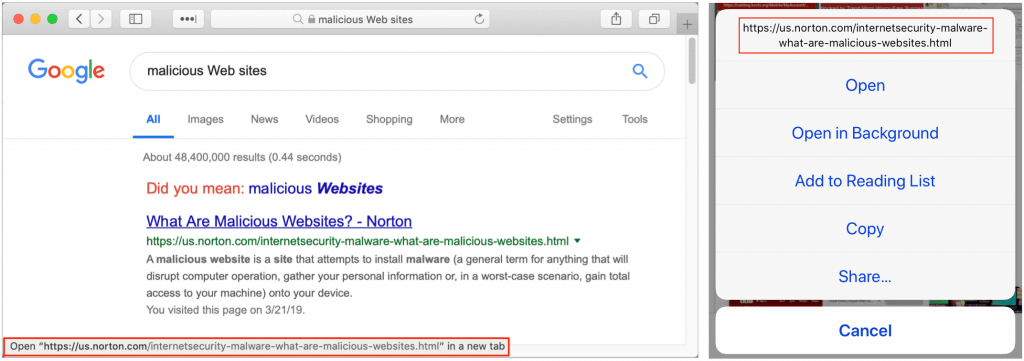
When you follow a link in Safari, you generally don’t know where you’re going to end up. That’s fine most of the time, but what if you’re concerned that a site might be trying to trick you into going somewhere malicious? Safari provides an easy way to look at the URL under a link. On the Mac, choose View > Show Status Bar, hover your pointer over the link, and look at the bottom of the window. In iOS, touch and hold a link (don’t press for 3D Touch) until a popover appears, showing the link and giving you options for opening it. The most important thing to look at is the domain—us.norton.com in the screenshots. It should match where you think you’re going, or at least look reasonable. If the URL is dubious, don’t follow the link.

Ignore Unsolicited Calls and Texts from Apple and Other Tech Companies

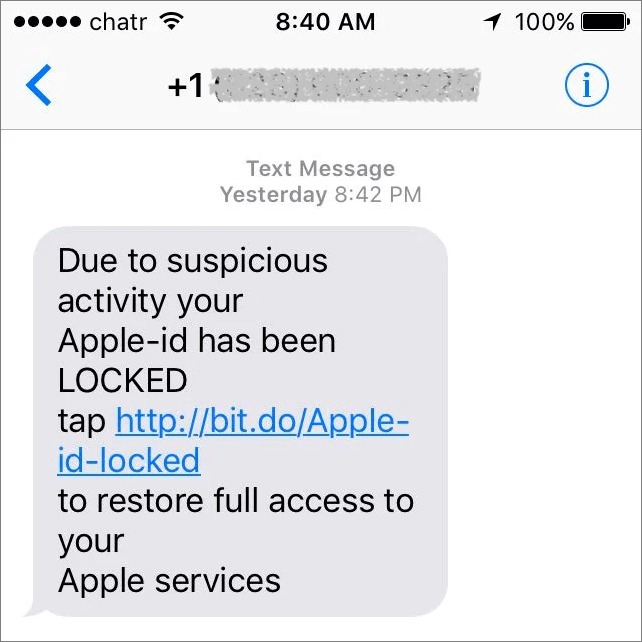
We don’t want to belabor the point, but multinational tech companies like Apple, Facebook, and Google will never call or text you personally out of the blue. So if you get a call or text purporting to be from such a company, it’s 99.9% likely to be a scam, and you should ignore it regardless of whether the caller ID seems legitimate. If you’re still worried, look up the company’s tech support phone number separately—never respond directly to such a call or tap a link in a text—and discuss the situation with the support reps. Or contact us, and we’ll talk it through with you.

This Is Hands-Down the Easiest Way to Give Someone Your Wi-Fi Network Password

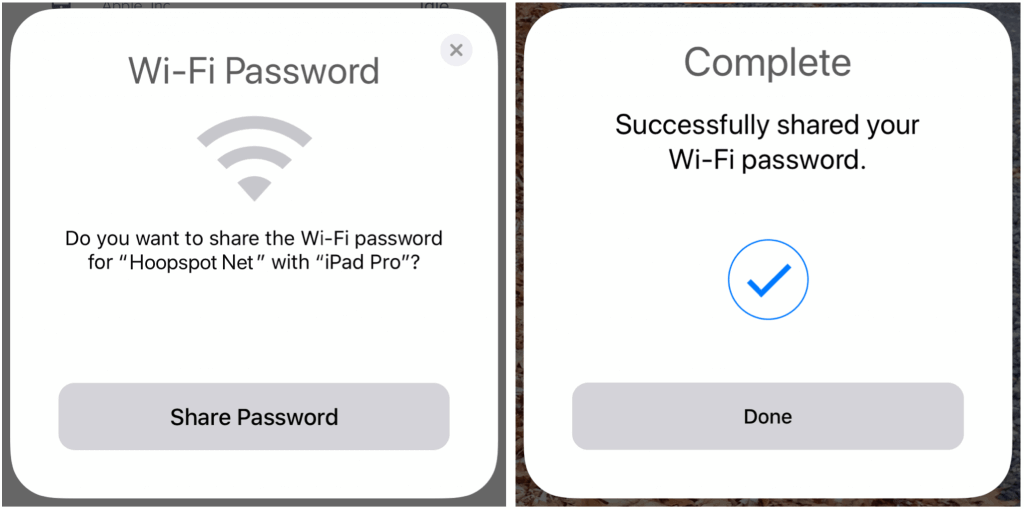
You know the drill—a friend comes to visit and wants to get on your Wi-Fi network. You’ve written the password down somewhere, but where? Even if you have it handy, it’s a pain for your friend to type in. Since macOS 10.13 High Sierra and iOS 11, Apple’s operating systems can make connecting a lot easier. Have your guest choose your network, and then put their device next to one of your devices that’s awake and connected to the Wi-Fi network. As long as you have a card in your Contacts app whose name matches your friend’s My Card in their Contacts, your device should ask if you want to share the Wi-Fi password with them. Just tap Share Password when prompted and you’re done!

Did You Know iOS 12 Lets You Add a Second Person to Face ID?

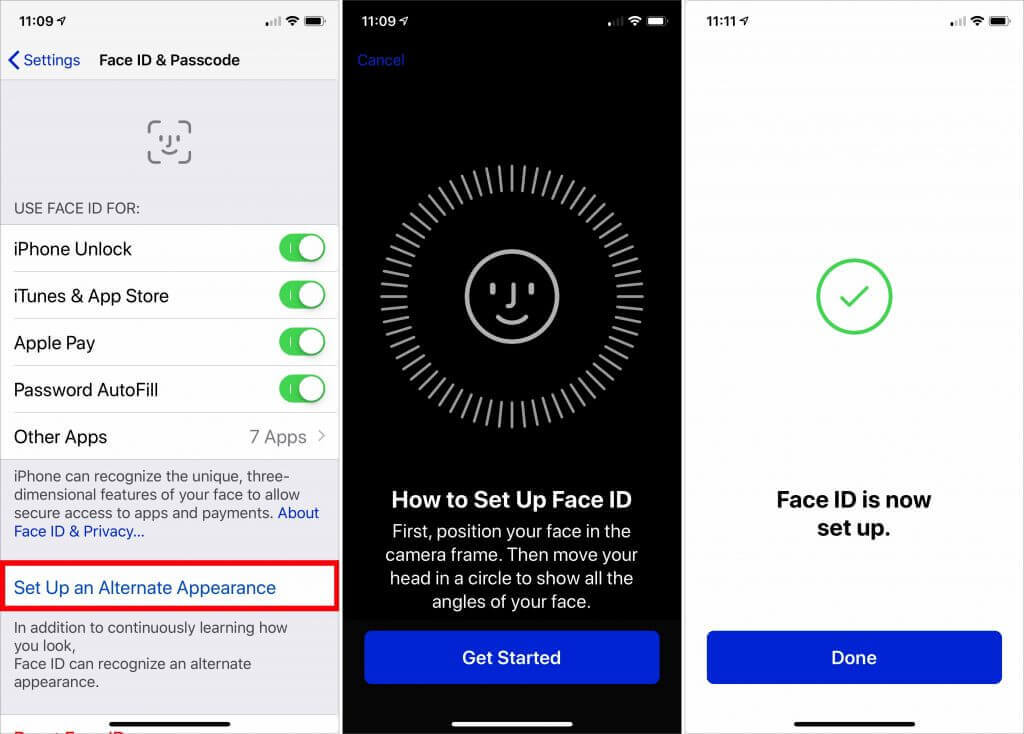
Touch ID lets users register up to five fingers that can unlock an iPhone, which has long been a boon for those who share access to their iPhone with trusted family members. However, users of the iPhone X haven’t been able to give a second person Face ID-based access, forcing those people to wait for Face ID to fail and then tap in a passcode manually. iOS 12 lifts that limitation, allowing a second person to register their face with Face ID on the iPhone X and the new iPhone XR, XS, and XS Max. To set this up, go to Settings > Face ID & Passcode. Enter your passcode and tap Set Up an Alternate Appearance. Then give your iPhone to the person who should have access and have them follow the simple setup directions.

Have Your Online Passwords Been Stolen? Here’s How to Find Out.

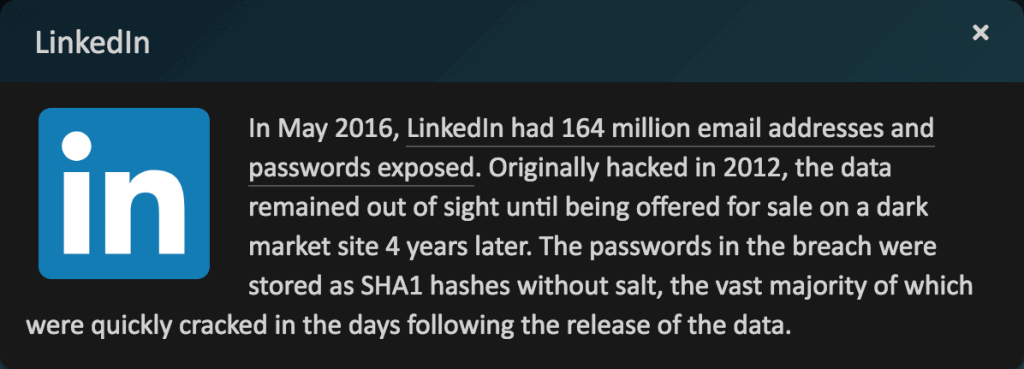
Data breaches have become commonplace, with online thieves constantly breaking into corporate and government servers and making off with millions—or even hundreds of millions!—of email addresses, often along with other personal information like names, physical address, and passwords.
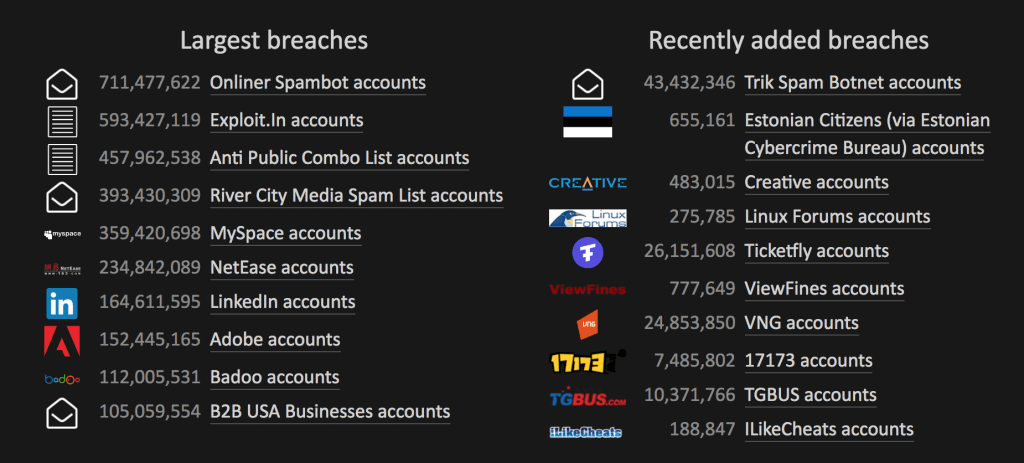
It would be nice to think that all companies properly encrypt their password databases, but the sad reality is that many have poor data security practices. As a result, passwords gathered in a breach are often easily cracked, enabling the bad guys to log in to your accounts. That may not seem like a big deal—who cares if someone reads the local newspaper under your name? But since many people reuse passwords across multiple sites, once one password associated with an email address is known, attackers use automated software to test that combination against many other sites.
This is why we keep beating the drum for password managers like 1Password and LastPass. They make it easy to create and enter a different random password for every Web site, which protects you in two ways.

  • Because password managers can create passwords of any length, you don’t have to rely on short passwords that you can remember and type easily. The longer the password, the harder it is to crack. A password of 16–20 characters is generally considered safe; never use anything shorter than 13 characters.
  • Even if one of your passwords was compromised, having a different password for every site ensures that the attackers can’t break into any of your other accounts.

But password security hasn’t always been a big deal on the Internet, and many people reused passwords regularly in the past. Wouldn’t it be nice to know if any of your information was included in a data breach, so you’d know which passwords to change?

A free service called Have I Been Pwned does just this (“pwned” is hacker-speak for “owned” or “dominated by”—it rhymes with “owned”). Run by Troy Hunt, Have I Been Pwned gathers the email addresses associated with data breaches and lets you search to see if your address was stolen in any of the archived data breaches. Even better, you can subscribe to have the service notify you if your address shows up in any future breaches.
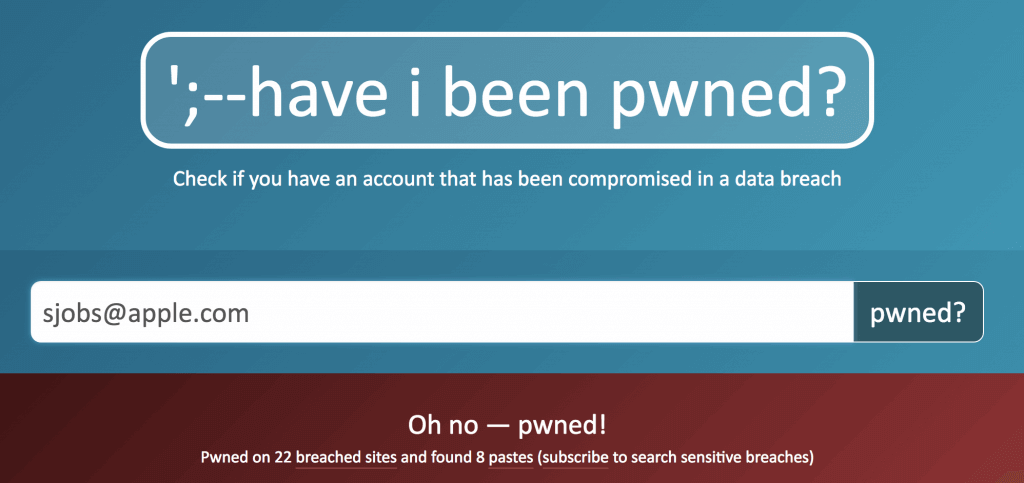
Needless to say, you’ll want to change your password on any site that has suffered a data breach, and if you reused that password on any other sites, give them new, unique passwords as well. That may seem like a daunting task, and we won’t pretend that it isn’t a fair amount of work, but both 1Password and LastPass offer features to help.

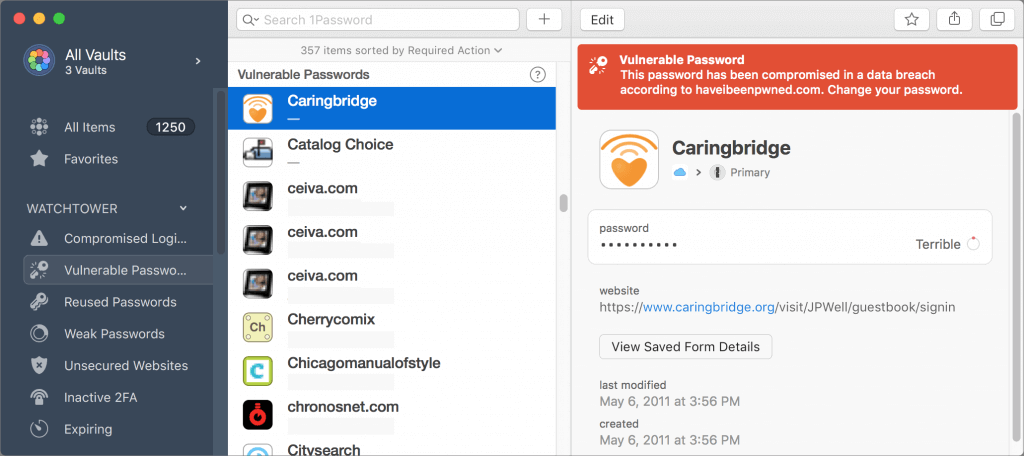
In 1Password, look in the sidebar for Watchtower, which provides several lists, including accounts where the password may have been compromised in a known breach, passwords that are known to have been compromised, passwords that you reused across sites, and weak passwords.
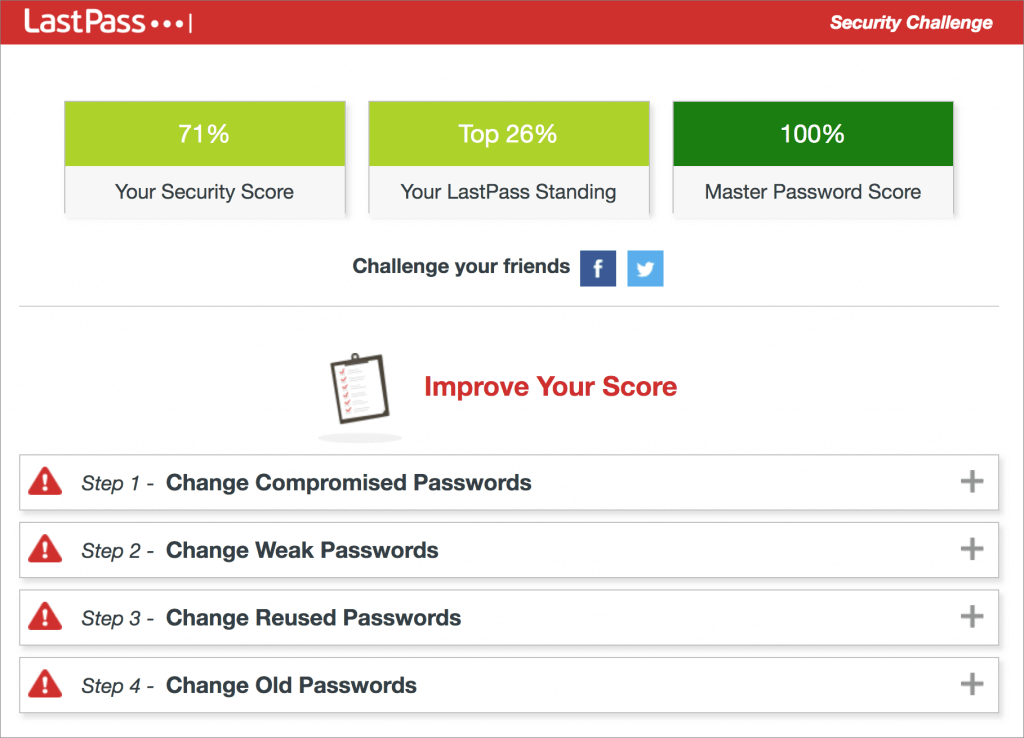
LastPass provide essentially the same information through its Security Challenge and rates your overall security in comparison with other LastPass users. It suggests a series of steps for improving your passwords; the only problem is that you need to restart the Security Challenge if you don’t have time to fix all the passwords at once.
Regardless of which password manager you use, take some time to check for and update compromised, vulnerable, and weak passwords. Start with more important sites, and, as time permits, move on to accounts that don’t contain confidential information.


Social Media: Have any of your online passwords been stolen in a breach? The answer is probably “yes,” and today’s article helps you discover and correct your most problematic passwords.

Install Minor Operating System Updates to Maintain Herd Immunity

It seems like Apple releases updates to iOS, macOS, watchOS, and tvOS nearly every week these days. It has been only a few months since iOS 11 and macOS 10.13 High Sierra launched, and we’ve already seen ten updates to iOS and seven updates to macOS. Some of these have been to fix bugs, which is great, but quite a few have been prompted by the need for Apple to address security vulnerabilities.

Have you installed all these updates, or have you been procrastinating, tapping that Later link on the iPhone and rejecting your Mac’s notifications? We’re not criticizing—all too often those prompts come at inconvenient times, although iOS has gotten better about installing during the night, as long as you plug in your iPhone or iPad.

We know, security is dull. Or rather, security is dull as long as it’s present. Things get exciting—and not in a good way—when serious vulnerabilities come to light. That’s what happened in November 2017, when it was reported that anyone could gain admin access to any Mac running High Sierra by typing root for the username and leaving the password field blank. That one was so bad that Apple pushed Security Update 2017-001 to every affected Mac and rolled the fix into macOS 10.13.2.

Part of the problem with security vulnerabilities is that they can be astonishingly complex. You may have heard about the Meltdown and Spectre hardware vulnerabilities discovered in January 2018. They affect nearly all modern computers, regardless of operating system, because they take advantage of a design flaw in the microprocessors. Unfortunately, the bad guys—organized crime, government intelligence agencies, and the like—have the resources to understand and exploit these flaws.

But here’s the thing. Security is an arms race, with attackers trying to take advantage of vulnerabilities and operating system companies like Apple, Microsoft, and Google proactively working to block them with updates. If enough people install those updates quickly enough, the attackers will move on to the next vulnerability.

The moral of the story? Always install those minor updates. It’s not so much because you will definitely be targeted if you fail to stay up to date, but because if the Apple community as a whole ceases to be vigilant about upgrading, the dark forces on the Internet will start to see macOS and iOS as low-hanging fruit. As long as most people update relatively quickly, it’s not worthwhile for attackers to put a lot of resources into messing with Macs, iPhones, and iPads.

That said, before you install those updates, make sure to update your backups. It’s unusual for anything significant to go wrong during this sort of system upgrade, but having a fresh backup ensures that if anything does go amiss, you can easily get back to where you were before.