Apple Silicon Macs Can’t Boot from the DFU Port
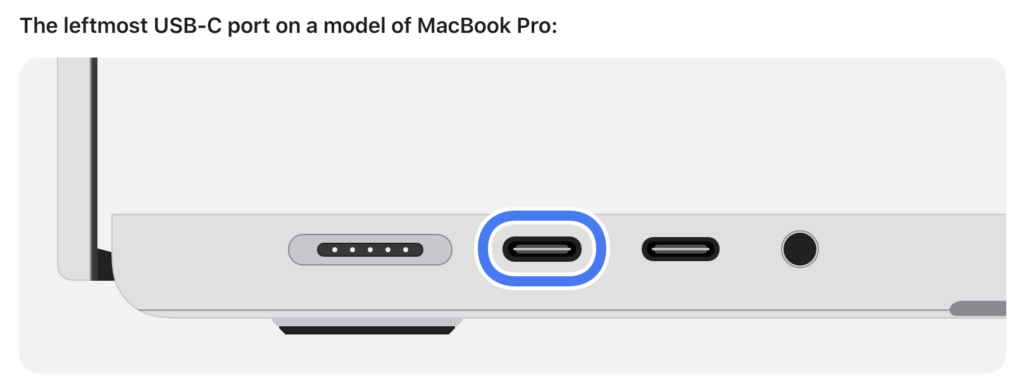
Booting from an external SSD (hard disks are too slow) provides a convenient way to test specific versions of macOS or troubleshoot problems with your Mac’s internal storage. However, a little-known gotcha has caused untold hair loss among those trying to boot from an external drive. Macs with Apple silicon cannot start up from external drives connected to their DFU (device firmware update) USB-C port. The only way to determine which port this is on a given Mac is to look it up on Apple’s website. If your Mac won’t boot from an external drive, connect it to a different USB-C port.
(Featured image by iStock.com/ardasavasciogullari)
Social Media: If your Apple silicon Mac won’t boot from an external drive, the issue may be related to which USB-C port you’re using—the special DFU port cannot be used for booting from external drives. Learn how to identify that port on your Mac.