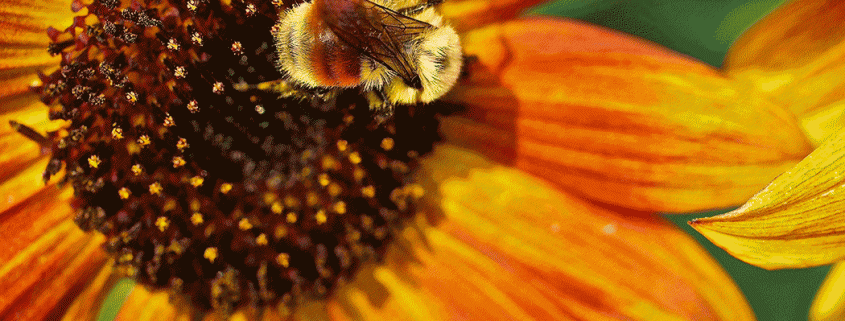
Macro Photography
Photography invites you to notice, to look, to see and to focus. When you photograph a flower, you see the fine details and make choices about which aspect of the flower to document. The stamen? The inside of the flower? The edge of a petal? Because your back yard or garden is a place where you have some ability to control and modify the environment, its ideal for practicing macro or extreme close-up photography. Think of it as making portraits of plants, single petals on a sunflower, the curve of bloom, the textures of a zucchini, the work of bees pollinating.
Many point-and-shoot cameras have a “flower” mode that sets the camera up for macro pictures. Designed to get as much in focus as possible, Flower mode helps you hold still for a sharp picture. It also sets an outdoor white balance, so the colors will be accurate for average sunlit conditions.
Macro photography can be done with cameras that have changeable lenses in several different ways. Many zoom lenses include some macro, but can leave you wishing for more. Dedicated macro lenses are for those who live for closeup photography and demand uncompromising quality. If you want to find out about this style of photography before committing to an expense like a new lens, consider adding a close-up filter or extension tube to a lens you already own. Each of these methods provide different benefits, so you may want to try more than one. Filters and tubes are budget friendly enough that you could do both and experiment.
Now, select your image file size. Go big. Choose the largest file size in your camera’s menu and then select the highest quality—generally called “Fine.” This setting provides enough resolution to crop pictures and print enlargements. Memory cards for a digital cameras are larger capacity and cheaper now than ever, so don’t bother to “save space.” You can’t get a crisp print from an undersized file. For resizing and other fine tuning, you can edit your images in a program like Adobe Photoshop. Need help? Stop in and we’ll show you how to make changes to your settings, and check our class schedule for learning opportunities with like minded photographers.
Now that you’re ready to work with your camera, your next task is to consider shooting conditions. With macro photography you’ll quickly discover that the slightest breeze creates movement, blurring your subject. And, good lighting is essential.
The best natural light is often that of bright overcast skies, early morning, or evening. Otherwise, choose a breeze-free time of day and be prepared to modify the light to create the best photographs. Notice where your own shadow falls to prevent accidental shading.
Use bounce or diffused flash to light deep shadows and create sparkling highlights. Or, try light modifiers like reflectors and diffusers to catch and redirect sunlight to fill shadows. This kind of reflected light looks soft and natural. Consider a gold reflector to mimic sunset light and bring out warm colors.
In the harsh midday sun, placing a diffuser or a plain white umbrella above your subject softens and diffuses the light while preserving details in the highlights and shadows. An umbrella also can be useful to block the wind.
Macro photography is best accomplished from the stability of a tripod, whether you have a phone, a point-and-shoot or a camera with changeable lenses. Once you set up your camera, look carefully at the background and foreground of the picture for objects that compete for attention with your chosen subject. Sticks, rocks, grass and leaves that are out of focus and mostly invisible in your viewfinder can become glaringly apparent in a photograph. A single blade of grass or a dead weed can spoil an otherwise perfect picture.
Two essential macro photography skills are patience and intimacy. Patience while you wait for a playful breeze to pass. Patience to find or create the perfect lighting conditions. Patience to checking the details. Intimacy to be willing to see and experience photography in ways you have never done before.


