At its Worldwide Developer Conference keynote on June 7th, Apple shared details about what we can expect to see later this year in macOS 12 Monterey, iOS 15, iPadOS 15, watchOS 8, tvOS 15, and HomePod Software 15. It was a firehose of announcements, but one thing became clear: Apple wants to spread its technologies across its entire ecosystem of devices. Although each platform—Mac, iPhone, iPad, Apple Watch, Apple TV, and HomePod—retains its unique qualities, nearly every feature that the company announced works across as many platforms as make sense.
Before we get into the ten features that we think you’ll most like when everything ships in September or October, we should note that Apple was surprisingly silent on one topic: future Apple silicon chips. Many observers had expected Apple to announce an M1X or M2 chip that would power professional laptop and desktop Macs. We’ll have to satisfy ourselves with the impressive performance of the M1-based Macs we have now and wait a little longer for whatever comes next.
On to the hot new features!
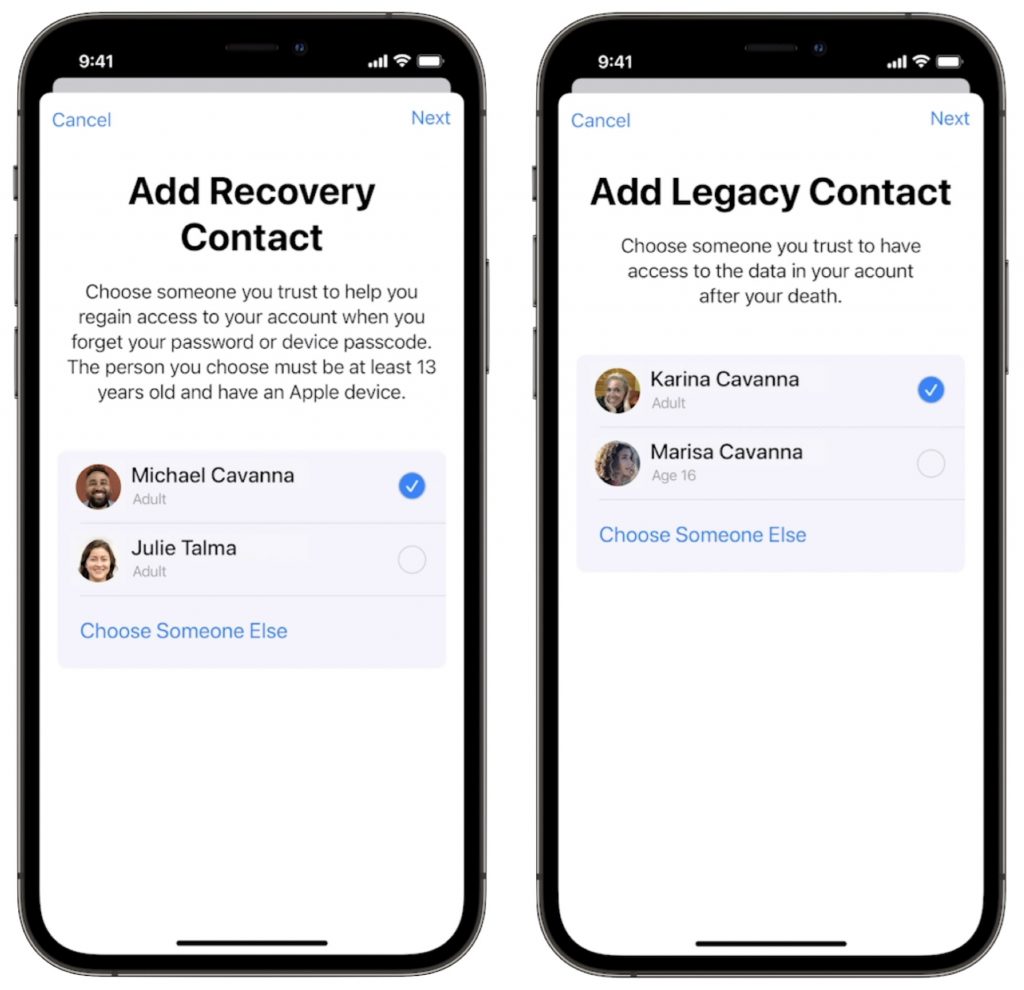
Account Recovery and Legacy Contacts Simplify Recovering Account Data
It’s all too common that people forget their Apple ID passwords and can’t access their accounts. Apple hopes to make that a little less stressful with Account Recovery Contacts. Specify someone as your Account Recovery Contact, and they’ll be able to help you reset your password and regain access to your account, with no need to call us or Apple for assistance.
Also welcome will be the addition of Legacy Contacts. Once this feature is available, everyone should make sure they have appropriate family members or friends set as Legacy Contacts. Then, in the event of your untimely death, your Legacy Contacts can access your account and personal information. Using Legacy Contacts will be far easier than having to provide the legal paperwork to Apple to request access to a deceased family member’s accounts.

FaceTime Gains Features That Make It Competitive with Zoom
During the last year, we’ve all spent vastly more time in videoconferencing apps for work, school, and socializing. Alas, Apple’s FaceTime has been a weak entry in that market. With the features Apple is now promising, however, it should compete well with the likes of Zoom, Skype, and Google Meet. FaceTime will finally get a standard grid view, blur your backgrounds with Portrait mode, and offer two microphone modes: Voice Isolation to cut down on background noise (for standard meetings) and Wide Spectrum to leave ambient sound unfiltered (for performances, say). FaceTime will even be able to alert you when you’re talking but muted.
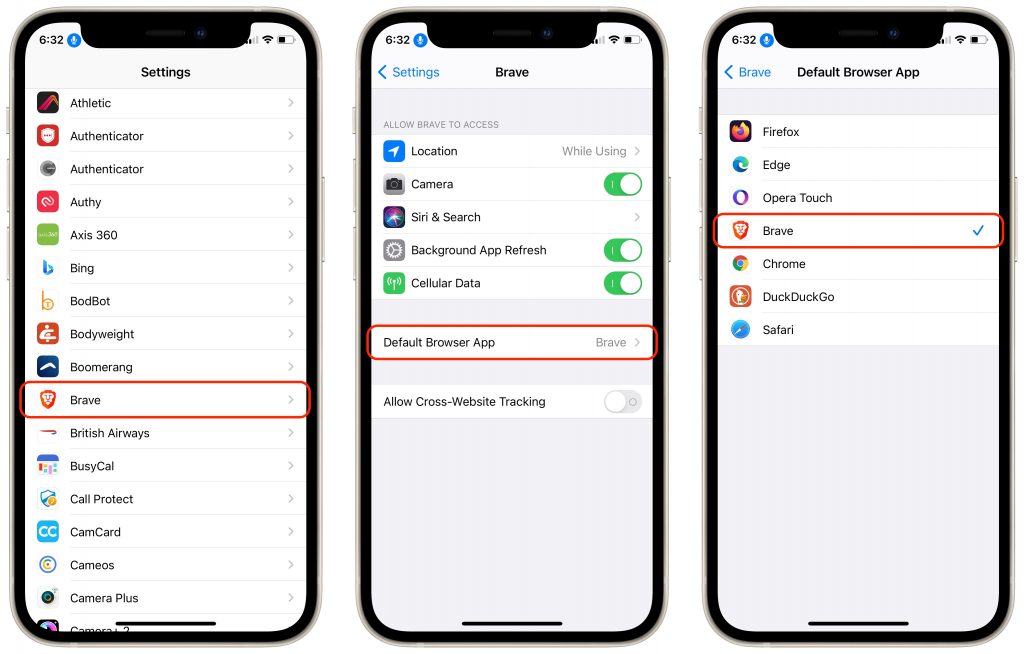
More important yet is the fact that you’ll finally be able to invite Windows and Android users to FaceTime calls using standard Web links. Non-Apple users will have to use a Chrome-based browser like Google Chrome, Microsoft Edge, or Brave. Plus, when you create an event in Calendar, you’ll be able to make a Web link for the call that you can share. And when it’s time for the call, a Join button makes it easy to get in.
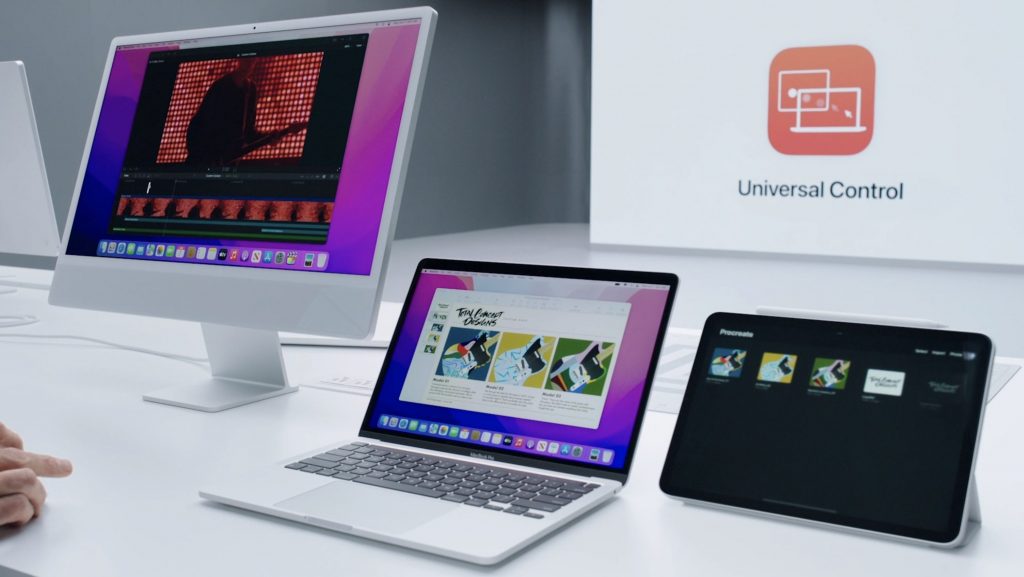
Universal Control Lets Macs and iPads Share a Keyboard and Pointing Device
With Sidecar in macOS 10.15 Catalina and iOS 13, Apple made it so you could use an iPad as a secondary screen for a Mac. In macOS 12 Monterey and iPadOS 15, Apple is taking that concept further. With Universal Control, if you merely set a Mac and an iPad next to each other, you’ll be able to use the Mac’s keyboard and mouse or trackpad to work between the two devices (in fact, Universal Control supports up to three). No setup is required—just move your pointer to the edge of the Mac screen and push it “through” the edge to move it to the iPad screen. You can even drag and drop content between devices.
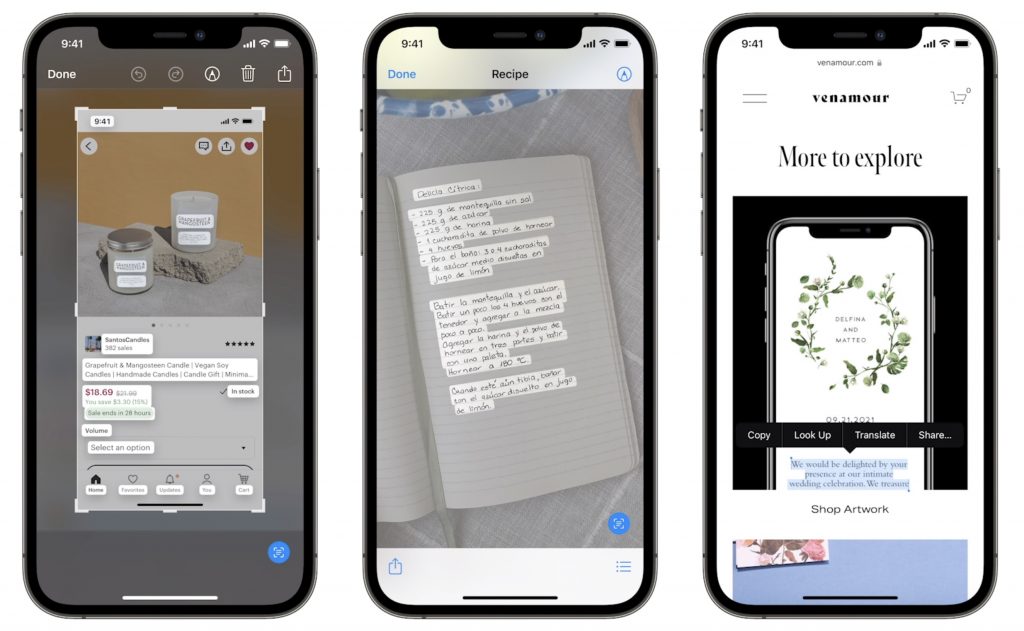
Live Text Lets You Work with Text in Images
Have you ever taken a photo of something just to capture a phone number or address? We have, for sure. Apple’s new Live Text feature treats text in images just like text you type, so you can use functions like copy and paste, lookup, and translate. Live Text will work in Photos, of course, but also in Quick Look, Safari, and Screenshot, and in live Camera previews on the iPhone. It’s an impressive use of image recognition technologies.
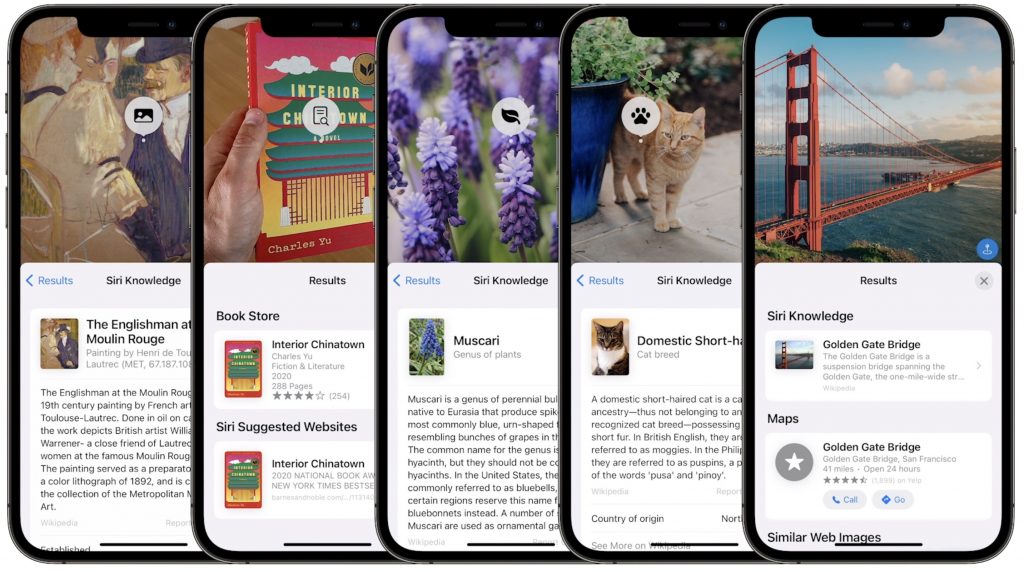
Along the same lines, in Photos, you’ll also be able to use the information button on any photo to highlight recognized objects and scenes and get additional information about them. Apple says you’ll be able to learn more about popular art and landmarks, plants and flowers, books, and pet breeds.
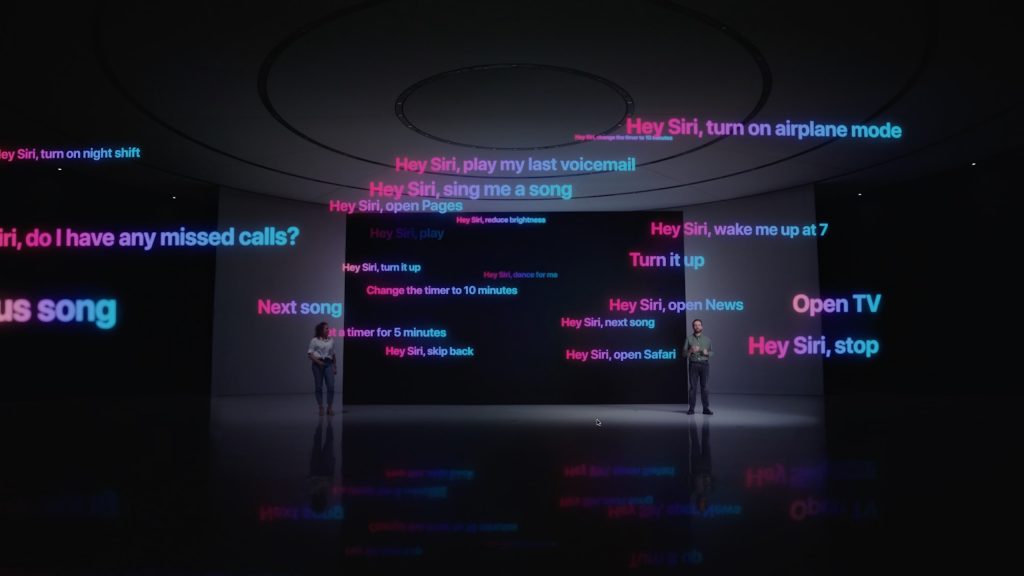
Siri Gets Faster, More Reliable, More Private, and More Useful
Thanks to the ever-increasing power of the Neural Engine in Apple devices, Apple says it will bring all processing of Siri requests onto your device. That may not sound like a big deal, but it means that Siri should work faster, more reliably, and more privately. It will be faster because there’s no need to send speech to and from Apple’s servers for processing. It will make Siri work more reliably when your iPhone doesn’t have strong cell service and enable offline support for many types of requests. And Apple won’t know what you’re saying at all.
Other Siri improvements will include the capability to announce reminders when you’re wearing AirPods, improved conversation context so you can refer to what you just asked, and support for controlling HomeKit devices at specific times. HomeKit developers will even be able to add Siri support to their products through a HomePod.
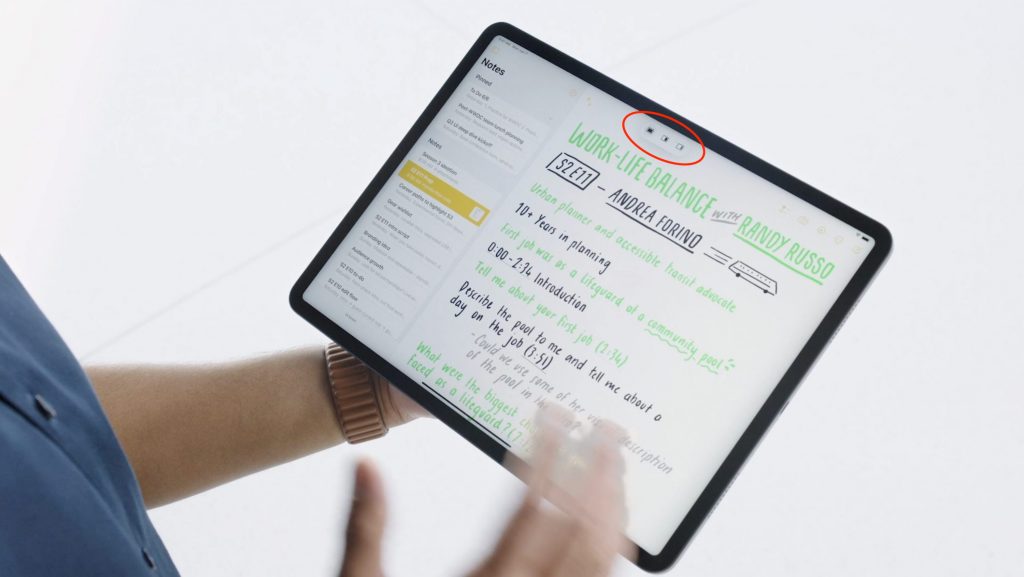
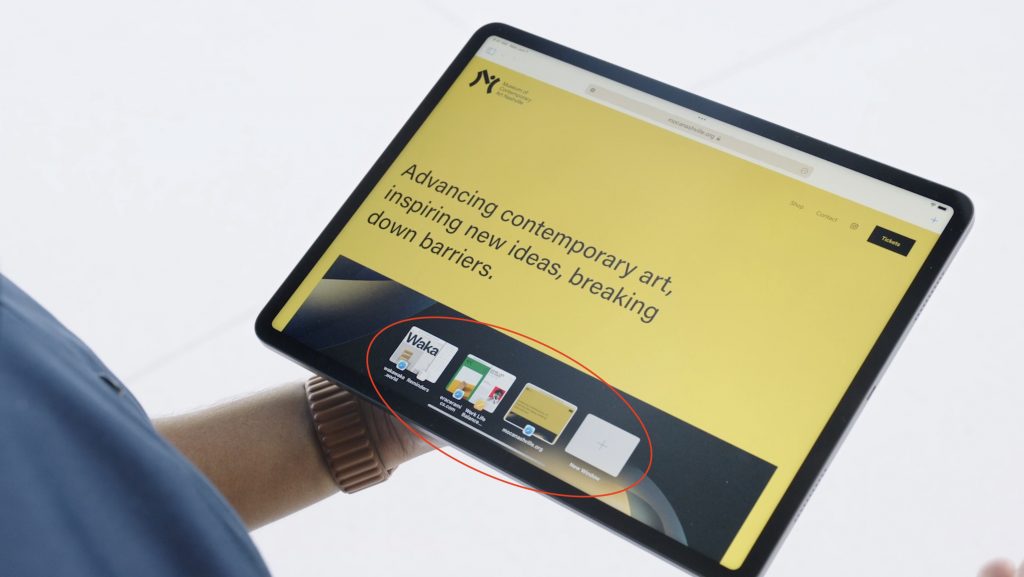
Improved Multitasking Controls Come to the iPad
The big problem with Apple’s multitasking options on the iPad has been remembering how to use them. With iPadOS 15, Apple hopes to solve that with a new menu that will appear at the top of apps, with buttons for entering full screen, Split View, or Slide Over.
Apple also added a new multiwindow shelf that appears at the bottom of the screen at launch and provides a Dock-like view of all the open windows in that app. If you ignore it, it fades away quickly, but it should help you remember which windows you have open and access them quickly.
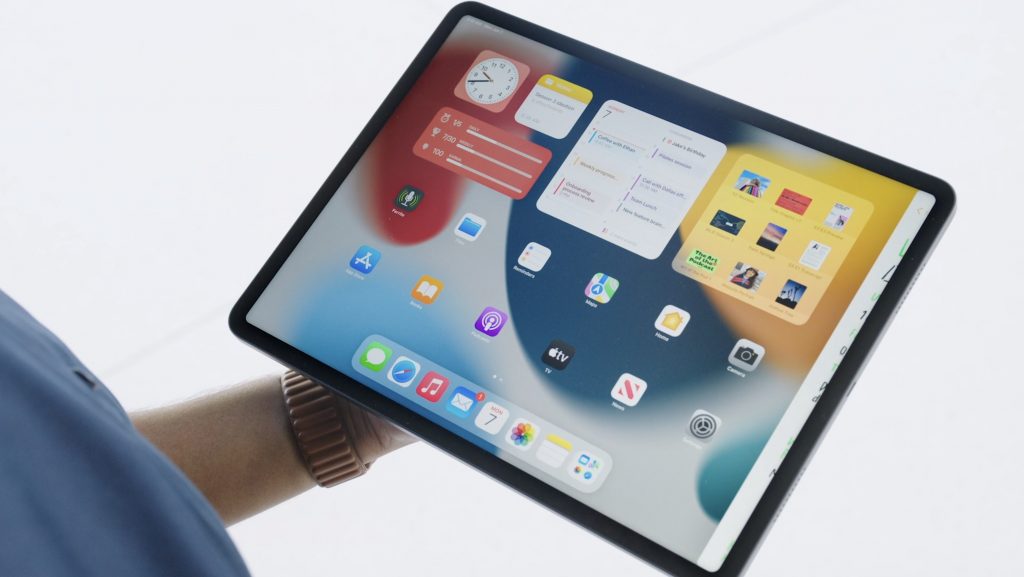
The iPad Finally Gets the App Library and Home Screen Widgets
Last year, in iOS 14, Apple introduced the App Library and Home Screen widgets. The App Library holds all your apps so you can declutter your life by removing them from the Home Screen. And Home Screen widgets let you add app-specific widgets that provide at-a-glance information. Sadly, iPadOS 14 didn’t include those features.
iPadOS 15 rectifies that oversight, adding both the App Library and Home Screen widgets, complete with some larger widget sizes for the larger iPad screen. They’ll work just like on the iPhone. It’s about time!
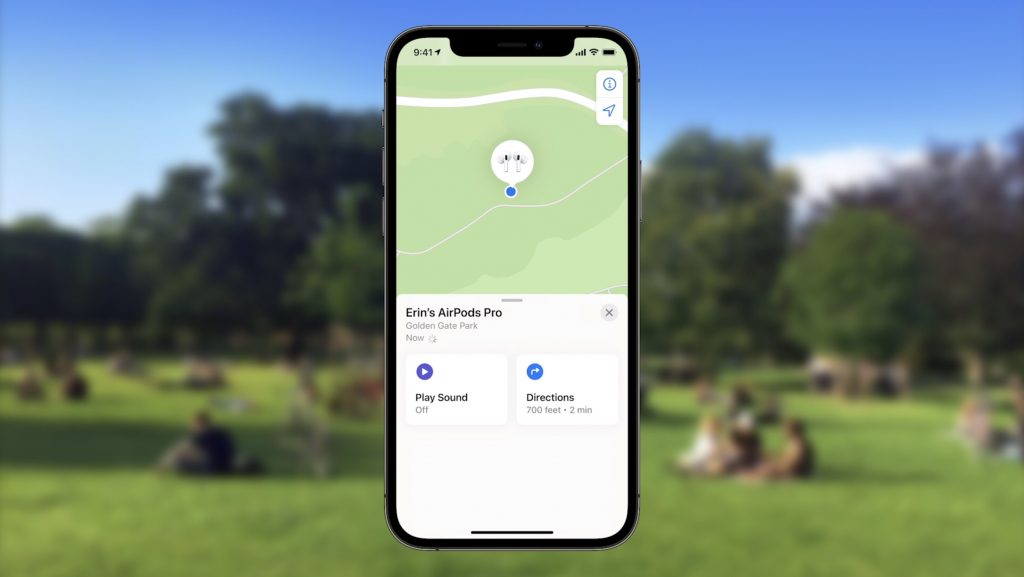
Locate Lost AirPods Pro and AirPods Max with Find My Network Support
As it stands now, you can theoretically find AirPods using the Find My app. However, it shows only the last position of the AirPods at a general level, and you have to get within range of them to play a sound. In the future, however, the AirPods Pro and AirPods Max will support the Find My network, so other people’s devices can report their location generally, and once you get within Bluetooth range, you can play a sound to locate them.
Hopefully, that will happen less often thanks to new separation alerts that, when enabled, will alert you when you leave an Apple device, AirTag, or Find My-compatible item behind.
Private Relay Protects Safari Traffic for iCloud+ Subscribers
Apple has been adding lots of privacy-protecting features over the past few years, but Private Relay goes even further to ensure that even your ISP can’t track where you go on the Web and sell that data to advertisers. Private Relay encrypts your Safari traffic and passes it through two Internet relays. No one—not even Apple—can then use your IP address, location, and browsing activity to create a detailed profile of you. Everyone who pays for extra iCloud storage will transition to the new iCloud+ for the same cost and will get Private Relay for no additional fee.
While we’re talking about iCloud, Apple also says that you’ll be able to get custom domain names for iCloud Mail addresses and invite family members to use the same domain with their iCloud Mail accounts.
Use AirPlay to Send Audio or Video to Your Mac
Many people have discovered how neat it is to use AirPlay to display photos or videos from an iPhone or iPad on a TV attached to an Apple TV. Macs could also broadcast their displays to an Apple TV. But what you couldn’t do is use AirPlay to send audio or video from another Apple device to a Mac. With macOS 12 Monterey, that will become possible, enabling you to use a Mac’s large screen to play a video, share a Keynote presentation, and more.
Apple’s upcoming operating system releases boast many other new features, and we plan to explore more of them once everything ships in a few months. We’ll let you know when it’s time to update!
(Featured image by Apple)
Social Media: At its Worldwide Developer Conference keynote, Apple announced a boatload of new features that we’ll see in macOS 12 Monterey, iOS 15, iPadOS 15, and watchOS 8 later this year. Here are the ten features we think you’ll most like: