Along with a new version of Safari in iOS 15 and iPadOS 15, Apple has released Safari 15 for macOS 11 Big Sur and macOS 10.15 Catalina. Why do this before macOS 12 Monterey ships? Some of the browser’s new capabilities—notably the Tab Groups feature—integrate it more deeply into your Apple device experience by syncing across devices. So, assuming you have Safari 15 on at least some of your devices, what’s new, and is it any good?
New Tab Bar Interface
For Safari 15, Apple tried to minimize the tab bar interface to occupy less screen real estate and stand out less from the content of Web pages by co-opting the color of each page. Early betas were met with a litany of complaints from testers, and Apple pulled back in the eventual releases, offering settings that let you retain the old interface. How that plays out varies between the iPhone, iPad, and Mac:
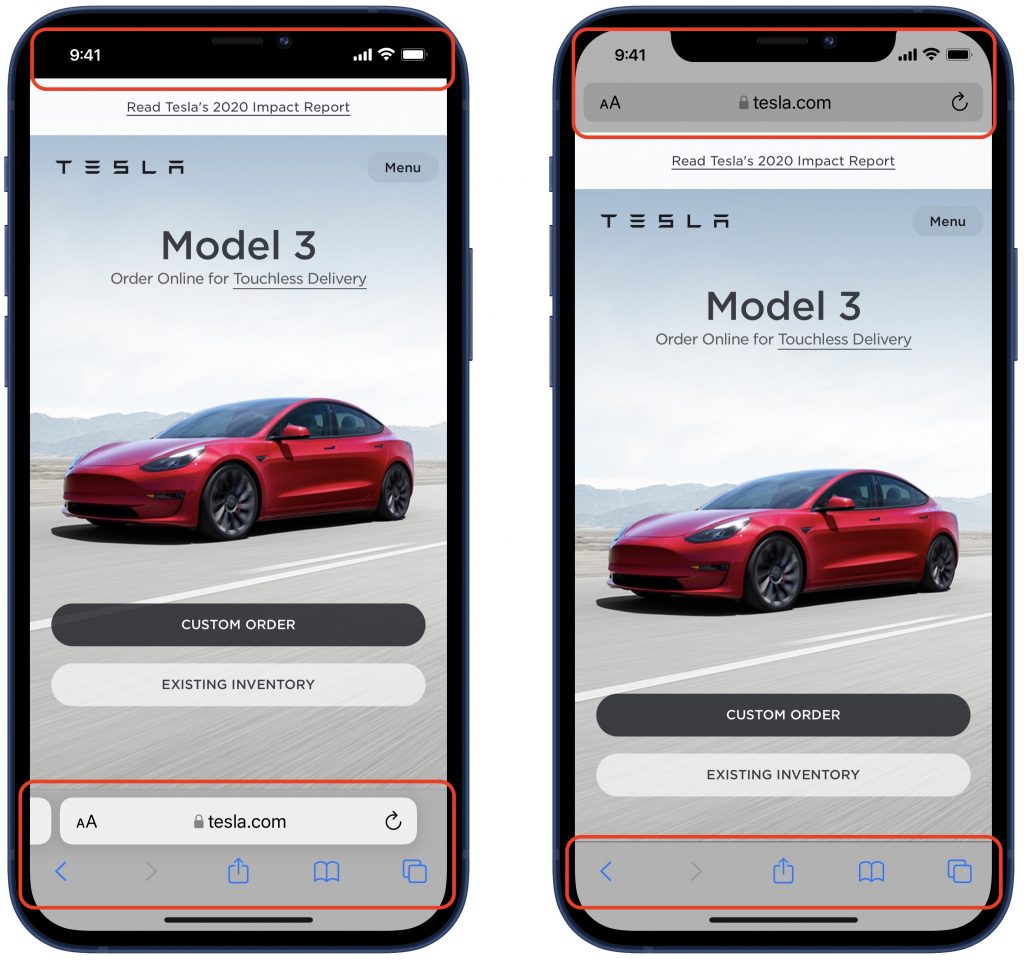
- iPhone: Apple combined the address bar and tab bar into a single set of controls at the bottom of the screen, where they’re easier to reach with your thumb while working one-handed and where you can swipe left and right to switch tabs. Plus, the status bar area at the top of the screen takes on the color from the current site, which isn’t necessarily a visual win. This is a huge change from the controls appearing at the top, so if you don’t like it, go to Settings > Safari and switch from Tab Bar (below left) to Single Tab (below right). Turn off Allow Website Tinting (also below right) if you don’t like the colorizing.

- iPad: Displays on the iPad are relatively small, so saving some vertical space with the new Compact Tab Bar could be helpful. However, since the tab bar automatically minimizes when you scroll down a page, reducing its size when it’s visible isn’t as much of a win as it might seem. And the colorized tab bar can be shockingly bright. In Settings > Safari, you can choose between Compact Tab Bar (below top) and Separate Tab Bar (below bottom); either way, consider disabling Show Color in Tab Bar.
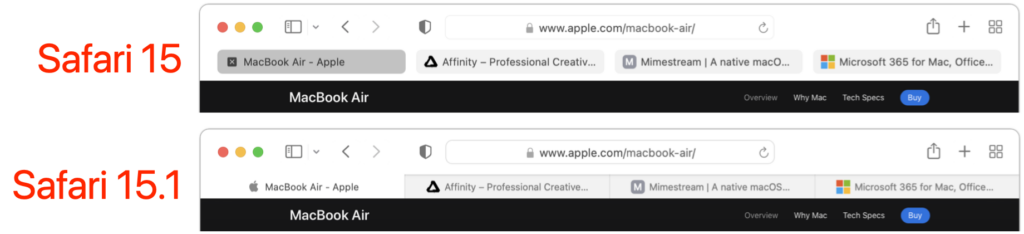
- Mac: Laptop screens aren’t huge, and Safari doesn’t minimize its tab bar when you scroll, as it does on the iPhone and iPad, so saving some vertical space might be welcome on a smaller screen. But the way the Compact layout embeds the address field inside a tab and reduces the number of buttons you can see may perturb you (below top). Once again, the colorized tab bar can be glaring. To revert to something closer to the old look, in Safari > Preferences > Tabs, select Separate for the tab layout (below bottom), and disable Show Color in Tab Bar to keep the controls gray regardless of the site color.
Voice Search
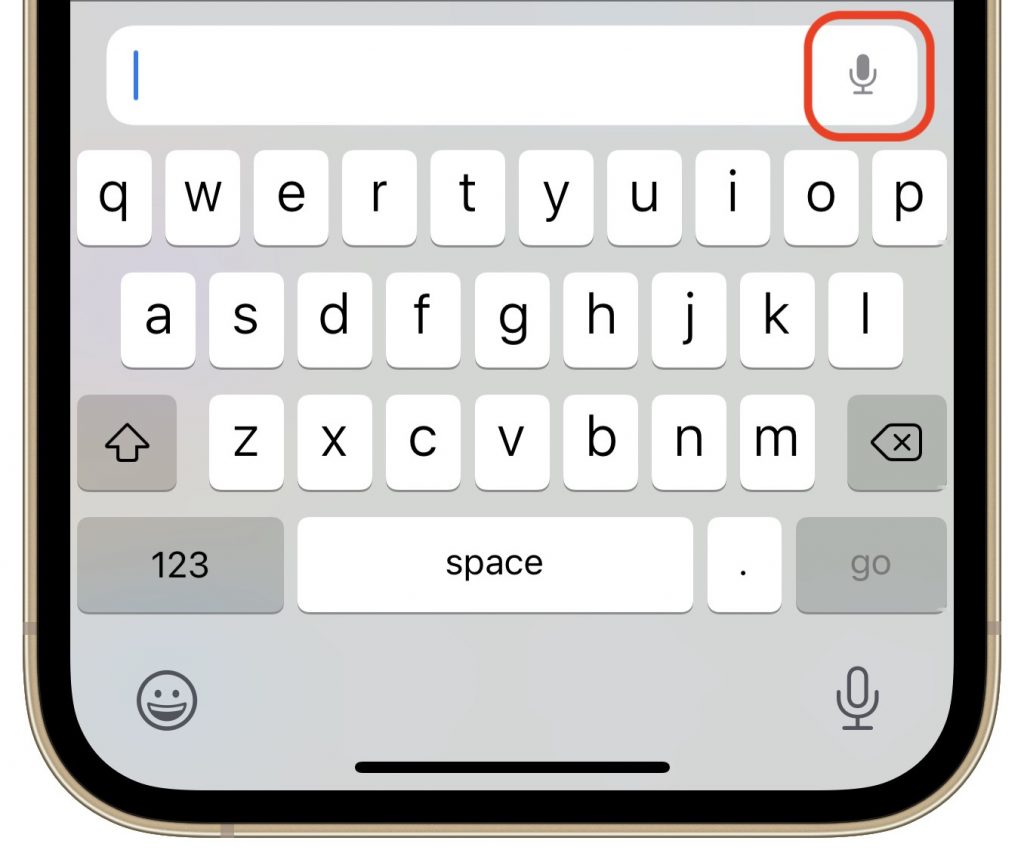
For many searches, it’s easier to speak than type, and Apple has made doing that even faster with Voice Search on the iPhone and iPad. Tap the current tab to display the address field, tap the microphone button, and speak instead of typing. As soon as you stop, Safari performs the search. You can even navigate directly to a site by speaking its URL, like “apple dot com.” Sadly, Apple didn’t extend this feature to the Mac version of Safari 15.
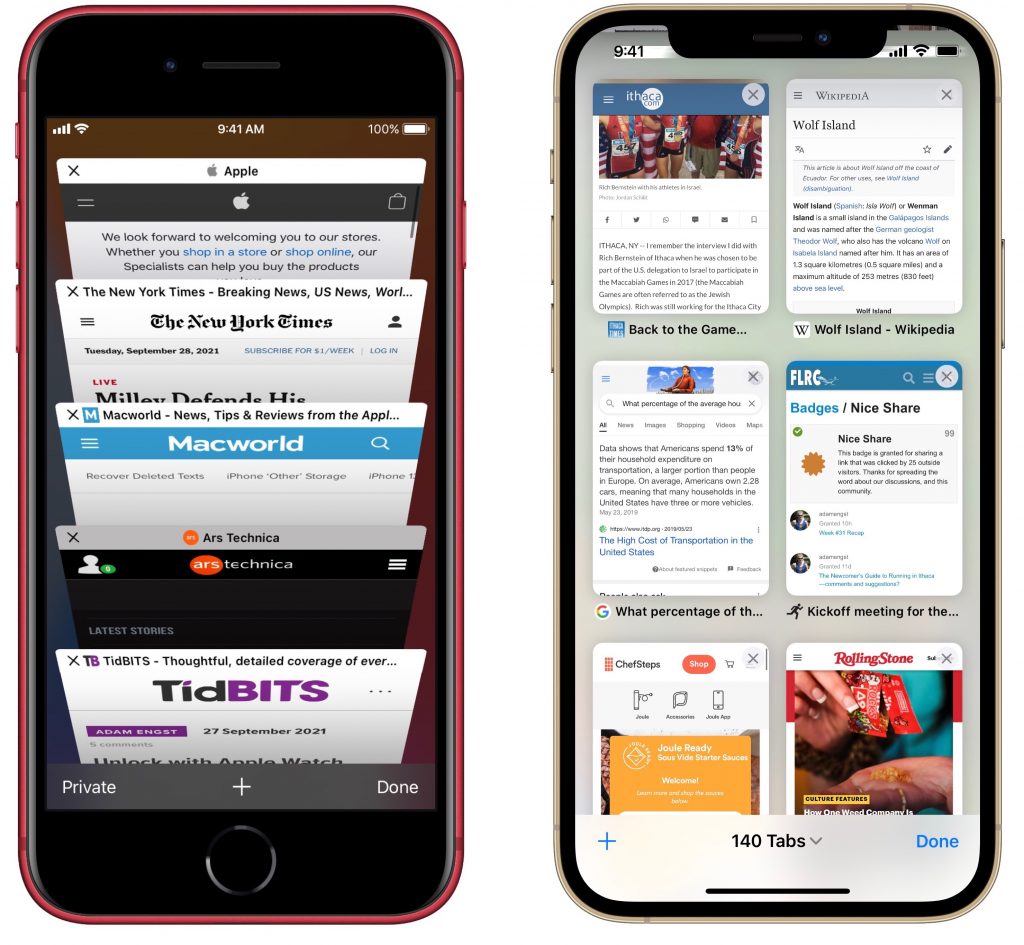
Tab Switcher
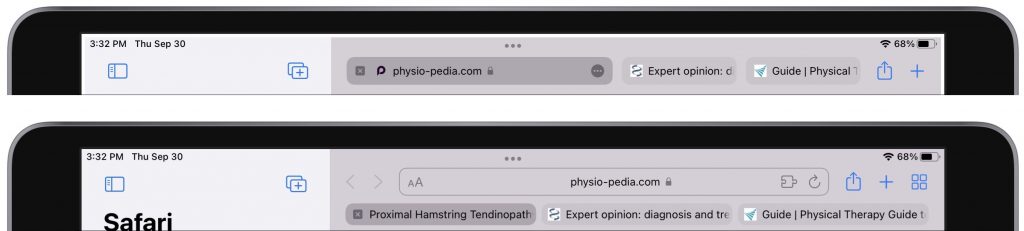
In iOS 14 and earlier, Safari used a card stack metaphor for its tab switcher (below left), which could make it hard to see what each tab contained. In Safari in iOS 15, Apple took a cue from the iPad and Mac versions of the app and moved to a grid interface for the tab switcher (below right). You can drag the tab thumbnails around to organize them and remove them by tapping an X button (weirdly located in the upper-right corner) or swiping them left off-screen. You can also bring up the option to close all open tabs by pressing and holding Done at the lower right corner of the screen.
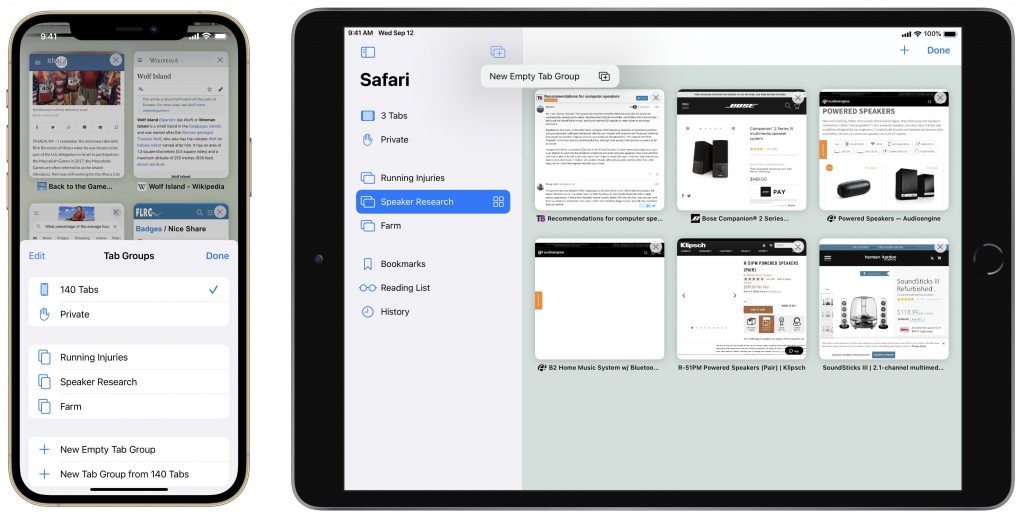
Tab Groups
If you struggle under the cognitive load of dozens of unrelated tabs, the new Tab Groups feature might help. With it, you can collect tabs into as many groups as you like and switch among them. You work with tab groups in either the tab switcher interface (iPhone and iPad with the Separate Tab Bar) or the sidebar (Mac and iPad with the Compact Tab Bar).
To open the tab switcher on the iPhone, tap the tab button in the lower-right corner of the screen; on the iPad, tap the different-looking tab button in the upper-right corner. Once you have the tab switcher open, tap X Tabs to reveal the Tab Groups menu. To show the sidebar on either the iPad or the Mac, tap or click the sidebar button in the upper-left corner of the tab bar.
Once you have the Tab Groups menu or sidebar showing:
- To create a new tab group on the iPhone’s or iPad’s Tab Groups menu, tap New Empty Tab Group, name it, and tap Save. In the sidebar on a Mac or iPad, use the New Tab Group button at the top (or choose File > New Empty Tab Group on the Mac). You can also use New Tab Group from X Tabs to create a tab group from currently open tabs.
- To switch to a different tab group, tap it in the Tab Groups menu on an iPhone or iPad, or access it from the sidebar on a Mac or iPad.
- To delete a tab group, swipe left on it in the Tab Groups menu or sidebar to reveal a delete icon on an iPhone or iPad; on the Mac, Control-click it and choose Delete.
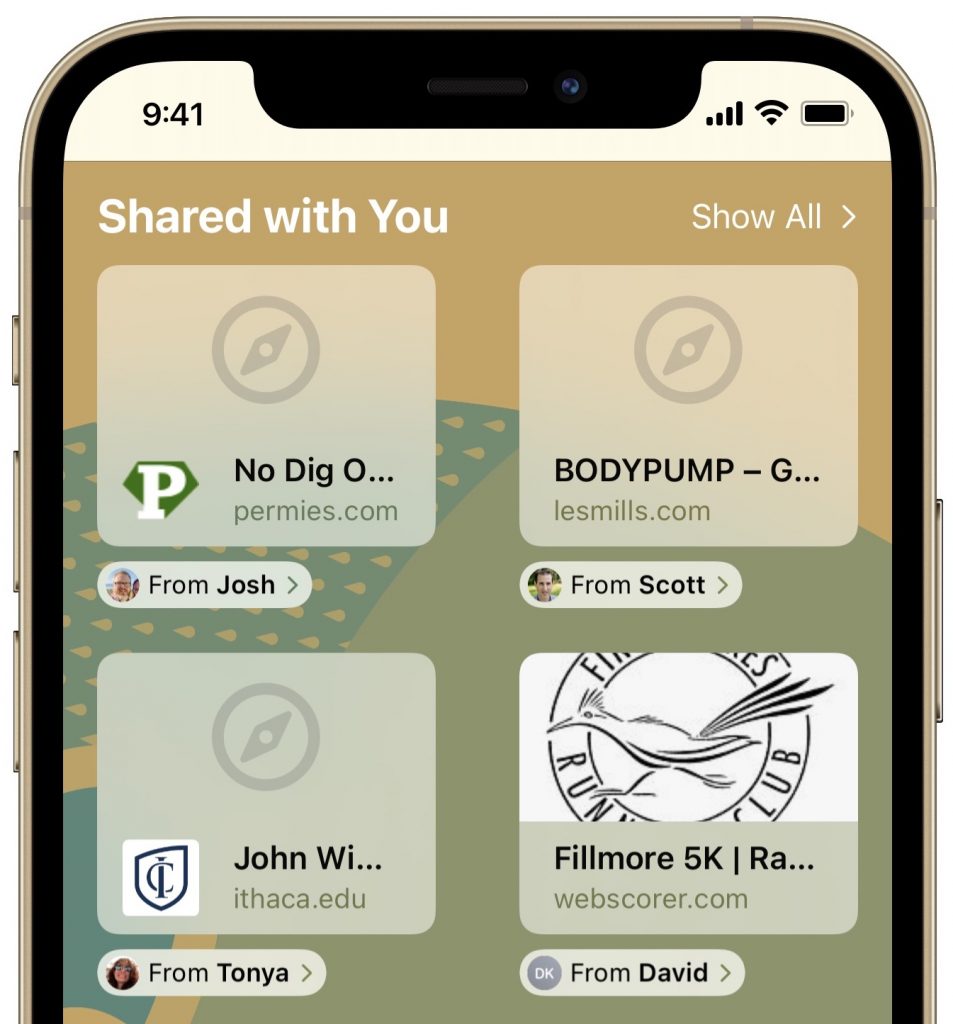
Shared with You
Ever gone spelunking through Messages to find a link someone sent you? Safari 15’s new Shared with You feature should help. It automatically collects all Web pages you receive in Messages into a new Shared with You section of the Safari start page. On the iPad and Mac, there’s also a Shared with You item in the sidebar.
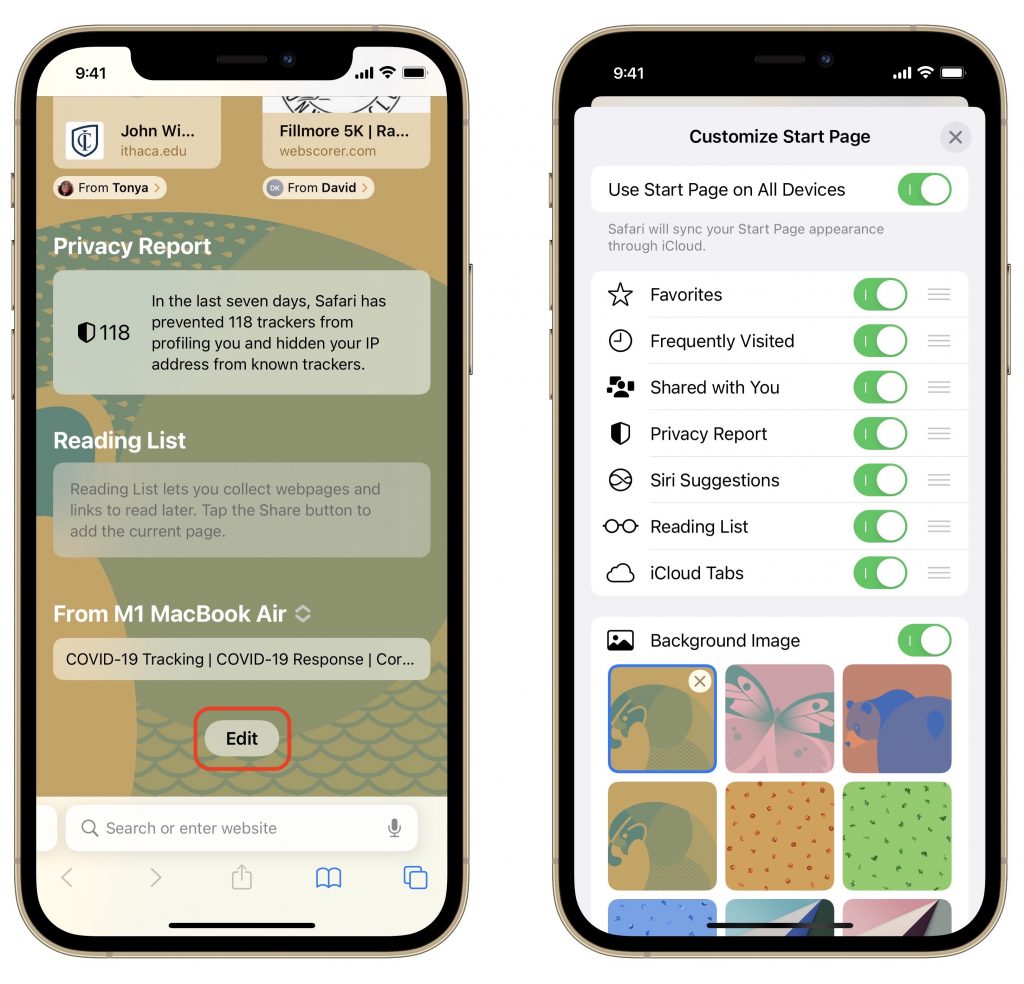
Customizable Start Page
Speaking of the start page, if you want to customize which headings appear and in what order, you can now do that on the iPhone and iPad. (Choosing which headings appear has long been possible on the Mac by clicking the little settings button in the lower-right corner, but reordering isn’t possible there.)
Create a new tab to view the start page, scroll to the bottom, and tap Edit. Then disable any headings you don’t want to see and drag the remaining ones into your desired order. You can also choose among several Apple-provided background images and have your start page settings sync to your other devices.
Other Stuff
Two final new features may be welcome but probably won’t rock your world:
- Pull to refresh: If you need to reload a Web page on the iPhone or iPad, either you can tap the reload button in the address field if it’s visible with your tab bar settings, or you can now just pull down with your finger from the top of a page.
- HTTPS upgrade: If you visit a website that supports encrypted HTTPS but is also loading insecure content over unencrypted HTTP, Safari will now ensure that you connect to it over HTTPS so your entire connection is secure.
There you have it! Check out the new features in Safari 15 and let them improve your browsing experience.
(Featured image based on an original by iStock.com/Evgenii Mitroshin)
Social Media: Safari 15 brings some welcome new features, along with tab bar interface changes that have received mixed reviews. Read on to learn about the features and how you can customize the tab bar more to your liking.