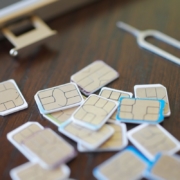
Posts

Try Using a Magic Trackpad 2 with Your iPad Running iPadOS 13.4

When Apple released iPadOS 13.4 recently, it came with an unexpected feature: trackpad and mouse support. Apple plans to release a Magic Keyboard for iPad Pro that has a built-in trackpad in May as well, but in the meantime, you can control an iPad entirely via a Magic Trackpad 2 (the wedge-like one that recharges via a Lightning port). Pair it in Settings > Bluetooth, and look for settings in Settings > General > Trackpad. Apple did an impressive job with integrating a cursor into the iPadOS experience: the small, circular cursor shifts colors subtly depending on the background, becomes a highlighted selection rectangle when over objects, expands icons on the Home screen, and morphs into a thin insertion point when in text. Plus, Apple built in oodles of two- and three-finger gestures to mimic what you can do directly on the iPad screen—see the full list at TidBITS.

(Featured image by Adam Engst)

MacBook Air Update Features Magic Keyboard, iPad Pro Gets a Trackpad

In a widely expected update, Apple has introduced a new MacBook Air that replaces the much-maligned butterfly keyboard with the new Magic Keyboard. The MacBook Air also gains faster processors, enhanced graphics, and more storage options, all for $200 less than before.

Apple also threw back the curtains on an updated iPad Pro that will be compatible with a new iPad Pro-specific Magic Keyboard that includes a trackpad. The iPad Pro is available now, but the Magic Keyboard won’t ship until May.

MacBook Air Gains Magic Keyboard, Faster Performance, and Other Enhancements

In an effort to eliminate the hated butterfly keyboard from the Mac line, Apple has released an updated MacBook Air that features the scissor-key Magic Keyboard introduced last year in the 16-inch MacBook Pro. That keyboard has received highly positive reviews, and we’re happy to see it appear in the MacBook Air. (Look for a new model to replace the current 13-inch MacBook Pro soon as well.) The Magic Keyboard includes 12 function keys as well as a Touch ID sensor, but no Touch Bar.

Apple significantly improved the MacBook Air’s performance by providing a choice of 10th-generation Intel Core processors, including the model’s first quad-core processor option. The base level 1.1 GHz dual-core Intel Core i3 is probably pretty slow, but upgrading to a 1.1 GHz quad-core i5 is only $100 and a 1.2 GHz quad-core i7 is just $250.

Graphics should be noticeably speedier as well, thanks to the switch to Intel Iris Plus Graphics. The MacBook Air can now drive a 6K display too, if you have a Pro Display XDR.

Apple also doubled the base level of storage to 256 GB, and you can increase that to 512 GB ($200), 1 TB ($400), or 2 TB ($800).

Minor enhancements include True Tone technology for more natural images on the 13-inch Retina display, “wide stereo sound” for the speakers, and support for Bluetooth 5.0.

As welcome as all these changes are, the best news is that Apple simultaneously dropped the MacBook Air’s price. The entry-level model now starts at $999, and it’s available to the education market for just $899.

iPad Pro

We were waiting for the Magic Keyboard to come to the MacBook Air, but we had no inkling that Apple was going to add a trackpad option to the iPad Pro. It will come in the form of the new Magic Keyboard, due in May, and will require iPadOS 13.4, slated for late March. Apple says it will be easy to use, with the pointer transforming to highlight user elements appropriately as the user moves their finger across the trackpad. What it won’t be is cheap, at $299 for the 11-inch model and $349 for the 12.9-inch model. (The second-generation Apple Pencil and an updated Smart Keyboard Folio remain available.)

The other unexpected change in the new iPad Pro is the addition of the new LiDAR Scanner. LiDAR (light detection and ranging) is a way of measuring distance with reflected laser light. It’s commonly used in self-driving cars, but Apple is instead using it to beef up the iPad Pro’s augmented reality (AR) capabilities. It offers existing ARKit apps instant AR placement, improved motion capture, and people occlusion. Apple also uses it to improve the Measure app. We can’t help but think Apple is testing the technology for future AR goggles.

Less surprising improvements include a new processor—Apple’s custom A12Z Bionic chip—and a dual-camera system that combines a 12-megapixel wide camera and a 10-megapixel ultra-wide camera that zooms out two times to capture a much wider field of view. The iPad Pro also now boasts five microphones for capturing audio and four speakers that automatically adjust to any orientation.

Pricing for the iPad Pro itself hasn’t changed. The 11-inch model starts at $799, with the 12.9-inch model at $999. Both come with 128 GB of flash storage, up from 64 GB in the previous models, and you can buy more storage: 256 GB (add $100), 512 GB ($300), or 1 TB ($500). Cellular connectivity costs an extra $150.

Mac mini

Last and indeed least, Apple announced that the standard configurations of the Mac mini now have twice as much storage as before. That means the $799 configuration comes with 256 GB and the $1099 configuration comes with 512 GB. 1 TB and 2TB configurations remain available, and there are no other changes.

(Featured image by Apple)


Social Media: Here’s some good news! Apple has introduced a new MacBook Air with a better keyboard and faster processor for $200 less. And there’s a new iPad Pro with trackpad support. Seriously! Check out the news at:


The Fastest Way to Change Wi-Fi Networks in iOS 13

Historically, picking a new Wi-Fi network has required you to open the Settings app and tap Wi-Fi, forcing you to unlock your iPhone or switch away from what you were doing. In iOS 13, however, Apple added a better way to connect to a new Wi-Fi network. Open Control Center (swipe down from the upper-right corner on an iPhone X or later or an iPad; or up from the bottom on an earlier iPhone), press and hold on the network settings card in the upper-left corner to expand it, and then press and hold on the Wi-Fi icon to reveal a list of Wi-Fi networks. Tap one to switch to it.

(Featured image by Paul Hanaoka on Unsplash)

Use Guided Access to Let Kids and Others Use Your iPhone Temporarily

Let’s get one thing straight. You know that you should never, ever share your iPhone or iPad passcode with anyone you don’t trust implicitly, like a spouse or adult child, right? That’s because, with your iOS passcode, someone could change your Apple ID password, and if you use iCloud for email, completely steal or otherwise abuse your online identity. (Scared? Good. If you’ve given anyone your passcode, go change it right now. We’ll wait.)

So if sharing your passcode is such a terrible idea, how do you let someone else use your iPhone or iPad temporarily? Perhaps you want to let your kid play a game in the car while you focus on tricky winter driving. Or maybe you time running races with an iPhone app and want someone to do the timing without giving them full access to your iPhone. Whatever the reason you want to give someone limited access to a single app in iOS 13, the solution is Guided Access.

Enabling and Configuring Guided Access

To turn Guided Access on, navigate to Settings > Accessibility > Guided Access (it’s near the bottom), and flick the switch. While you’re here, check out the remaining settings:

  • Passcode Settings: Create a passcode for getting out of Guided Access here (it can be different than your normal one), and choose whether you can use Touch ID or Face ID to exit as well.
  • Time Limits: You don’t set time limits here, but you can set audio and spoken warnings before the time runs out.
  • Accessibility Shortcut: Enable this if you also use triple-click for another Accessibility Shortcut like Magnifier.
  • Display Auto-Lock: Choose how long the device can be inactive before the screen turns off. If the Guided Access user wakes up the device, they’ll still be in Guided Access.

With those settings configured, switch to the desired app and triple-click the side or Home button, and if necessary, tap Guided Access in the Accessibility Shortcut list. You can do five things:

  • Set session-specific options: Tap Options in the lower-right corner to access various switches. If they’re disabled:
    • Side Button or Sleep/Wake Button: The user can’t put the device to sleep.
    • Volume Buttons: The user can’t change the volume.
    • Motion: The screen doesn’t change from the orientation (portrait or landscape) it was in when you started Guided Access.
    • Touch: The user can’t do anything with the screen at all—probably most appropriate for letting a young child watch a video.
    • Dictionary Lookup: Prevents word lookups in some apps.
  • Set time limits: At the bottom of the Options list, tap Time Limit and set an amount of time after which the device can’t be used until you enter the Guided Access passcode.
  • Disable specific areas on the screen: Draw circles around parts of the screen you want to make off-limits to the user. After making a circle, you can move it by dragging it, resize it by dragging any of its handles, or remove it by tapping its X button.
  • Start/Resume Guided Access: In the upper-right corner, tap Start. If you haven’t yet set a passcode, you’ll be prompted to do that.
  • Exit the setup screen: In the upper-left corner, tap End.

Using Guided Access

Once you tap Start, iOS tells you it’s entering Guided Access and lets you use the current app with the restrictions you’ve applied. If you decide that the restrictions aren’t right, triple-click the side or Home button to return to the setup screen. When you’re done, tap Resume in the upper-right corner.

To leave Guided Access, triple-click the side or Home button, enter the passcode, and in the setup screen, tap End in the upper-left corner.

That’s it! Once you understand the various limitations of Guided Access, you’ll be able to turn it on and off quickly whenever you need to let someone use your iPhone or iPad for a while.

(Featured image by mohamed Abdelgaffar from Pexels)


Social Media: Never, ever share your iPhone or iPad passcode with anyone who you don’t trust implicitly. Instead, you can give people limited access to a single app with Guided Access. Learn more here:

Need to Charge Your iPhone or iPad More Quickly? Get a Higher Wattage Power Adapter

By default, most iPhones and iPads ship with Apple’s tiny 5-watt power adapters. They work, but not quickly. However, the iPhone 8 and later, all models of the iPad Pro, and the most recent iPad Air and iPad mini models support fast charging when connected to higher wattage power adapters. You may have an older one of these around, or you can buy a new one. Apple has bundled with iOS devices or sold 10-watt, 12-watt ($19), and 18-watt ($29, USB-C) power adapters, and the company has also produced 29-watt, 30-watt ($49), 61-watt ($69), and 87-watt ($79) USB-C power adapters for Mac laptops. Plug your compatible iPhone or iPad into one of these chargers with an appropriate cable (for a USB-C charger, you’ll need a USB-C to Lightning Cable, $19), and it will charge significantly more quickly. Look for a wattage rating on the adapter itself, or multiply the output volts and amps together to get watts.

(Featured image by Matthew Henry on Unsplash)

iOS 13 Makes Editing Text Easier

Let’s be honest—text editing in iOS has never been anywhere near as good as it is on the Mac. We may be more accustomed to our mice and keyboards, but the Multi-Touch interface has always been clumsy when it comes to text. Apple keeps trying to improve iOS’s text editing features, and iOS 13 (and iPadOS 13) brings some welcome changes in how we go about positioning the text insertion point, selecting text, and performing the familiar options in the Mac’s Edit menu: Cut, Copy, Paste, and Undo/Redo. Has it caught up with the Mac yet? You’ll have to decide that for yourself, once you’ve learned the new techniques.

Note that these changes apply only to spots in iOS where you’re entering and editing text, not selecting and copying static, read-only text such as a Web page in Safari. And even when you are working on a Web page where you can enter and edit text, the site may override iOS’s text handling.

Insertion Point Positioning

Positioning the insertion point on the Mac is easy—you move the cursor to the right spot and click. In previous versions of iOS, you could tap to put the insertion point at the start or end of a word, or press and hold briefly to bring up a magnifying glass that let you put the insertion point anywhere, including within a word. It was slow and awkward, and made better mostly by trackpad mode, which you could invoke by long-pressing the Space bar.

iOS 13 improves positioning by letting you press and hold the insertion point to pick it up and then drag it to where you want it. This approach is much easier and more sensible than the previous method.

Selecting Text

On the Mac, you can select text with multiple clicks, by clicking and dragging, or by using the keyboard. In iOS, however, text selection has always been tough—you could double-tap to select a word, but anything else required subsequent moving of start and end markers. (On an iPad with a keyboard, you could hold Shift and use the arrow keys too.)

Happily, iOS 13 improves text selection. To start, you can still double-tap to select a word, but you can also triple-tap to select a sentence (shown below) and even tap four times in quick succession to select an entire paragraph. Unfortunately, these selection shortcuts may not work in all apps, but you can always fall back on the previous approach.

For selections of an arbitrary length, just press, pause ever so briefly to start selecting, and then drag to extend the selection. In other words, it’s as close to the Mac approach as is possible with the Multi-Touch interface. If the selection isn’t quite right, you can adjust the start and end markers.

Cut, Copy, Paste, and Undo Gestures

Everyone knows Command-X for Cut, Command-C for Copy, Command-V for Paste, and Command-Z for Undo on the Mac. In previous versions of iOS, those commands were available only from a popover that appeared when text was selected, or (for Paste) when you pressed and held in a text area. The only command with a gesture, so to speak, was Undo. At the risk of dropping it, you could shake your iOS device to undo your last action. Not good.

iOS 13 introduces a variety of three-finger gestures to make these commands quick and easy to invoke. Note that you can use the entire screen for these gestures—it’s OK to make them with one finger over the keyboard.

  • Copy: To copy selected text, pinch in with three fingers, or, more likely, your thumb, index finger, and middle finger.
  • Cut: To cut (copy and then delete) selected text, perform the copy gesture twice in quick succession.
  • Paste: To paste the text you’ve copied at the insertion point, reverse the action—pinching out (spreading) with three fingers.
  • Undo: To undo a mistake, immediately swipe left or tap twice with three fingers. You can keep swiping or double-tapping to undo more actions.
  • Redo: To redo the action that you just undid, swipe right with three fingers.

Whenever you use one of these gestures, a little feedback badge appears at the top of the screen to reinforce what you just did.

If you can’t remember which direction to pinch or swipe, press and hold with three fingers anywhere for a second to see a shortcut bar at the top of the screen with icons for Undo, Cut, Copy, Paste, and Redo.

Finally, instead of using Cut and Paste to move a swath of selected text, try dragging it to the new position.

Slide to Type

Various third-party keyboards have provided “slide-to-type” over the years, letting you type a word by sliding your finger from letter to letter on the keyboard without lifting it up in between. But switching to a third-party keyboard meant that you often gave up useful other features, like Siri dictation, so most people stuck with Apple’s default keyboard.

On the iPhone, iOS 13 now lets you slide to type on its default keyboard, and it works surprisingly well. In iPadOS 13, slide-to-type works only on the new floating keyboard you can get by pinching with two fingers on the default keyboard (pinch out with two fingers to restore the default keyboard). When you get to the end of a word, lift your finger to insert it, and then start sliding again for the next word. If you make a mistake, the suggestions above the keyboard often provide the word you want. You can switch between tapping (best for unusual words) and sliding on a word-by-word basis.

Make a mistake with sliding? By default, tap Delete after inserting a slide-to-type word to delete the whole word, not just the final letter. If you don’t like that behavior, turn off Delete Slide-to-Type by Word in Settings > General > Keyboard.

(Featured image by Lorenzo Cafaro from Pixabay)


Social Media: Today’s article will make text editing in iOS 13 faster and more fun. Read about important new and improved techniques for selecting, copying, and moving text, plus a new slide-to-type option.

The Scoop on the New iPhone 11, Apple Watch Series 5, 7th-gen iPad, and Apple Services

At its September 10th special event, Apple unveiled a slew of new products and services, including the iPhone 11, the Apple Watch Series 5, the seventh-generation iPad, Apple Arcade, and Apple TV+.

The company also said that iOS 13 and watchOS 6 would ship on September 19th, with iPadOS 13 appearing on September 30th and macOS 10.15 Catalina due sometime in October. Don’t feel the need to update to iOS 13.0 right away, though, since Apple also said that iOS 13.1 would arrive just 11 days later, on September 30th. It will contain some features that the company had to pull from iOS 13.0. Other features will continue to roll out throughout the coming months too.

This iPhone Goes to 11

After several Roman numeral years starting with the iPhone X, Apple has reverted to digits, introducing the iPhone 11, iPhone 11 Pro, and iPhone 11 Pro Max. These are more significant updates than last year’s models, thanks largely to additional cameras, two for the iPhone 11 and three for the Pro models.

The entry-level iPhone 11 improves on its iPhone XR predecessor with separate 12-megapixel Wide and Ultra Wide cameras that let you take wider shots without resorting to panoramas. iOS 13 uses computational photography with both cameras to enable the new Night mode, which combines multiple exposures for astonishingly better low-light photos.

The new front-facing TrueDepth camera is also now 12 megapixels, has a wider field of view for selfies, and supports Smart HDR for more natural-looking photos. It also now records 4K video at up to 60 frames per second and 120 frames per second with slo-mo.

Like the iPhone XR, the iPhone 11 has a 6.1-inch Liquid Retina screen, but it boasts increased performance with Apple’s new A13 Bionic chip. That makes Face ID up to 30% faster and lets it work better at varying distances and at more angles. Although there’s no 5G cellular support yet, the iPhone 11 does offer Gigabit-class LTE and Wi-Fi 6. For those who need multiple cellular plans simultaneously, it supports Dual SIM with eSIM.

The iPhone 11 features a case made of aluminum and glass that Apple claims is the toughest glass ever used in a smartphone. It can also theoretically withstand dunking in up to 2 meters of water for up to 30 minutes—don’t test that if you can avoid it. And the iPhone 11 comes in six colors, with prices starting at $699 for 64 GB of storage.

The iPhone 11 Pro and iPhone 11 Pro Max take photos and videos to the professional level, supporting everything the iPhone 11 can do and adding a third Telephoto camera. Each of the three 12-megapixel cameras can record 4K video with extended dynamic range and cinematic video stabilization. You can switch between the cameras smoothly while filming video. The presentation even demoed a beta of the FiLMiC Pro app, which will let you record separate video streams from each camera at the same time.

For still images, the triple-camera system adds a Telephoto mode to the Wide and Ultra Wide modes in the iPhone 11, and iOS 13 utilizes all three cameras and computational photography to deliver even better results. For instance, Portrait mode can now switch between Wide and Telephoto framing to provide a wider field of view that’s great for group portraits.

Although the screen sizes remain the same as in last year’s iPhone XS (5.8 inches) and iPhone XS Max (6.5 inches), the iPhone 11 Pro and iPhone 11 Pro Max sport new Super Retina XDR OLED-based screens that have significantly higher brightness and contrast specs. Physically, the new models are just a hair—almost literally at about half a millimeter—larger in every dimension than last year’s iPhones. Battery life is much better, with the iPhone 11 Pro lasting up to 4 hours longer than the iPhone XS and the iPhone 11 Pro Max besting the iPhone XS Max by up to 5 hours.

The iPhone 11 Pro models feature a stainless steel band and textured matte glass back, and they can handle being submerged in up to 4 meters of water for up to 30 minutes. We still don’t recommend testing this. Pricing with 64 GB of storage starts at $999 for the iPhone 11 Pro and $1099 for the iPhone 11 Pro Max. They’re available in four colors: gold, space gray, silver, and the new midnight green.

All the iPhone 11 models become available for pre-order on Friday, September 13th at 5 AM Pacific, and they’ll ship to customers and stores on September 20th. If you’re not overwhelmed by the new features, or just don’t want to pay that much, the iPhone 8 and iPhone XR remain available, starting at $449 and $599.

Apple Watch Series 5 Is Always-On

With the new Apple Watch Series 5, available for pre-order now and shipping on September 20th, Apple addressed one of the most common complaints about its wrist-based iPhone accessory. Now, instead of going black whenever you lower your wrist, the Apple Watch Series 5’s screen will merely dim, brightening back up as soon as you raise your wrist or tap the screen. That way you can read it without taking any particular action or waiting for it to light up. This change involved some impressive engineering since battery life remains at 18 hours in typical usage.

Also new is a built-in compass that enables the Maps app to show which direction you’re facing to assist in getting started with navigation. It also powers a new Compass app that shows heading, incline, latitude, longitude, and current elevation, and the Workout app can report current elevation and elevation gain. You can add one of three new compass complications to some watch faces.

Finally, the Apple Watch Series 5 cellular models feature international emergency calling. If you have an accident or get into trouble while traveling, your watch can call the local emergency services via Emergency SOS or through fall detection, regardless of where you purchased the watch or even if you have a working cell plan.

The Apple Watch Series 5 is available in the traditional aluminum ($399) and stainless steel ($699) cases. For more money, Apple has introduced a new titanium case ($799) and brought back the white ceramic case ($1299). If you don’t need the ECG and fall detection features that the Series 5 retains from the Series 4, the aluminum Series 3 model remains available, starting at $199.

Seventh-Generation iPad Goes Semi-Pro

No one was expecting Apple to update its entry-level iPad, but the new seventh-generation iPad sweetens what is already the best deal in the Apple universe. Starting at just $329, the new iPad increases the screen size to 10.2 inches, up from 9.7 inches, and adds a Smart Connector that allows you to connect Apple’s Smart Keyboard to it. It’s a few millimeters larger and a few grams heavier, but nothing you’ll notice.

Otherwise, the seventh-generation iPad is similar to the sixth-generation model, with an A10 Fusion chip, 8-megapixel 1080p rear camera, and 1.2-megapixel 720p front-facing camera. It also supports the first-generation Apple Pencil for stylus input. Battery life remains the same.

It’s available for pre-order now and will ship on September 30th.

Apple Arcade and Apple TV+ Details Revealed

We focus on Apple’s computing and communications products and services, which is why we haven’t written much about the recent release of Apple Card, the company’s new credit card, which provides increased privacy protections and an excellent interface, but no export options. Similarly, we don’t expect to say much in the future about Apple Arcade, which is Apple’s new game subscription service, or Apple TV+, the company’s slate of original video content, both of which were unveiled at Apple’s event.

For completeness, though, we should note that Apple Arcade will cost $4.99 per month when Apple launches it on September 19th. You’ll get a 30-day free trial to see if a service that gives your family access to over 100 games across all your Apple devices is compelling.

Apple TV+ debuts on November 1st, and it too will cost $4.99 per month for access to all of Apple’s original content. It doesn’t include any back catalog shows and movies such as are available from Netflix, Amazon Prime, Hulu, and Disney+. A 7-day free trial will be available, but if you buy a new iPhone, iPad, iPod touch, Mac, or Apple TV, you’ll get a year for free.

Phew! So many announcements! Our take is that the seventh-generation iPad is a compelling buy for anyone who wants an iPad but doesn’t need the performance of the iPad Air and iPad Pro models. The always-on screen of the Apple Watch Series 5 is welcome if you’re in the market for a new Apple Watch, though it may not be worth upgrading if you already have a recent model. And the new iPhone 11 models look awfully nice for anyone who takes photos and videos. And, let’s face it, that’s most of us these days.

(Featured image by Apple)


Social Media: It’s official! Apple has announced new iPhones with significantly improved camera capabilities, an Apple Watch with an always-on screen, and an improved entry-level iPad. Read on for details of all these and more:

A Quick Way to Check Battery Levels on Your iPhone, Apple Watch, and AirPods

Apple’s Batteries widget is a little known but highly useful tool for quickly assessing which of your small Apple devices is lowest on power—something you may wish to do when traveling with only one charging cable. To access it, switch to Today view on the iPhone, accessible by swiping right on the Home screen or Lock screen. If the Batteries widget isn’t already there, scroll to the bottom, tap Edit, and tap the green + button to the left of Batteries in the list. Of course, if you just want to check the battery status on one device, that’s possible too. It’s easy to figure out how much power remains in your iPhone’s battery because of the indicator at the top right of the screen (swipe down on it to invoke Control Center and see the percentage on the iPhone X and later). On the Apple Watch, swipe up on the screen to see its battery percentage in Control Center. For AirPods, open the case and wait for the pop-up to appear on your iPhone’s screen.

(Featured image by Adam Engst)

A Quick Trick to Turn Your iPhone into a Magnifying Glass

It’s maddening to want to read a serial number or other bit of fine print that you can barely see. But fret no longer—your iPhone or iPad makes a fabulous magnifying glass! Assuming Magnifier is enabled in Settings > General > Accessibility > Magnifier, you can bring it up by pressing the Home button (for Touch ID devices) or side button (for Face ID devices) three times quickly. If that’s too hard to remember, you can also add a Magnifier button to Control Center in Settings > Control Center > Customize Controls. The special camera viewfinder is zoomed automatically, but you can change the zoom level with the slider, tap the flash icon to turn on the LED light (if available on your device), enable a filter to change the color or contrast, or lock the focus by tapping the lock icon. You can also freeze the image by tapping the white shutter button, which is great for grabbing a picture of a tiny serial number on the back of some device (tap that button again to resume using Magnifier). To leave Magnifier, press the Home button or swipe up from the bottom of the screen.

Apple’s New AirPods Add “Hey Siri,” More Talk Time, and Optional Wireless Charging

If you use Apple’s AirPods, you’re probably a fan. But if you haven’t tried them, you may not realize what you’re missing. They pair quickly and reliably with all your Apple devices, provide excellent audio quality, and sit comfortably in most people’s ears (more so than the wired EarPods). The AirPods are Apple’s most popular accessory—the company sold 35 million in 2018.

Apple has now unveiled the second-generation AirPods, the first hardware update since their initial release in December 2016. A new Apple-designed H1 chip designed for headphones provides faster connections, more talk time (up to 3 hours), and the convenience invoking Siri with “Hey Siri.” (With the first-generation AirPods, you can configure a double-tap to bring up Siri—when the AirPods are active, look in Settings > Bluetooth > AirPods.)

The new AirPods still cost $159 with a standard Lightning-based charging case, but Apple has also introduced the Wireless Charging Case, which is bundled with the new AirPods for $199 or available separately for both the first- and second-generation AirPods for $79. The Wireless Charging Case works with any Qi-compatible charging mat. It features a tiny LED indicator light on the front of the case to show the case’s charge status, and if you buy from Apple online, you can now get 19 characters of personalized engraving on the front of the case.


Social Media: Apple just released the second-generation AirPods with faster connections, more talk time, “Hey Siri,” and an optional Wireless Charging Case. The AirPods were great before, and now they’re better than ever. Details at: