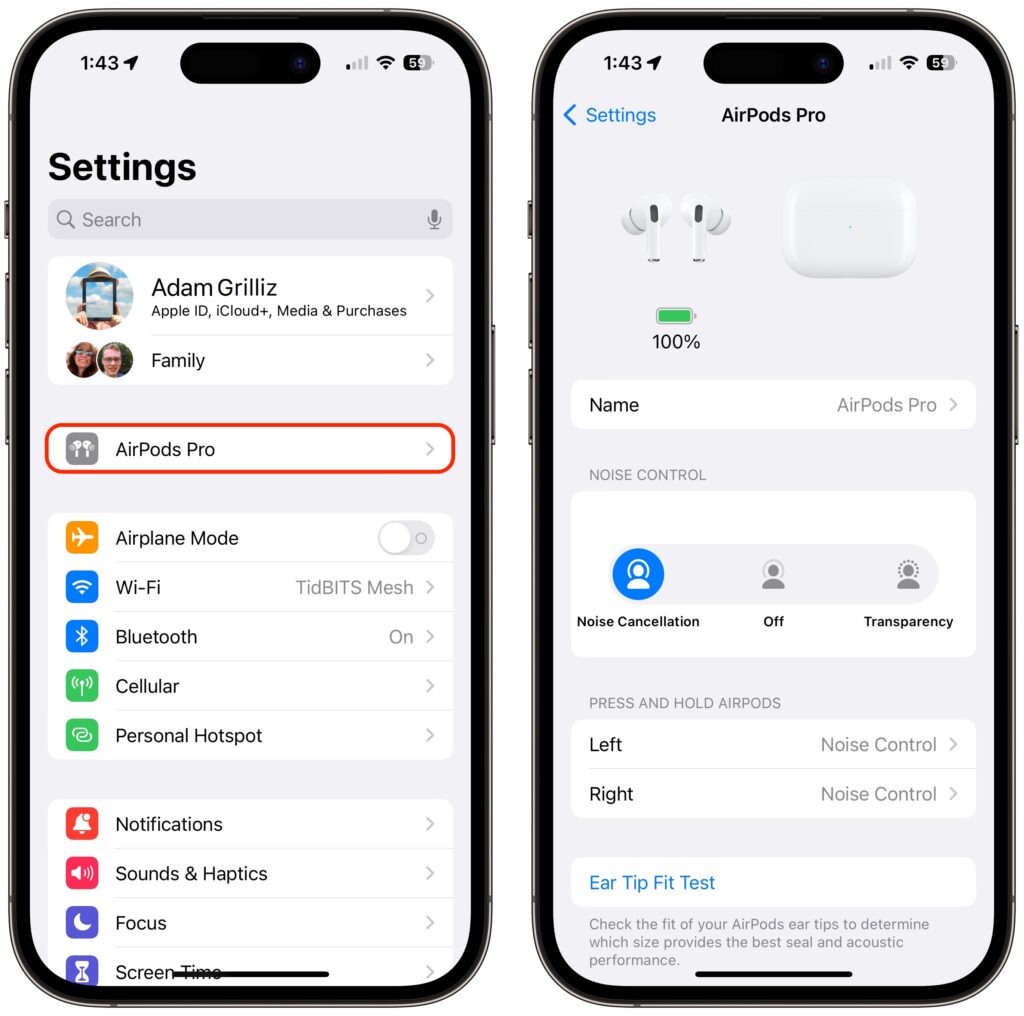
Although iOS and iPadOS are extremely stable, there are times when rebooting your iPhone or iPad can eliminate odd or problematic behavior, and there’s no harm in trying it. In the past, you’ve had to remember which buttons to press or select Settings > General > Shut Down and then press a button to turn the device back on. In iOS 16 and iPadOS 16, however, Siri has learned a new trick: how to reboot iPhones and iPads. Invoke Siri by holding the side button or Home button, and then say, “Reboot” or “Restart this device.” (Using “Hey Siri” can result in unexpected results, and saying “Restart” on its own tends to cause Music to start playing the last song.) Tap Restart, and your device reboots. If only this worked for the Apple Watch and HomePod too!
(Featured image by iStock.com/Wachiwit)
https://f11photo.com/wp-content/uploads/sites/13/2022/12/Reboot-iPhone-Siri-photo.jpg8001280F-11 Photohttps://f11photo.com/wp-content/uploads/sites/13/2023/06/PR-F11Photo-logo.jpgF-11 Photo2022-12-01 13:06:002023-01-01 22:11:39You Can Now Use Siri to Reboot Your iPhone or iPad
If you find yourself at a family gathering with bored children over the holidays, allow us to recommend an activity that can keep kids engaged. Figure out something the kids can do that involves motion—knocking down a tower of blocks, rolling a ball or toy car down stairs, even just making silly faces—and record them using the Slo-Mo option in the Camera app. Swipe left (iPhone) or down (iPad) on the viewfinder or labels to move from Photo mode to Slo-Mo mode, and then tap the red record button to start filming. Our test kids had fun building tall towers to knock over while filming, giggled madly while watching the videos, and went on to brainstorm other activities to film in slow motion.
(Featured image by iStock.com/Elena Vafina)
https://f11photo.com/wp-content/uploads/sites/13/2022/12/Record-slo-mo-video-kids-photo.jpg8001280F-11 Photohttps://f11photo.com/wp-content/uploads/sites/13/2023/06/PR-F11Photo-logo.jpgF-11 Photo2022-12-01 13:05:002023-01-01 22:11:41Need to Amuse Small Children During the Holidays? Try Slow Motion Video
In mid-November, Apple launched its new Emergency SOS via satellite feature for the iPhone 14 lineup. If you have an iPhone 14 and find yourself in an emergency situation in the US or Canada without cellular or Wi-Fi service, you can still contact emergency services. Apple says the service will expand to France, Germany, Ireland, and the UK in December 2022. The service is free for 2 years, and Apple hasn’t said what it will cost after that.
The challenge we users face with Emergency SOS via satellite is that it works only when you have no cellular or Wi-Fi service, and nearly all the time when you’re in such a situation, there’s no emergency. So if something bad does happen when you’re far from civilization, you may not be in the best state of mind to use Emergency SOS for the first time.
Apple has thought of that and provides two ways to get some experience talking to a satellite. One is the Emergency SOS via satellite demo, which you can try anytime. Or, for a real-world test of the system when you have no cellular or Wi-Fi coverage, you can try sharing your location via satellite using the Find My app. Once you’re outside with a clear view of the sky, here’s what to do.
Emergency SOS via Satellite Demo
To get started with the Emergency SOS via satellite demo, go to Settings > Emergency SOS, scroll down, and tap Try Demo. First, the iPhone walks you through several screens that turn off cellular, explain how the system works, and tell you that in a real emergency, you’ll answer a series of standard questions to help the dispatcher send the help you need.
Next, the demo teaches you how to find and connect to a satellite. Along with asking you to turn left or right—follow the arrows on the locator until it turns green—the demo may tell you that you have to wait for a few minutes until another satellite comes into range.
You won’t run through the same questionnaire you would in a real emergency, though. Instead, you get canned texts that mimic the conversation you might have with a real dispatcher. You can reply however you want, but it won’t change the responses. When you finish, tap End Demo.
Remember, in a real emergency, you’d dial 911 or invoke Emergency SOS by holding the side button and either volume button until the Emergency SOS slider appears. The call won’t work, but you’ll be able to start the Emergency SOS via satellite process for real.
Share Your Location with Find My via Satellite
As welcome as Emergency SOS via satellite will be if you ever need it, Find My via satellite may have more real-world utility right now. It enables you to share your location manually via the Find My app, regardless of the situation. Once you complete the process, anyone with whom you share your location generally will be able to see the updated-via-satellite location.
To get started in your cellular-free location, open the Find My app, tap Me in the toolbar, and tap Send My Location.
Find My will then start directing you to turn left and right, holding your iPhone up to the sky and pointing it at the satellite. A circular direction-finder shows which way to go and when you’re pointing in the right direction. If it fails (as it did in the lower-left message below), you’ll be directed to get a clear view of the horizon. If you’re in a deep valley, climbing higher may solve the problem, as it did in our test. The process isn’t quick, but the constant feedback and progress bar ensures that you feel like it’s doing something the entire time.
It’s important to realize that no one will be notified of your location, and you have no other way to communicate with people via satellite. So you’ll want to make plans with a friend or family member before you go into a situation where you could need help without having cellular service. Have a conversation beforehand so they know to look for you in Find My if you don’t get in touch by a predetermined time.
It would be nice if you could notify family or friends of your location for situations where you’d like help but don’t need emergency services. In the future, Apple could use the Send My Current Location option in Messages, but that doesn’t work via satellite now. Regardless, Emergency SOS and Find My via satellite are tremendously impressive, and we expect Apple to enhance the iPhone’s satellite communication capabilities in future iPhones and versions of iOS.
(Featured image by iStock.com/AntonioFrancois)
Social Media: For iPhone 14 owners, the future is here today with Emergency SOS and Find My via satellite, which let you contact emergency services and share your location by talking to a communications satellite. Learn how to try it here:
https://f11photo.com/wp-content/uploads/sites/13/2022/12/Emergency-SOS-via-satellite-photo.jpg8001280F-11 Photohttps://f11photo.com/wp-content/uploads/sites/13/2023/06/PR-F11Photo-logo.jpgF-11 Photo2022-12-01 13:04:002023-01-01 22:11:44Practice with the Emergency SOS via Satellite Demo, Just in Case
It’s common for one person in a family to handle booking airline tickets and thus to be in charge of checking in for the flight online and downloading boarding passes. If that’s you, what’s the best way to send each iPhone-wielding person in your family their own boarding pass? Rather than tussle with sharing the check-in confirmation email, add all the family boarding passes to Wallet on your iPhone. Then, for each person’s boarding pass, tap the ••• button ➊, tap Pass Details ➋, tap the share icon in the upper-right corner ➌, and share the pass via AirDrop or any other standard method. When the person receives it, they’ll be prompted to add the pass to their Wallet app.
(Featured image by iStock.com/IPGGutenbergUKLtd)
https://f11photo.com/wp-content/uploads/sites/13/2022/11/Wallet-scanning-boarding-pass-photo.jpg8001280F-11 Photohttps://f11photo.com/wp-content/uploads/sites/13/2023/06/PR-F11Photo-logo.jpgF-11 Photo2022-11-01 14:36:002022-11-30 16:43:51Share Airline Boarding Passes Using Wallet and AirDrop
Perhaps the most surprising change in the iPhone 14 line, at least in the United States, was the shift from using removable SIM cards to eSIM.
SIM cards—SIM stands for Subscriber Identity Module—have been a fixture in the mobile phone world for many years because they provide the unique identification necessary to connect a subscriber and a plan with a phone. Because SIM cards are removable, you can use them to transfer an existing plan to a new phone, switch carriers, or enable temporary service while traveling—all by inserting the appropriate SIM card.
But SIM cards are small, fussy, and require physical interaction, so the industry came up with eSIM, or embedded SIM, where a programmable SIM is integrated into the circuitry of the phone. With eSIM, you can also activate a plan, transfer a plan to a new phone, or change carriers, typically without interacting with customer service. You also don’t have to acquire a physical SIM, figure out how to open your phone’s SIM tray, or insert the tiny SIM card in the correct orientation without dropping or damaging it. Plus, without a SIM slot and tray, iPhones have one less spot where water could get in and one less moving part that could break, and Apple doesn’t have to provide a SIM tool that you’ll likely lose (and replace with a paperclip).
Apple’s eSIM Transition
eSIM support is widespread among US carriers but less so internationally, which is why models of the iPhone 14 sold outside the US retain the SIM tray. The main place where lack of eSIM support is likely to be an issue—at least for the near future—is international travel. Historically, it was easy to purchase a pre-paid SIM card for a local carrier in the airport upon arriving, but that will no longer work for a US iPhone 14. The iPhone is sufficiently popular that international carriers are adding eSIM support, but it’s still possible to travel to a country where you can’t get local service with an iPhone 14 due to the lack of a SIM tray. Apple maintains a list of international carriers that support eSIM in various ways, including with pre-paid plans for travelers, and offers advice on how to use eSIM when traveling. (eSIM isn’t available at all in mainland China, but Apple’s list includes worldwide service providers that sell pre-paid data plans you can use when traveling in China and other countries without eSIM support.)
Apple has been moving toward eSIM for several years, starting with the iPhone XS, iPhone XS Max, and iPhone XR in 2018. Those iPhones—and every model up to the iPhone 14—had both a SIM tray and eSIM, which enabled the use of two separate cellular plans, each with its own phone number. With the iPhone 13, Apple enabled Dual SIM support with eSIM alone, and some carriers started giving customers the option to activate their primary service with eSIM, leaving the SIM tray or the second eSIM available for a second plan. Apple says you can store and switch among up to eight or more eSIMs, two of which can be active at any time, but it’s unclear how that works—an update to iOS might be necessary.
Cellular-capable iPads have had eSIM support since the seventh-generation iPad, fifth-generation iPad mini, third-generation iPad Air, first-generation 11-inch iPad Pro, and third-generation 12.9-inch iPad Pro.
eSIM Carrier Activation: Some carriers can assign a new eSIM to your iPhone, making it easy to switch to a new iPhone or enable an eSIM-based plan after setup. eSIM Carrier Activation involves following a few simple onscreen instructions where you basically acknowledge that activation is happening. Make sure you can place a phone call afterward, and if you’re switching from a SIM card, remove it and restart your iPhone.
eSIM Quick Transfer: If you’re transferring a SIM or eSIM from an old iPhone to a new one and you have both at hand, you may be able to use eSIM Quick Transfer. It will provide instructions during setup, or you can initiate it after setup with Settings > Cellular > Add Cellular Plan and either selecting a plan from a list or tapping Transfer From Another Device. You can also convert a physical SIM to an eSIM on the same phone if your carrier supports eSIM Quick Transfer; check to see if Settings > Cellular has a Convert to eSIM option. If so, tap it and follow the instructions.
Scan a QR code or use a carrier app: Carriers that don’t support eSIM Carrier Activation or eSIM Quick Transfer initiate setup by providing either a QR code you can scan—during setup or afterward—or a custom app. Either way, follow the iPhone’s instructions to complete the setup.
Although we’ve become accustomed to swapping SIM cards in and out of our iPhones such that eSIM feels new and confusing, it should be a better overall solution that’s easier to set up, less error-prone, and more secure. There may be some short-term annoyance for US iPhone 14 owners who travel internationally, but we anticipate that will dissipate over time as international carriers start supporting eSIM.
(Featured image by iStock.com/fz750)
Social Media: Apple has gone all-in on eSIM, eliminating the SIM tray from iPhone 14 models sold in the US. What’s eSIM? Glad you asked—read on for the details of the technology and why it’s better than SIM cards.
https://f11photo.com/wp-content/uploads/sites/13/2022/11/SIM-cards-photo.jpg8001280F-11 Photohttps://f11photo.com/wp-content/uploads/sites/13/2023/06/PR-F11Photo-logo.jpgF-11 Photo2022-11-01 14:34:002022-11-30 16:43:55Apple Is Driving the iPhone to eSIM: Here’s What You Need to Know
The iPhone has long been able to play clicking sounds when you tap the keys on the virtual keyboard, but that feedback, while sometimes welcome, can become annoying when you’re trying to be quiet. A new feature in iOS 16 provides haptic feedback—tiny taps you can feel in your fingertips as you tap keys on the keyboard. It’s a subtle but highly effective way of mimicking a real keyboard, and we encourage you to try it. Turn the feature on in Settings > Sounds & Haptics > Keyboard Feedback. (While you’re there, try turning off Sound; it may no longer be necessary.)
(Featured image by iStock.com/Yosi Azwan)
https://f11photo.com/wp-content/uploads/sites/13/2022/10/Keyboard-keys-photo.jpg8001280F-11 Photohttps://f11photo.com/wp-content/uploads/sites/13/2023/06/PR-F11Photo-logo.jpgF-11 Photo2022-10-03 14:08:002022-11-01 12:06:41Add Haptic Feedback to the iPhone Keyboard in iOS 16
Back in 2017, when Apple added the notch to the iPhone X for Face ID, the resulting loss of usable screen real estate caused the company to remove the battery percentage indicator from the status area. Since then, you’ve only been able to estimate how much battery life you had left from the icon; you had to open Control Center to see the numeric percentage. In iOS 16, however, Apple has revived the battery percentage indicator for Face ID iPhones, building it into the battery icon itself so it doesn’t occupy more of the status bar. Unfortunately, it’s not available on the iPhone XR, iPhone 11, iPhone 12 mini, or iPhone 13 mini, perhaps due to a lack of sufficient screen resolution. Everyone else can enable it in Settings > Battery.
(Featured image by Adam Engst)
https://f11photo.com/wp-content/uploads/sites/13/2022/10/iOS-16-Battery-Percentage-photo.jpg8001280F-11 Photohttps://f11photo.com/wp-content/uploads/sites/13/2023/06/PR-F11Photo-logo.jpgF-11 Photo2022-10-03 14:07:002022-11-01 12:06:42Bring Back the Battery Percentage Indicator in iOS 16
We’ve recently worked with a few clients who were paying too much for their Internet or cellular service. Internet service providers (ISPs) and cellular carriers occasionally adjust their service plans to account for new technologies, economies of scale, changing competitive landscapes, and marketing efforts. Sometimes they’ll increase speeds or capabilities across the board, but more often, when they debut new plans, current customers are grandfathered into their existing plans, often without notification. Upgrading to a new, better plan is usually simple—first, check the plan details on your ISP’s or cellular carrier’s website. Then, if they look better or cheaper—or if you don’t remember what service levels you should be getting—call the company’s support line and ask if switching plans would be beneficial. Beware that they may try to upsell you on a more expensive plan, so agree to switch only if you’ll end up paying less or getting significantly more. Remember, more speed isn’t necessarily worthwhile—most people won’t notice the difference between 250 Mbps and 1 Gbps, for instance.
(Featured image by Adam Engst)
https://f11photo.com/wp-content/uploads/sites/13/2022/10/Check-ISP-plans-photo.jpg8001280F-11 Photohttps://f11photo.com/wp-content/uploads/sites/13/2023/06/PR-F11Photo-logo.jpgF-11 Photo2022-10-03 14:05:002022-11-01 12:06:44Are You Paying Too Much for Internet or Cellular Connectivity?
iOS 16 has been out for a bit now, and it’s likely safe to upgrade as long as you don’t rely on obsolete apps that might not be compatible. When you take the plunge, the first new feature to check out is the capability to create, customize, and switch among multiple Lock Screens, each with its own wallpaper, clock font, and widgets. It’s reminiscent of how you customize Apple Watch faces. Plus, you can now link a Lock Screen to a Focus so you know when that Focus is active.
To get started, touch and hold the Lock Screen until the Lock Screen switcher appears. (Your iPhone must be unlocked at this point, which can be a bit tricky with a Touch ID-based iPhone—gently touch the Home button to authenticate, but don’t press it or you’ll open the Home Screen.)
Tap the blue plus button to create a new Lock Screen—see below for how to configure it. Once you have several Lock Screens, swipe left and right to pick one, and tap it to make it active. You can customize aspects of a Lock Screen after creating it by tapping the Customize button, and if you don’t like what you’ve done, delete it by swiping up and tapping the trash button.
Wallpapers
iOS 16 offers seven types of wallpapers, which you select while creating a Lock Screen by tapping buttons at the top or samples in a visual gallery below.
Photos: Most people will choose a photo for their wallpaper. iOS 16 uses machine learning to identify images that are likely to work well, separating them with image-selection filters into four categories: People, Pets, Nature, and Cities. You can also scroll through all your photos or particular albums and search for photos. Some people and pets will float above the clock (unless you add widgets), but you can toggle that with the Depth Effect option accessible in the ••• button.
Photo Shuffle: Having trouble deciding which photo you prefer? The Photo Shuffle wallpaper automatically selects and switches between photos for you, letting you specify which categories to use, which people to include, and even which individual photos to show or hide (tap the ••• button to remove a suggested photo from the rotation). You can set the photo to rotate with a tap on the Lock Screen, whenever you lock your iPhone, hourly, or daily.
Emoji: This wallpaper tiles up to six emoji in several different grid sizes and layouts, and you can change the background color by tapping the ••• button. Thanks to Apple’s quality emoji art, the Emoji wallpaper is surprisingly attractive.
Weather: Those who work in windowless offices might particularly appreciate the Weather wallpaper, which changes to reflect the current weather conditions (and time of day) in your location.
Astronomy: For a broader perspective, the Astronomy wallpaper lets you look at the Earth, Moon, or solar system whenever you pick up your iPhone. Swipe to pick your preferred celestial body and zoom level.
Color: Want something simpler? The Color wallpaper lets you choose a background color gradient from the color picker. Swipe to apply different effects.
Collections: This category, which appears only in the gallery, provides Apple-designed graphics such as Unity, Pride, and the clownfish wallpaper from the original iPhone.
Take some time to explore all the wallpaper types and their options—the combinations are nearly endless. There’s no downside to creating and switching among different Lock Screens as the mood strikes you.
Clock font and color
Once you decide on a wallpaper for a Lock Screen, you can customize the clock font and color by tapping the clock. There are only eight font options, but you should be able to find one you like. With color, Apple provides some suggestions below the font choices, but if you scroll all the way to the right and tap the color wheel, you can use iOS 16’s color pickers to select any color. The goal is to make sure it’s readable against the background image you’ve chosen.
Widgets
Beyond the eye candy of wallpapers and the customizable clock, widgets make the iOS 16 Lock Screen more useful than ever. Some iPhone users are accustomed to having flashlight and camera buttons on the Lock screen—everyone can now add widgets to two distinct zones on the Lock Screen, above and below the clock. The widget zone above the clock holds only a single line of text or other controls, and it always displays alongside the date, which shrinks if necessary. The zone below the clock is taller and can hold two sizes of widgets: small ones that occupy a single slot and large ones that take over two slots. You can mix and match small and large widgets to fill—or not—the four available slots.
To add widgets, tap the desired zone and tap widgets in the panel that appears. Suggestions appear at the top, but if you scroll down, you can see a list of all the apps that offer widgets. Tap an app to see its widgets—swipe to see the full set it offers. Once you’ve added a widget, you may be able to tap it again to configure it—such as by specifying tickers for the Stocks widget. To rearrange widgets, drag them but be aware that this works poorly at the moment; it may be easier to delete the widgets (tap the ⊖ button) and add them again in the desired order.
Focus
Focus subsumed Do Not Disturb in iOS 15. Although Focus is far more flexible and customizable than Do Not Disturb, that power also makes it hard to predict when notifications will be blocked, since it can be difficult to know when a Focus is active. With iOS 16, Apple has made Focus more obvious by letting you link a Focus to a Lock Screen.
When you’re in the Lock Screen switcher, a Focus button appears toward the bottom of each Lock Screen. Tap it and select a Focus to link them.
Two things become true once you’ve linked a Focus to a Lock Screen:
When you activate that Focus in Control Center, or its settings cause it to activate automatically, iOS 16 switches to the linked Lock Screen. That’s handy if you have a manually triggered Focus for family time, for instance, or an automatically activated Focus for Driving.
When you switch to a particular Lock Screen, its linked Focus activates and starts blocking notifications. It’s probably easier to activate a Focus in Control Center, but switching Lock Screens has the same effect.
It may take a few weeks to figure out what Lock Screens you prefer and customize them to your liking, but we think you’ll enjoy this new feature.
(Featured image by Adam Engst)
Social Media: iOS 16’s marquee feature is customizable Lock Screens—read on to learn how to make multiple Lock Screens, each with its own wallpaper, clock font and color, and interactive widgets.
https://f11photo.com/wp-content/uploads/sites/13/2022/10/Lock-Screen-photo.jpg8001280F-11 Photohttps://f11photo.com/wp-content/uploads/sites/13/2023/06/PR-F11Photo-logo.jpgF-11 Photo2022-10-03 14:04:002022-10-19 09:32:04The Many New Lock Screen Customizations in iOS 16
In iOS 14, Apple overhauled widgets, allowing you to add them to your Home screen in addition to the Today View accessible by swiping right on the Home screen. App developers responded with a slew of new widgets, but old-style widgets that are limited to Today View remain available. If you no longer want these older widgets cluttering the bottom of your Today View, here’s how to remove them. Swipe right on the Home screen to enter Today View. At the bottom of Today View, tap the Edit button, and at the bottom of the collection of old-style widgets (new-style widgets wiggle), tap Customize. In the Add Widgets screen, tap the red ⊖ button next to each widget you want to delete and confirm by tapping Remove.
(Featured image by Adam Engst)
https://f11photo.com/wp-content/uploads/sites/13/2022/09/Remove-old-widgets-photo.jpg8001280F-11 Photohttps://f11photo.com/wp-content/uploads/sites/13/2023/06/PR-F11Photo-logo.jpgF-11 Photo2022-09-01 14:36:002022-10-03 06:34:21Remove Old-Style Today View Widgets from Your iPhone