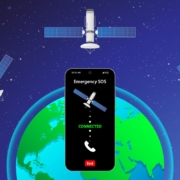
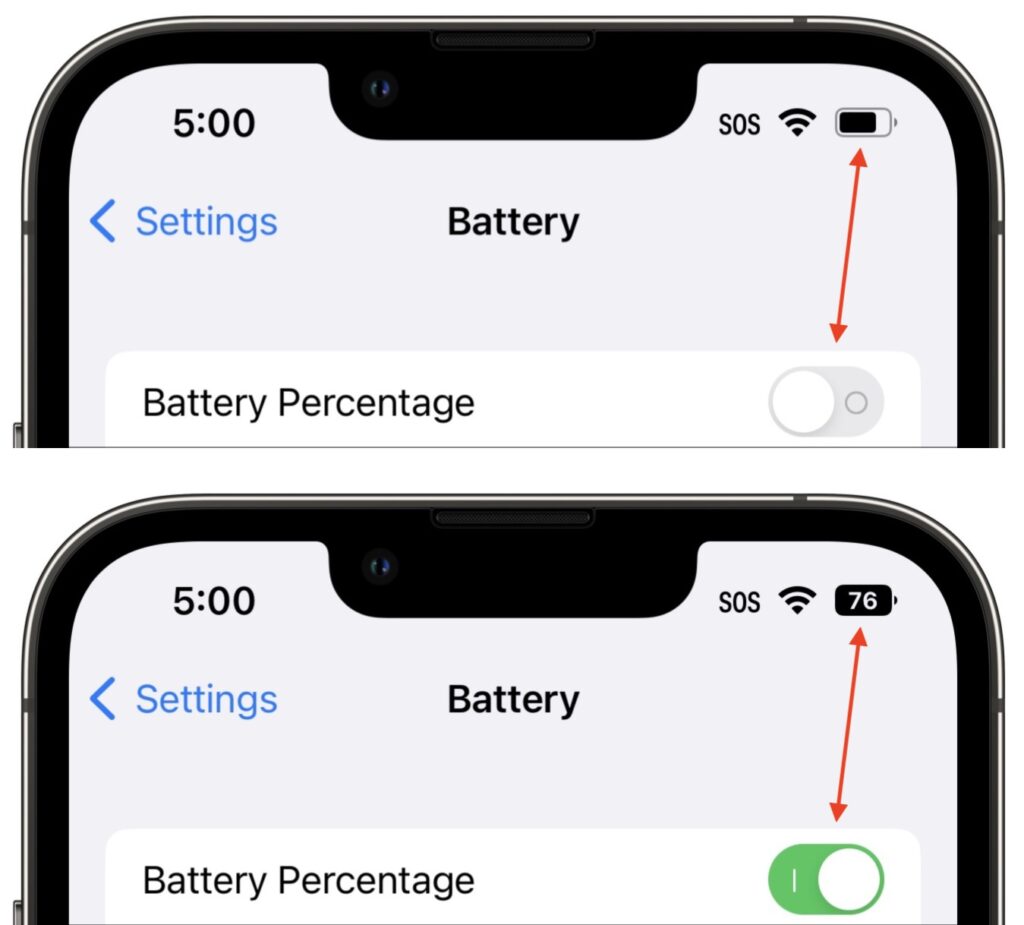
In mid-November, Apple launched its new Emergency SOS via satellite feature for the iPhone 14 lineup. If you have an iPhone 14 and find yourself in an emergency situation in the US or Canada without cellular or Wi-Fi service, you can still contact emergency services. Apple says the service will expand to France, Germany, Ireland, and the UK in December 2022. The service is free for 2 years, and Apple hasn’t said what it will cost after that.
The challenge we users face with Emergency SOS via satellite is that it works only when you have no cellular or Wi-Fi service, and nearly all the time when you’re in such a situation, there’s no emergency. So if something bad does happen when you’re far from civilization, you may not be in the best state of mind to use Emergency SOS for the first time.
Apple has thought of that and provides two ways to get some experience talking to a satellite. One is the Emergency SOS via satellite demo, which you can try anytime. Or, for a real-world test of the system when you have no cellular or Wi-Fi coverage, you can try sharing your location via satellite using the Find My app. Once you’re outside with a clear view of the sky, here’s what to do.
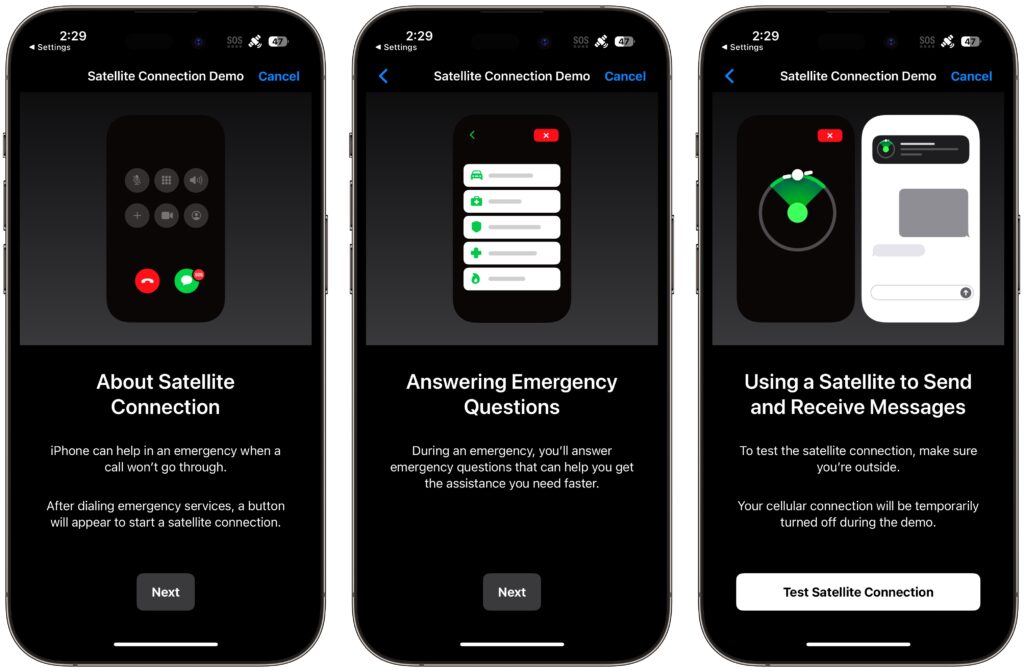
Emergency SOS via Satellite Demo
To get started with the Emergency SOS via satellite demo, go to Settings > Emergency SOS, scroll down, and tap Try Demo. First, the iPhone walks you through several screens that turn off cellular, explain how the system works, and tell you that in a real emergency, you’ll answer a series of standard questions to help the dispatcher send the help you need.

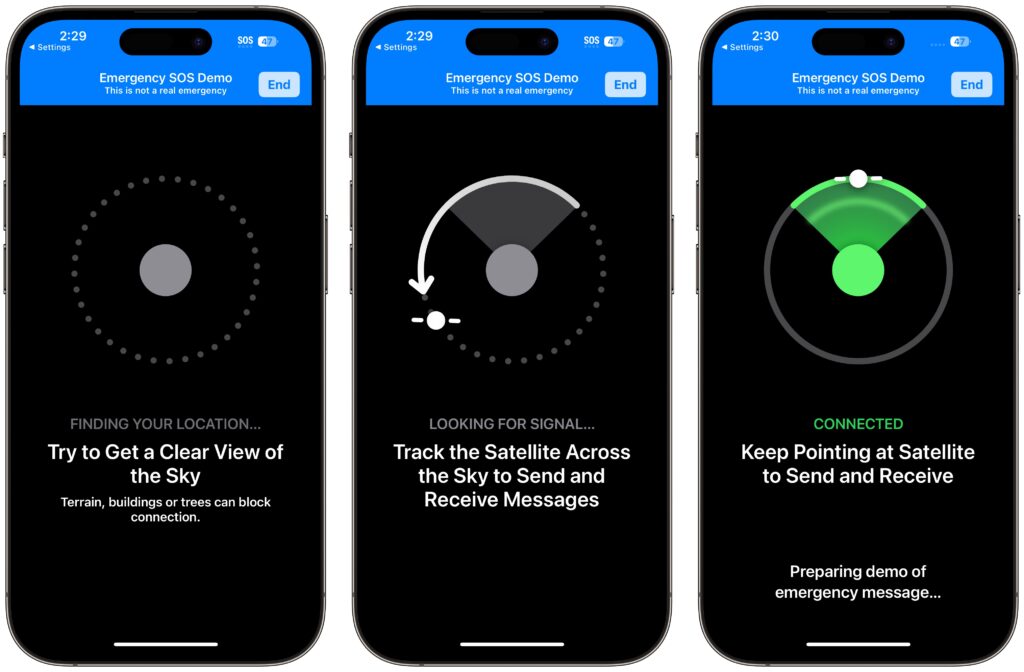
Next, the demo teaches you how to find and connect to a satellite. Along with asking you to turn left or right—follow the arrows on the locator until it turns green—the demo may tell you that you have to wait for a few minutes until another satellite comes into range.
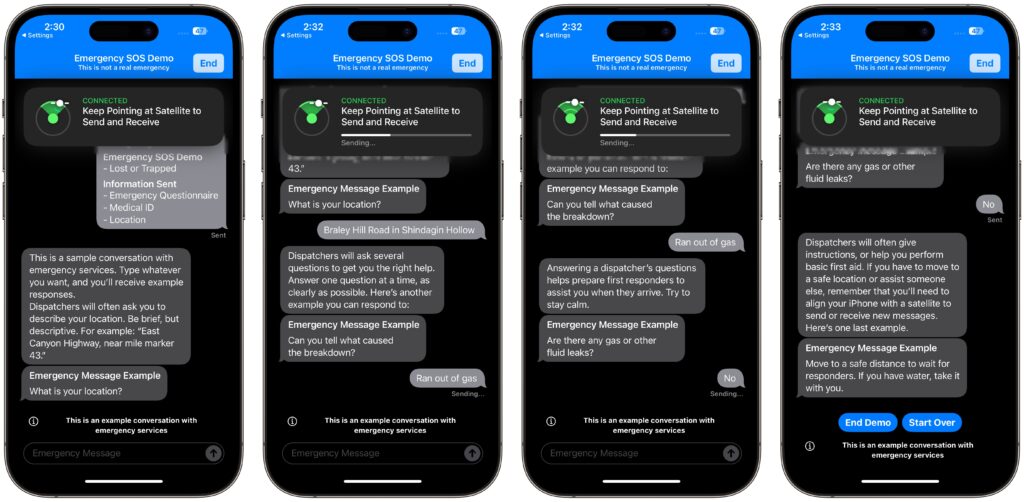
You won’t run through the same questionnaire you would in a real emergency, though. Instead, you get canned texts that mimic the conversation you might have with a real dispatcher. You can reply however you want, but it won’t change the responses. When you finish, tap End Demo.
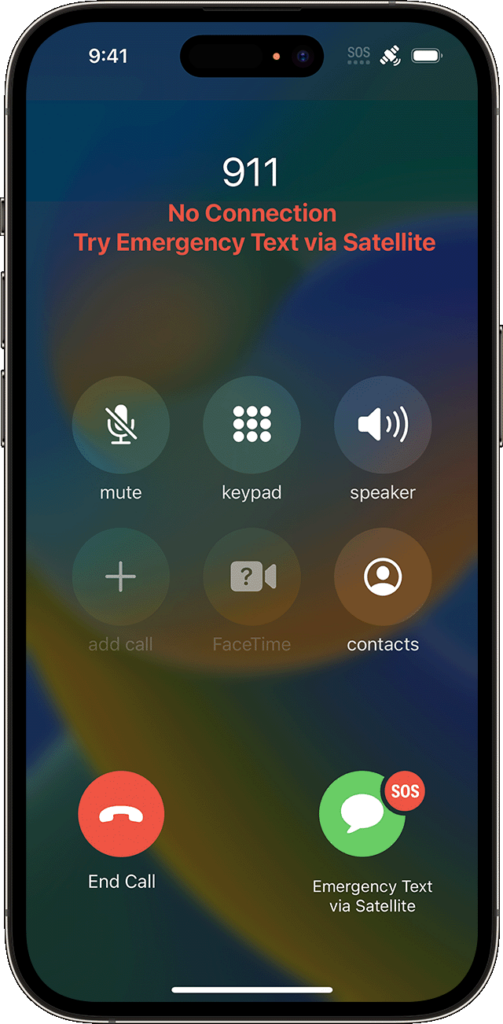
Remember, in a real emergency, you’d dial 911 or invoke Emergency SOS by holding the side button and either volume button until the Emergency SOS slider appears. The call won’t work, but you’ll be able to start the Emergency SOS via satellite process for real.
Share Your Location with Find My via Satellite
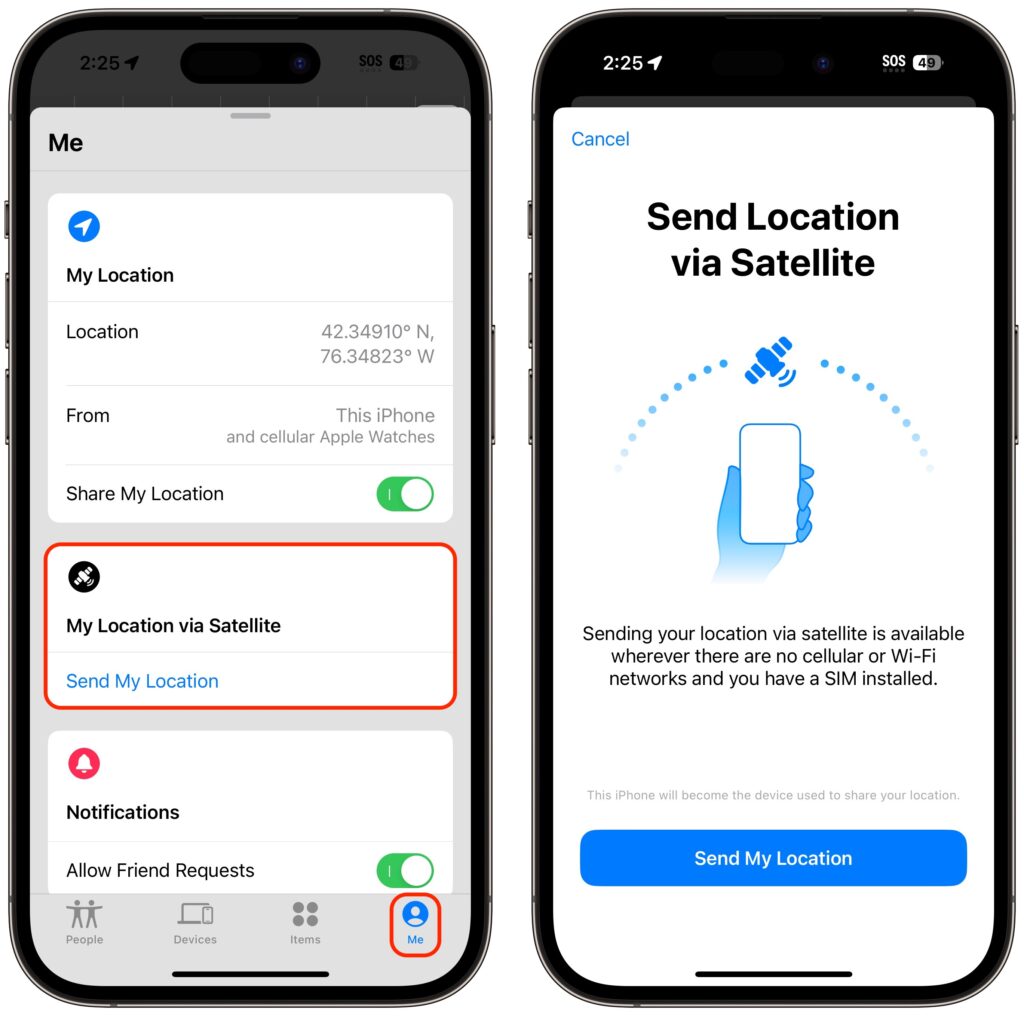
As welcome as Emergency SOS via satellite will be if you ever need it, Find My via satellite may have more real-world utility right now. It enables you to share your location manually via the Find My app, regardless of the situation. Once you complete the process, anyone with whom you share your location generally will be able to see the updated-via-satellite location.
To get started in your cellular-free location, open the Find My app, tap Me in the toolbar, and tap Send My Location.
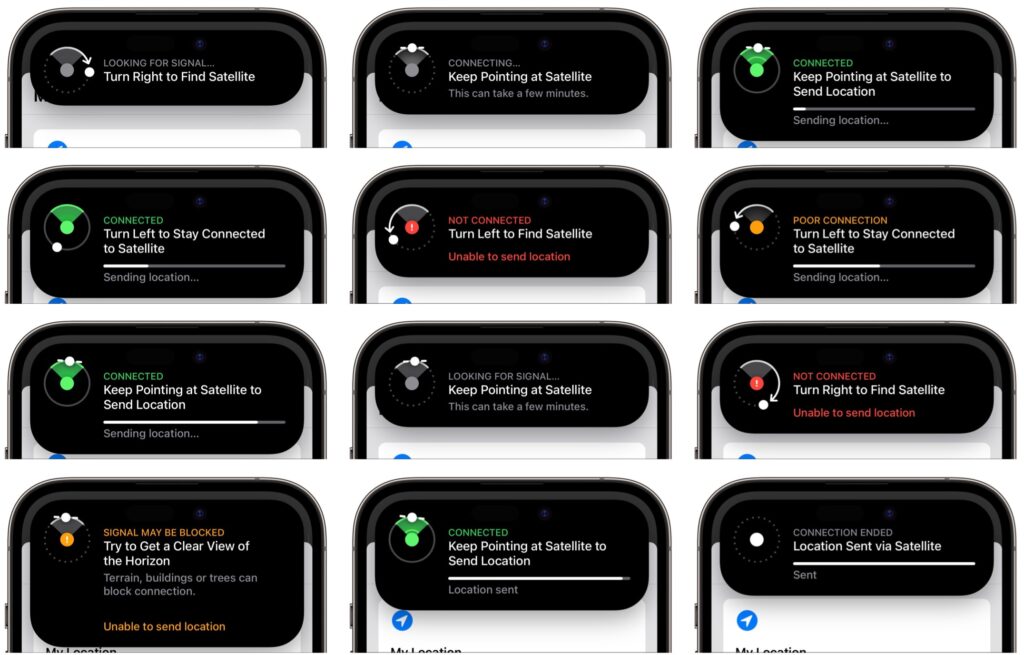
Find My will then start directing you to turn left and right, holding your iPhone up to the sky and pointing it at the satellite. A circular direction-finder shows which way to go and when you’re pointing in the right direction. If it fails (as it did in the lower-left message below), you’ll be directed to get a clear view of the horizon. If you’re in a deep valley, climbing higher may solve the problem, as it did in our test. The process isn’t quick, but the constant feedback and progress bar ensures that you feel like it’s doing something the entire time.
It’s important to realize that no one will be notified of your location, and you have no other way to communicate with people via satellite. So you’ll want to make plans with a friend or family member before you go into a situation where you could need help without having cellular service. Have a conversation beforehand so they know to look for you in Find My if you don’t get in touch by a predetermined time.
It would be nice if you could notify family or friends of your location for situations where you’d like help but don’t need emergency services. In the future, Apple could use the Send My Current Location option in Messages, but that doesn’t work via satellite now. Regardless, Emergency SOS and Find My via satellite are tremendously impressive, and we expect Apple to enhance the iPhone’s satellite communication capabilities in future iPhones and versions of iOS.
(Featured image by iStock.com/AntonioFrancois)
Social Media: For iPhone 14 owners, the future is here today with Emergency SOS and Find My via satellite, which let you contact emergency services and share your location by talking to a communications satellite. Learn how to try it here: