If a new Mac has recently arrived in your life, it may be time to hand your old Mac down to a friend or family member, pass it on to a coworker, or send it back to Apple for recycling. Here’s what to do.
Backup
Before anything else, make a backup, just in case. Do this even if you’ve already migrated your data to your new Mac, since it’s possible that data could have been corrupted during the transfer without you realizing. At minimum, update your old Mac’s Time Machine backup by clicking the Time Machine icon in the menu bar, and choosing Back Up Now. For extra safety, consider using an app like Carbon Copy Cloner or SuperDuper to make a bootable duplicate that will be easier to navigate if you need to recover a file.
Deauthorize iTunes and Other Apps
It’s uncommon for apps to have licensing schemes that are tied to your Mac’s hardware these days, but if you have any, such as those from Adobe, be sure to deauthorize or deactivate them.
However, there is one app that most people will need to deauthorize: iTunes. That’s because Apple allows you to play content purchased from iTunes only on up to five computers associated with your Apple ID, so be sure to deauthorize Macs that you won’t use again before passing them on.
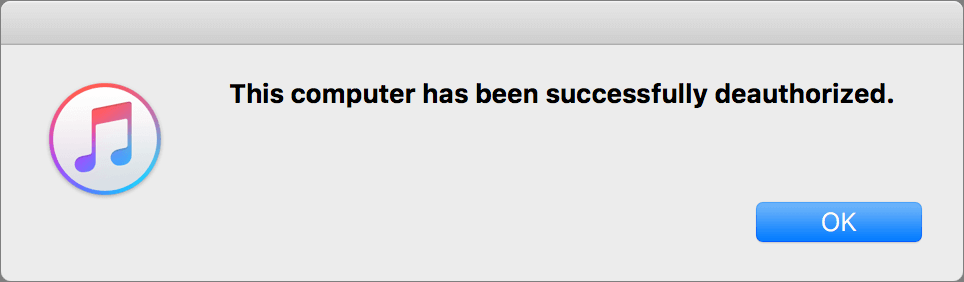
To do this, open iTunes and choose Account > Authorizations > Deauthorize This Computer. Enter your Apple ID credentials when prompted.

If you’ve forgotten to do this, you can deauthorize all your computers once per year (and then add back those you still have). To do this in iTunes, choose Account > View My Account, and in the Apple ID Summary next to Computer Authorizations, click Deauthorize All.
Sign Out of iCloud
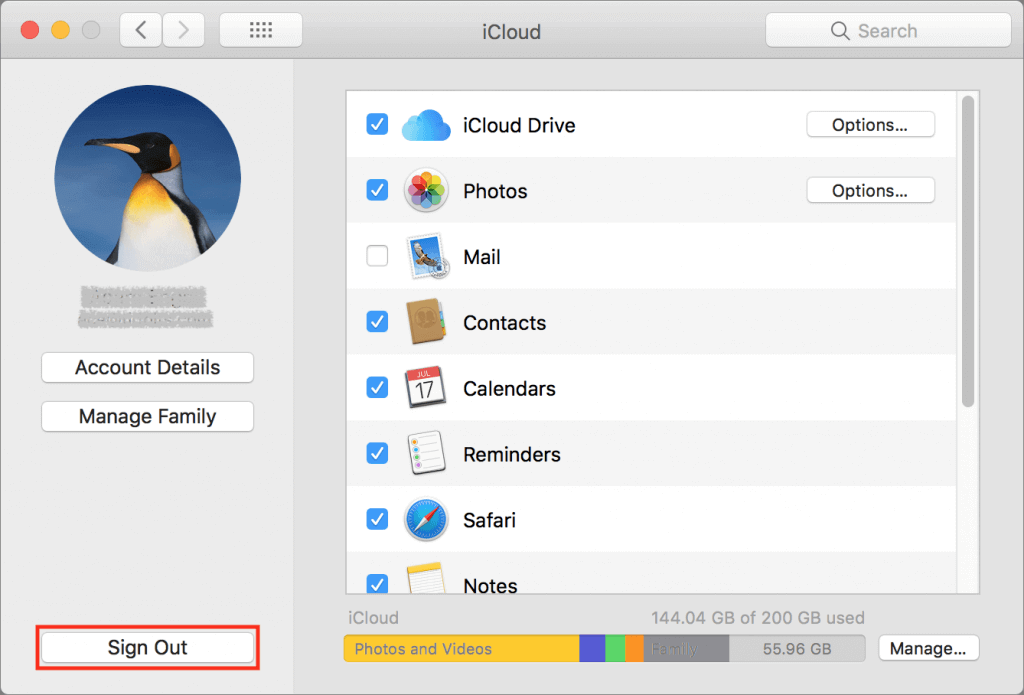
Next, you should sign out of iCloud to remove any connection between your iCloud account and the old Mac. Doing so disconnects the Mac from synchronization of your iCloud data.
To do this, open System Preferences > iCloud, and click the Sign Out button. If you’ve been syncing via iCloud Drive, Calendar, Contacts, Reminders, and so on, the Mac will ask if you want to keep the data on the Mac or delete it. Don’t bother deleting it since you’ll erase the Mac’s drive in a future step.
Sign Out of iMessage
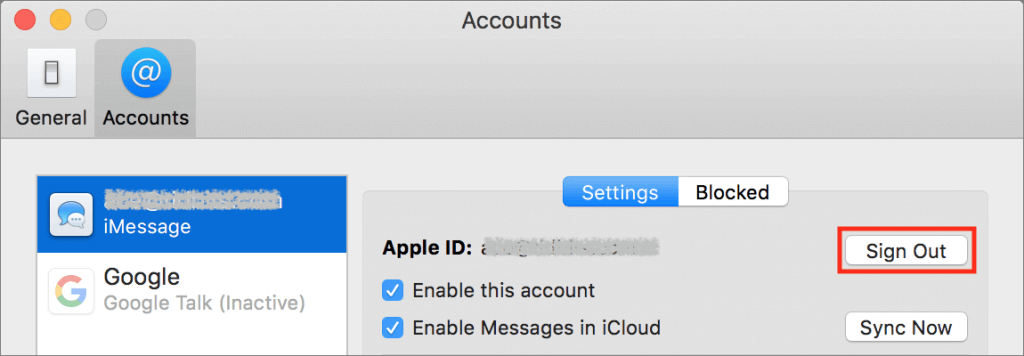
Much as with iCloud, you should sign out of your iMessage account, at least if your Mac is running OS X 10.8 Mountain Lion or later. To do this, open Messages and choose Messages > Preferences > Accounts. Select your iMessage account and click Sign Out. (In 10.14 Mojave, instead of clicking Accounts in the toolbar, click iMessage.)
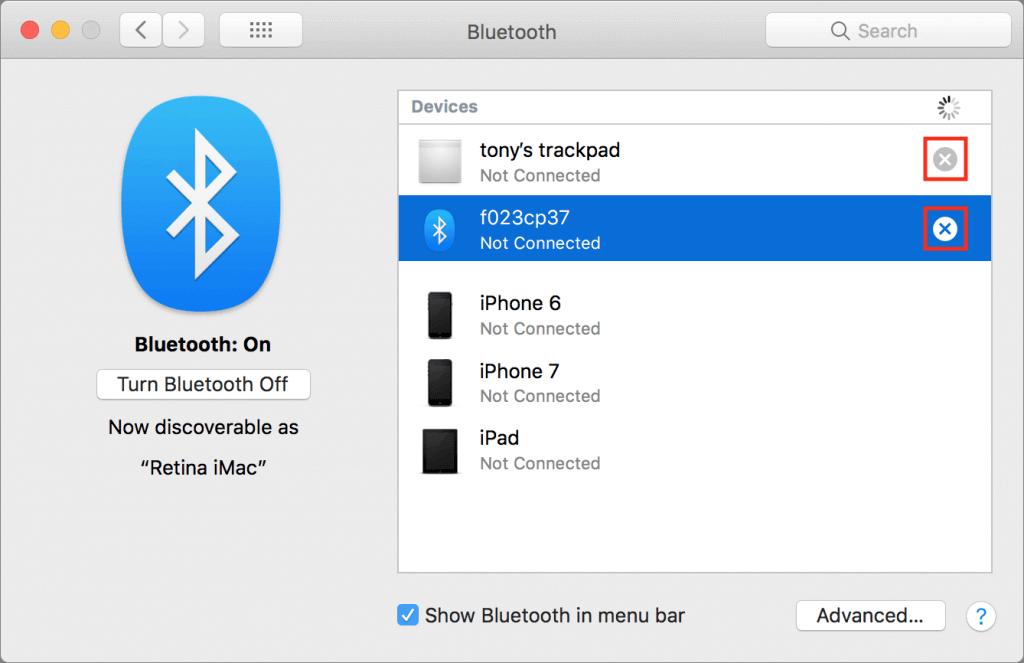
Unpair Bluetooth Devices
If you’re giving your Mac to another user along with its Bluetooth devices, such as a wireless keyboard and trackpad, you don’t need to do anything with them. However, if you plan to hang on to your Bluetooth devices and use them with another Mac, you should unpair them. That’s especially true if someone else in your home or office will be using the old Mac, since the device might end up working on multiple Macs, which could cause confusion.
Before you unpair a wireless keyboard and mouse or trackpad, however, make sure you have a wired keyboard and pointing device available, since you won’t be able to erase the drive and reinstall macOS without them. If you lack wired alternatives, don’t unpair your keyboard and pointing device.
To unpair Bluetooth devices, open System Preferences > Bluetooth, and in the list of devices either hover over a device or select it. Then click the X button to the right. When prompted, click Remove.
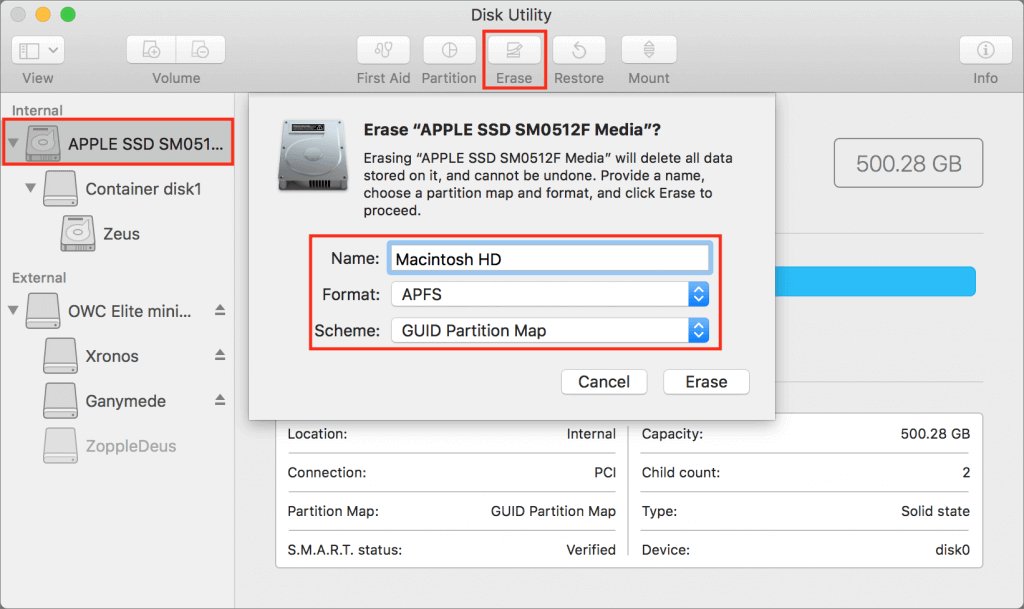
Erase the Drive and Reinstall macOS
Here’s the most important step—erasing the Mac’s drive. After all, you don’t want the next user to be able to access all your photos, documents, email, and more. Luckily, this is easy to do.
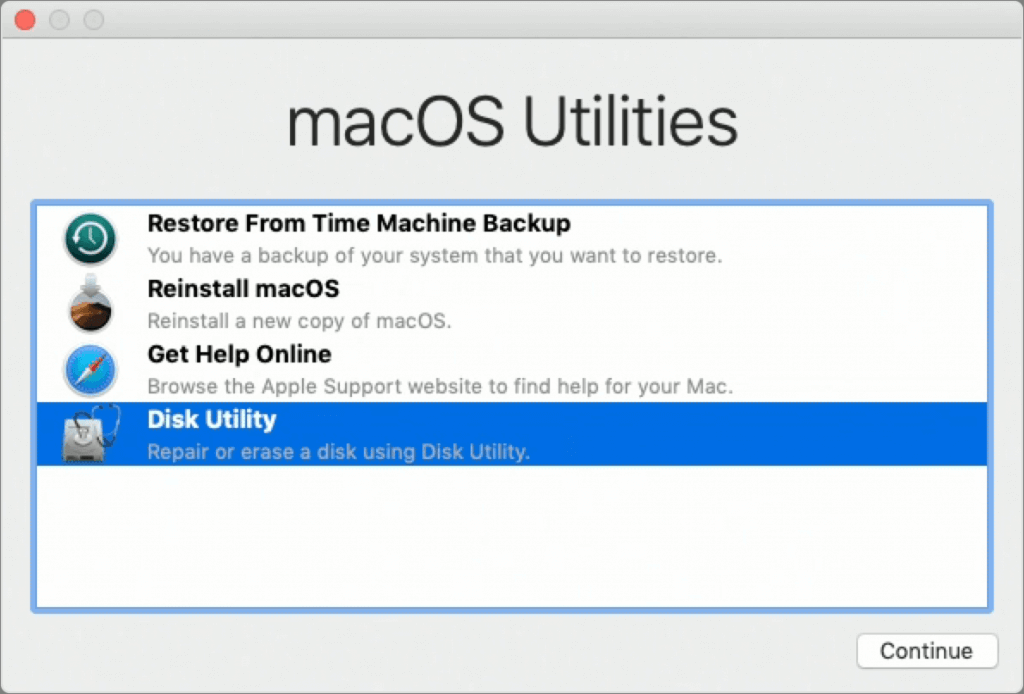
First, start up from macOS Recovery by holding down Command-R while the Mac boots. In the macOS Utilities window that appears, select Disk Utility and click Continue.
In Disk Utility, select the internal drive, click Erase in the toolbar, and in the dialog that appears, enter a new name, choose a format, and choose GUID Partition Map for the scheme. For the format, stick with the default, since the macOS installer will convert it later if necessary. Quit Disk Utility when you’re done.
Once the drive is erased, you’ll be returned to the macOS Utilities window, where you can select Reinstall macOS (or Reinstall OS X, if it’s an older Mac) and click Continue. Obviously, if you’re sending it back to Apple for recycling, there’s no reason to do this.
The installation process takes time, and when it’s done, the Mac will restart into the setup assistant. Press Command-Q at the Welcome screen to shut down. When the new user starts the Mac up again, they’ll be able to continue with the setup process. That’s it—now you’re ready to give the Mac to its next user.
Social Media: If you’re passing an old Mac on to a colleague, friend, or family member—or returning it to Apple for recycling—follow these steps to prepare it for its next stage in life and ensure that no one will be able to access your data.