Posts

Most Pantone Color Books for Adobe Creative Cloud to Require Pantone Connect License

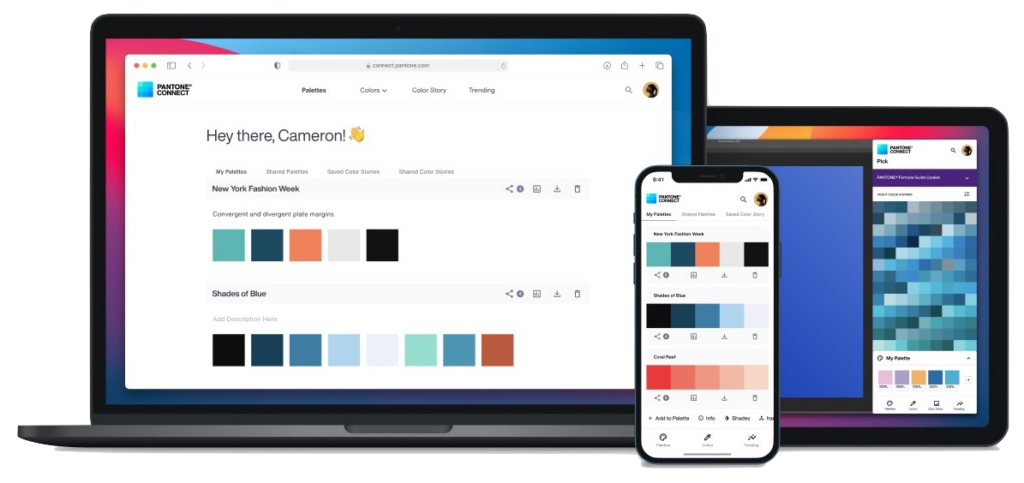
Adobe says that Pantone Color Books will be phased out of Adobe Creative Cloud apps, starting with updates to Illustrator, InDesign, and Photoshop released after August 16, 2022. After November 2022, only three Pantone Color Books will remain: Pantone + CMYK Coated, Pantone + CMYK Uncoated, and Pantone + Metallics Coated. To access all other Pantone Color Libraries, Creative Cloud users will need to purchase a Pantone Connect license and access the libraries through the Pantone Connect plug-in. Pantone Connect costs $59.99 per year or $7.99 per month. For the most part, existing files should continue to work as before, although Adobe offers details of how files in Illustrator, InDesign, and Photoshop may be affected.

(Featured image based on an original by iStock.com/Kanizphoto)

What’s That Little Orange Dot by Control Center in macOS 12 Monterey?

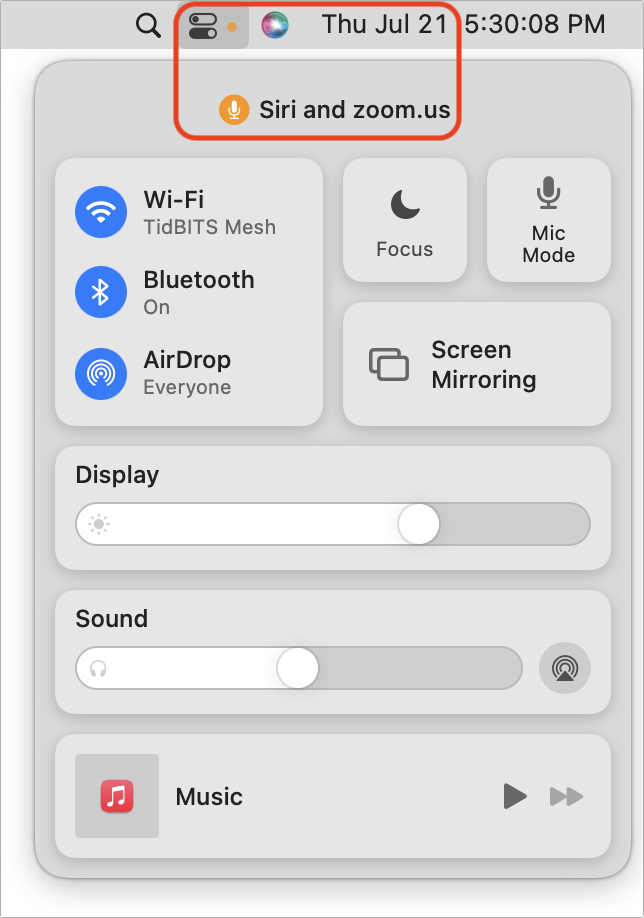
Have you noticed a little orange dot next to the icon for Control Center on the menu bar in macOS 12 Monterey? (And if not, you can’t miss it now.) Apple added that dot to alert you that something is using the Mac’s microphone to listen to the room. Click the Control Center icon to see which apps are using the mic. In nearly all situations, it will be entirely innocuous: Siri needs to listen for the “Hey, Siri” trigger, as in the screenshot below, and the Zoom app needs microphone access to provide audio in a video call. But if you don’t recognize the app that’s listening, you’ll want to look into it to make sure there’s nothing creepy going on.

(Featured image by iStock.com/Mihajlo Maricic)

Go Beyond Get Info with the Finder’s Inspector Window

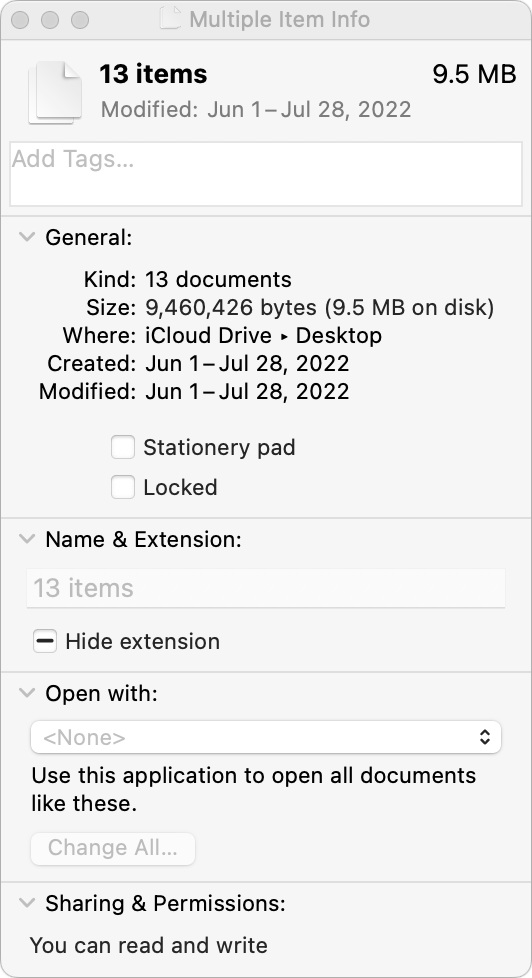
You probably know that selecting a file in the Finder and choosing File > Get Info (Command-I) brings up the Get Info window. This window provides information about the file, including its name, kind, size, creation and modification dates, and much more. You can also use Get Info to hide or show filename extensions, lock and unlock files, and change permissions. But what if you want to do those things to multiple files or figure out how large a set of files is? Turn to the Finder’s Inspector window instead. Select multiple files, hold down the Option key, and choose File > Show Inspector (Command-Option-I). The Inspector window looks and works almost exactly like the Get Info window. As a bonus, if you leave the Inspector window open, it updates to reflect whatever you select in the Finder—that’s faster than opening Get Info repeatedly for different items.

(Featured image by iStock.com/ipuwadol)

Choosing the Best Mac for a College-Bound Student in 2022

Do you have a child starting college soon? It’s likely that your kid has been relying heavily on a computer throughout high school, but if it was a school-provided laptop or shared family computer, now’s the time to get them something of their own. And even if they had their own laptop throughout high school, if it’s old or unreliable, college is a good excuse to bring them up to date. If you haven’t been paying close attention to Apple’s Mac lineup, you might wonder which model makes the most sense.

First, don’t buy anything without first checking with the college. Many college departments have specific requirements based on the software students use in their classes. Generally, these revolve around processor type, amount of RAM, and storage space. Luckily, current Macs should meet the requirements. Second, see if the college provides access to education pricing—most will—to save a few hundred dollars.

Colleges often specify—and students usually prefer—laptops instead of desktop machines. Although the 24-inch iMac is an excellent machine with a gorgeous screen, it’s too big and unwieldy for the transient lifestyle of the typical college student. The same applies to a Mac mini or Mac Studio with an external display. A laptop is much easier to pack during moves, and it can travel to class every day. A student who’s accustomed to taking notes on an iPad with a Smart Keyboard and Apple Pencil might be able to use that along with a desktop Mac, but most students should focus on Apple’s laptops.

In the past, it was harder to decide which model was best for a given student, but with Apple’s move to the M1 and M2 chips, which significantly outperform the Intel processors used in previous models, the decision is easier. We see three primary scenarios:

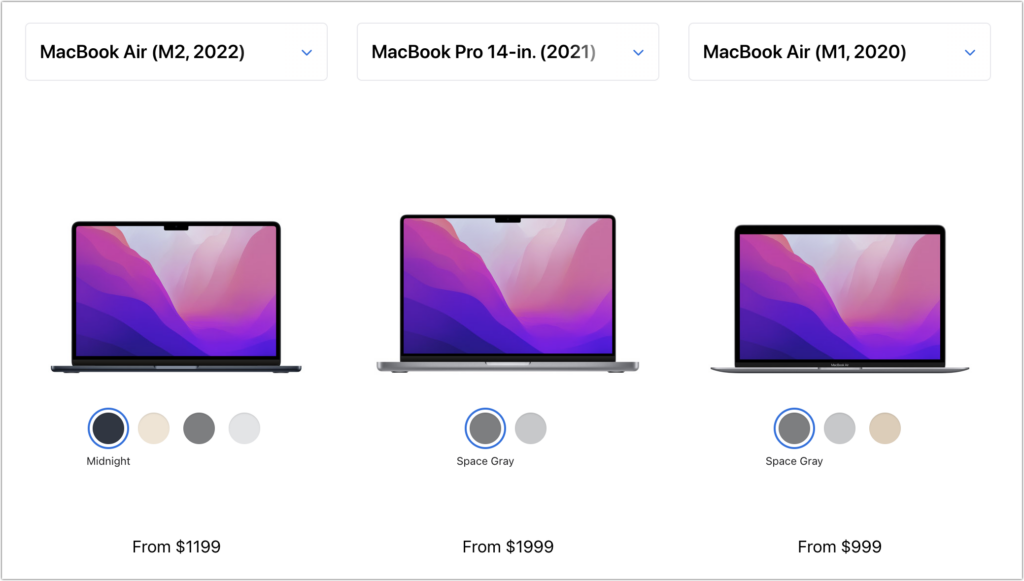
  • Most students: Buy Apple’s MacBook Air. It’s Apple’s smallest, lightest, and least expensive laptop, but thanks to its M1 or M2 processor, it has fabulous performance for everyday tasks. Although the M1 MacBook Air from 2020 remains available for those who need the most cost-effective option (starting at $999), the new M2 MacBook Air is a better choice for most people, thanks to its bigger-brighter-better 13.6-inch screen, faster performance, 24 GB memory ceiling, and higher-resolution webcam. It starts at $1199.
  • Better specs: If performance is more important than cost—particularly if your student will be working with processor-intensive tasks like video editing—look to the 14-inch MacBook Pro. It features an M1 Pro chip that’s more powerful than the base-level M2 and is configurable with an even faster M1 Max chip. Its screen is bigger, and it can take up to 32 GB of memory. Its price starts at $1999.
  • Windows compatibility: The only downside of the transition to Apple silicon is that it’s no longer easy to run Windows using virtualization software like VMware Fusion (free for students) or Parallels Desktop. On M1 and M2 Macs, it is possible to run Parallels Desktop and Windows for ARM Insider Preview, but we can’t recommend that anyone rely on that combination yet. If Windows compatibility is paramount, your choices are a used Intel-based MacBook Pro or—much as we hate to say it—a PC laptop that runs Windows natively.

Regardless of which laptop you decide on, you’ll have to pick a processor, an amount of RAM, and storage capacity:

  • Processor: With the M1 MacBook Air, you’re limited to the M1 chip with an 8-core CPU and 7-core GPU, so there is no choice to make. However, with the M2 MacBook Air, the M2 chip always has an 8-core CPU, but you can pay $100 to upgrade from an 8-core GPU to a 10-core GPU. The performance difference isn’t likely to be noticeable with everyday apps, but for $100, it might be worth it, just in case. The 14-inch MacBook Pro has three M1 Pro options and two more M1 Max options, and choosing among them is probably best done by weighing likely performance needs against the increased cost.
  • Memory: The M1 MacBook Air offers the choice of 8 GB or 16 GB. 8 GB is acceptable for most college students, but we’d encourage 16 GB to reduce the chance that memory becomes a limiting factor in performance. The M2 MacBook Air lets you choose from 8 GB, 16 GB, or 24 GB, and again, we’d default to 16 GB unless there’s some particularly memory-hungry software in play. With the 14-inch MacBook Pro, 16 GB is standard and fine for most tasks, but 32 GB is available if you think it will be necessary, and for seriously intensive work, the M1 Max chip in the 14-inch MacBook Pro offers a 64 GB option.
  • Storage: For both MacBook Air models, 256 GB is the lowest storage level, and you can upgrade to 2 TB. The 14-inch MacBook Pro starts at 512 GB and offers upgrades up to a whopping 8 TB. Choose the amount of storage based on budget—it gets expensive fast—and anticipated usage—audio and especially video can consume a lot of space, as can large numbers of photos, but most other uses don’t. Remember that it’s easy to connect an external Thunderbolt SSD or hard drive to offload large files that don’t have to be kept available at all times.

To our thinking, the most obvious choice for a Mac that’s likely to last for four years of college would be the new M2 MacBook Air with a 10-core GPU, 16 GB of memory, and 512 GB of storage. Be sure to budget for AppleCare+, too; it’s almost guaranteed that some mishap will befall a student laptop, and AppleCare+ covers up to two incidents of accidental damage every year.

You’ll need to have some conversations with your child to find out what they think they’ll need—and be sure to double-check that against the college’s recommendations—but if you have any questions after that, don’t hesitate to contact us.

(Featured image by Apple)


Social Media: Which Mac is best for a new college student? Short answer: the new M2 MacBook Air. Read on for the longer explanation and how we recommend configuring it.

Do You Keep Losing Your Pointer on a Large Screen? Try This Tip for Finding It

A large screen—or several screens!—increases productivity by helping you see more content at once. It’s a big help to refer to a Web page in one window while writing in another, for instance, or to check your calendar while composing an email. But the more screen real estate you have, the easier it is to lose track of the tiny pointer arrow. Happily, Apple added a clever trick for finding the pointer to macOS—quickly slide your finger or shake your mouse back and forth horizontally a few times to enlarge the pointer briefly.

(Featured image based on an original by iStock.com/Fanliso)

How to Recover from Overzealous Auto-Correct Curly Quotes

Most of the time, it’s appropriate when an auto-correct feature turns single and double hash marks into single and double curly quotes. However, there are times when the curly quotes are awkward for some reason or actively wrong. For instance, hash marks indicate feet and inches, as in 5′ 6″. You could attempt to disable the auto-correct feature or copy and paste a hash mark from some other place, but the simple fix is to type the hash mark, watch auto-correct change it, and immediately press Command-Z to revert to the hash mark. We can’t guarantee this will work in all situations, but it’s generally effective.

(Featured image by iStock.com/nicoletaionescu)

Easily Share Wi-Fi Passwords with Other People and Devices

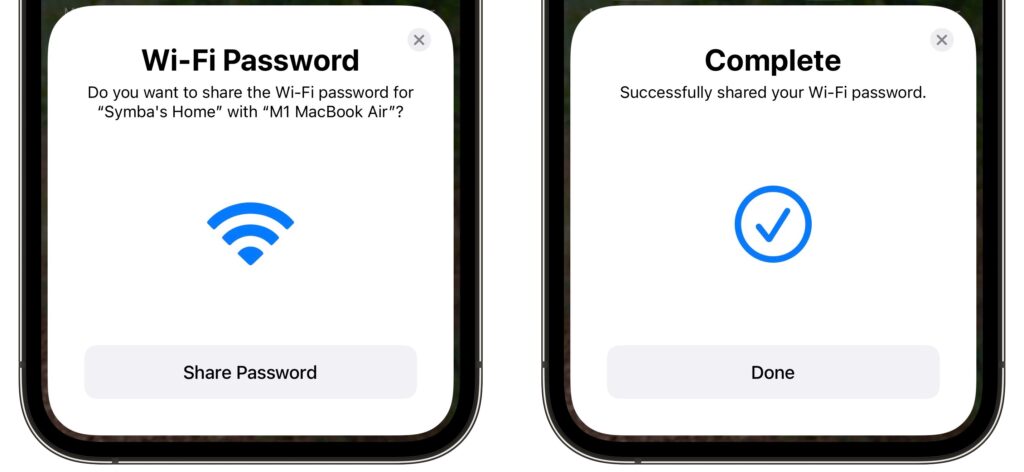
You’re on vacation with your family, staying in an Airbnb, with multiple Apple devices to connect to the apartment’s Wi-Fi. Typing the password repeatedly would be a pain, but happily, Apple has added a password-sharing feature to all its operating systems. Once you enter the password on your iPhone, whenever someone else—or another of your devices—tries to connect to the Wi-Fi network, your iPhone will prompt you to share the password. Tap Share Password and then Done. It’s also a great way to share your home Wi-Fi password with a visitor. (For password sharing to work, both devices must have Wi-Fi and Bluetooth on and Personal Hotspot disabled, and you and the other person must have each other’s Apple ID email address saved in Contacts.)

(Featured image by Adam Engst)

Where to Find Lyrics in Apple’s Music Apps

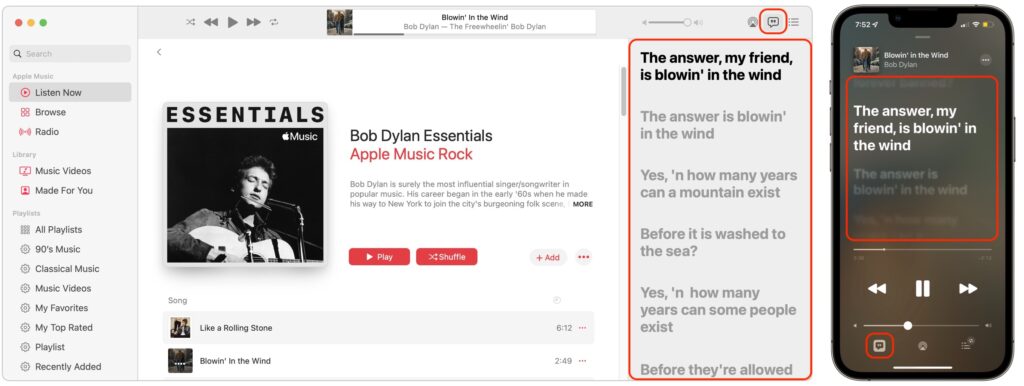
It’s often tough to figure out exactly what a singer is saying (which can lead to some amusing mistakes), but for many songs in Apple Music, you can bring up full lyrics in the Music app, regardless of which device you’re using. On the Mac, click the speech balloon button in the upper-right corner to display the lyrics pane on the right side of the window. On an iPhone, tap the playback controls at the bottom of the screen to bring up the Now Playing view, then tap the speech balloon button in the lower-left corner to show lyrics. Music on the iPad is similar to the iPhone, but the speech balloon button is on the right side. With many songs, the lyrics will scroll as the song plays, but with others, you’ll just get a static display. Either way, you’ll know that the ants, my friends, are not blowin’ in the wind.

(Featured image by iStock.com/Chattrawutt)

The Best Characters to Use When Naming Files and Folders

Back in the early 1980s, DOS filenames couldn’t be more than 8 characters long with a period and a 3-character extension. That was limiting, so when Apple developed the Mac operating system in 1984, it allowed longer names and eliminated the need for an extension, although Mac OS X’s Unix roots meant a return of the filename extension in 2001. Since then, filename restrictions have loosened to the point where it’s easy to think that they no longer exist.

If only that were true! In some ways, the situation has become even cloudier, thanks to additional limitations from file-sharing services like Dropbox, OneDrive, and Box. (Google Drive’s native Web interface reportedly has no naming limitations, but files whose names contain Windows or macOS forbidden characters may not sync via Google Drive’s desktop software.) Plus, people tend to move files between operating systems more than ever before—if you’re sending a file from your Mac to a Windows user through Dropbox, you need to make sure that all three can deal with the filename.

At least length isn’t something that you generally have to think about these days, since both macOS and Windows—and the cloud services—accept filenames up to 255 characters in length. Technically speaking, Windows limits directory paths (the enclosing folder names along with the filename) to 255 characters, but even still, that shouldn’t be difficult to avoid.

What could go wrong if you run afoul of a naming restriction? macOS and Windows may simply not let you type the character—for example, you can’t put a colon in a Mac filename. Putting a period at the start of a Mac or Unix filename will hide the file. Cloud sharing services might rename the file, or you might encounter syncing issues where files don’t appear where they should. Certain characters can also cause trouble when files are used at the command line.

Here are the characters to avoid and the operating systems and services that prohibit them:

  • : (colon): macOS, Windows, Dropbox, OneDrive, Box
  • . (period): macOS (at the start of a name), Dropbox
  • / (forward slash): macOS, Windows, Dropbox, OneDrive, Box
  • (backslash): Windows, Dropbox, OneDrive, Box
  • < (less than): Windows, Dropbox, OneDrive, Box
  • > (greater than): Windows, Dropbox, OneDrive, Box
  • ” (double quote): Windows, Dropbox, OneDrive, Box
  • | (vertical bar or pipe): Windows, Dropbox, OneDrive, Box
  • ? (question mark): Windows, Dropbox, OneDrive, Box
  • * (asterisk): Windows, Dropbox, OneDrive, Box
  • ^ (caret): Windows (using FAT-formatted drives)

In addition, avoid using special characters like the © (copyright) symbol or emoji 🤷🏽‍♂️  in filenames. They might work locally, but all bets are off if you share the files in any way.

A few other recommendations:

  • Avoid unusual punctuation; in particular, note that OneDrive renames filenames containing:
    • , (comma) to ^J
    • # (number sign) to ^N
    • & (ampersand) to ^O
    • ~ (tilde) to ^F
  • Never start or end file or folder names with a space, and avoid spaces in filenames that will be uploaded to a Web or SFTP server.
  • Avoid putting more than one period in a filename, and don’t put a period after a filename extension.
  • Never assume that names are case sensitive—always make sure that similarly named items differ by more than just case.

If all that seems like a lot to keep in mind, here’s the simple rule that will ensure your filenames will work everywhere:

Name files only with uppercase (A-Z) and lowercase (a-z) letters, digits (0-9), and the hyphen (-) and underscore (_), plus a single period (.) and extension.

(Featured image by iStock.com/cosmin4000 and smartstock)


Social Media: You might think that you can name a file or folder any way you want, but macOS and Windows have restrictions on which characters you can use, and the prevalence of cloud sharing services makes it all the more important to avoid prohibited characters.
Apple Discontinues macOS Server—Start Your Migration Plans

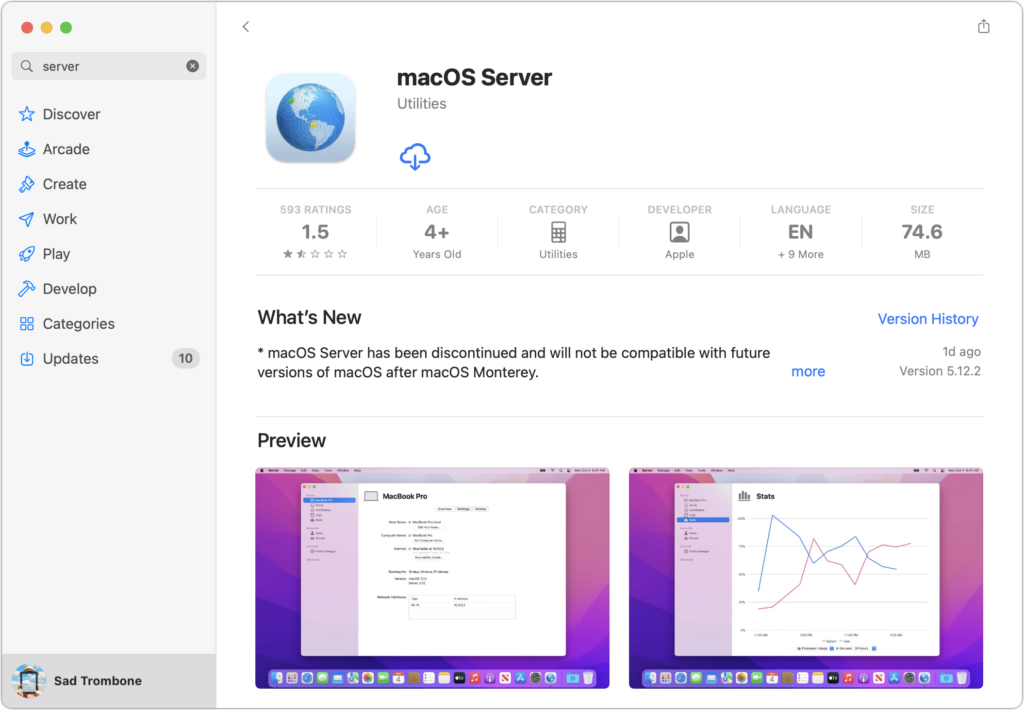
In a move that should surprise no one, Apple has discontinued macOS Server, which started out as a server-focused version of Mac OS X and eventually morphed into a set of add-on network servers for macOS. Exactly what was in macOS Server varied over time, but in 2018, Apple trimmed it to just Profile Manager, Open Directory, and Xsan. That was made possible in part because Apple integrated Caching Server, File Sharing Server, and Time Machine Server into every installation of macOS 10.13 High Sierra and later. If you’re still using macOS Server, you can continue to download (look through your purchases) and use the app with macOS 12 Monterey, but it’s time to start planning your migration since Apple says macOS Server won’t work at all in the next version of macOS. Contact us if you need advice on the best way to proceed.

(Featured image by iStock.com/Daniel Megias)