Text Replacements Not Working on the Mac? Check This Setting
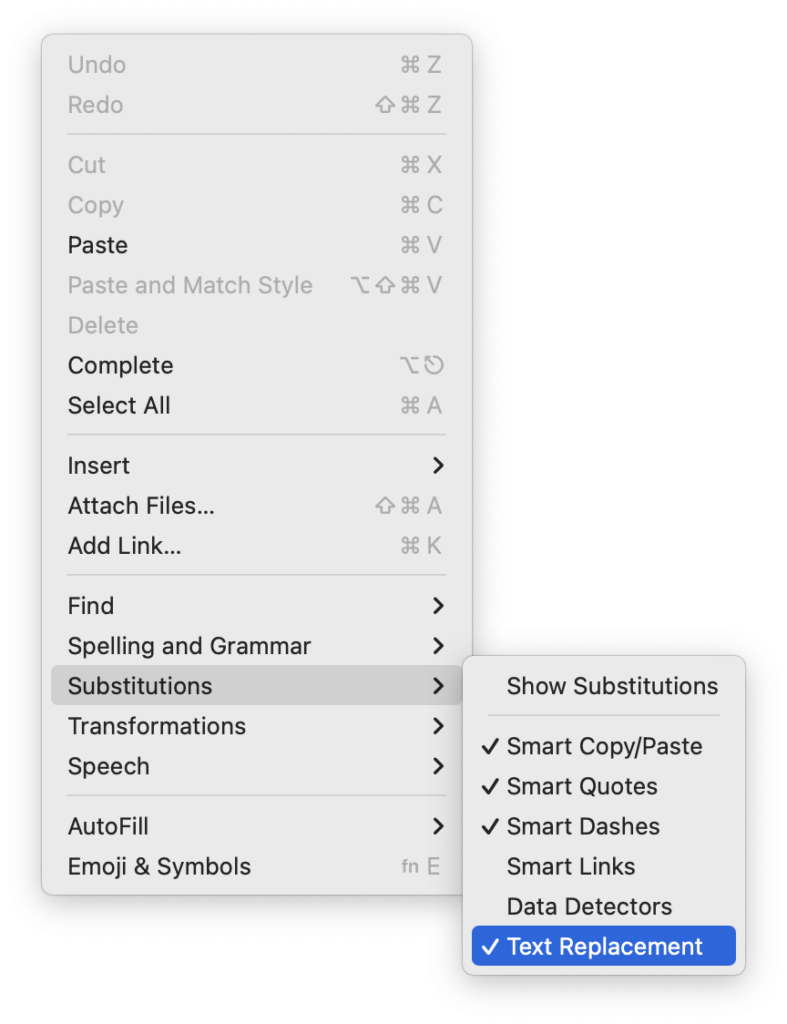
Apple provides a handy ecosystem-wide feature that replaces a typed abbreviation—say “eml”—with text you specify, like your email address. (Seriously, copy that one so you don’t have to type your email address repeatedly.) These automatic text replacements sync via iCloud so you can use them on the Mac, iPhone, and iPad. Find them on the Mac in System Settings > Keyboard > Text Replacements and on the iPhone and iPad in Settings > General > Keyboard > Text Replacement. They’re great, but it can be mysterious when they stop working on the Mac. The culprit? A menu item being turned off. So, if text replacements aren’t working in a particular app, choose Edit > Substitutions > Text Replacement to turn them back on.
(Featured image by iStock.com/tookitook)
Social Media: Apple’s built-in text replacement feature expands a short abbreviation you type into something longer, but a simple menu option can prevent it from working in a Mac app. Here’s how to fix it.