Clean Your iPhone’s Camera Lens
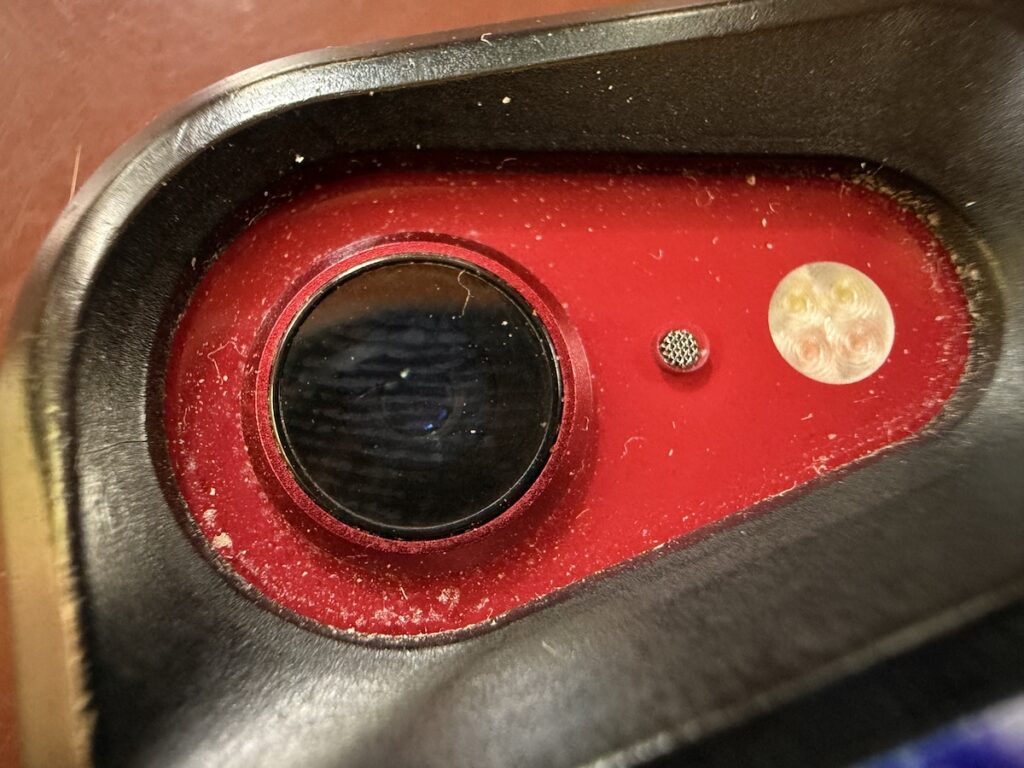
Serious photographers take care of their lenses. The rest of us just stuff our iPhones into our pockets or purses and pay no attention to the fingerprints and grime they collect. If your iPhone’s camera lens is smudged, it will impact the quality of your photos. Take a few seconds to polish it with a microfiber cloth now and then, or, you know, simply wipe it with the edge of your T-shirt. Your photos will thank you.
(Featured image by iStock.com/EyeEm Mobile GmbH)
Social Media: To prevent fingerprint smudges and other grime from impacting the quality of your iPhone photos, clean the lens occasionally with a microfiber cloth or at least the edge of your T-shirt.