Posts

Reveal Your Desktop Quickly with a Keyboard Shortcut

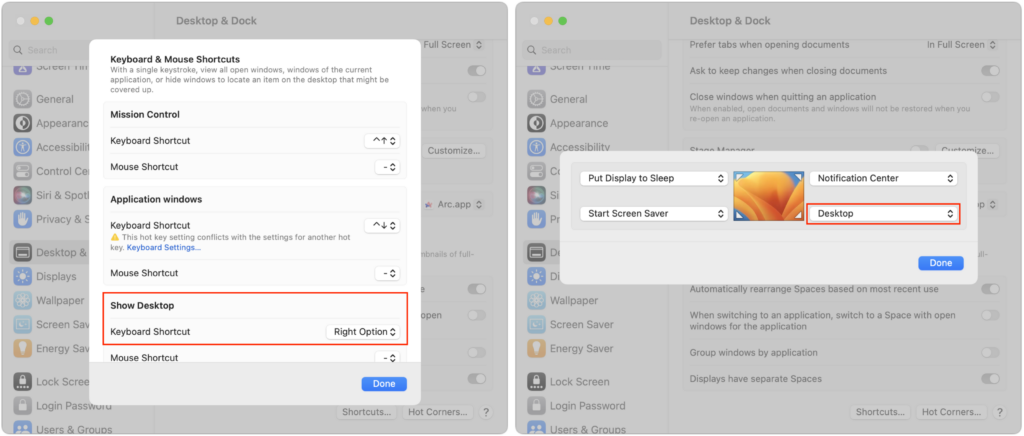
The Mac’s Desktop is a remarkably useful place. It’s a good spot for in-progress documents, screenshots, images dragged out of Web pages, and more. However, app windows tend to obscure the Desktop, making it harder to use. There are two quick ways you can temporarily hide windows, making it easy to access icons on the Desktop. In macOS 13 Ventura, in System Settings > Desktop & Dock, click the Shortcuts button at the bottom and assign a keyboard shortcut to Show Desktop (we like the Right Option key). Or click Hot Corners and choose Desktop for one of the corners. (In macOS 12 Monterey and earlier, look in System Preferences > Mission Control.) Then, press that keyboard shortcut or put your pointer in that corner to move your windows aside temporarily. When you’re done, press the key or move the pointer there again to put the windows back.

(Featured image based on an original by iStock.com/AmnajKhetsamtip)


Social Media: The Mac’s Desktop is a great place for in-progress documents, screenshots, and other things you’re working on, but only if you can get to it easily. Read on for two little-known tricks for temporarily pushing windows aside.

How Often Should Macs Be Replaced?

It’s a question as old as the personal computer. When should you replace your current Mac with a new model that’s faster and more capable? If money were no object, the answer would be easy—whenever you feel like it. For the rest of us, and particularly for organizations with multiple Macs and limited budgets, the question is harder to answer. But answer it we must because most of us can’t do our jobs without a Mac.

Let’s first look at some of the things that might encourage you to upgrade:

  • Performance and resale value: Many companies and large organizations swap out their Macs every 3 to 5 years. That’s considered the sweet spot where performance starts to decline, but resale value remains relatively high. Plus, Macs of that age start to have more problems that may require repair, resulting in lost productivity due to downtime.
  • Hardware limitations: At some point, you might feel your Mac is too slow—you’re seeing the spinning beachball frequently, or tasks are taking too long to complete. Another common concern crops up when you frequently have to shuffle files around to deal with low disk space on the startup drive. Or perhaps the battery life of a Mac laptop isn’t always sufficient for your needs—losing hours of productivity while on an airplane without seat power can be problematic.
  • macOS support: Although there’s no requirement that you run the latest version of macOS, being unable to upgrade is a hint that your Mac is getting older. Apple provides security updates for the two versions of macOS before the current one, so if your Mac can’t stay within that update circle, it will become more vulnerable to security exploits.
  • Physical damage: Macs are fairly durable, which often keeps them running even when the screen is cracked, a key sticks sometimes, or the case has been dented. The more damage your Mac has, the more likely it is that something else will go wrong, potentially at an inconvenient time.
  • General flakiness: It’s hard to quantify this, but an older Mac might start to feel slow, crash more often, or act weirdly. Sometimes those problems can be resolved by reinstalling macOS and apps from scratch, but that’s a lot of work and far from guaranteed.
  • Repair support: Apple guarantees that it will provide parts and service for all products within 5 years of when Apple last distributed them for sale. After that, Apple considers the products “vintage” for the next 2 years and will repair them subject to parts availability. Apple considers products pulled from the market more than 7 years before to be “obsolete” and won’t repair them apart from Mac laptops that are eligible for an additional battery-only repair period.
  • Shiny new Mac: Sometimes, it’s easy to delay a new Mac purchase because none of the Macs seem quite right. At other times, however, the exact Mac you want will be released just when you need it, making for an easy decision.

With those variables in mind, let us offer recommendations for different audiences:

  • Large-fleet organizations: It’s probably not worth the time to consider the needs of every employee in the context of what Mac they have. Instead, create a policy for replacing Macs on a 3- to-5-year schedule you can build into your annual budget. When it’s time to replace a particular Mac, swap it out for a comparable new model and send the old one to a resale organization.
  • Small-fleet organizations: For companies and nonprofits with a smaller number of Macs and a smaller budget, stick with the same 3- to 5-year schedule, but instead of automatically replacing each Mac as its number comes up, use it as an opportunity to evaluate the user’s needs and then either replace the Mac or set the next evaluation date. You may end up replacing Macs slightly less often, perhaps every 4 to 6 years. It’s also more likely that old Macs will be handed down rather than resold.
  • Creatives and freelancers: If you live and die by the work you can accomplish on your Mac, pay regular attention to whether your Mac is meeting your needs. You’ll probably start to notice issues in 3 to 5 years, and as soon as you do, start watching Apple’s releases to see what new Mac might be the best replacement. Also, consider saving a small amount per month with the idea that you’ll have enough to buy your new Mac about the time the old one noticeably starts to cut into your productivity.
  • Home users: As long as the Mac meets your needs and can run a version of macOS that’s receiving security updates, there’s no harm in continuing to use it for 8 years or more. However, if it starts to need hardware repairs and repeated consultant visits, that’s an indication that you should spend the money on a new Mac instead. Once it can no longer run a supported version of macOS, it’s time for a replacement.
  • Fixed budgets: We get it—sometimes there’s no money for a new Mac. Assuming you can accomplish what you need to do and avoid sketchy parts of the Internet, go ahead and run your current Mac into the ground. It could last 10 years or more. And when it comes time to replace it, there’s no shame in looking to the used market—all those Macs that others are replacing often come up for sale at bargain prices.

We hope this has given you some structure for thinking about replacing Macs, whether you’re worried about the Mac on your desk or all those in the entire design department. And, of course, feel free to contact us for help putting together a replacement schedule.

(Featured image by iStock.com/Prykhodov)


Social Media: When should you replace the Mac on your desk—or your organization’s Macs? There is no single answer, but we run down some variables that play into the decision and make recommendations for different use cases.

What’s the Difference between Removing and Deleting an App?

There are many reasons you might want to get rid of apps from your iPhone or iPad. To begin, touch and hold on a blank spot on a Home Screen to enter “jiggle mode.” Then tap the ⊝ icon for any app to see the question about whether to delete the app entirely or merely remove it from the Home Screen. Delete the app if you don’t want to use it anymore or need to reclaim the space it occupies. (You can download it from the App Store again.) Remove the app from the Home Screen if you want to reduce clutter, keep the app on your device, and don’t mind opening it from the App Library (swipe left past all the Home Screens) or from Search (swipe down from the middle of the screen).

(Featured image based on an original by iStock.com/Photosbypatrik)

Quickly Put Lots of Files in a Folder with One Command

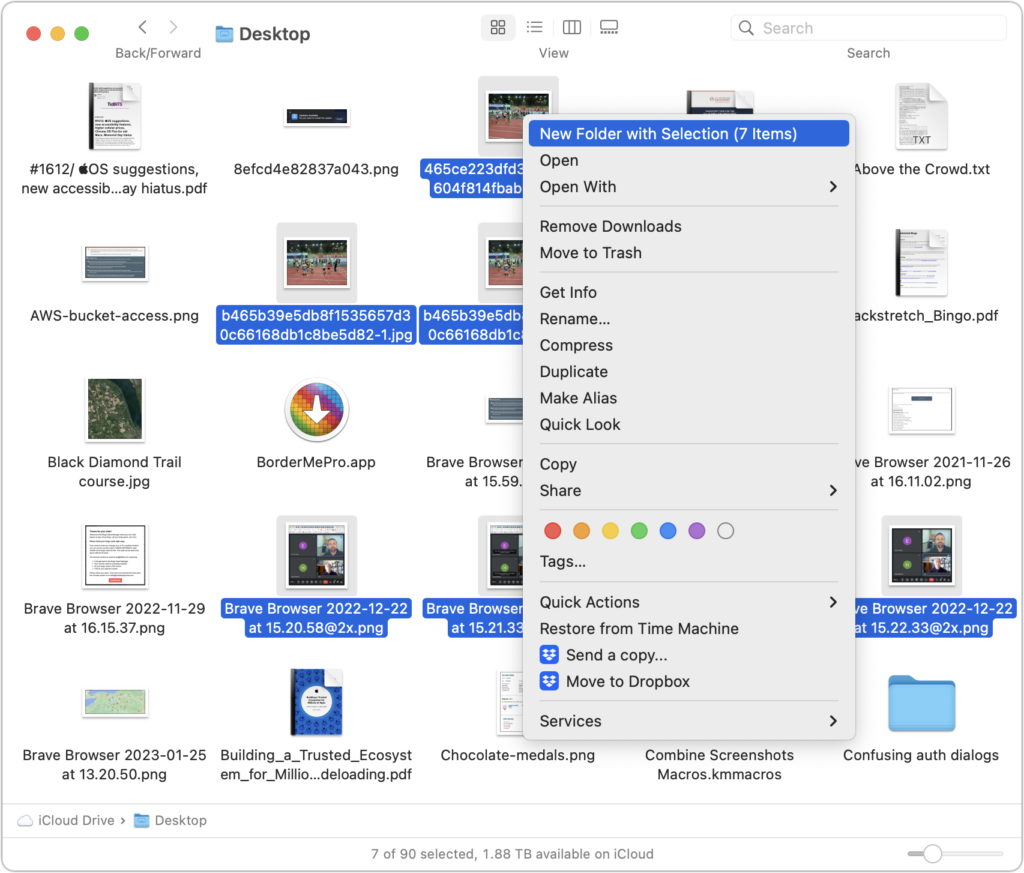
Imagine that you’re working with a bunch of files, and you want to put a set of them in a new folder. You could stop what you’re doing, make a new folder, select all the files, and drag them into the folder, like an animal. Or you could take advantage of a slick Finder command that Apple added in macOS 11 Big Sur. Simply select the files you want to put in a folder, Control-click one of them, and choose New Folder with Selection (X Items) from the top of the contextual menu. A folder called “New Folder With Items” appears, with your selected files inside. This feature may not be life-changing, but some people use it often.

(Featured image by iStock.com/ArLawKa AungTun)

Find Devices and People from Your HomePod

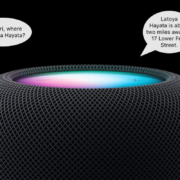
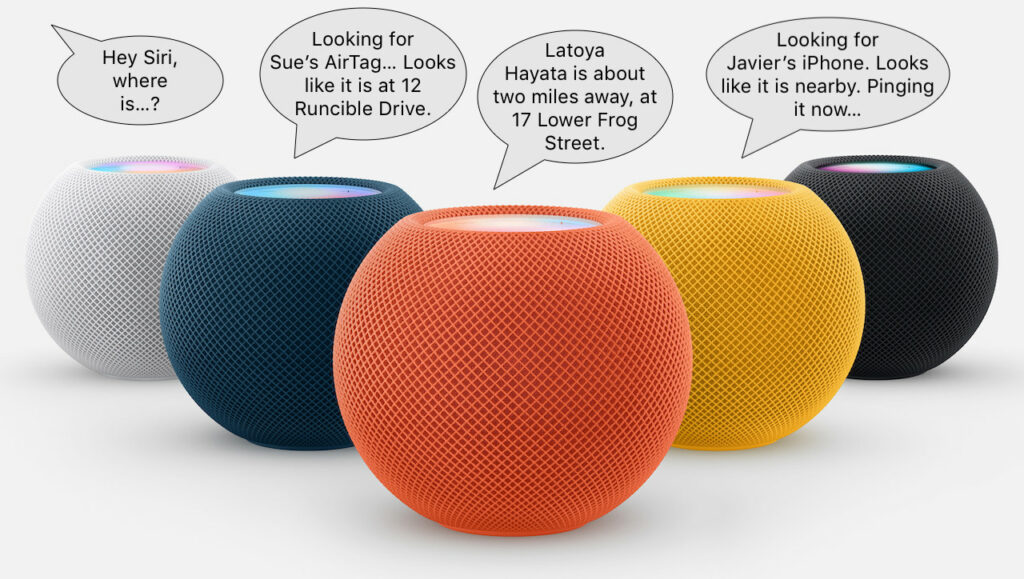
This feature evokes one of those “living in the future” moments for us. The recently released HomePod Software 16.3 now supports Find My, which means you can ask Siri to locate one of your devices or a friend or family member who shares their location with you. If you have a HomePod, ask Siri, “Where is my iPhone?” Assuming your HomePod has updated (and if not, update it manually in the Home app), Siri will respond by causing your iPhone to play a sound. Or ask where someone is—Siri will respond with more details for nearby people and city locations for those far away.

(Featured image based on an original by Apple)

Need to Back Up or Export a Messages Conversation? Try PDF or iMazing

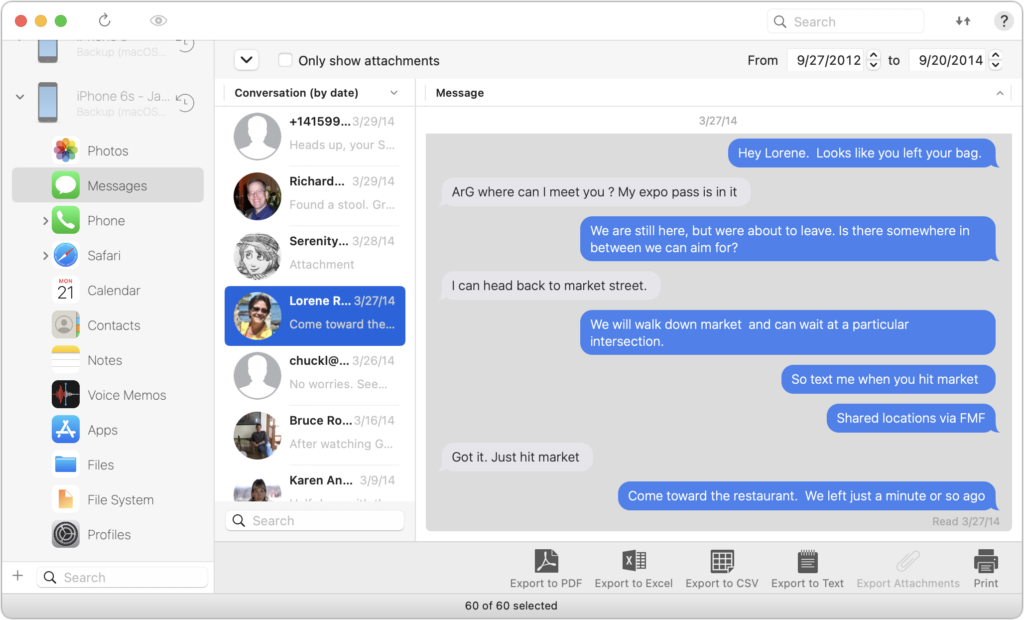
Occasionally, we hear from a client who needs to document a Messages conversation with timestamps, perhaps as part of a lawsuit. The only way to do that on an iPhone or iPad is to take a series of screenshots, but if you have a Mac, there are additional options. The easiest approach is to select the conversation, choose File > Print, and save it as a PDF. If you need a different format, try the macOS iMazing app, which can export all or selected messages from an iPhone backup in PDF, Excel, CSV, and text. It can also export attachments. The trial version lets you extract up to 25 items, and it’s only $39.99 if you have more significant iPhone exporting needs.

(Featured image by iStock.com/Morakot Kawinchan)

You Can Use Face ID in iOS 16 on Newer iPhones When You’re Lying on Your Side

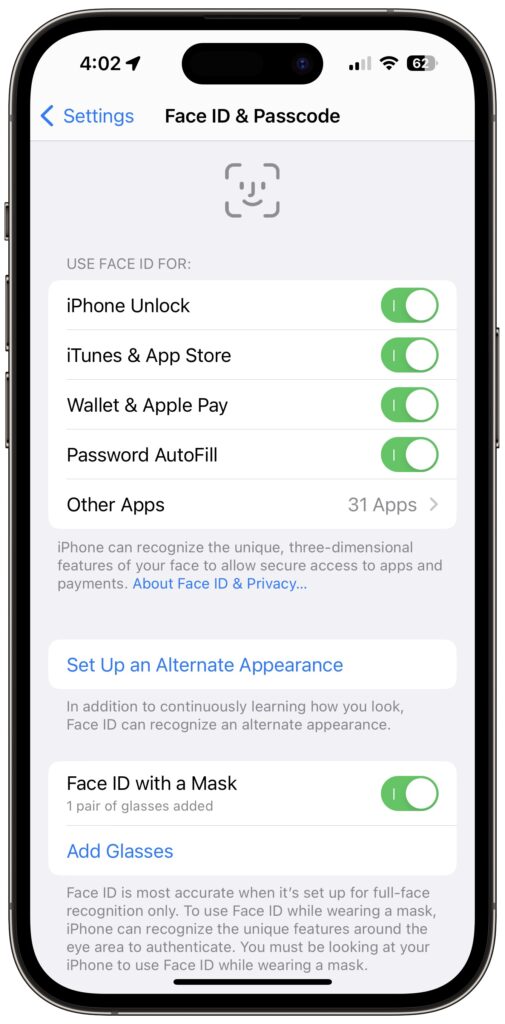
If you’ve ever tried to use Face ID to unlock an iPhone while lying on your side in bed, you may have noticed that it didn’t work. That’s because Face ID used to require that the iPhone be upright, in portrait mode. In iOS 16, however, Apple has improved Face ID so it will unlock your iPhone even when you’re lying on your side and the iPhone is in landscape orientation. Alas, this capability requires an iPhone 13 or iPhone 14, but if you have one of those phones, give it a try in bed tonight—you don’t need to adjust any settings.

(Featured image by iStock.com/Kateryna Onyshchuk)

Use Quick Look to Preview Spotlight Results in Ventura

When you search using Spotlight on the Mac, it provides a decent amount of information about each result, including name and other metadata. But what if you want to see what’s behind the search result? In macOS 13 Ventura, Apple added Quick Look support to Spotlight so you can easily preview the search results. Do a search, click or use the arrow keys to select a search result, and then press the Space bar to open it in a Quick Look window. It even renders websites!

(Featured image based on an original by iStock.com/Nastco)

It’s Time to Try Dictation in iOS 16 and iPadOS 16

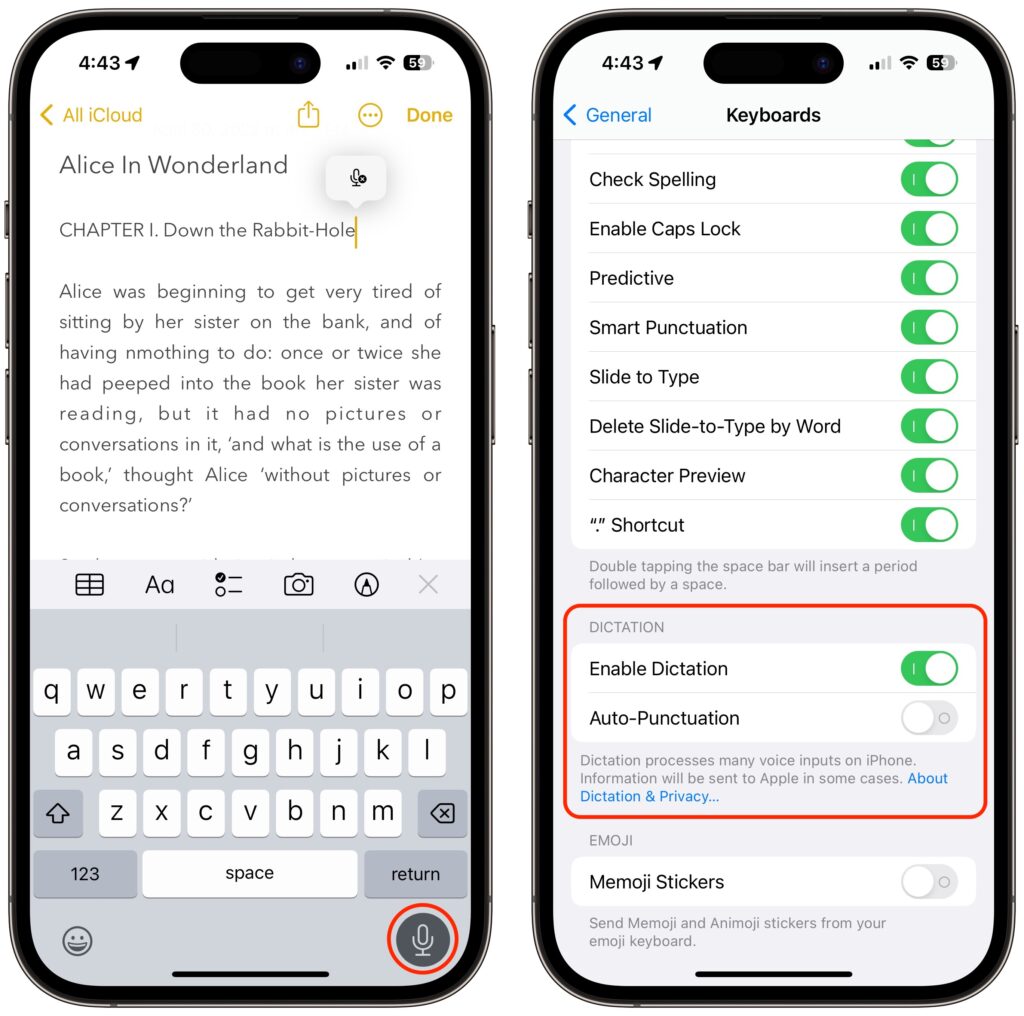
Apple has long provided a microphone button in the keyboard to invoke dictation on the iPhone and iPad. But, it wasn’t always easy to hit, and you had to switch back to the keyboard to fix the inevitable mistakes. (Apple’s dictation is a huge timesaver but far from perfect, particularly with homonyms and proper nouns.) With iOS 16 and iPadOS 16, Apple made the microphone button larger and repositioned it to make it easier to tap. More importantly, the keyboard remains available while dictation is active, enabling you to work with text manually during dictation. You can fix mistakes, reposition the insertion point, select and delete text, and so on. For instance, if dictation inserts the wrong word, double-tap the word to select it and speak the replacement. Or, if you want to add something, tap in the text to move the insertion point and start speaking again. Dictation can even add punctuation for you, but it’s a little haphazard at that, so you might want to disable that option in Settings > General > Keyboard.

(Featured image by iStock.com/fizkes)

Copy Gigabytes of Data Between Macs with Target Disk Mode

Apple makes it easy to move data between Macs. You can send files via AirDrop, attach them to an email message, put them in a Messages conversation, turn on and connect via File Sharing, or use a file-sharing service like iCloud Drive, Dropbox, or Google Drive as an intermediary, to name just a few of the more obvious approaches.

But what if you have a lot of data—say tens or even hundreds of gigabytes—to transfer from one Mac to another? The techniques listed above might work, but we wouldn’t bet on it. If you had an external drive with sufficient free space handy, you could copy all the data to it from one Mac and then copy the data from it to another Mac. To cut the copy time in half, try Target Disk Mode instead. You may even be able to use Target Disk Mode on an older Mac to transfer an account with Migration Assistant when setting up a new Mac.

What Is Target Disk Mode?

Target Disk Mode is a special boot mode for Intel-based Macs and an option in macOS Recovery on Macs with Apple silicon that enables one Mac to behave like an external drive for another Mac. Target Disk Mode is nearly universal, easy to set up, and one of the fastest methods of moving files between Macs. Let’s unpack that statement:

  • Nearly universal: Every Mac sold in the last decade supports Target Disk Mode, so you can be sure it will work with any modern Mac. That’s true of both Intel-based Macs and Macs with Apple silicon.
  • Easy setup: Because Apple has baked Target Disk Mode into the Mac firmware, the version of macOS is irrelevant beyond the Thunderbolt cable requirement discussed below. There’s no software to configure nor any permissions to worry about. Putting a Mac into Target Disk Mode is particularly simple on Intel-based Macs, but it’s also easy on Macs with Apple silicon.
  • Speed: Because you’re connecting one Mac directly to another using Thunderbolt, you’ll get the fastest transfer speeds available.

If either Mac has macOS 11 Big Sur or later installed, you’ll need to connect them with a Thunderbolt cable—it’s fine to use Apple’s Thunderbolt 3 to Thunderbolt 2 adapter for connecting newer and older Thunderbolt-capable Macs. If both Macs are running an earlier version of macOS, you can use Thunderbolt, USB, or FireWire, depending on the available ports. (Note that the Apple USB-C Charge Cable that comes with the Apple power adapter doesn’t support Target Disk Mode, so if that’s the cable you were planning to use, sorry, but you’ll need to buy a real Thunderbolt cable.)

Step-by-Step Instructions for Intel-based Macs

To put an Intel-based Mac into Target Disk Mode for copying data, follow these steps:

  1. Connect the source Mac to the destination Mac with an appropriate cable.
  2. On the source Mac, either:
    • Restart the Mac, and once it starts booting, hold down the T key until you see the Target Disk Mode screen with a bouncing Thunderbolt logo.
    • Open System Settings/Preferences > Startup Disk, click Target Disk Mode, and then click Restart.
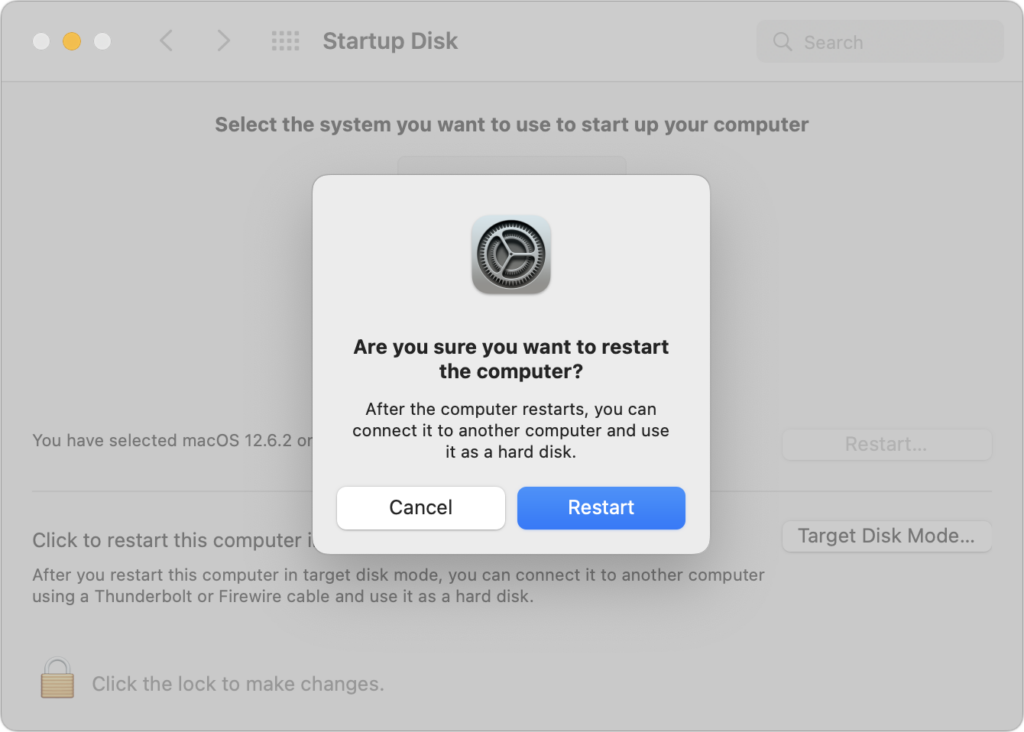
  3. The source Mac’s data and applications volume appears on the destination Mac’s Desktop like an external drive; if the source Mac is encrypted with FileVault, give it a minute to appear on the destination Mac, after which you’ll need to enter its password.
  4. Transfer the files as you would normally.
  5. When you’re done, unmount the source Mac’s drive by dragging it to the Trash in the Dock. Then press and hold the power button on the source Mac for a few seconds to shut it down.

Step-by-Step Instructions for Macs with Apple Silicon

The process is somewhat more involved for Macs with Apple silicon, where the shared drive or volume appears like a network volume:

  1. Connect the source Mac to the destination Mac with an appropriate cable.
  2. On the Mac with Apple silicon, choose Shut Down from the Apple menu to turn it off.
  3. Press and hold the power button until “Loading startup options” appears.
  4. Click Options, and then click Continue to enter macOS Recovery.
  5. Select a user, click Next, enter the user’s password, and click Continue.
  6. Choose Utilities > Share Disk.
  7. Select the drive or volume you want to share, and click Start Sharing. (If the drive is encrypted using FileVault, click Unlock and enter the FileVault password first.)
  8. On the destination Mac, open a Finder window and click Network (under Locations) at the bottom of the sidebar.
  9. In the Network window, double-click the Mac with the shared drive or volume, click Connect As, select Guest in the Connect As window, and then click Connect. The shared drive or volume becomes available like any other external hard drive.
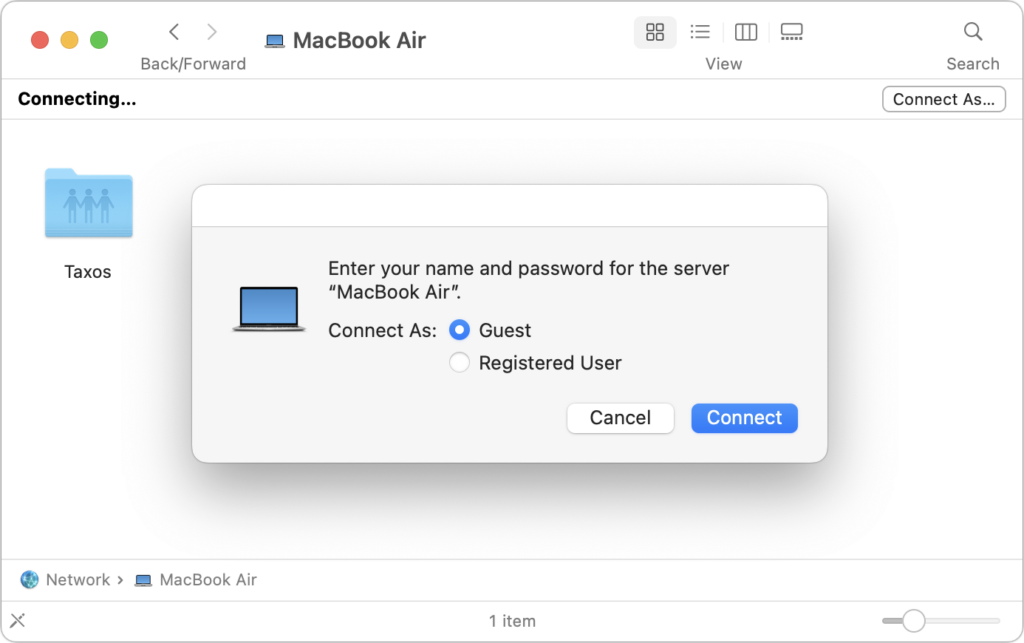
  10. Transfer the files as you would normally.
  11. When you’re done, unmount the shared drive or volume by dragging it to the Trash, then click Stop Sharing on the source Mac.

Although it’s not something you’ll use every day, Target Disk Mode is one of the unsung innovations that has made Macs easier to use for decades, and it’s well worth keeping in mind whenever you need to move lots of data between machines.

(Featured image by Adam Engst)


Social Media: If you have to move tens or hundreds of gigabytes of data between Macs, give Target Disk Mode a try. It’s fast, easy, and reliable. Details here: