Posts

Is Your Wi-Fi Network a Security Risk?

With Wi-Fi security, it’s easy to fall into the “out of sight, out of mind” trap. Your Wi-Fi router probably lives in a corner or closet, and of course, Wi-Fi’s radio waves are invisible. But the ease of connecting your devices to your Wi-Fi network means it’s equally as easy for a hacker to connect to your network and eavesdrop on your traffic. Or rather, it’s easy unless you take advantage of the security options available in every Wi-Fi router.

Before looking at those options, let’s discuss the importance of securing your wireless network. The fact is, we all send sensitive data over Wi-Fi and onto the Internet. That data includes passwords, financial information, and personal details, all of which could be used for identity or outright theft. For those who work at home, it may also include important corporate credentials and information. In addition, if your Wi-Fi network is open for everyone and has a bandwidth cap, you could be throttled or incur additional charges due to extra usage from someone using your network without your knowledge. Worse, someone could engage in illegal activity from your network, potentially putting you at legal risk.

Here are six ways you should secure your Wi-Fi network, plus another that’s usually not worth the effort. Exactly how you go about these tasks varies depending on your Wi-Fi router, but they should all be easy to accomplish.

1. Change Your Wi-Fi Router’s Default Password

Every Wi-Fi router has an app- or Web-based administrative interface where you can adjust settings, including security options. The first thing you should do when setting up a new Wi-Fi router is change the password for accessing that admin interface. (And if you didn’t do that when you set up your current Wi-Fi router, go do it now. Immediately. We’ll wait.) The default passwords are well known to hackers, who can use them to take over routers and turn off all the other security settings.

2. Change the Default Network Name (SSID)

Every Wi-Fi network has a name—technically an SSID, or Service Set Identifier. There’s no security benefit in changing it to anything in particular, but you should change it from the default name. That’s because default names often identify the router’s manufacturer, such as “Netgear” or “Linksys,” and some routers have known vulnerabilities or password styles that make it easier to break in. Of course, the main advantage of changing the network name is that it makes it easier to pick out from any other nearby networks.

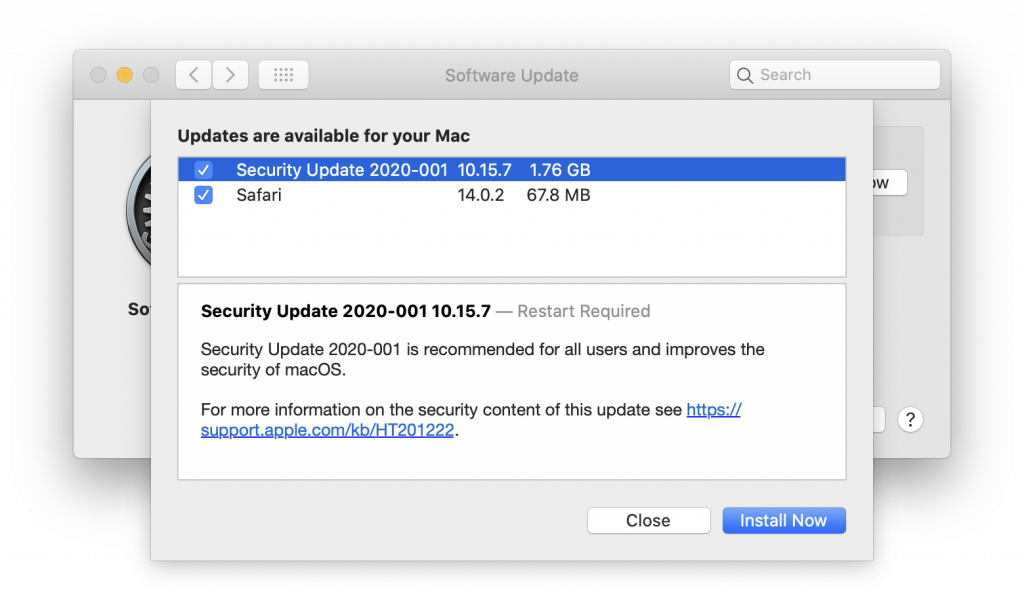
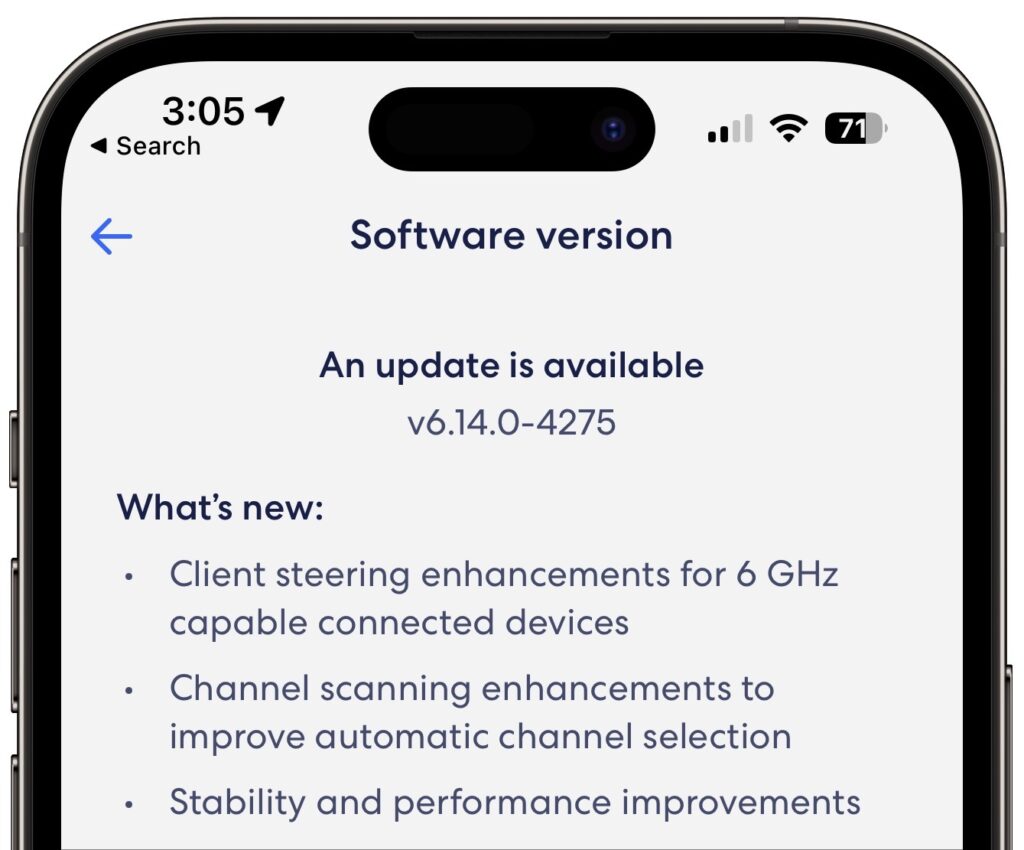
3. Update Your Wi-Fi Router’s Firmware

Wi-Fi router manufacturers frequently fix security vulnerabilities and release new firmware versions. Check to make sure your Wi-Fi router has the latest firmware available, and if there’s an option for it to update its firmware automatically, turn that on.

4. Disable WPS (Wi-Fi Protected Setup) If Possible

When you connect a new device to your Wi-Fi network, you need to enter your Wi-Fi password. That’s entirely reasonable, and Apple devices automatically offer to share that password with your other Apple devices and other people in your Contacts. More generally, a technology called Wi-Fi Protected Setup (WPS) was designed to enable connecting without typing the Wi-Fi password, either by entering an 8-digit PIN or pressing a button on the router. The button is fine—no one can connect without physical access to the router. But the PIN is horribly insecure and can be brute forced with readily available cracking software. If your router supports WPS—not all do, happily—turn it off entirely.

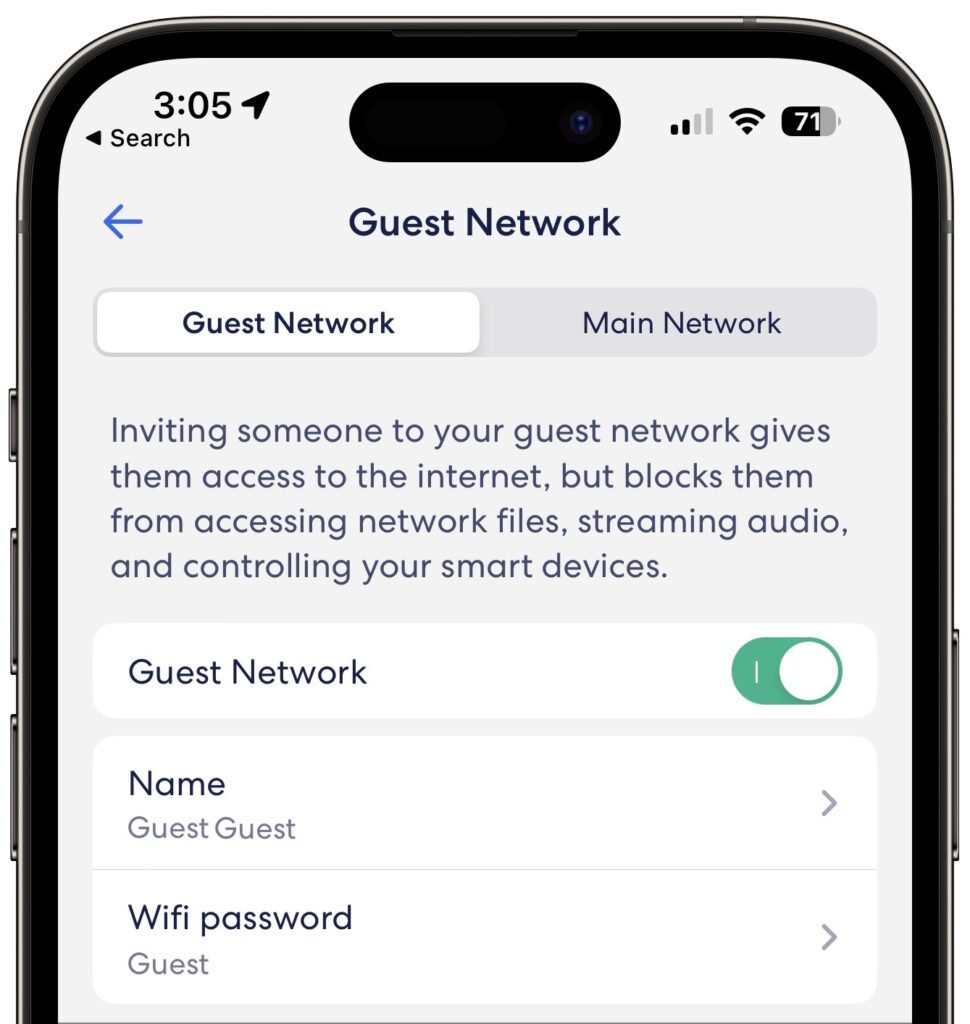
5. Create a Guest Network

You’ll probably want to give visitors access to your Wi-Fi network so they can get to the Internet. The best way to do that is to create a guest network—a feature in nearly all Wi-Fi routers—separate from your main Wi-Fi network. It has a different name and password, and its traffic is isolated from yours, ensuring that even if a hacker were to access it, they wouldn’t be able to eavesdrop on your communications. It can have a simpler password since all it’s protecting is your bandwidth. One additional tip—put “Internet of Things” devices like smart appliances, video game consoles, and the like on your guest network to ensure they don’t provide access to your main network’s traffic if they’re hacked. You probably won’t want to do that with HomeKit devices, which will work better on the same network as your Apple devices.

6. Use Strong WPA2 or WPA3 Encryption

After changing the default admin password, this is the second-most important piece of Wi-Fi security advice. All traffic on a Wi-Fi network can (and should) be encrypted so hackers can’t eavesdrop with impunity. The first wireless security protocol was WEP (Wired Equivalent Privacy), which was commonly used from the late 1990s through 2004. Unfortunately, WEP is so easily broken today that it’s no longer considered secure. If you still use WEP, immediately switch to WPA2 (Wi-Fi Protected Access). There’s also WPA3, which is even more secure but is available only in hardware sold in the last few years.

Don’t Bother Hiding Your SSID

Finally, you may see suggestions that you should hide your Wi-Fi SSID, which prevents nearby devices from displaying it when they list available networks. That might seem like it would improve security, but all it does is prevent the sort of people who aren’t a threat anyway from seeing it. Anyone with the necessary software and skills to break into an unprotected or weakly protected Wi-Fi network can still detect and access a hidden network. They might even be more interested in what’s there, given that the network owner took the trouble to hide it. As long as you follow all the other advice in this article, there’s no benefit in hiding the SSID as well.

Bonus Advice: Use a VPN When on Public Wi-Fi Networks

Ensuring the security of your Wi-Fi network is essential, but what about public Wi-Fi networks in coffee shops, hotels, and airports? Because they’re open to anyone within range, they’re insecure by definition, and anyone on the network could theoretically see any other user’s traffic. Don’t panic. Most Web connections now use HTTPS, which encrypts traffic between you and the destination site (look for https at the start of URLs or a lock icon in the address bar of your Web browser). To ensure that all traffic is protected from prying eyes, use a VPN (Virtual Private Network), which creates an encrypted pipe from your computer to a VPN server elsewhere. Many organizations provide or even require VPN use so that traveling or remote employees can’t inadvertently use unencrypted connections. If your organization doesn’t have a VPN now but would like to set one up, contact us.

(Featured image by iStock.com/CASEZY)


Social Media: As more personal and work information passes through Wi-Fi networks, it becomes increasingly important that you follow this advice to secure your network.

Choosing the Best Mac for a College-Bound Student in 2022

Do you have a child starting college soon? It’s likely that your kid has been relying heavily on a computer throughout high school, but if it was a school-provided laptop or shared family computer, now’s the time to get them something of their own. And even if they had their own laptop throughout high school, if it’s old or unreliable, college is a good excuse to bring them up to date. If you haven’t been paying close attention to Apple’s Mac lineup, you might wonder which model makes the most sense.

First, don’t buy anything without first checking with the college. Many college departments have specific requirements based on the software students use in their classes. Generally, these revolve around processor type, amount of RAM, and storage space. Luckily, current Macs should meet the requirements. Second, see if the college provides access to education pricing—most will—to save a few hundred dollars.

Colleges often specify—and students usually prefer—laptops instead of desktop machines. Although the 24-inch iMac is an excellent machine with a gorgeous screen, it’s too big and unwieldy for the transient lifestyle of the typical college student. The same applies to a Mac mini or Mac Studio with an external display. A laptop is much easier to pack during moves, and it can travel to class every day. A student who’s accustomed to taking notes on an iPad with a Smart Keyboard and Apple Pencil might be able to use that along with a desktop Mac, but most students should focus on Apple’s laptops.

In the past, it was harder to decide which model was best for a given student, but with Apple’s move to the M1 and M2 chips, which significantly outperform the Intel processors used in previous models, the decision is easier. We see three primary scenarios:

  • Most students: Buy Apple’s MacBook Air. It’s Apple’s smallest, lightest, and least expensive laptop, but thanks to its M1 or M2 processor, it has fabulous performance for everyday tasks. Although the M1 MacBook Air from 2020 remains available for those who need the most cost-effective option (starting at $999), the new M2 MacBook Air is a better choice for most people, thanks to its bigger-brighter-better 13.6-inch screen, faster performance, 24 GB memory ceiling, and higher-resolution webcam. It starts at $1199.
  • Better specs: If performance is more important than cost—particularly if your student will be working with processor-intensive tasks like video editing—look to the 14-inch MacBook Pro. It features an M1 Pro chip that’s more powerful than the base-level M2 and is configurable with an even faster M1 Max chip. Its screen is bigger, and it can take up to 32 GB of memory. Its price starts at $1999.
  • Windows compatibility: The only downside of the transition to Apple silicon is that it’s no longer easy to run Windows using virtualization software like VMware Fusion (free for students) or Parallels Desktop. On M1 and M2 Macs, it is possible to run Parallels Desktop and Windows for ARM Insider Preview, but we can’t recommend that anyone rely on that combination yet. If Windows compatibility is paramount, your choices are a used Intel-based MacBook Pro or—much as we hate to say it—a PC laptop that runs Windows natively.

Regardless of which laptop you decide on, you’ll have to pick a processor, an amount of RAM, and storage capacity:

  • Processor: With the M1 MacBook Air, you’re limited to the M1 chip with an 8-core CPU and 7-core GPU, so there is no choice to make. However, with the M2 MacBook Air, the M2 chip always has an 8-core CPU, but you can pay $100 to upgrade from an 8-core GPU to a 10-core GPU. The performance difference isn’t likely to be noticeable with everyday apps, but for $100, it might be worth it, just in case. The 14-inch MacBook Pro has three M1 Pro options and two more M1 Max options, and choosing among them is probably best done by weighing likely performance needs against the increased cost.
  • Memory: The M1 MacBook Air offers the choice of 8 GB or 16 GB. 8 GB is acceptable for most college students, but we’d encourage 16 GB to reduce the chance that memory becomes a limiting factor in performance. The M2 MacBook Air lets you choose from 8 GB, 16 GB, or 24 GB, and again, we’d default to 16 GB unless there’s some particularly memory-hungry software in play. With the 14-inch MacBook Pro, 16 GB is standard and fine for most tasks, but 32 GB is available if you think it will be necessary, and for seriously intensive work, the M1 Max chip in the 14-inch MacBook Pro offers a 64 GB option.
  • Storage: For both MacBook Air models, 256 GB is the lowest storage level, and you can upgrade to 2 TB. The 14-inch MacBook Pro starts at 512 GB and offers upgrades up to a whopping 8 TB. Choose the amount of storage based on budget—it gets expensive fast—and anticipated usage—audio and especially video can consume a lot of space, as can large numbers of photos, but most other uses don’t. Remember that it’s easy to connect an external Thunderbolt SSD or hard drive to offload large files that don’t have to be kept available at all times.

To our thinking, the most obvious choice for a Mac that’s likely to last for four years of college would be the new M2 MacBook Air with a 10-core GPU, 16 GB of memory, and 512 GB of storage. Be sure to budget for AppleCare+, too; it’s almost guaranteed that some mishap will befall a student laptop, and AppleCare+ covers up to two incidents of accidental damage every year.

You’ll need to have some conversations with your child to find out what they think they’ll need—and be sure to double-check that against the college’s recommendations—but if you have any questions after that, don’t hesitate to contact us.

(Featured image by Apple)


Social Media: Which Mac is best for a new college student? Short answer: the new M2 MacBook Air. Read on for the longer explanation and how we recommend configuring it.

Picking the Best Mac for a College-Bound Student

Do you have a child heading off to college soon? As you’re undoubtedly aware from high school, a computer is essential for a college student. If you haven’t been paying close attention to Apple’s Mac lineup, you might wonder which model makes the most sense.

First, don’t buy anything without first checking with the college. Many college departments have specific requirements based on the software that students have to use in their classes. Generally, these revolve around processor type, amount of RAM, and storage space. Luckily, current Macs should meet the requirements.

Colleges often specify—and students usually prefer—laptops instead of desktop machines. Although the iMac is an excellent machine with a gorgeous screen, it’s too big and unwieldy for the transient lifestyle of the typical college student. The same is true of a Mac mini and external display. A laptop is much easier to pack during moves, and it can travel to class every day. A student who’s accustomed to taking notes on an iPad with a Smart Keyboard and Apple Pencil might be able to use that along with a desktop Mac, but most people should focus on Apple’s laptops.

In the past, it was harder to decide which model was best for a given student, but with Apple’s move to the M1 chip, which significantly outperforms the Intel processors used in previous models, the decision is easier. We see three primary scenarios:

  • Most students: Buy Apple’s M1-based MacBook Air. It’s Apple’s smallest, lightest, and least expensive laptop, but thanks to its M1 processor, it has nearly identical performance to the heavier and more costly M1-based MacBook Pro. It also has the same lovely 13.3-inch Retina display. It starts at $999, and an education discount may be available.
  • Slightly better specs: If cost is of little concern, the M1-based MacBook Pro offers just a bit more performance due to fans that keep its M1 chip cool. It also has a Touch Bar (which some people like, but others don’t), somewhat longer battery life, and nominally better speakers and microphones. It starts at $1299, and again, education pricing may be available.
  • Windows compatibility: The only reason to buy an older Intel-based MacBook Pro— available in either 13.3-inch ($1799) and 16-inch ($2399) models—is if Windows compatibility is essential. All Intel-based Macs can run Windows with no problems, either by restarting in Apple’s Boot Camp or using virtualization software like VMware Fusion (free for students) or Parallels Desktop. (On M1-based Macs, it’s possible to run Parallels Desktop and Windows for ARM Insider Preview, but we can’t recommend that anyone rely on that combination yet.)

Regardless of which laptop you decide on, you’ll have to pick a processor, an amount of RAM, and storage capacity:

  • Processor: With the M1-based MacBook Air, you have a choice between two CPUs that are identical apart from one having a 7-core GPU and the other an 8-core GPU. No one is likely to notice the difference for everyday software, but the price difference is only $50 if you’re also getting at least 512 GB of storage. (The M1-based MacBook Pro offers only the 8-core GPU chip.) For Intel-based Mac laptops, there are various options based on clock speed and number of cores. They’re all fine, but you pay for performance, so buy what fits your budget and needs.
  • RAM: With the M1-based Macs, you can choose between 8 GB and 16 GB of RAM. 8 GB may be acceptable, but we recommend 16 GB. Intel-based Mac laptops start at 16 GB, which is a decent base level, and you can go up to 32 GB or 64 GB (16-inch only). Generally speaking, go beyond 16 GB only if you know you need it.
  • Storage: For the M1-based Macs, 256 GB is the lowest storage level, whereas the Intel-based Macs usually start higher. Either way, you can upgrade to a maximum of 2 TB. Choose the amount of storage based on budget and anticipated usage—video takes a lot of space, as can large numbers of photos, but most other uses don’t.

To our thinking, the most obvious choice for a Mac that’s likely to last for four years of college would be the M1-based MacBook Air with the 8-core GPU, 16 GB of RAM, and 512 GB of storage. Be sure to budget for AppleCare+, too; it’s almost guaranteed that some mishap will befall a student laptop, and AppleCare+ covers up to two incidents of accidental damage every year.

You’ll need to have some conversations with your child to find out what they think they’ll need—and be sure to double-check that against the college’s recommendations—but if you have any questions after that, don’t hesitate to contact us.

(Featured image by Apple)


Social Media: Which Mac is the best for a new college student? Short answer: the M1 MacBook Air. Read on for the longer explanation and how we recommend configuring it.

Forget Adobe Acrobat: Preview May Be All You Need to Work with PDFs

We regularly hear from people who think they need Adobe Acrobat DC to manipulate PDFs. Don’t misunderstand: Adobe Acrobat is the gold standard, but it’s complicated and expensive—$14.99 per month or as part of Creative Cloud for $52.99 per month. In contrast, Apple’s Preview is easy and free with macOS. Here are six tasks that people may think require Acrobat but can easily be accomplished in Preview.

Remove and Rearrange or Export Pages

Have a PDF with unnecessary pages? You can delete them in Preview. First, make sure page thumbnails are showing in the sidebar by choosing View > Thumbnails. Then select the pages you want to remove and press Delete. Choose File > Save when you’re done—you’ll need to do that after all the rest of these tasks too.

Rearranging pages also happens in the sidebar—just drag the thumbnails as needed. If you drag a thumbnail to the Finder, Preview exports the page as its own PDF file.

Merge and Add Pages

What about putting pages from one PDF into another? Preview has your back there too. Open both PDFs, make sure their sidebars are showing page thumbnails, and then drag one or more thumbnails from one sidebar to the other, dropping them between the desired pages in the destination.

You can also drag a PDF from the Finder into the sidebar to add all its pages. Or, to take a photo or scan a document and insert it into the document, Control-click in the sidebar and choose Import from iPhone or iPad.

Annotate Text

Let’s say someone asks for edits or comments on a PDF. Although you can’t change the text with Preview, you can mark up the document.

  • Highlight text: They may give you flashbacks to high school, but Preview provides a handful of colored highlighters, along with underline and strikethrough styles. Choose one from the Highlight menu in the toolbar and then select the desired text.
  • Add highlight notes: To ensure that your highlights make sense to others, add notes to them. Control-click the highlighted text and choose Add Note. Then enter your note in the colored box that appears. It shrinks when you click away from it and expands when you click it again.
  • Add general notes: You can also place faux sticky notes anywhere on a PDF page. Reveal the Markup toolbar by clicking the Markup button, and then click the Note button. Dag the closed note box to position it on the page. See all your notes in the sidebar by choosing View > Highlights and Notes.
  • Add shapes and text boxes: The Markup toolbar also contains controls for creating various shapes (including lines with arrows) and text boxes. At times, the best way to show what you mean is to put a box, line, or text directly on the page. Click a shape to add it—text you type while it’s selected sticks with the shape, like the speech balloon below and the arrows above.

If you do need to edit the text of a PDF, that’s a job for Adobe Acrobat or another PDF tool like Smile’s PDFpen.

Redact Text

Sometimes, when you’re sharing a PDF, you want to redact sensitive information so it can’t be read. macOS 11 Big Sur’s version of Preview can permanently obscure and delete selected text from the document. Choose Tools > Redact and select the text you want to hide.

In earlier versions of macOS, you can simulate redaction by covering text with a colored rectangle. Unfortunately, recipients could delete your rectangle or copy the text underneath it. Don’t depend on this workaround to protect confidential information. For true redaction in older versions of macOS, use Acrobat or PDFpen.

Fill PDF Forms

Although Preview cannot create fillable PDF forms (again, turn to Acrobat or Smile’s PDFpenPro), it works fine for entering information into such forms. If you have to fill out an IRS form for your employer, for instance, Preview should work fine. Just click in a field and type, or click a checkbox to select it.

One warning. We’ve heard occasional reports that Windows users reading PDFs with forms filled out in Preview sometimes don’t see the entered text. When returning an important form, it’s always best to ask the recipient to confirm that it worked. If it doesn’t, fall back on the free Adobe Acrobat Reader DC.

Sign Documents

Now that so much paperwork has gone digital, we often need to sign PDFs. The most important documents will probably use a service like SignEasy that’s designed for collecting legally binding, secure signatures. But for something like a simple permit application, you can add your signature in Preview by clicking the Signature button in the Markup toolbar and choosing it.

Inserting (and resizing) an already created signature is easy, as is the one-time process of making one. Click the Signature button, and then click Create Signature. If your Mac has a trackpad, write on it with your finger or a rubber-tipped iPad stylus. Or use a marker to write your signature on paper and take a picture of it with the camera. In macOS 10.15 Catalina and later, you can also create a signature on an iPhone or iPad. Once created, the signature sticks around in Preview and even syncs to your other Macs through iCloud.

Note that Preview’s signature is just a graphic that could be copied, so it’s no more protected than a handwritten signature that could be scanned or photocopied.

Useful as all these features are, they’re just the tip of the iceberg when it comes to what Preview can do, particularly with graphics. For a complete look at Preview’s features, check out the 178-page ebook Take Control of Preview.

(Featured image by Cytonn Photography from Pexels)


Social Media: If you think you have to pay for a pricey copy of Adobe Acrobat DC just to add and remove pages from PDFs, annotate documents, redact text, fill PDF forms, and sign documents, think again. Preview can do all that and more for free.

5 New Year’s Resolutions That Will Improve Your Digital Security

Happy New Year! For many of us, the start of a new year is an opportunity to reflect on fresh habits we’d like to adopt. Although we certainly support any resolutions you may have made to get enough sleep, eat healthy, and exercise, could we suggest a few more that will improve your digital security?

Keep Your Devices Updated

One of the most important things you can do to protect your security is to install new operating system updates and security updates soon after Apple releases them. Although the details seldom make the news because they’re both highly specific and highly technical, you can get a sense of how important security updates are by the fact that a typical update addresses 20–40 vulnerabilities that Apple or outside researchers have identified.

It’s usually a good idea to wait a week or so after an update appears before installing it, on the off chance that it has undesirable side effects. Although such problems are uncommon, when they do happen, Apple pulls the update quickly, fixes it, and releases it again, usually within a few days.

Use a Password Manager

We’ve been banging this drum for years. If you’re still typing passwords in by hand, or copying and pasting from a list you keep in a file, please switch to a password manager like 1Password or LastPass. Even Apple’s built-in iCloud Keychain is better than nothing. A password manager has five huge benefits:

  • It generates strong passwords for you. Password1234 can be hacked in seconds.
  • It stores your passwords securely. An Excel file on your Desktop is a recipe for disaster.
  • It enters passwords for you. Wouldn’t that be easier than typing them in manually?
  • It audits existing accounts. How many of your accounts use the same password?
  • It lets you access passwords on all your devices. Finally, easy login on your iPhone!

A bonus benefit for families is password sharing. It allows, for example, a married couple to share essential passwords or for parents and teens to share certain passwords.

In short, using a password manager is more secure, faster, easier, and just all-around better. If you need help getting started, get in touch.

Beware of Phishing Email

Individuals and businesses alike frequently suffer from security lapses caused by phishing, forged email that fools someone into revealing login credentials, credit card numbers, or other sensitive information. Although spam filters can catch many phishing attempts, it’s up to you to be on your guard at all times. Here’s what to watch for:

  • Any email that tries to get you to reveal information, follow a link, or sign a document
  • Messages from people you don’t know, asking you to take an unusual action
  • Direct email from a large company for whom you’re an anonymous customer
  • Forged email from a trusted source asking for sensitive information
  • All messages that contain numerous spelling and grammar mistakes

When in doubt, don’t follow the link or reply to the email. Instead, contact the sender in some other way to see if the message is legit.

Avoid Sketchy Websites

We won’t belabor this one, but suffice it to say that you’re much more likely to pick up malware from sites on the fringes of the Web or that cater to the vices of society. To the extent that you can avoid sites that provide pirated software, “adult” content, gambling opportunities, or sales of illicit substances, the safer you’ll be. That’s not to say that reputable sites haven’t been hacked and used to distribute malware too, but it’s far less common.

If you are concerned after spending time in the darker corners of the Web, download a free copy of Malwarebytes or DetectX Swift and scan for malware manually.

Never Respond to Unsolicited Calls or Texts

Although phishing happens mostly via email, scammers have also taken to using phone calls and texts. Thanks to weaknesses in the telephone system, such calls and texts can appear to come from well-known companies, including Apple and Amazon. Even worse, with so much online ordering happening, fake text messages pretending to help you track packages are becoming more common.

For phone calls from companies, unless you’re expecting a call back from a support ticket you opened, don’t answer. Let the call go to voicemail, and if you feel it’s important to respond, look up the company’s phone number elsewhere, and talk with someone at that number rather than one provided by the voicemail.

For texts, avoid following links unless you recognize the sender and it makes sense that you’d be receiving such a link. (For instance, Apple can text delivery details related to your orders.) Regardless, never enter login information at a site you’ve reached by following a link because there’s no way to know if it’s real. Instead, if you want to learn more, navigate manually to the company’s site by entering its URL yourself, then log in.

Let’s raise a glass to staying safe online in 2021!

(Featured image based on originals from Tim Mossholder and Jude Beck on Unsplash)


Social Media: Have a safer 2021 with New Year’s resolutions that will help you secure your devices, avoid email and text scams, and stay safe from malware, as well as benefit from the security and ease-of-use of password managers, which can even fill in passwords for iPhone apps.

Audiovisual Tips for Better Videoconferencing

Whether for work or socializing, we’re all spending a lot more time in video calls these days. But—surprise!—it turns out that many of our group video calls could be more pleasant, less embarrassing, and overall better if we follow a few basic audiovisual tips.

Make Sure You Have Decent Lighting

Natural light is best, but room light is generally fine too, especially if it’s coming from the side. Overhead light isn’t quite as flattering, but whatever you do, avoid light that comes from underneath your face or you’ll look like an old-time movie villain. Also, avoid sitting in front of a window because the bright light behind you will make you look way too dark. Pull a shade or try to put your computer against the window so the light hits your face instead.

Arrange for a Decent Background

You may not have many choices for where your computer is located, and thus for what’s behind you when you’re on a video call. If you’re using Zoom or Skype, you can employ a virtual background (pick one that’s appropriate for the context, and for goodness sake, don’t use an animated background). Otherwise, make sure that what’s behind you is tidy and wouldn’t embarrass you if the people on the call were to visit in person. Or, take it up a level and put a pleasing arrangement of art or photos on the wall behind you. Even if they are too small to be seen well, they will break up a monotonous blank wall.

Wear Appropriate Clothing

Yes, it’s tempting to schlub around all day in pajamas or ratty old sweats. Resist the urge and wear the same type of clothes you’d put on if you were meeting with these people in person. That includes pants—if you get up in the middle of the call without thinking, you don’t want to advertise your taste in boxers. You don’t want your boss and colleagues to have a mental image of you as a total slob. For bonus points, avoid tops that are bright white, black, or have distracting patterns.

Think Like a Movie Director

Particularly if you need to use a phone, tablet, or laptop to participate in a video call, think about your camera angles. It’s best to have the camera at roughly the same height as your face, if possible, so if you can avoid it, don’t put your laptop in your lap or hold your phone at your waist. And if you’re using a phone, don’t walk around such that the changing background distracts everyone else.

And Like a Movie Star

It’s sometimes hard to remember that everyone can see you even though they’re not in the room, but you’ll come off as more alert, confident, and engaged if you sit up straight, get close enough to the camera so your face fills the screen, and smile. Seriously, you’re on Candid Camera, so act like it. You’ll almost always have a thumbnail that shows what you look like, so make sure you like what you see. Oh, and don’t touch your face repeatedly.

Look at the Camera, Not the Other Participants

This one is tough. The camera is usually at the top center of your screen, so if you look anywhere else, it seems like you’re avoiding eye contact. It can make you look shifty or inattentive. But it’s hard not to look at the other people or at your own video thumbnail. The best trick is to resize and position your video window so the person you’re most likely to look at is right under the camera.

Pay Attention and Don’t Multitask

Look, we get it—a lot of meetings are boring. But it’s both rude and distracting to the speakers if you are clearly doing something else or worse, leaving and coming back. Focus on the screen, and show that you’re paying attention by nodding your head, smiling, and all the other little things you’d do if the meeting were taking place in person. If you truly can’t stay engaged, turn off your audio and video so no one has to see and hear you. If you need an excuse for that, say that your Internet connection is being a little wonky, so you want to cut down on bandwidth usage.

Mute Your Mic When Not Talking

The more people on a call, the more important this tip is. All videoconferencing apps have a Mute button you can click so others in the call aren’t distracted by you coughing or sneezing, your children playing in the other room, or other extraneous noise. Just remember to unmute before you start talking. It’s hard to remember at first, but you’ll get good at it.

All this may seem like a lot to think about, but once you get your environment set up properly, you’ll be a bright spot in the video grid at your regular meetings. And then maybe you can forward this article to your family, friends, and colleagues so they can up their video game too.

(Featured image by Marcus Aurelius from Pexels)


Social Media: On your video calls, do you look like a shifty character in a low-budget horror flick? With our audiovisual tips, you can level up and make your calls more pleasant, less embarrassing, and more productive.

Strategies for Moving from Mojave to Catalina

For some Mac users, macOS 10.15 Catalina is no longer a choice. That’s because the new 16-inch MacBook Pro and the 2019 Mac Pro that Apple released late last year ship with Catalina installed and can’t run any previous version of macOS.

But for most people, it’s time to consider an upgrade to Catalina. Most backup software now works with Catalina’s bifurcated drive approach that puts the system on a separate, read-only volume from your data and apps. We’ve all had several months to come to terms with the fact that old 32-bit apps won’t even launch in Catalina. And Apple has shipped several updates that bring Catalina to version 10.15.3, addressing most of the complaints users had with the initial release.

If you are ready to try Catalina but still want to use 10.14 Mojave, we have some advice for how to make that happen. This could be the case for someone who has purchased a new Mac that does support Mojave but came with Catalina installed, for someone who wants to test Catalina while still using Mojave, or for someone who wants to move on to Catalina but has a 32-bit app that they aren’t ready to say good-bye to.

Downgrade from Catalina to Mojave on Some New Macs

Apple has started installing Catalina on new Macs other than the 16-inch MacBook Pro and 2019 Mac Pro, but since these older Macs can still run Mojave, it’s possible—if a bit tricky—to downgrade them to Mojave.

System engineer Armin Briegel has worked out a way of downgrading new Macs to Mojave. First, you create a Mojave Installer USB drive. To use that drive to boot a Mac with a T2 security chip, you must allow external booting from the Security Utility on the Recovery partition. Once you’ve booted from your Mojave Installer drive, use Disk Utility to erase the entire internal drive. Then install Mojave.

Use Virtualization to Keep 32-bit Apps Running

For some people, what’s keeping them on Mojave is a single 32-bit app that will never be updated in an appropriate fashion. Quicken 2007 falls into this category, as does the ScanSnap Manager app for the ScanSnap S1300, S1500, and S1500M scanners. Sure, you can get a current version of Quicken, but it may not do precisely what you want, and Fujitsu would be happy to sell you a new ScanSnap scanner that does come with 64-bit software, but then you’ll have to figure out what to do with your old scanner.

So if you’re ready to upgrade to Catalina in general but need to maintain access to one or two apps, one solution is virtualization software: either Parallels Desktop or VMware Fusion. Both apps let you run nearly any operating system—including older versions of macOS like Mojave—in a virtual machine. In essence, they fool the guest operating system, whether it’s Mojave or Windows, into thinking it’s running normally on a computer, when it’s actually running in a virtual environment.

These apps cost about $80, and while there’s a bit of work in setting them up (the screenshot below shows the option for installing Mojave in Parallels Desktop during setup), once you have them configured, it’s easy to run older apps alongside newer ones with little or no performance hit. This approach is also perfect for a 16-inch MacBook Pro or Mac Pro that can’t run Mojave in any other way.

Install Catalina and Mojave on Separate APFS Volumes and Switch Boot

Finally, there’s one other option that lets you switch back and forth between Mojave and Catalina, assuming your Mac supports Mojave. You can create an APFS volume on your internal drive and install another version of macOS on that. It’s easy, and Apple provides full instructions. The only problem with this approach is that you’ll have to restart to switch operating systems, whereas both are available simultaneously with the virtualization solution.

First, make sure you have at least one current backup of your Mac, since it’s foolhardy to adjust your drive structure without one. Next, in Disk Utility, select your internal drive, choose Edit > Add APFS Volume, and click Add. We recommend naming the drive such that it will be clear what’s on it.

Then boot into macOS Recovery and install the desired version of macOS on your new volume. The keys you hold down to get into Recovery determine which version of macOS you’ll get:

  • Command-R reinstalls the latest version of macOS that was installed on your Mac.
  • Command-Option-R upgrades to the latest version of macOS that’s compatible with your Mac.
  • Command-Shift-Option-R reinstalls the version of macOS that came with your Mac, or the closest version still available.

Choose Reinstall macOS from the macOS Utilities window and proceed from there.

Once the installation is complete, to switch from one version of macOS to another, open System Preferences > Startup Disk, choose the desired volume to boot from, and then click Restart. Or, press Option at startup and select the desired volume from the Startup Manager screen.

Needless to say, the decision about when and how to upgrade to Catalina isn’t a trivial one, so feel free to contact us to discuss your particular situation or to get help with any of the procedures that we’ve described in this article.

(Featured image by Apple)


Social Media: Considering upgrading to Catalina? Or maybe you have a new Mac that came with it already installed? Read on for strategies for downgrading to Mojave or running both Catalina and Mojave.

Need to Merge Photos Libraries? Here Are Your Options

Photos makes it easy to create and switch between libraries. That’s good when photos need to be kept completely separate. For instance, a real estate agent might want to keep personal photos separate from house photos taken for work. But too much separation is annoying—you have to keep switching between libraries, and it’s easy to import new photos into the wrong one.

If you struggle with multiple Photos libraries, never fear—you can merge them. Unfortunately, the process is slow, can require a lot of disk space, and may result in the loss of some metadata. You have three options: merging through iCloud Photos, using the PowerPhotos utility, and merging by exporting and importing. Each has pros and cons.

Merge through iCloud Photos

Apple’s iCloud Photos service offers the best solution for merging libraries. The trick is that whenever you designate a library as your System Photo Library, Photos automatically uploads all images that aren’t already present, adding them to the photos already in iCloud Photos. It also retains all the metadata surrounding your photos—titles, keywords, albums, facial recognition, projects, and more.

On the downside, using iCloud Photos almost certainly won’t be free unless you have so few photos that the combined library will fit within the free 5 GB of iCloud space Apple gives everyone. Almost everyone will have to pay for additional storage space ($0.99 per month for 50 GB, $2.99 for 200 GB, or $9.99 for 2 TB) for at least the month in which you’re doing the merge. iCloud Photos is a good service, so it’s likely worth paying for anyway.

More problematic is that the iCloud Photos way of merging will be very slow. If you haven’t already started using it, it could take a week or more to upload many thousands of photos. Plus, it will probably download the entire cloud-based collection of photos to each library whose photos you want to merge, so you may need a lot of local disk space too.

If you haven’t previously used iCloud Photos, go to System Preferences > iCloud and click the Options button next to Photo. In the dialog, select iCloud Photos.

Now, starting with the smallest Photos library and working up in size, follow these steps for each library you want to merge:

  1. Double-click the Photos library to open it.
  2. In Photos > Preferences > General, click Use as System Photo Library. (If it’s dimmed out, that library is already set as the System Photo Library.)
  3. Wait for photos to upload. Scroll to the bottom of the Photos view to see the progress. A Pause link will appear there during uploading—click it if you need to keep Photos from overwhelming your Internet connection. Once the photos have all uploaded, go back to Step 1 with your next Photos library.

When you’re done, the last Photos library becomes the one you’ll keep, and you can delete the others. Needless to say, make sure you have good backups first!

Merge with PowerPhotos

The $30 PowerPhotos from Fat Cat Software provides a variety of extra capabilities when working with Photos. It helps you to create and manage multiple libraries, copy photos between libraries, find duplicates, and—most important for this topic—merge libraries.

Because PowerPhotos is working entirely on your Mac’s drive, it’s fast and it doesn’t require huge amounts of extra disk space. Unfortunately, unlike the iCloud Photos approach, which brings in both originals and any edits to those photos, PowerPhotos can import only your original photos or the versions that you’ve edited, not both. Plus, it can’t merge facial recognition data, smart albums, or print projects.

PowerPhotos provides an actual interface for merging too—choose Library > Merge Libraries to start.

In the window that appears, you have four tasks:

  1. Choose source libraries. You aren’t limited to merging just two libraries; you can pick multiple sources.
  2. Choose the destination library. This is the library you want to receive all the photos. If you want, you can create a new one.
  3. Configure duplicate handling. PowerPhotos can import just one of several copies of duplicate photos, or you can bring in all the duplicates if that’s important.
  4. Choose options. PowerPhotos can merge album contents, create an album from each source library, and create a backup before merging. Most important, though, is the choice of whether to merge your original photos or the edited versions.

Merge by Exporting and Importing

This final option is conceptually simple. You export all the photos from one library and then import them into another. It’s even what Apple recommends. The main thing it has going for it is that it’s free, and it will be faster than the iCloud Photos approach. It could also be useful if you want to copy a subset of photos between libraries, rather than merging all photos.

However, as with PowerPhotos, you have to choose between original and edited photos, and you’ll need a lot of extra disk space. Even worse, you’ll lose even more metadata, including albums, faces, and print projects. And if you export as JPEG, your photos may also suffer a slight quality drop as they’re recompressed.

For those who want to use this approach, Apple provides detailed instructions. In essence, you’ll click Photos in the sidebar to see everything, and then choose Edit > Select All. Then you’ll choose File > Export and either Export X Photos (to get the edited versions of images) or Export Unmodified Original for X Photos (to get the original images). Once everything has exported, you’ll switch libraries in Photos and then drag the folder of exported images back into Photos to import it.

Our nod goes to the iCloud Photos technique, but PowerPhotos is a fine utility for those who aren’t perturbed by its limitations. Of course, don’t start any merging without making backups first, and if you need help, don’t hesitate to call us.


Social Media: If you want to merge Photos libraries to avoid having to switch back and forth, there are several approaches you can take, but each comes with pros and cons. See them all at:

Troubles with Messages? Read On for Ten Possible Solutions

Apple’s Messages app for iOS and macOS generally works well, but when it doesn’t, figuring out what’s wrong and how to fix it can take some doing. Here are a few of the most common solutions we’ve come across for problems with sending and receiving messages.

Help Android-switcher friends turn off iMessage

Do you have a friend who previously used an iPhone but later switched to an Android phone? People like that can confuse your copy of Messages, which doesn’t know if it should send to them via iMessage (no) or SMS (yes). If you text with someone in this situation, get them to deregister from iMessage.

Check device connectivity

If messages aren’t flowing when you think they should be, the first “is it plugged in?” thing to check is connectivity. Make sure that your iPhone has at least cellular service (for SMS) and cellular data (for iMessage) and that your iOS device isn’t in Airplane mode. In the case of a Mac, make sure it’s connected to your network.

Relaunch the Messages app

Force-quitting in iOS isn’t something you should do willy-nilly, since it slows down your device and hurts battery life, but it’s worth trying if Messages isn’t sending or receiving messages correctly. Double-press the Home button on Touch ID devices or swipe up and to the right from the bottom of the screen on Face ID devices, then swipe up on the Messages app thumbnail to force-quit it. On the Mac, just quit and relaunch Messages.

Toggle iMessage off and back on

Here’s an easy one. In iOS, go to Settings > Messages and turn the iMessage switch at the top off and back on. iMessage may take a minute or two to reactivate. On the Mac, go to Messages > Preferences > iMessage > Settings, uncheck Enable This Account, and then log in again.

Toggle Messages in iCloud off and back on

With the new Messages in iCloud feature, Apple syncs conversations through your iCloud account. If messages from one device aren’t showing up properly on another device, in iOS, go to Settings > Your Name > iCloud and turn Messages off and back on. On the Mac, go to Messages > Preferences > iMessage > Settings and uncheck and recheck Enable Messages in iCloud.

Verify your phone number and email addresses are correct in Messages settings

SMS relies on a phone number, and you can be contacted via iMessage via a phone number or email address. Make sure you can be reached at all the appropriate ones. In iOS, go to Settings > Messages > Send & Receive to check. On the Mac, look in Message > Preferences > iMessage > Settings.

If they’re not right, fix them in iOS in Settings > Passwords & Accounts > iCloud > Your Name > Contact Information, by tapping Edit in the Reachable At section. On the Mac, you add these addresses with the plus button in System Preferences > iCloud > Account Details > Contact.

Verify that SMS fallback is enabled

When you’re in an area with sketchy cell service, there may not be enough of a data connection for iMessage to work. In such a situation, SMS text messages are more likely to get through, but Messages will try to send to iMessage users via SMS only if you turn on Send as SMS in Settings > Messages.

Check text message forwarding settings

If you’re receiving SMS messages on your iPhone but not any of your other devices, make sure Text Message Forwarding is enabled for the relevant devices (they need to be signed in to the same iCloud account). On your iPhone, look in Settings > Messages > Text Message Forwarding.

When in doubt, restart

Restarting can resolve all manner of problems, so it’s always worth a try if all the settings and accounts are correct. On the Mac, of course, just choose Apple > Restart. For iOS devices with Touch ID, press and hold the top button until the Slide to Power Off slider appears. For those with Face ID, press and hold the side (iPhone) or top (iPad) button and one of the volume buttons until the slider appears.

Reset network settings in iOS

Finally, the most voodoo of the fixes we’ve seen work is to reset network settings in iOS. You don’t want to start with this option because doing so also resets Wi-Fi networks and passwords, cellular settings, and VPN settings. But if all else fails, go to Settings > General > Reset > Reset Network Settings.

If none of these techniques fix your problem, let us know and we’ll see what we can do to help!


Social Media: Having trouble with sending or receiving in Messages? Read this article for solutions to common texting problems:

Three Ways to Tell If You Should Get a New iPhone Battery before 2019

Are you happy with your iPhone’s battery life? If your iPhone regularly ends up in Low Power Mode or doesn’t always make it to the end of the day without extra juice, read on to learn how to determine when it’s time for a new battery.

It may be important to get to this soon because people with an iPhone 6, SE, 6s, 7, 8, or X can likely get Apple to replace the battery for just $29 through December 31st, 2018—the price will go up in 2019. (The cost is $79 for even older iPhones; non-Apple repair shops may be less expensive, but it’s generally better to stick with Apple’s parts and service providers.) That $29 price is thanks to a discount program Apple instituted in January 2018 as an apology for silently reducing the performance of the iPhone 6 and later in an effort to prevent them from shutting down due to weak batteries. See Apple’s A Message to Our Customers about iPhone Batteries and Performance for details.

Here are the top three signs that you need a new battery right away.

1. Your iPhone Is Bulging

This one is obvious and possibly dangerous. If the lithium-ion battery in your iPhone is defective or damaged, it can swell due to outgassing or other chemical reactions. In the worst case, a swollen battery can catch fire or explode—it’s why airlines are concerned about batteries in luggage.

If you notice your iPhone is swelling, you need to deal with it immediately. Power it off and place it in a fireproof container. Then take it to a repair professional or an Apple store right away, or call us for advice on how best to proceed.

2. Your Older iPhone Has Lousy Battery Life or Shuts Down Unexpectedly

Generally speaking, iPhone batteries last a few years without losing too much capacity. However, if your iPhone’s battery drains well before the end of the day, or if it shuts off unexpectedly, that’s a sign that you may need to replace the battery.

Before you do that, go to Settings > Battery and look at battery usage by app, which shows which apps have consumed the most power for the last 24 hours or the last 10 days. Tap Show Activity to see how many minutes the app was in use.

If anything near the top of that list seems odd—it’s not an app you use much or its background activity is excessive—consider force-quitting the app. (Open the app switcher by double-pressing the Home button on a Touch ID iPhone or swiping up and slightly right on a Face ID iPhone, then swipe up on the app’s thumbnail.) You might also disable that app’s switch in Settings > General > Background App Refresh.

But if your iPhone is more than a few years old, it’s probably time for a new battery. Batteries are consumable items, and Apple designs the iPhone to retain up to 80% of its original capacity after 500 complete charge cycles (from 0% to 100%, even if that comes over the course of several charging sessions). Don’t suffer with a weak battery—just get it replaced.

3. An iPhone 6 or Later Feels Sluggish

Starting with iOS 10.2.1, Apple changed things so the iPhone 6 and later would reduce performance to avoid peak power demands that could overwhelm an older battery and cause the iPhone to shut down unexpectedly. Not shutting down is good, but reducing performance is bad.

So if you have an iPhone 6 or later that feels poky, it may be iOS throttling performance to work around a weak battery. With iOS 11.3 or later on these iPhone models, you can go to Settings > Battery > Battery Health to learn more about your battery. iOS displays your maximum battery capacity and, under Peak Performance Capability, tells you if it has enabled performance management to avoid shutdowns. That’s a hint you need a new battery, and we’d be concerned about any maximum capacity under 90%.

iOS lets you disable performance management to avoid the throttling, but it’s nuts to do that and risk unexpected shutdowns. Just replace the battery and your performance will return to normal.

Apple will replace an iPhone battery for free under warranty only if its maximum capacity is under 80% and it has had fewer than 500 charge cycles. However, as previously noted, the company will replace an out-of-warranty battery in the iPhone 6 and later for $29 (plus $6.95 if shipping is required) through the end of 2018, so it’s worth taking advantage of the deal this month. In 2019, the price will go up to $49 for most iPhones and $69 for the iPhone X.

So hey, don’t suffer with an iPhone that’s working poorly due to the battery!


Social Media: If you have any battery issues with an iPhone 6 or later, you can still get a $29 battery replacement from Apple through the end of December. Don’t suffer with a weak battery—learn more at: