Is Your Mac Running Low on Disk Space? Here’s How to Delete Unnecessary Files
Between apps, photos, videos, music, and downloads, it’s easy to fill up your Mac’s drive, particularly one with just 128 or 256 GB of drive space. macOS warns you when you get too low on space, but those warnings may come late—for optimum Mac performance, we recommend you keep at least 10–20% of your drive free for new downloads and virtual memory swap files. There are excellent utilities that help you find and delete unnecessary files, such as the free GrandPerspective, the $9.99 DaisyDisk, and the $14.99 WhatSize, but Apple’s built-in storage management capabilities will likely be all you need.
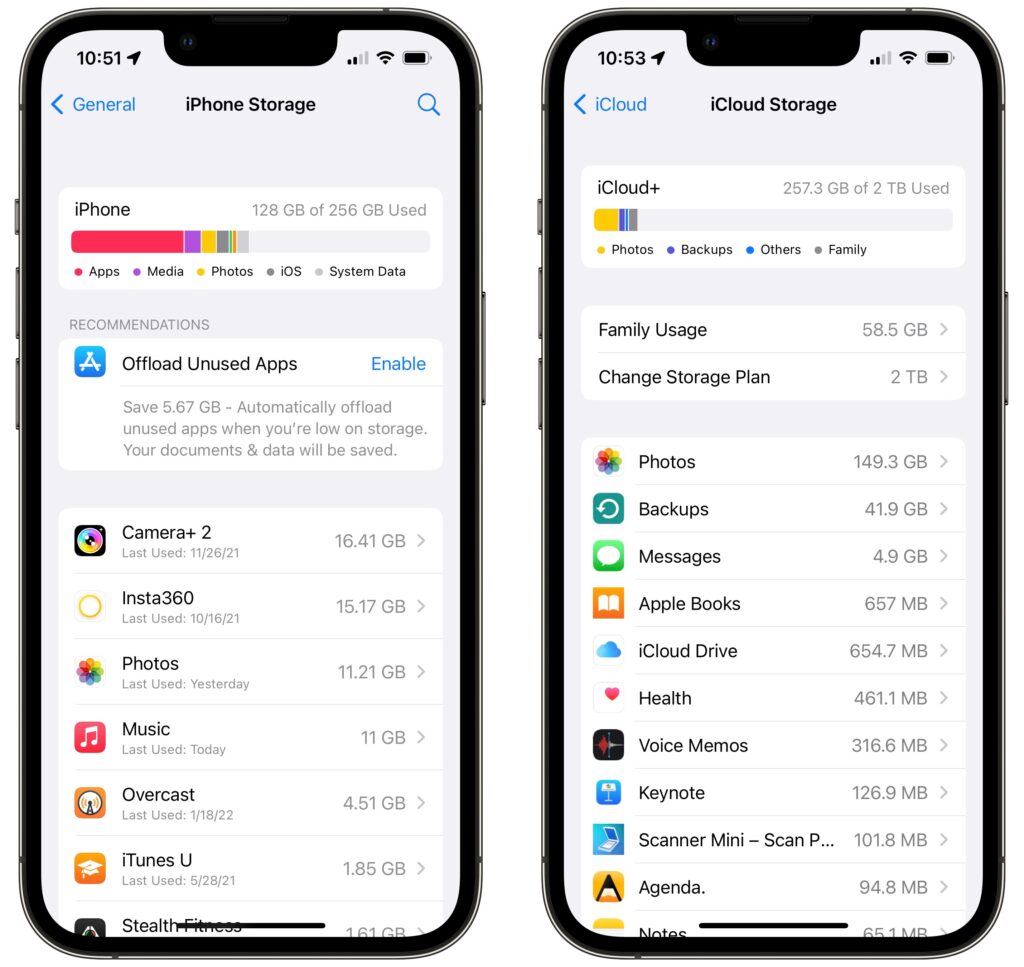
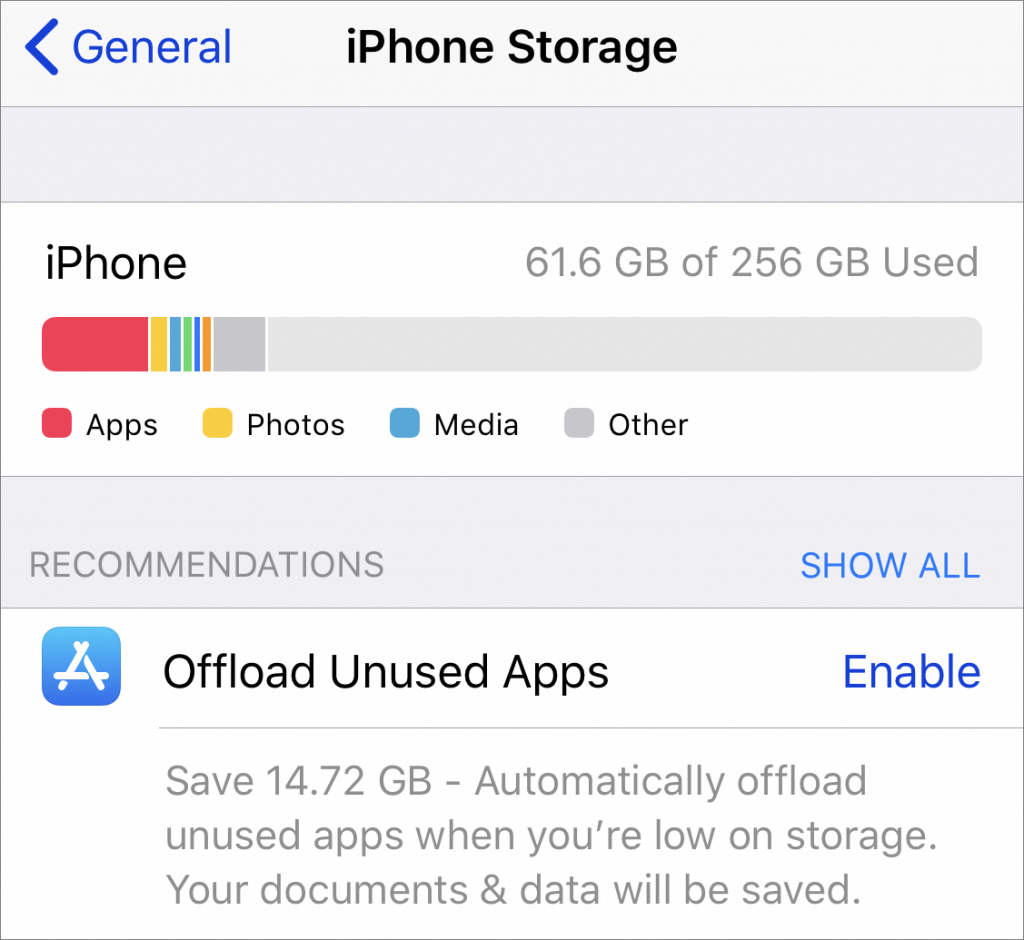
Apple first introduced its Storage Management tool in the System Information app in macOS 10.12 Sierra, making it accessible from the About This Mac dialog. Starting in macOS 13 Ventura, Apple moved those capabilities to System Settings > General > Storage, providing a quick overview of your drive usage at the top. Hover over each colored bar to see how much space is taken up by a particular type of data. The light gray space at the end of the bar is what’s still available.
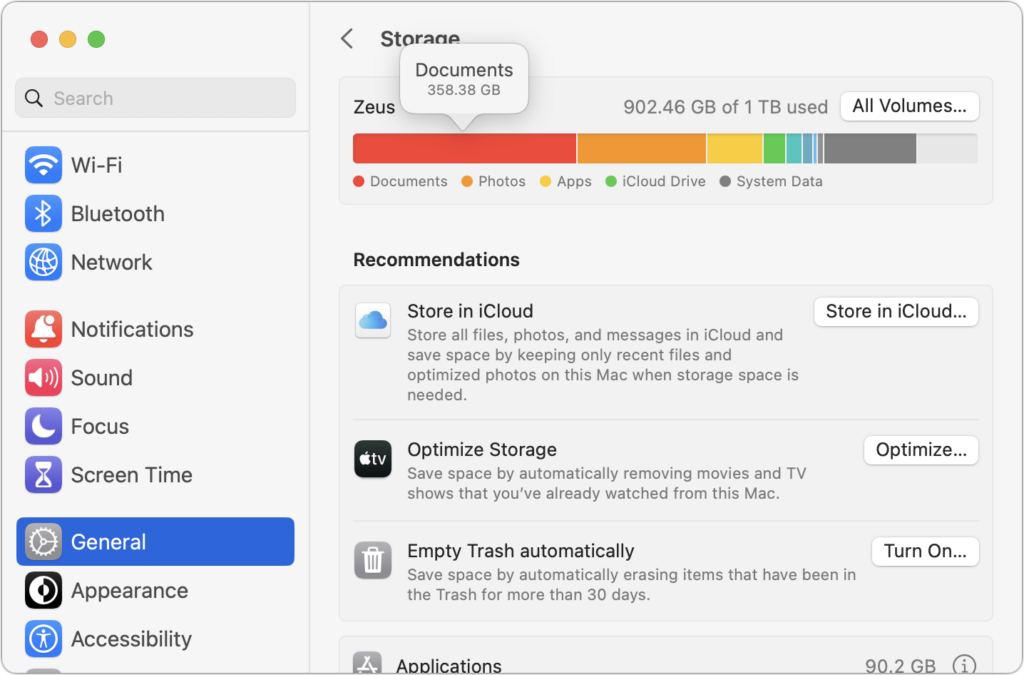
Below the graph, macOS may offer some recommendations for reducing storage over time, but they come with tradeoffs. Storing files in iCloud and optimizing Apple TV videos will replace local files with stubs pointing at a version stored in the cloud. That’s OK, but you then have to download the original before you can use it. Deleting files automatically after they’ve been in the Trash for more than 30 days is also fine but could have undesirable results if you ever want to recover older files from the Trash. Enable these if you wish, but the real work happens farther down on the screen, where you find all the categories of files you can explore. Depending on what apps you use, they will vary a bit between Macs, but they correspond to the colored bars you saw in the storage graph. Double-click each one to see what it displays.
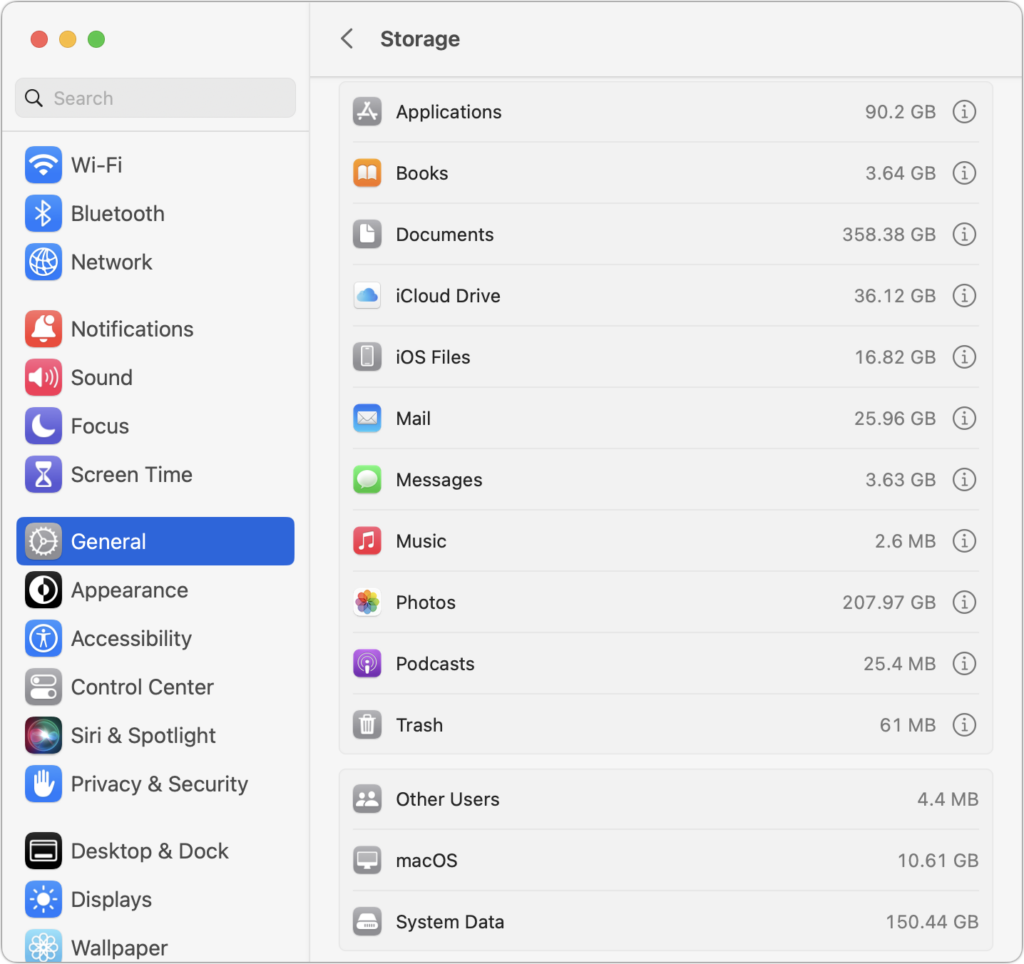
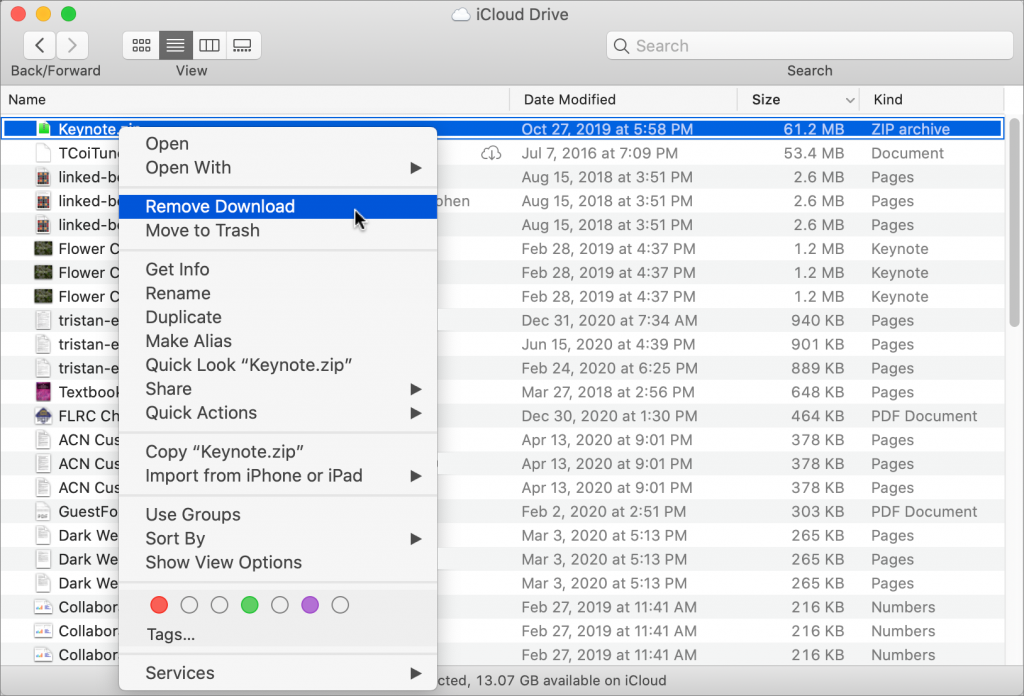
For a few app-specific categories, like Mail and Podcasts, you merely learn how much space the app’s data occupies—to save space, you must delete unnecessary data from within the app itself. iCloud Drive and Photos are similar but also let you enable space optimization, which stores only placeholder files or smaller optimized photos on the Mac, leaving the originals in iCloud for later downloading whenever you access them.
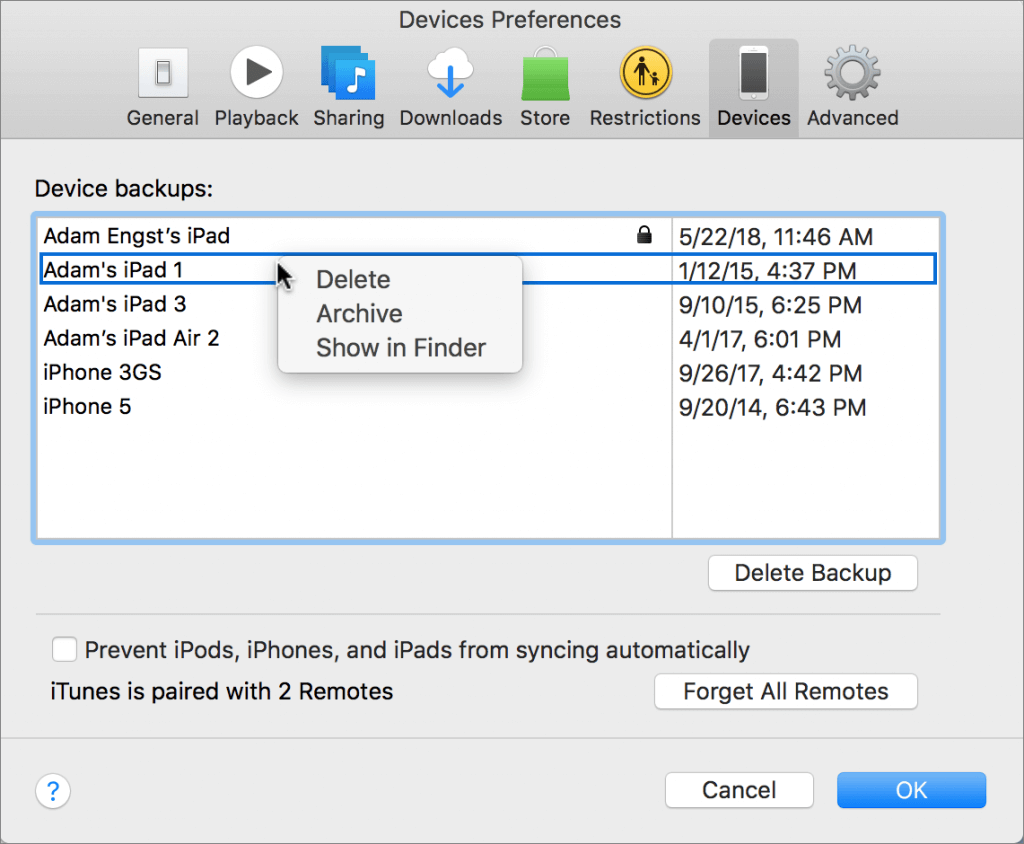
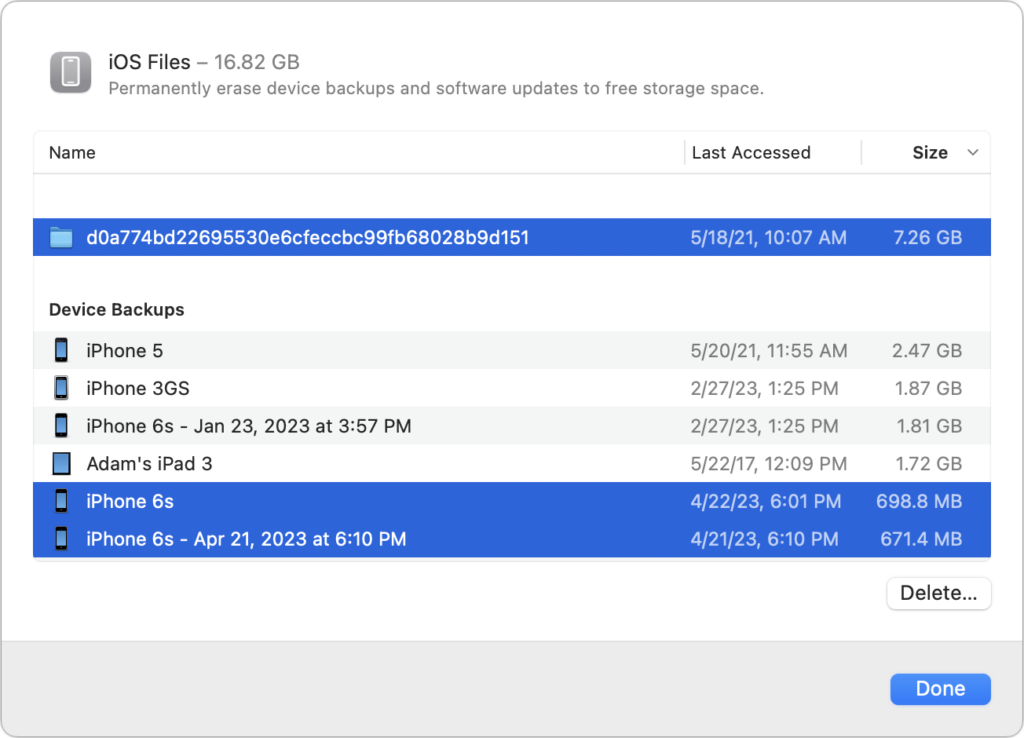
More interesting are the Applications, Documents, and iOS Files categories, each of which may reveal gigabytes of unnecessary data. iOS Files, for instance, shows any device backups and software updates stored on your Mac’s drive. It’s worth keeping the latest backup of devices you still use, but delete any older backups and updates that are just wasting space—well over 8 GB in the screenshot below.
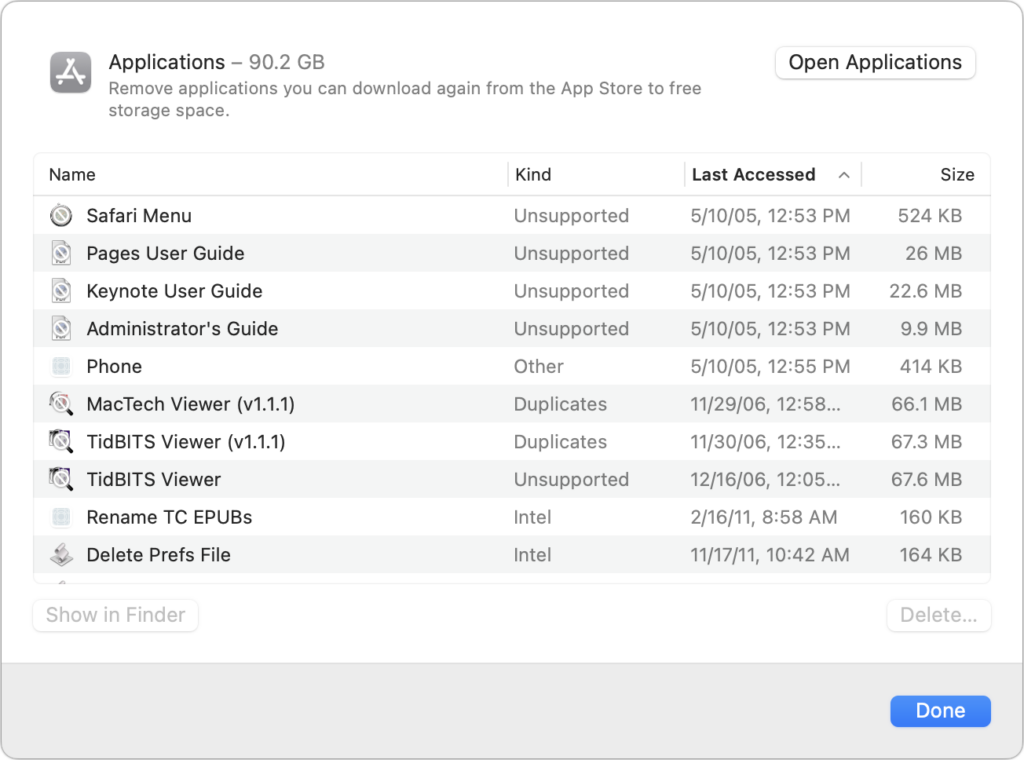
The Applications category lists your apps and is sorted by size by default. But try clicking the column header for Kind and scrolling down. You can probably delete most apps tagged as Unsupported, Duplicates, or Older Versions. Similarly, click the Last Accessed column header to see which apps you haven’t launched in years. Many of them can probably go, too.
In Documents, you’ll see four buttons: Large Files, Downloads, Unsupported Apps, and File Browser.
- Large Files shows huge files regardless of where on your drive they’re located.
- Downloads shows you the contents of your Downloads folder, much of which you likely don’t need.
- Unsupported Apps lists any PowerPC or 32-bit apps that won’t run on your Mac. You can delete them.
- File Browser provides a column view sorted by file size and shows sizes next to each item. It’s great for trawling through your drive to see what’s consuming all that space.
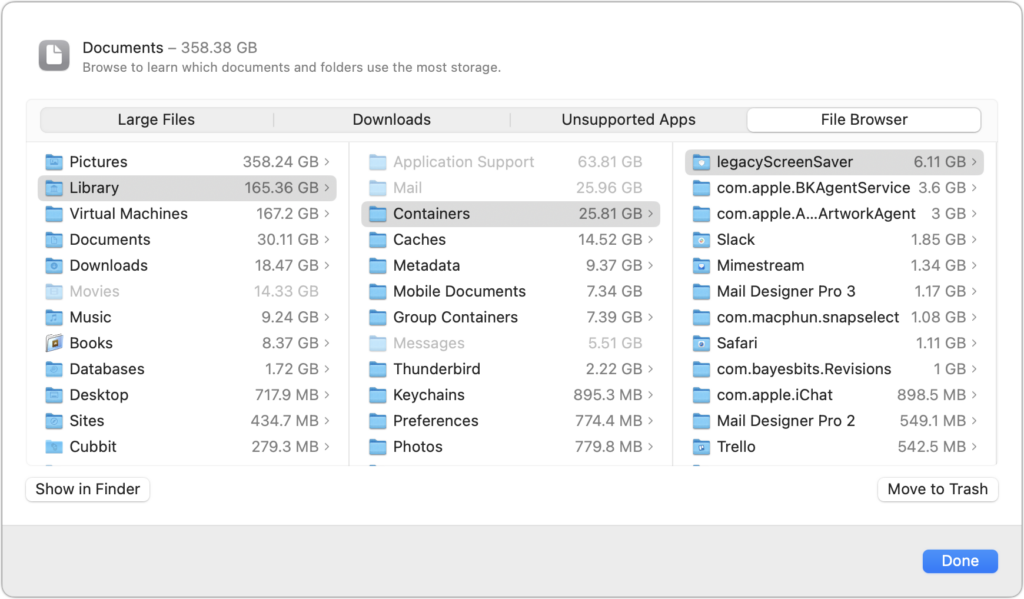
In any of these views, click Delete or Move to Trash to remove the file or Show In Finder to see it in its native habitat, which may help you decide if you should keep or delete the file. To delete multiple files at once, Command-click or Shift-click to select them and then click Delete to remove them all at once.
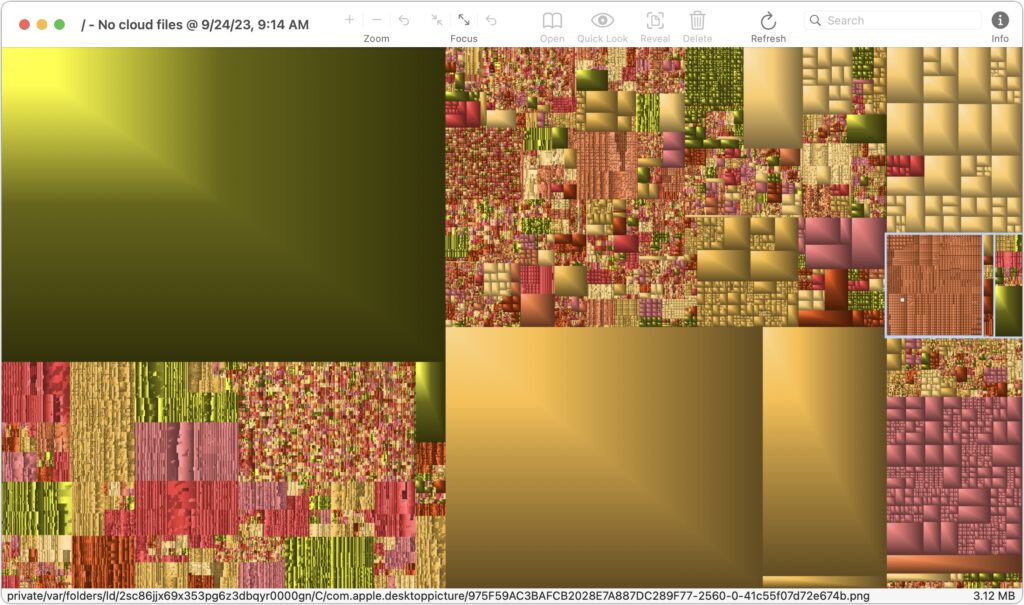
You may find it worth using GrandPerspective to get a visual overview of how space is used on your drive. After scanning, which can take a long time, it uses tiny colored blocks to represent files, collecting multiple blocks into bigger rectangles to show folder size. Toolbar buttons let you open, preview with Quick Look, reveal location, or delete whatever file block you click. Look in the status bar at the bottom of the window to see the path to the file.
In the screenshot below, the big boxes of color are massive virtual machine disk images, and the selected folder outlined in white at the right contains desktop pictures downloaded by an app that rotates them regularly—gigabytes of old files that can easily be deleted.
If your Mac’s drive has less than 10% free space, consider using Apple’s storage management capabilities—perhaps supplemented with GrandPerspective or another utility—to find and delete files that are wasting space.
Two final notes: Don’t get too wrapped up in the exact numbers in the storage graph matching what the Finder reports, and give the Mac some time to update its free space amounts after deleting files directly or emptying the Trash.
(Featured image based on an original by iStock.com/Bet_Noire)
Social Media: Is your Mac low on drive space? Learn how to use Apple’s built-in storage management capabilities—perhaps supplemented with a third-party utility—to find and delete gigabytes of unnecessary files.