Posts

The Importance of Staying Updated

Does it feel like your Apple devices are always asking you to install operating system updates? You’re not wrong—from September 2022 to January 2024, we saw the following releases in Apple’s previous set of operating systems:

  • macOS 13 Ventura: 20 releases
  • iOS 16: 25 releases
  • iPadOS 16: 20 releases
  • watchOS 9: 15 releases
  • tvOS 16: 12 releases

Apple issued many of those at the same time, but since you might not use all your devices every day, it can seem as though you spend all your time installing updates. As annoying as updating can be, we encourage you to do so soon after you’re notified for three reasons.

Reason One: Fewer Bugs

First, as has always been the case, updates fix bugs. You may not have experienced all the bugs that Apple fixes, but when one blocks something you want to do, the fix comes as a huge relief.

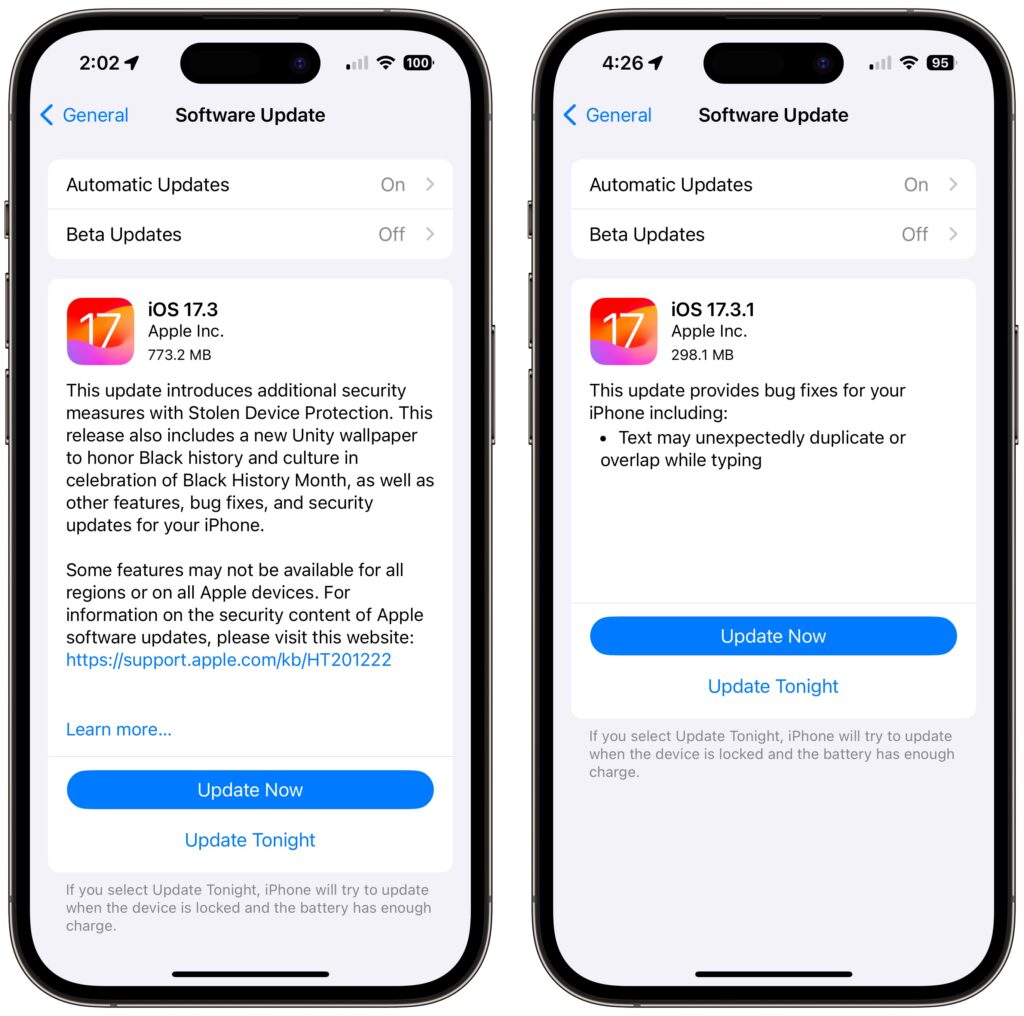
For instance, in a set of releases in January 2024, Apple inadvertently introduced a bug that caused text in many apps, including Mail, Notes, and Safari, to appear to be duplicated and overlap. It was only cosmetic, and switching to another window or resizing the window would make it look right again. But the bug was hugely disconcerting, so Apple fixed it two weeks later in macOS 14.3.1 Sonoma, iOS 17.3.1, iPadOS 17.3.1, and Safari 17.3.1 (which brought the fix to macOS 13 Ventura and macOS 12 Monterey).

Reason Two: Better Security

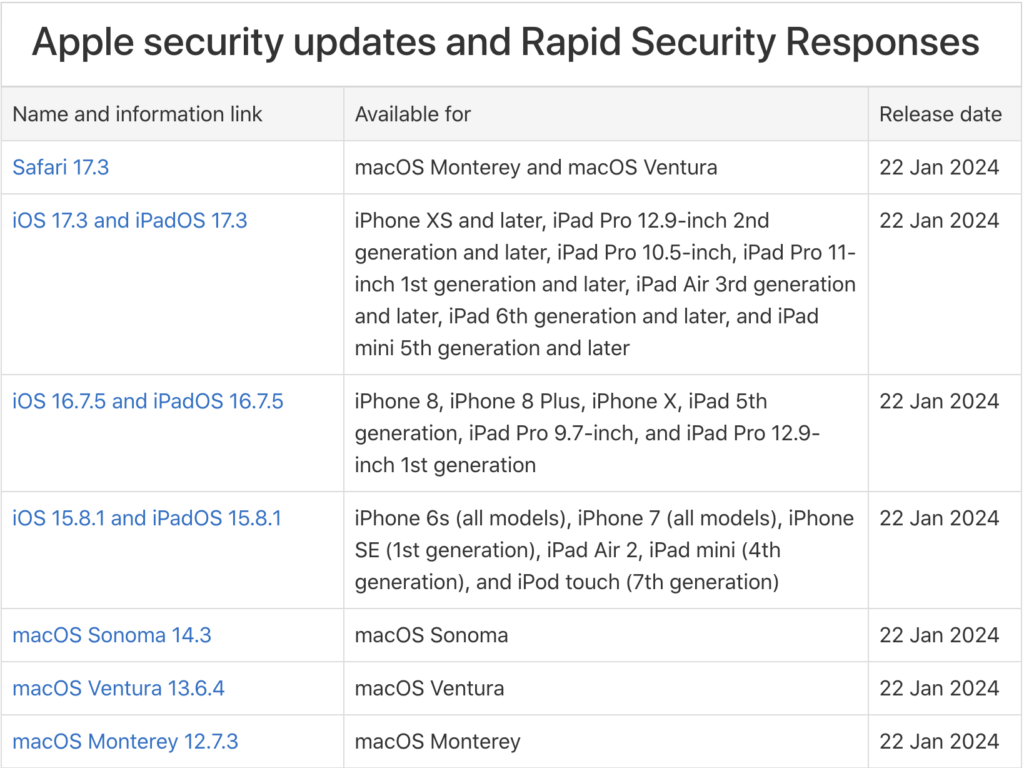
Second, many of the bugs Apple fixes won’t impact your experience of using your device, but they make it possible for attackers to steal information, install malware, spy on your communications, or even take over your entire device. Nearly all of Apple’s operating system updates contain security fixes to address newly discovered vulnerabilities, and some releases only have security fixes. Apple continues to release security updates for the last two versions of macOS and older versions of iOS and iPadOS as appropriate.

It’s easy to think that you won’t be impacted by security vulnerabilities, but remember that as soon as Apple releases an update outlining what it has fixed, attackers know what vulnerabilities exist in unpatched systems. Apple has to react swiftly to some reported vulnerabilities because blocking them can literally be a matter of life or death when it comes to, for instance, iPhone-using dissidents, activists, or journalists working in opposition to repressive governments that employ spyware against their enemies. (All spyware relies on previously unidentified vulnerabilities.)

However, some security vulnerabilities are more likely to impact regular users. For instance, in macOS 14.2.1, Apple fixed a bug in Screen Sharing. If you were sharing your full screen with someone else and had multiple Spaces, Screen Sharing could show the other person random windows in other Spaces, which could range from embarrassing (adult pictures) to seriously problematic (passwords or financial details).

Reason Three: New Features

Third, on the positive side, many operating system releases introduce welcome new features. When Apple unveils its next set of operating systems at the Worldwide Developer Conference in June, some of the promised features won’t appear with the initial releases. New features that shipped in later releases of macOS 14 Sonoma, iOS 17, iPadOS 17, and watchOS 10 include:

  • watchOS’s double-tap gesture for tapping the default button in many apps
  • AirDrop transfers continuing over the Internet when you move out of AirDrop range
  • Adding NameDrop to share contact info when you bring two devices near each other
  • Additional options to control when the iPhone screen shuts off in StandBy
  • The option to choose a specific album for the Lock Screen’s Photo Shuffle wallpaper
  • HomeKey support for Matter locks
  • Expanded Favorites in the Music app
  • A new automatic Favorite Songs playlist in the Music app
  • The addition of Apple’s Journal app
  • A Translate option for the Action button in the iPhone 15 Pro models
  • 10-day precipitation forecasts in the Weather app
  • Sharing of eligible passes in the Wallet app via NameDrop-like proximity
  • A catch-up arrow in Messages that lets you jump to the first unread message
  • Multiple timers in the Clock app on the Mac
  • Stolen Device Protection for the iPhone
  • Collaborative playlists in Apple Music
  • Support for streaming content to TVs in select hotel rooms using AirPlay

Just Update It

Updates provide both a carrot (user-facing bug fixes and new features) and a stick (security fixes). That’s why we recommend updating soon after Apple pushes out a new release and why devices under management usually receive updates quickly. Even if a security breach is unlikely, the liability of allowing devices to remain unpatched is too high for most organizations. Installing updates is an easy way to reduce worry about things like compromised accounts and ransomware.

There are three types of operating system releases:

  • Minor bug fix and security updates: Install these as soon as convenient, usually within a few days. Examples of these include macOS 14.3 to 14.3.1.
  • Interim feature updates: Because these include bug fixes and security updates alongside the new features, you’ll also want to install these within a few days. An example is iOS 17.2.1 to iOS 17.3.
  • Major version upgrades: Because Apple always releases security updates for the two versions of macOS before the current one, you can wait a month or three before installing a major upgrade, such as from macOS 13 to macOS 14. However, once you’ve verified that your apps and workflow are compatible with the new version, we recommend upgrading because skipping a major version of macOS often results in a more difficult upgrade experience.

In each of these cases, if you’re worried about how an update might impact your workflow, check online forums for discussions of each update and feel free to ask us what we recommend for your particular situation.

(Featured image by iStock.com/Fokusiert)


Social Media: We know it seems like your Apple devices are constantly asking you to install an update. Other than for major upgrades, we recommend updating shortly after updates appear so you can take advantage of bug fixes, security updates, and new features.

Feel Free to Upgrade to macOS 14 Sonoma When You’re Ready

Although we’re cautious about recommending that people upgrade to the latest major release of macOS, we think Apple has done a good enough job with macOS 14 Sonoma that anyone who wants to upgrade can do so now. That doesn’t mean you have to upgrade immediately, but there’s no major reason most people need to delay.

Our confidence comes from our positive experience working with those who have upgraded to Sonoma and the fact that Sonoma has received only three updates so far.  None included significant bug fixes:

  • macOS 14.1 fixed two bugs that could reset the System Services settings within Location Services and prevent encrypted external drives from mounting.
  • macOS 14.1.1 came with generic release notes, but the community discovered that it fixed a bug introduced in 14.1 that affected Photoshop and another that could prevent a new M3 24-inch iMac that shipped with macOS 13 Ventura from upgrading to Sonoma.
  • macOS 14.1.2 focused on fixing two WebKit-related security vulnerabilities that were exploited in iOS.

Apple will likely release another update before the end of the year, probably macOS 14.2, with some promised features, a few more bug fixes, and the usual handful of security improvements. After that, the company will continue with an update every month or so to address newly discovered bugs and security vulnerabilities.

That said, you can put off the Sonoma upgrade as long as you’re running macOS 12 Monterey or macOS 13 Ventura and are staying current with Apple’s security updates. Earlier macOS versions no longer receive security fixes, rendering them more vulnerable to attack. Possible reasons to continue delaying include:

  • You’re too busy. The upgrade process will take a few hours, plus some additional time to configure everything properly afterward. When you are ready to upgrade, aim for when a little downtime will be convenient.
  • You rely on incompatible software. The jump from Monterey or Ventura to Sonoma isn’t a big one, so most modern apps should have been updated by now. But if you’re still running macOS 10.14 Mojave or earlier with 32-bit apps, you’ll lose access to them if you upgrade. There’s nothing new here—32-bit apps stopped working in macOS 10.15 Catalina in 2019. Rather than delaying, consider running Mojave and your 32-bit apps in a virtual machine using VMware Fusion or Parallels Desktop.
  • You need consistent versions for workflow reasons. We’re unaware of any examples here, but it’s conceivable that a coworker could be stuck on an older version of macOS and older versions of shared productivity apps. If your upgrade would force you to update those apps and introduce compatibility issues when collaborating with that coworker, you may have to wait until your coworker can upgrade as well.

Sonoma won’t transform your experience of using a Mac, but it has new features you might appreciate. The most noticeable is probably desktop widgets that provide updated information at a glance—you can even add widgets from your iPhone. Sonoma also lets you turn websites in Safari into standalone apps, enjoy aerial screensavers from the Apple TV, create a video overlay of yourself on video calls when sharing your screen, autofill PDF forms, and use the keyboard while dictating.

Before You Upgrade

Once you’ve decided to upgrade to Sonoma, you have three main tasks:

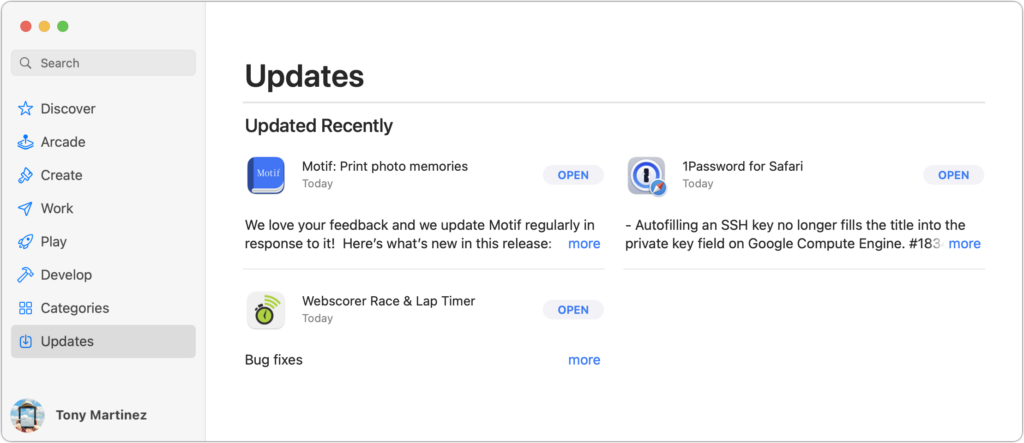
  • Update apps: Make sure all your apps are as up-to-date as possible. If you regularly put off updates, now’s the time to let them complete so you have Sonoma-compatible versions.
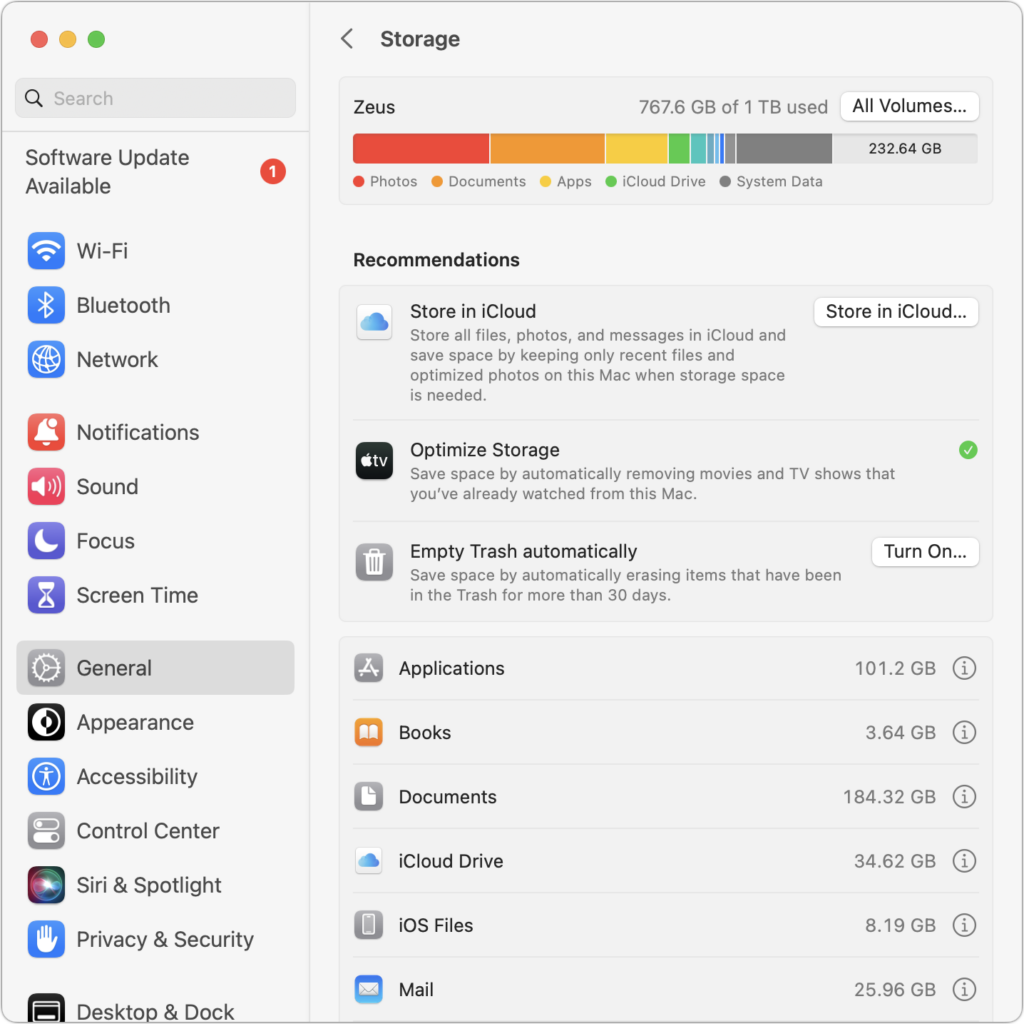
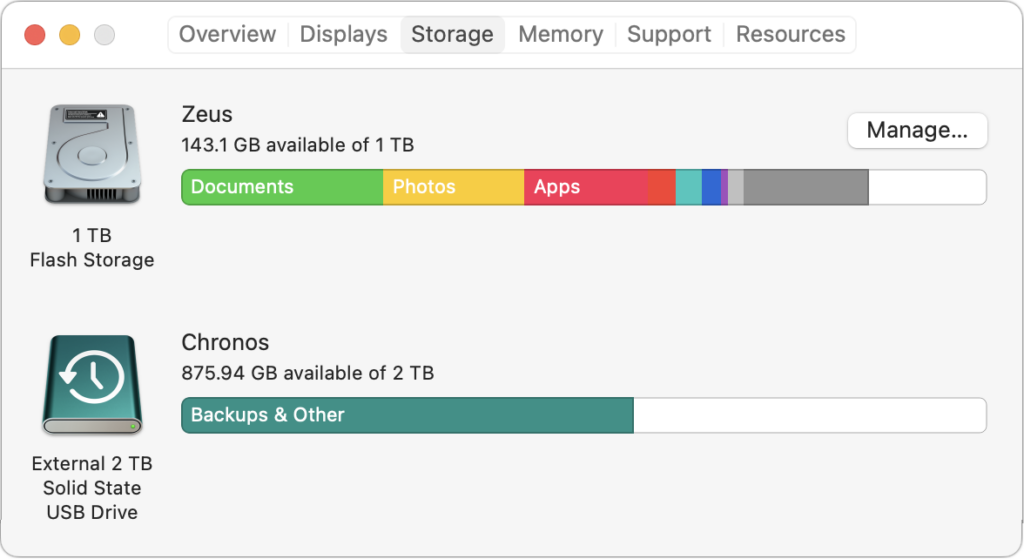
  • Clear space: Sonoma may need as much as 25 GB of free space to upgrade, and the Sonoma installer itself is about 12 GB, so we recommend making sure you have at least 37 GB free. Don’t cut this close—you should always have at least 10–20% free space for virtual memory, cache files, and breathing room. Check in Ventura by choosing System Settings > General > Storage; in earlier versions of macOS, choose About This Mac from the Apple menu and click Storage. System Settings provides quick ways to free up space. Another easy one for iCloud Drive users is to Control-click large folders and choose Remove Download to “evict” the local versions of those files temporarily; Box, Dropbox, and Google Drive have similar features.
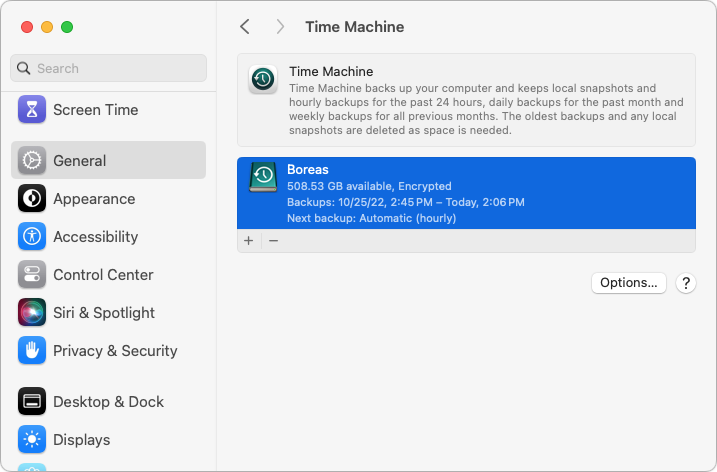
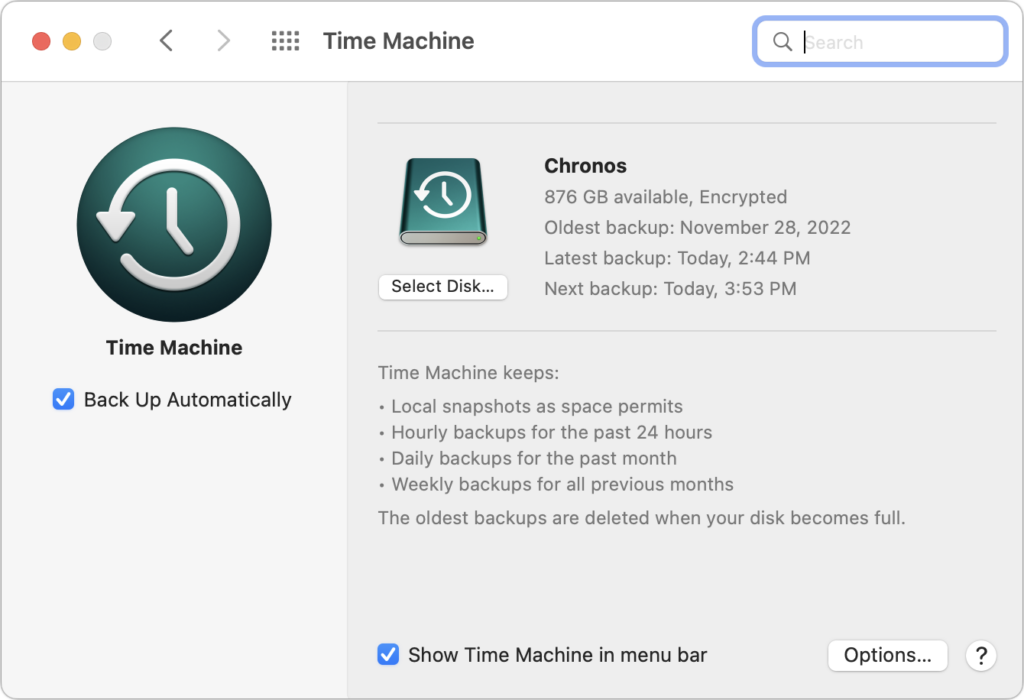
  • Make a backup: Never, ever install an update to macOS without ensuring you have at least one current backup first. In an ideal world, you’d have an updated Time Machine backup, a duplicate, and an Internet backup. That way, if something goes wrong, you can quickly revert.

Upgrading

After completing those tasks, ensure you won’t need your Mac for a few hours. There’s no telling exactly how long the upgrade will take, so never start an upgrade if you need the Mac soon.

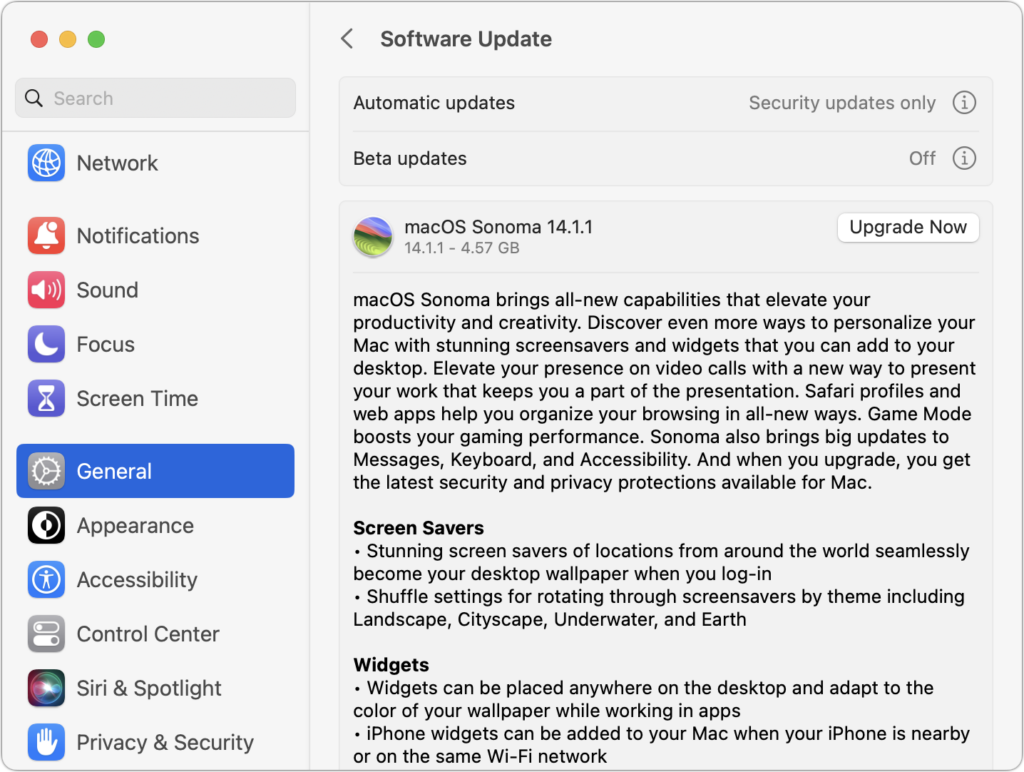
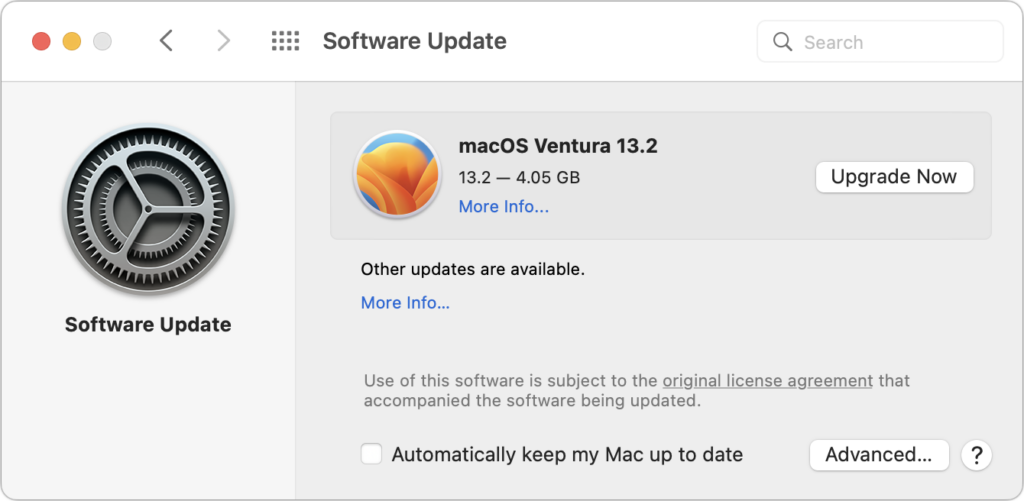
Initiating the upgrade is just a matter of opening System Settings > General > Software Update in Ventura (System Preferences > Software Update in previous versions of macOS), clicking the Upgrade Now button, and following the instructions. If you’d like more handholding, check out Joe Kissell’s ebook Take Control of Sonoma.

After You Upgrade

Part of the reason to set aside plenty of time for your Sonoma upgrade is that there are usually cleanup tasks afterward. We can’t predict precisely what you’ll run into, depending on what version of macOS you’re running now and what apps you use, but here are a few situations we’ve noticed in the past:

  • macOS may need to update its authentication situation by asking for your Apple ID password, your Mac’s password, and if you have another Mac, its password as well. Don’t worry that your Mac has been compromised by malware—it’s fine.
  • Some apps may have to ask for various permissions even though you previously granted them. Again, that’s fine and won’t happen again.
  • If you use your Apple Watch to unlock your Mac and apps (and you should, it’s great!), you may need to re-enable that in System Settings > Touch ID & Password (or Login Password on a non-Touch ID-enabled Mac (previously, it was in System Preferences > Security & Privacy > General).
  • If you use Gmail, Google Calendar, or other Google services, you may need to log in to your Google account again.
  • Websites that usually remember your login state may require that you log in again. If you’re using a password manager like 1Password, that’s easy.
  • You may have to re-enable text message forwarding to your Mac. You do this on your iPhone in Settings > Messages > Text Message Forwarding.

With all that housekeeping done, it’s time to check out all the new features in Sonoma!

(Featured image by Apple)


Social Media: When should you upgrade to macOS 14 Sonoma? There’s no need to install it today, but we think it’s now safe for those who want to take advantage of the new features and integration with Apple’s other operating systems.

You Can Now Upgrade to macOS 13 Ventura When You’re Ready

When upgrading to a new version of macOS, we err on the side of caution, at least in our recommendations. (We’ve been using macOS 13 Ventura for some time now and often install beta releases on secondary machines for testing purposes.) Upgrading is easy, but if you upgrade too soon, the new macOS version could make key apps inoperable, create workflow interruptions, or cause other negative consequences. On the other hand, waiting too long can cause problems—it’s important to stay in sight of the cutting edge for security reasons and to take advantage of Apple’s advances. Upgrading is not an if question; it’s a when question.

That when could be now. There’s no reason you must upgrade to macOS 13 Ventura right away, but if you want to, you should now be able to do so without undue interruptions. Ventura has been quite stable and has received only three updates since its initial release in October 2022:

  • macOS 13.0.1 provided just unspecified bug fixes and two security fixes.
  • macOS 13.1 introduced the Freeform digital whiteboard app, Advanced Data Protection for iCloud, improved searching for photos in Messages, participant cursors for shared notes in Notes, and the option to play sounds in the Find My app. There were also a couple of bug fixes and important security fixes.
  • macOS 13.2 added support for Security Keys for Apple ID for those who need the utmost security, fixed a few bugs, and blocked more security vulnerabilities.

Apple may have another feature or two up its sleeve for Ventura, and we’ll undoubtedly see more updates to address bugs and newfound security vulnerabilities, but there’s no significant reason to wait any longer.

That said, you can continue to delay as long as you’re running macOS 11 Big Sur or macOS 12 Monterey and are staying up to date with Apple’s security releases. (Both have received important updates recently.) Earlier versions of macOS no longer receive security fixes, rendering them more vulnerable to attack. Reasons to delay include:

  • You’re too busy. The upgrade process will take a few hours, and it may take additional time to configure everything properly afterward. When you are ready to upgrade, aim for when a little downtime will be convenient.
  • You’re still using incompatible software. The jump from Big Sur or Monterey to Ventura isn’t a big one, so most modern apps should have been updated to ensure compatibility with Monterey by now. But if you’re still running macOS 10.14 Mojave or earlier with 32-bit apps, you’ll lose access to them if you upgrade. (That first happened with macOS 10.15 Catalina in 2019.) With Mojave no longer receiving security updates, you need to find replacements for those apps and upgrade soon.
  • You need consistent versions for workflow reasons. We’re unaware of any examples here, but it’s not inconceivable that a coworker could be stuck on an older version of macOS and thus older versions of shared productivity apps. If your upgrade would force you to update those apps and introduce compatibility issues when collaborating with that coworker, you may have to wait until your coworker can upgrade as well.

Ventura won’t upend your experience of using a Mac, but it has numerous useful features, large and small. Along with the features mentioned above that shipped in updates, the new iCloud Shared Photo Library enables you to share photos and videos with up to five family members in a separate shared library. Stage Manager provides a new paradigm for window management. Messages lets you edit messages, undo sending, and mark conversations as unread. Similarly, Mail lets you undo sending, schedule messages to send later, and get follow-up reminders for replying. For better videoconferencing quality, Continuity Camera enables you to use your iPhone as a webcam, complete with Desk View for showing what’s on your desk during a call. The Mac finally gets its own Weather app. Perhaps even more important, Ventura shares some of these features with Apple’s other operating systems: iOS 16, iPadOS 16, watchOS 9, and tvOS 16. To take full advantage of those features across all your Apple devices, your Mac must be running Ventura.

However, we want to be upfront about one downside to upgrading to Ventura. Apple replaced System Preferences with System Settings. While we wouldn’t have described System Preferences as having a stellar user interface, it was at least familiar after decades of use. The new System Settings, which tries to mimic the Settings app in iOS and iPadOS, moves numerous settings around and makes some odd and unfortunate design decisions. You may find yourself relying heavily on its search field to find commonly used options.

Before You Upgrade

Once you’ve decided to upgrade to Ventura, you have three main tasks:

  • Update apps: Make sure all your apps are as up-to-date as possible. If you regularly put off updates, now’s the time to let them complete so you have Ventura-compatible versions.
  • Clear space: Ventura needs about 25 GB of free space to upgrade, and the Ventura installer itself is about 12 GB, so we recommend making sure you have at least 37 GB free. Don’t cut this close—you should always have at least 10–20% free space for virtual memory, cache files, and breathing room. Check by choosing About This Mac from the Apple menu and then clicking Storage.
  • Make a backup: Never, ever install an update to macOS without ensuring that you have at least one current backup first. In an ideal world, you’d have an updated Time Machine backup, a bootable duplicate, and an Internet backup. That way, if something goes wrong, you can easily restore.

Upgrading

After completing the above-listed tasks, ensure you don’t need your Mac for a few hours. There’s no telling exactly how long the upgrade will take, so never start an upgrade if you need the Mac soon.

Initiating the upgrade is just a matter of opening System Preferences > Software Update, clicking the Upgrade Now button, and following the instructions. If you’d like more handholding, check out Joe Kissell’s ebook Take Control of Ventura.

After You Upgrade

Part of the reason to set aside plenty of time for your Ventura upgrade is that there are usually cleanup tasks afterward. We can’t predict precisely what you’ll run into, depending on what version of macOS you’re running now and what apps you use, but here are a few situations we’ve noticed in the past:

  • macOS may need to update its authentication situation by asking for your Apple ID password, your Mac’s password, and if you have another Mac, its password too. Don’t worry that your Mac has been compromised by malware—it’s fine.
  • Some apps may have to ask for various permissions even though you previously granted them. Again, that’s fine and won’t happen again.
  • If you use your Apple Watch to unlock your Mac and apps (and you should, it’s great!), you may need to re-enable that in System Settings > Touch ID & Password (it’s an example of something that moved; previously, it was in System Preferences > Security & Privacy > General).
  • If you use Gmail, Google Calendar, or other Google services, you may need to log in to your Google account again.
  • Websites that usually remember your login state may require that you log in again. If you’re using a password manager like 1Password, that’s easy.
  • You may have to re-enable text message forwarding to your Mac. You do this on your iPhone in Settings > Messages > Text Message Forwarding.

With all that housekeeping done, it’s time to check out all the new features in Ventura!

(Featured image by Apple)


Social Media: Should you upgrade to macOS 13 Ventura? There’s no need to install it today, but we think it’s now safe for those who want to take advantage of the new features and integration with Apple’s other operating systems. Details here:

When Migrating to a New iPhone or iPad, Try Quick Start First

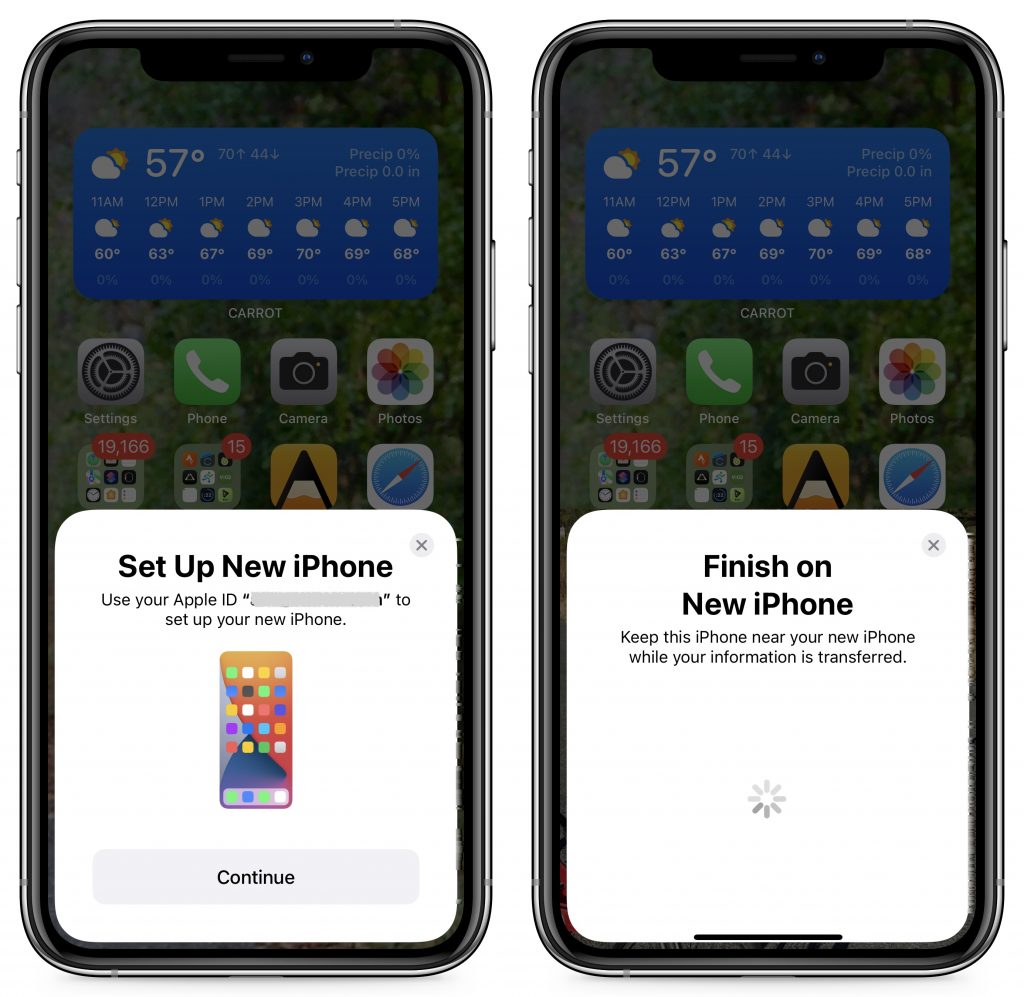
You have a new iPhone or iPad—congratulations! When transferring your data to the new device, you have three options: Quick Start, an iCloud backup, or a Mac backup. All will work, but they don’t quite provide the same end result (particularly if you didn’t encrypt your Mac backup). Our advice—backed by this post from Apple expert John Gruber—is to try Quick Start first because it transfers everything directly from your old device to your new one, maintaining app logins in most cases and allowing you to transfer your Apple Watch pairing. It may seem like it’s taking a long time before you can use the device, but it’s worth it to avoid logging in to numerous apps and unpairing and repairing your Apple Watch.

(Featured image by Adam Engst)

It’s Time to Consider Upgrading to macOS 11 Big Sur

We’re cautious when it comes to recommending upgrades to new versions of macOS. Apple makes the upgrade process easy—though it can be time-consuming—but upgrading can create workflow interruptions, render favorite apps inoperable, and have other consequences. At the same time, it’s important to stay in sight of the cutting edge for security reasons and to take advantage of advances from Apple and other developers. Upgrading is not an if question; it’s a when question.

We’re not saying that everyone needs to upgrade to macOS 11 Big Sur now, but if you want to, it should be safe now that Apple has released several bug-fix updates. However, there are still a few caveats, and preparation is essential.

Reasons Not to Upgrade

Some people should continue to delay upgrades to Big Sur due to software incompatibilities. Most software under steady development will have been updated for Big Sur by now, but some workflows rely on older versions of apps where an upgrade isn’t practical or possible (ancient versions of Adobe Creative Suite, for instance), or on obsolete apps that will never be updated. You may be able to learn more at RoaringApps, but those who haven’t yet upgraded past 10.14 Mojave may have to upgrade or replace 32-bit apps that ceased working starting with 10.15 Catalina.

The other app category that continues to have trouble with Big Sur are backup apps that make bootable duplicates. Catalina moved macOS to its own read-only volume, and Big Sur goes a step further by applying cryptographic signatures that make it even harder for an attacker to compromise the operating system. Unfortunately, that also makes creating a bootable duplicate difficult. Carbon Copy Cloner and ChronoSync have developed workarounds; SuperDuper remains incompatible at this point, although an older version can create data-only backups. If you rely on one of these apps for critical backups, make sure you know what you’re getting into before upgrading or reassess your backup strategy.

Before You Upgrade

Once you’ve decided to upgrade to Big Sur, you have three main tasks:

  • Update apps: Make sure all your apps are as up-to-date as possible. If you regularly put off updates, now’s the time to let them complete so you have Big Sur-compatible versions.
  • Clear space: Big Sur needs a minimum of 35.5 GB to upgrade, and as of macOS 11.2.1, the installer won’t proceed unless there’s enough space. Don’t cut this close—you should always have at least 10–20% free space for virtual memory, cache files, and breathing room.
  • Make a backup: Never, ever install a major upgrade to macOS without ensuring that you have at least one current backup first. In an ideal world, you’d have an updated Time Machine backup, a bootable duplicate, and an Internet backup. That way, if something goes wrong as thousands of files are moved around on your drive, you can easily restore.

After those tasks are complete, make sure you don’t need your Mac for a few hours. There’s no telling exactly how long the upgrade will take, especially if it has to convert your drive to APFS, so never start an upgrade if you need the Mac soon.

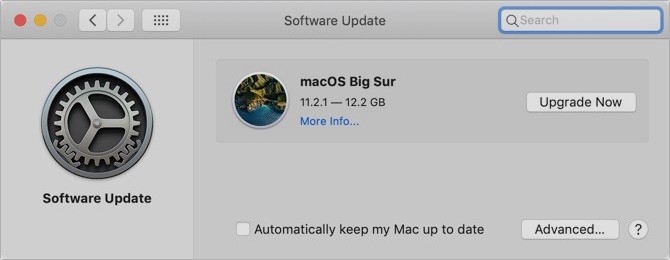
Initiating the upgrade is just a matter of opening System Preferences > Software Update, clicking the Upgrade Now button, and following the instructions.

After You Upgrade

Part of the reason to set aside plenty of time for your Big Sur upgrade is that there are always clean-up tasks afterward. We can’t predict precisely what you’ll run into, but here are a few situations we’ve noticed:

  • macOS will probably need to update its authentication situation by asking for your Apple ID password, your Mac’s password, and if you have another Mac, its password too. Don’t worry that this is a security breach—it’s fine.
  • Some apps may have to ask for permission to access your contacts and calendar even though you previously granted permission. Again, that’s fine.
  • If you use your Apple Watch to unlock your Mac and apps (and you should, it’s great!), you’ll need to re-enable that in System Preferences > Security & Privacy > General.
  • If you use Gmail or Google Calendar or other Google services, you may need to log in to your Google account again.
  • Websites that usually remember your login state will likely require that you log in again. If you’re using a password manager like 1Password, that’s easy.
  • You may have to re-enable text-message forwarding to your Mac on your iPhone in Settings > Messages > Text Message Forwarding.
  • Those who use Backblaze for Internet backups will find their backups have been “safety frozen.” Follow these instructions for thawing your account.

Finally, Time Machine in Big Sur now supports and prefers APFS-formatted drives, and all of Apple’s development is going in that direction now. You can keep using your existing Time Machine backup in Big Sur, but after you’re confident that everything is working well—and you have another backup—it’s worth removing your Time Machine backup drive in System Preferences > Time Machine > Select Disk, reformatting the drive as APFS in Disk Utility, and restarting the backup in the Time Machine preference pane.

With all that housekeeping done, it’s time to check out all the new features in Big Sur!

(Featured image based on originals by Apple)


Social Media: Should you upgrade to macOS 11 Big Sur? There’s no need to do so yet, but it should be safe for most people, so if you’re excited about the new look and the new features, this is a good time to upgrade. Read on for our pre- and post-upgrade tasks.

Strategies for Moving from Mojave to Catalina

For some Mac users, macOS 10.15 Catalina is no longer a choice. That’s because the new 16-inch MacBook Pro and the 2019 Mac Pro that Apple released late last year ship with Catalina installed and can’t run any previous version of macOS.

But for most people, it’s time to consider an upgrade to Catalina. Most backup software now works with Catalina’s bifurcated drive approach that puts the system on a separate, read-only volume from your data and apps. We’ve all had several months to come to terms with the fact that old 32-bit apps won’t even launch in Catalina. And Apple has shipped several updates that bring Catalina to version 10.15.3, addressing most of the complaints users had with the initial release.

If you are ready to try Catalina but still want to use 10.14 Mojave, we have some advice for how to make that happen. This could be the case for someone who has purchased a new Mac that does support Mojave but came with Catalina installed, for someone who wants to test Catalina while still using Mojave, or for someone who wants to move on to Catalina but has a 32-bit app that they aren’t ready to say good-bye to.

Downgrade from Catalina to Mojave on Some New Macs

Apple has started installing Catalina on new Macs other than the 16-inch MacBook Pro and 2019 Mac Pro, but since these older Macs can still run Mojave, it’s possible—if a bit tricky—to downgrade them to Mojave.

System engineer Armin Briegel has worked out a way of downgrading new Macs to Mojave. First, you create a Mojave Installer USB drive. To use that drive to boot a Mac with a T2 security chip, you must allow external booting from the Security Utility on the Recovery partition. Once you’ve booted from your Mojave Installer drive, use Disk Utility to erase the entire internal drive. Then install Mojave.

Use Virtualization to Keep 32-bit Apps Running

For some people, what’s keeping them on Mojave is a single 32-bit app that will never be updated in an appropriate fashion. Quicken 2007 falls into this category, as does the ScanSnap Manager app for the ScanSnap S1300, S1500, and S1500M scanners. Sure, you can get a current version of Quicken, but it may not do precisely what you want, and Fujitsu would be happy to sell you a new ScanSnap scanner that does come with 64-bit software, but then you’ll have to figure out what to do with your old scanner.

So if you’re ready to upgrade to Catalina in general but need to maintain access to one or two apps, one solution is virtualization software: either Parallels Desktop or VMware Fusion. Both apps let you run nearly any operating system—including older versions of macOS like Mojave—in a virtual machine. In essence, they fool the guest operating system, whether it’s Mojave or Windows, into thinking it’s running normally on a computer, when it’s actually running in a virtual environment.

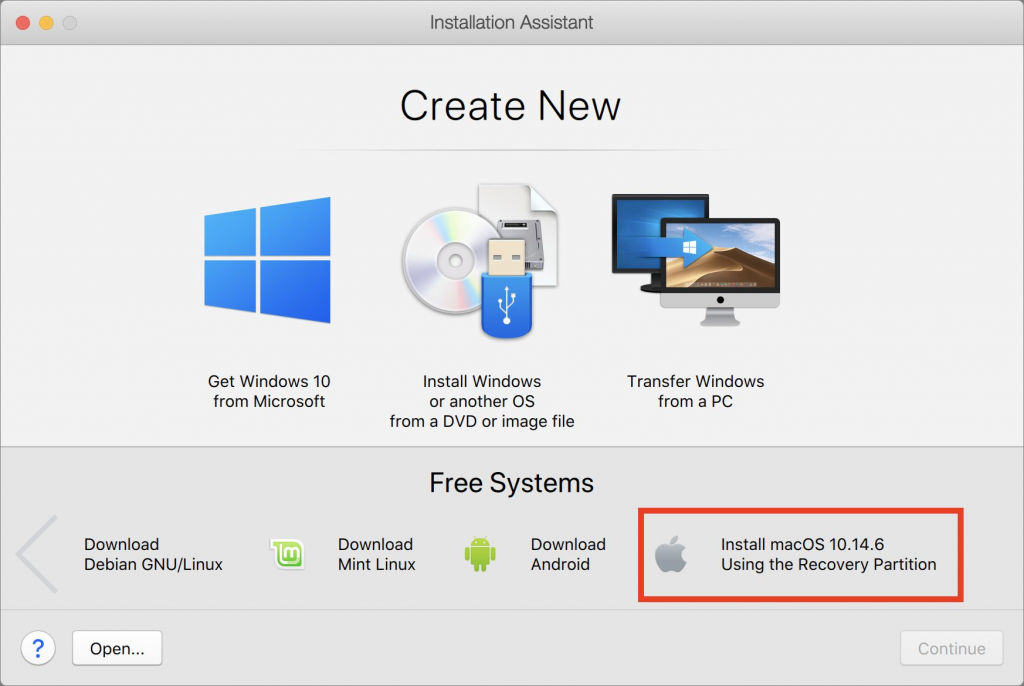
These apps cost about $80, and while there’s a bit of work in setting them up (the screenshot below shows the option for installing Mojave in Parallels Desktop during setup), once you have them configured, it’s easy to run older apps alongside newer ones with little or no performance hit. This approach is also perfect for a 16-inch MacBook Pro or Mac Pro that can’t run Mojave in any other way.

Install Catalina and Mojave on Separate APFS Volumes and Switch Boot

Finally, there’s one other option that lets you switch back and forth between Mojave and Catalina, assuming your Mac supports Mojave. You can create an APFS volume on your internal drive and install another version of macOS on that. It’s easy, and Apple provides full instructions. The only problem with this approach is that you’ll have to restart to switch operating systems, whereas both are available simultaneously with the virtualization solution.

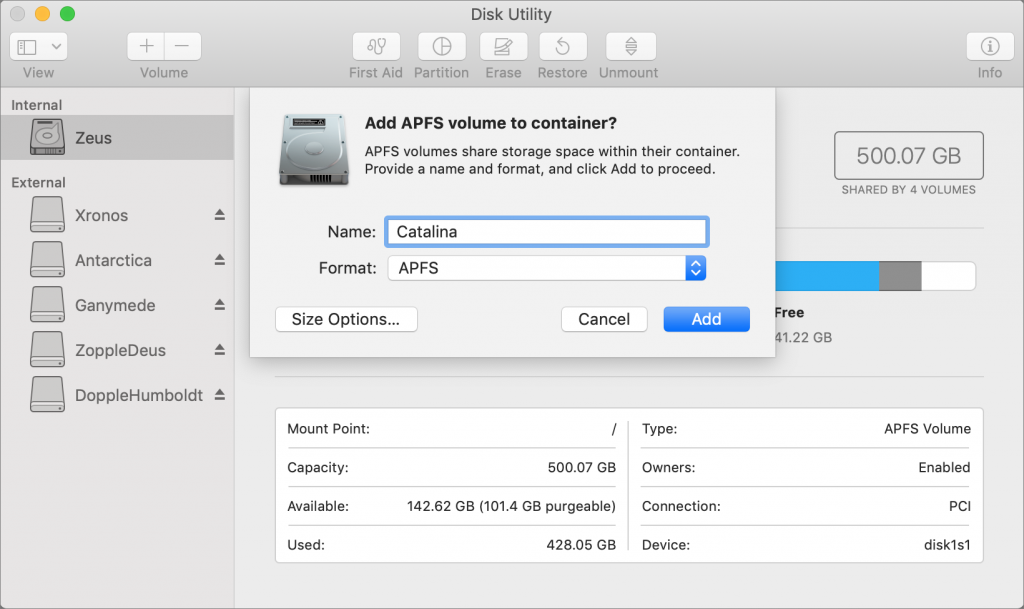
First, make sure you have at least one current backup of your Mac, since it’s foolhardy to adjust your drive structure without one. Next, in Disk Utility, select your internal drive, choose Edit > Add APFS Volume, and click Add. We recommend naming the drive such that it will be clear what’s on it.

Then boot into macOS Recovery and install the desired version of macOS on your new volume. The keys you hold down to get into Recovery determine which version of macOS you’ll get:

  • Command-R reinstalls the latest version of macOS that was installed on your Mac.
  • Command-Option-R upgrades to the latest version of macOS that’s compatible with your Mac.
  • Command-Shift-Option-R reinstalls the version of macOS that came with your Mac, or the closest version still available.

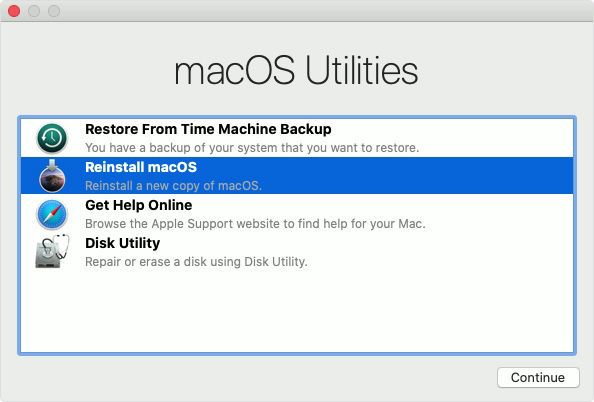
Choose Reinstall macOS from the macOS Utilities window and proceed from there.

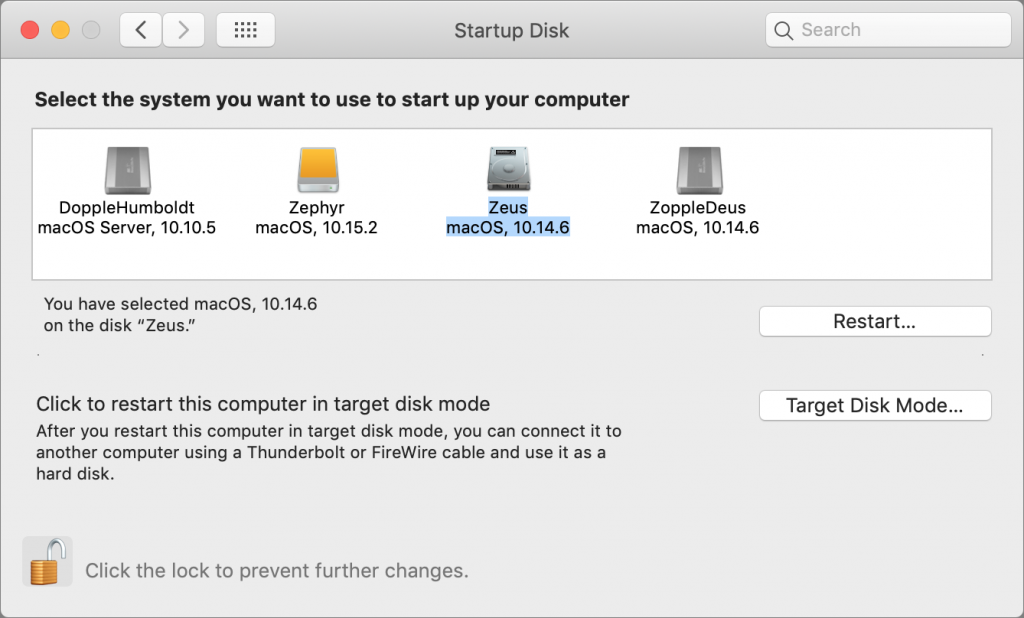
Once the installation is complete, to switch from one version of macOS to another, open System Preferences > Startup Disk, choose the desired volume to boot from, and then click Restart. Or, press Option at startup and select the desired volume from the Startup Manager screen.

Needless to say, the decision about when and how to upgrade to Catalina isn’t a trivial one, so feel free to contact us to discuss your particular situation or to get help with any of the procedures that we’ve described in this article.

(Featured image by Apple)


Social Media: Considering upgrading to Catalina? Or maybe you have a new Mac that came with it already installed? Read on for strategies for downgrading to Mojave or running both Catalina and Mojave.

When Should You Upgrade to macOS 10.14 Mojave, iOS 12, watchOS 5, and tvOS 12?

It’s that time of year again, when an Apple user’s thoughts drift to new versions of macOS, iOS, watchOS, and tvOS. Apple announced the new versions in June, and public betas have been available since. But once Apple makes macOS 10.14 Mojave, iOS 12, watchOS 5, and tvOS 12 available for free download, you’ll need to decide when to install each.

(Note that we say when and not if. There’s no harm in delaying major operating system upgrades until Apple has had a chance to squash early bugs. But waiting too long puts you at risk from security vulnerabilities and prevents you from taking advantage of new features. Plus, should you have to replace an Apple device unexpectedly, you will likely have to use the current operating system, which could be awkward if you weren’t ready.)

The hardest upgrade decision comes with macOS 10.14 Mojave. Whereas the last version of macOS—High Sierra—was a refinement upgrade that added few new features, Mojave introduces lots. Some people’s eyes will appreciate Dark mode, and the Dynamic Desktop changes subtly throughout the day. More practically, Stacks help organize files on cluttered Desktops, the Finder’s new Gallery view makes browsing images easier, and Quick Actions in the Finder’s Preview pane and in Quick Look let you work on files without even opening them. Apple significantly enhanced macOS’s screenshot and screen recording capabilities as well. And apps like Home, News, Stocks, and Voice Memos make the jump from iOS.

However, these features are bound to come with quirks and bugs, and Mojave’s new privacy and security controls may cause problems for older software. So we recommend waiting until at least version 10.14.1 or even 10.14.2 before upgrading. That gives you time to make sure your key apps are compatible with Mojave and for Apple to resolve any unanticipated problems.

iOS 12 is a different story, particularly if you have an older iPhone or iPad. That’s because Apple has focused on improving performance for such devices. If your device is bogging down, iOS 12 may give it a new lease on life. Also compelling is Screen Time, which helps you track your usage and set limits if you’re unhappy about how much time you spend giving Facebook your personal data. Screen Time even works for your entire family, so it could make dinner less device-intensive. A beefed-up Do Not Disturb lets you keep your iPhone from nagging you so much, and new features let you tamp down excessive notifications more easily. Finally, if you do the same things repeatedly, Siri Shortcuts can help you create your own Siri voice commands.

Our take is that iOS 12 is a good upgrade. Don’t pull the trigger instantly, since Apple may discover important bugs in the first week or two, but after that, upgrade when you have time to play with the new features.

watchOS 5 is linked to iOS 12, so you can’t upgrade your Apple Watch until your iPhone is running the latest. Most of the changes revolve around the Workouts app, with automatic detection of running workouts, a new Yoga workout, activity competitions, and more. Other new features include a Walkie-Talkie app, the arrival of Apple’s Podcasts app, a smarter Siri watch face, and improved notifications. There’s no downside to watchOS 5, so as soon as iOS 12 lands on your iPhone, set your Apple Watch to upgrade that night.

tvOS 12 is the easiest to agree to install. It’s a minor upgrade, with just a few new features. The most noticeable is a new aerial screensaver of Earth from low orbit, made by the crew of the International Space Station. You can also tap the touchpad of the Siri Remote while an aerial screensaver is playing to see where it was taken. When you start trying to type a password on the Apple TV, a notification on your iPhone lets you autofill that password. And finally, the Apple TV 4K gains support for Dolby Atmos soundscapes. So yeah, install tvOS 12 when it comes out, or let your Apple TV do it automatically.

As much as change can be hard, we’re excited about Apple’s new operating systems. Like you, we probably won’t end up using all the new features, but some will enhance the experience of being an Apple user.


Social Media: Apple is about to release four major operating system upgrades—macOS 10.14 Mojave, iOS 12, watchOS 5, and tvOS 12. When should you take the leap and install them? Short answer: it depends. Long answer: read on!