iCloud Services Being Wonky? Check Apple’s System Status Page

Many Apple users rely on mac.com, me.com, or icloud.com email addresses, along with plenty of other iCloud-related services. So if you can’t send or receive email, if photos aren’t transferring via iCloud Photo Library, or if some other iCloud-related service isn’t responding, the first thing to do is check Apple’s System Status page. It’s updated every minute, and if it shows that the associated Apple service is having problems, you know to sit tight until things come back up. If everything is green, you’ll have to look elsewhere for a solution—or get in touch with us.

Troubles with Messages? Read On for Ten Possible Solutions

Apple’s Messages app for iOS and macOS generally works well, but when it doesn’t, figuring out what’s wrong and how to fix it can take some doing. Here are a few of the most common solutions we’ve come across for problems with sending and receiving messages.

Help Android-switcher friends turn off iMessage

Do you have a friend who previously used an iPhone but later switched to an Android phone? People like that can confuse your copy of Messages, which doesn’t know if it should send to them via iMessage (no) or SMS (yes). If you text with someone in this situation, get them to deregister from iMessage.

Check device connectivity

If messages aren’t flowing when you think they should be, the first “is it plugged in?” thing to check is connectivity. Make sure that your iPhone has at least cellular service (for SMS) and cellular data (for iMessage) and that your iOS device isn’t in Airplane mode. In the case of a Mac, make sure it’s connected to your network.

Relaunch the Messages app

Force-quitting in iOS isn’t something you should do willy-nilly, since it slows down your device and hurts battery life, but it’s worth trying if Messages isn’t sending or receiving messages correctly. Double-press the Home button on Touch ID devices or swipe up and to the right from the bottom of the screen on Face ID devices, then swipe up on the Messages app thumbnail to force-quit it. On the Mac, just quit and relaunch Messages.

Toggle iMessage off and back on

Here’s an easy one. In iOS, go to Settings > Messages and turn the iMessage switch at the top off and back on. iMessage may take a minute or two to reactivate. On the Mac, go to Messages > Preferences > iMessage > Settings, uncheck Enable This Account, and then log in again.

Toggle Messages in iCloud off and back on

With the new Messages in iCloud feature, Apple syncs conversations through your iCloud account. If messages from one device aren’t showing up properly on another device, in iOS, go to Settings > Your Name > iCloud and turn Messages off and back on. On the Mac, go to Messages > Preferences > iMessage > Settings and uncheck and recheck Enable Messages in iCloud.

Verify your phone number and email addresses are correct in Messages settings

SMS relies on a phone number, and you can be contacted via iMessage via a phone number or email address. Make sure you can be reached at all the appropriate ones. In iOS, go to Settings > Messages > Send & Receive to check. On the Mac, look in Message > Preferences > iMessage > Settings.

If they’re not right, fix them in iOS in Settings > Passwords & Accounts > iCloud > Your Name > Contact Information, by tapping Edit in the Reachable At section. On the Mac, you add these addresses with the plus button in System Preferences > iCloud > Account Details > Contact.

Verify that SMS fallback is enabled

When you’re in an area with sketchy cell service, there may not be enough of a data connection for iMessage to work. In such a situation, SMS text messages are more likely to get through, but Messages will try to send to iMessage users via SMS only if you turn on Send as SMS in Settings > Messages.

Check text message forwarding settings

If you’re receiving SMS messages on your iPhone but not any of your other devices, make sure Text Message Forwarding is enabled for the relevant devices (they need to be signed in to the same iCloud account). On your iPhone, look in Settings > Messages > Text Message Forwarding.

When in doubt, restart

Restarting can resolve all manner of problems, so it’s always worth a try if all the settings and accounts are correct. On the Mac, of course, just choose Apple > Restart. For iOS devices with Touch ID, press and hold the top button until the Slide to Power Off slider appears. For those with Face ID, press and hold the side (iPhone) or top (iPad) button and one of the volume buttons until the slider appears.

Reset network settings in iOS

Finally, the most voodoo of the fixes we’ve seen work is to reset network settings in iOS. You don’t want to start with this option because doing so also resets Wi-Fi networks and passwords, cellular settings, and VPN settings. But if all else fails, go to Settings > General > Reset > Reset Network Settings.

If none of these techniques fix your problem, let us know and we’ll see what we can do to help!


Social Media: Having trouble with sending or receiving in Messages? Read this article for solutions to common texting problems:

Apple Has Disabled Group FaceTime to Prevent Pre-call Eavesdropping

A serious bug has been discovered in Apple’s Group FaceTime multi-person video chat technology. It allows someone to call you via FaceTime and then, with just a few simple steps, listen in on audio from your iPhone, iPad, or Mac while the call is ringing, before you have accepted or rejected it. To prevent the problem from being exploited, Apple says it has disabled Group FaceTime and promises a fix “later this week.”

In the meantime, if you’re still concerned (there were some reports of people being able to invoke the bug even after Apple disabled Group FaceTime), we recommend turning off FaceTime entirely in Settings > FaceTime in iOS and by launching the FaceTime app in macOS and then choosing FaceTime > Turn FaceTime Off. (Or just be quiet when a FaceTime call comes in.) Apple may be able to fix the problem without requiring users to update software; if iOS and macOS updates do prove to be necessary, we recommend that you install them sooner rather than later.

Two Ways to Convince a Wedged iPhone to Connect to the Internet Again

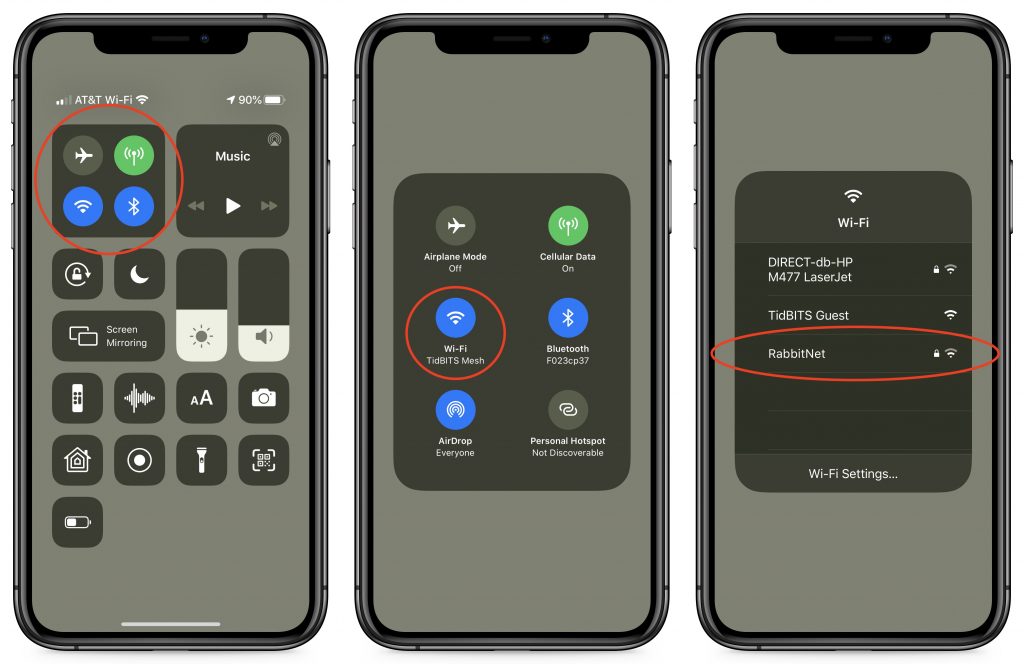
Every now and then, we’ve seen iPhones stop being able to access the Internet, either via Wi-Fi or a cellular data connection. Assuming that the Internet connection is working for other devices, there are two easy ways to reset your iPhone’s connection and get it working again. First, enable Airplane mode to shut off the iPhone’s radios—bring up Control Center and tap the Airplane mode button. After a few seconds, tap the button again to turn it off. Second, if toggling Airplane mode doesn’t work, power down the iPhone by pressing and holding the top or side button (iPhone 8 or earlier) or both the side button and a volume button (iPhone X or later) until the slider appears (or go to Settings > General > Shut Down). Drag the slider to turn off the iPhone. Once the phone is powered down, hold the side (or top) button again until the Apple logo appears. In just a moment, your phone will be back on, and you should be able to access the Internet normally.

Don’t Use Rules in Apple’s Mail to Send “Out of Office” Replies

It’s helpful to unplug occasionally and ignore email while on vacation or otherwise away from your work routine. And it’s a good idea to set up a vacation auto-responder to tell correspondents what to do in your absence. It might be tempting to create such an auto-reply with a rule in Mail on the Mac, but resist the temptation! It’s way too easy to end up sending replies to every message from a mailing list or to addresses that will themselves reply back, causing a mail loop where each message generates another reply, ad infinitum. Instead, always set up such auto-responders in the server settings for your email provider, which are better about avoiding mail loops. Here are instructions for Gmail, iCloud, Outlook.com, Spectrum, Xfinity/Comcast, and Yahoo. If you use a different email provider, the instructions will likely be similar; check with your provider for details.

The Secret Trick for Enabling Caps Lock When Typing in iOS

The Caps Lock key on Mac keyboards often feels extraneous, since it’s easy enough to hold the Shift key while typing multiple capital letters for acronyms like HIPPA or when you want to shout GET OFF MY LAWN! But if you need to do that on an iPhone or iPad, it’s annoying to keep tapping the Shift key to switch to the uppercase keyboard for each letter. Luckily, Apple has baked a time-saving trick into its onscreen keyboard. Tap the Shift key twice in a row to lock it on, type the letters you need, and tap it again to unlock it. Notice that when Shift is locked on, a horizontal line appears beneath the arrow on the Shift key.

Siri in Mojave Now Supports HomeKit and Find My iPhone

Siri on the Mac hasn’t been as useful as on iOS devices, but with macOS 10.14 Mojave, Apple enhanced the Mac version of Siri in a variety of ways. Apple says that Siri now knows about food, celebrities, and motorsports, but more interesting is how you can ask Siri to control your HomeKit devices (“Turn on the bedroom lights.”) and locate your iOS devices or AirPods via Find My iPhone (“Where is my iPhone?”).

Getting Rid of an Old Mac? Follow These Steps to Prep It for Its Next Life

If a new Mac has recently arrived in your life, it may be time to hand your old Mac down to a friend or family member, pass it on to a coworker, or send it back to Apple for recycling. Here’s what to do.

Backup

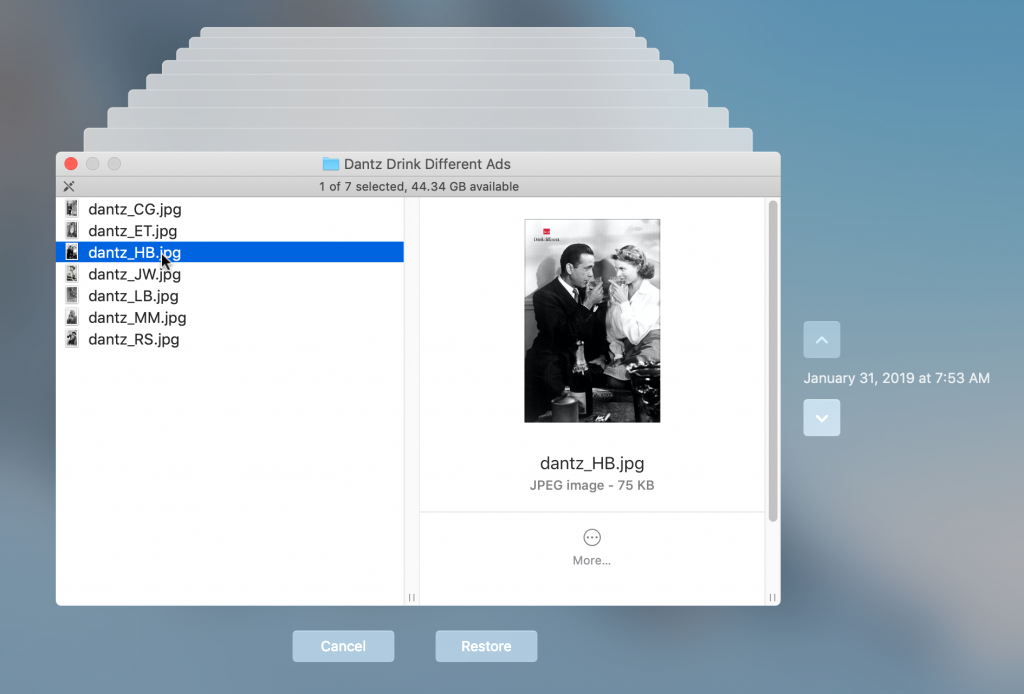
Before anything else, make a backup, just in case. Do this even if you’ve already migrated your data to your new Mac, since it’s possible that data could have been corrupted during the transfer without you realizing. At minimum, update your old Mac’s Time Machine backup by clicking the Time Machine icon in the menu bar, and choosing Back Up Now. For extra safety, consider using an app like Carbon Copy Cloner or SuperDuper to make a bootable duplicate that will be easier to navigate if you need to recover a file.

Deauthorize iTunes and Other Apps

It’s uncommon for apps to have licensing schemes that are tied to your Mac’s hardware these days, but if you have any, such as those from Adobe, be sure to deauthorize or deactivate them.

However, there is one app that most people will need to deauthorize: iTunes. That’s because Apple allows you to play content purchased from iTunes only on up to five computers associated with your Apple ID, so be sure to deauthorize Macs that you won’t use again before passing them on.

To do this, open iTunes and choose Account > Authorizations > Deauthorize This Computer. Enter your Apple ID credentials when prompted.

If you’ve forgotten to do this, you can deauthorize all your computers once per year (and then add back those you still have). To do this in iTunes, choose Account > View My Account, and in the Apple ID Summary next to Computer Authorizations, click Deauthorize All.

Sign Out of iCloud

Next, you should sign out of iCloud to remove any connection between your iCloud account and the old Mac. Doing so disconnects the Mac from synchronization of your iCloud data.

To do this, open System Preferences > iCloud, and click the Sign Out button. If you’ve been syncing via iCloud Drive, Calendar, Contacts, Reminders, and so on, the Mac will ask if you want to keep the data on the Mac or delete it. Don’t bother deleting it since you’ll erase the Mac’s drive in a future step.

Sign Out of iMessage

Much as with iCloud, you should sign out of your iMessage account, at least if your Mac is running OS X 10.8 Mountain Lion or later. To do this, open Messages and choose Messages > Preferences > Accounts. Select your iMessage account and click Sign Out. (In 10.14 Mojave, instead of clicking Accounts in the toolbar, click iMessage.)

Unpair Bluetooth Devices

If you’re giving your Mac to another user along with its Bluetooth devices, such as a wireless keyboard and trackpad, you don’t need to do anything with them. However, if you plan to hang on to your Bluetooth devices and use them with another Mac, you should unpair them. That’s especially true if someone else in your home or office will be using the old Mac, since the device might end up working on multiple Macs, which could cause confusion.

Before you unpair a wireless keyboard and mouse or trackpad, however, make sure you have a wired keyboard and pointing device available, since you won’t be able to erase the drive and reinstall macOS without them. If you lack wired alternatives, don’t unpair your keyboard and pointing device.

To unpair Bluetooth devices, open System Preferences > Bluetooth, and in the list of devices either hover over a device or select it. Then click the X button to the right. When prompted, click Remove.

Erase the Drive and Reinstall macOS

Here’s the most important step—erasing the Mac’s drive. After all, you don’t want the next user to be able to access all your photos, documents, email, and more. Luckily, this is easy to do.

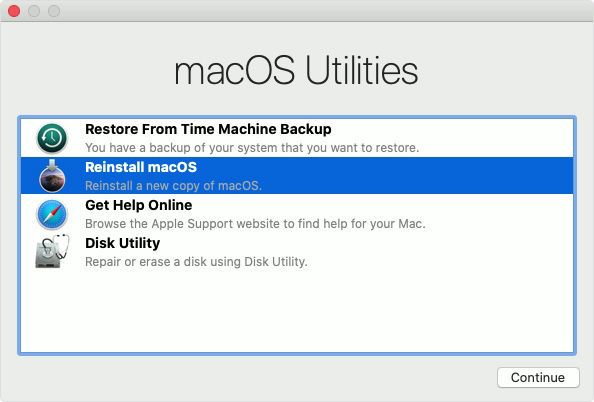
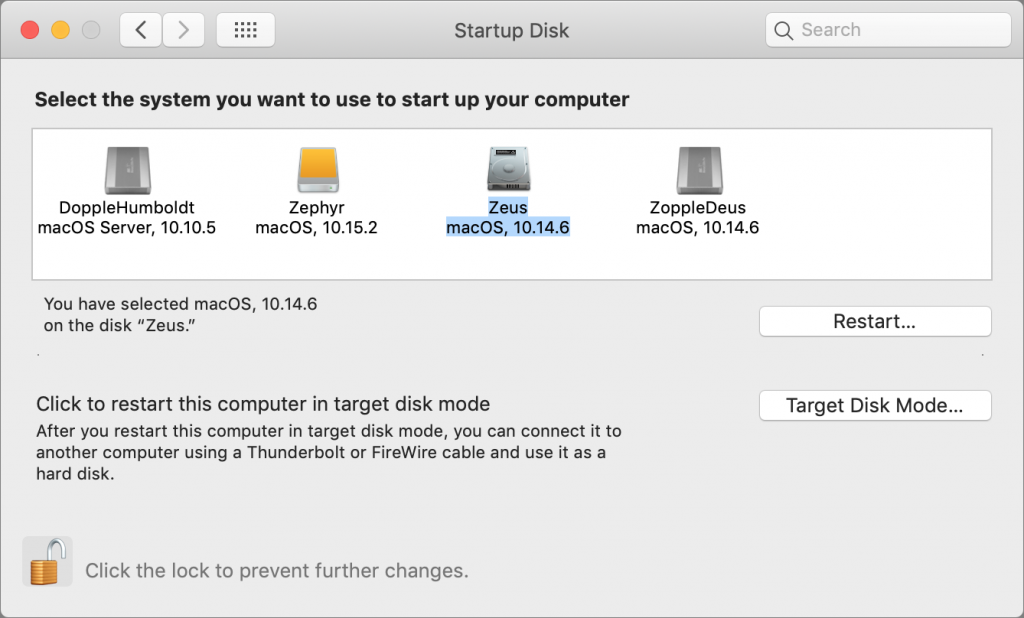
First, start up from macOS Recovery by holding down Command-R while the Mac boots. In the macOS Utilities window that appears, select Disk Utility and click Continue.

In Disk Utility, select the internal drive, click Erase in the toolbar, and in the dialog that appears, enter a new name, choose a format, and choose GUID Partition Map for the scheme. For the format, stick with the default, since the macOS installer will convert it later if necessary. Quit Disk Utility when you’re done.

Once the drive is erased, you’ll be returned to the macOS Utilities window, where you can select Reinstall macOS (or Reinstall OS X, if it’s an older Mac) and click Continue. Obviously, if you’re sending it back to Apple for recycling, there’s no reason to do this.

The installation process takes time, and when it’s done, the Mac will restart into the setup assistant. Press Command-Q at the Welcome screen to shut down. When the new user starts the Mac up again, they’ll be able to continue with the setup process. That’s it—now you’re ready to give the Mac to its next user.


Social Media: If you’re passing an old Mac on to a colleague, friend, or family member—or returning it to Apple for recycling—follow these steps to prepare it for its next stage in life and ensure that no one will be able to access your data.

File Messages Faster in Mail in Mojave

In macOS 10.14 Mojave, Apple exposed a feature of Mail that was useful, but hard to find and use. For several versions of Mail, you’ve been able to select a message and choose Message > Move To Predicted Mailbox to file the email in the suggested mailbox. (If the Move To command is disabled, Mail hasn’t yet learned how to move messages like the selected one. Once it sees you move messages from your mother into your Family mailbox, for instance, it will suggest that destination in the future.) In Mojave’s Mail, there’s also now a Move To toolbar button. If it can predict where the message will go, just click it; if not, click and hold to bring up a menu of all your mailboxes.

Recover Drive Space by Deleting Old and Unnecessary iOS Device Backups

If you’ve been good about backing up your iOS devices to iTunes on your Mac or to iCloud, give yourself a gold star! Both backup destinations are fine, but there’s one potential downside to iTunes backups: they can consume a lot of space on your Mac’s drive. In iTunes, go to iTunes > Preferences > Devices, where you’ll see all the iOS device backups that iTunes has stored. If there are multiple older backups or any for devices you no longer own, you can get rid of them. Control-click the offending backup, and choose Delete. Or, if you want to check how large a backup is first, instead choose Show In Finder, and then in the Finder, choose File > Get Info. When you’re ready, move the selected backup folder to the Trash.