We wanted to make sure that those of you who work on a Mac laptop with an external display know that you can close your laptop’s screen and keep working. Apple calls this closed-clamshell or closed-display mode. Of course, it requires that you connect an external keyboard and mouse or trackpad, via either USB or Bluetooth, and the laptop should be connected to power as well. Apple also recommends putting the Mac to sleep before disconnecting the external display. Why would you want to use closed-display mode? Mostly to conserve desk space when you have another preferred keyboard and pointing device, although it might also help graphics performance by allowing the Mac to focus on driving only the external display. There are lots of stands that hold a MacBook in a vertical orientation so it takes up less desk space.
https://f11photo.com/wp-content/uploads/sites/13/2020/09/MacBook-closed-display-photo.jpg8001280F-11 Photohttps://f11photo.com/wp-content/uploads/sites/13/2023/06/PR-F11Photo-logo.jpgF-11 Photo2020-09-01 13:06:002020-09-30 22:09:35Did You Know You Can Close a Mac Laptop When It Has an External Display?
Whether for work or socializing, we’re all spending a lot more time in video calls these days. But—surprise!—it turns out that many of our group video calls could be more pleasant, less embarrassing, and overall better if we follow a few basic audiovisual tips.
Make Sure You Have Decent Lighting
Natural light is best, but room light is generally fine too, especially if it’s coming from the side. Overhead light isn’t quite as flattering, but whatever you do, avoid light that comes from underneath your face or you’ll look like an old-time movie villain. Also, avoid sitting in front of a window because the bright light behind you will make you look way too dark. Pull a shade or try to put your computer against the window so the light hits your face instead.
Arrange for a Decent Background
You may not have many choices for where your computer is located, and thus for what’s behind you when you’re on a video call. If you’re using Zoom or Skype, you can employ a virtual background (pick one that’s appropriate for the context, and for goodness sake, don’t use an animated background). Otherwise, make sure that what’s behind you is tidy and wouldn’t embarrass you if the people on the call were to visit in person. Or, take it up a level and put a pleasing arrangement of art or photos on the wall behind you. Even if they are too small to be seen well, they will break up a monotonous blank wall.
Wear Appropriate Clothing
Yes, it’s tempting to schlub around all day in pajamas or ratty old sweats. Resist the urge and wear the same type of clothes you’d put on if you were meeting with these people in person. That includes pants—if you get up in the middle of the call without thinking, you don’t want to advertise your taste in boxers. You don’t want your boss and colleagues to have a mental image of you as a total slob. For bonus points, avoid tops that are bright white, black, or have distracting patterns.
Think Like a Movie Director
Particularly if you need to use a phone, tablet, or laptop to participate in a video call, think about your camera angles. It’s best to have the camera at roughly the same height as your face, if possible, so if you can avoid it, don’t put your laptop in your lap or hold your phone at your waist. And if you’re using a phone, don’t walk around such that the changing background distracts everyone else.
And Like a Movie Star
It’s sometimes hard to remember that everyone can see you even though they’re not in the room, but you’ll come off as more alert, confident, and engaged if you sit up straight, get close enough to the camera so your face fills the screen, and smile. Seriously, you’re on Candid Camera, so act like it. You’ll almost always have a thumbnail that shows what you look like, so make sure you like what you see. Oh, and don’t touch your face repeatedly.
Look at the Camera, Not the Other Participants
This one is tough. The camera is usually at the top center of your screen, so if you look anywhere else, it seems like you’re avoiding eye contact. It can make you look shifty or inattentive. But it’s hard not to look at the other people or at your own video thumbnail. The best trick is to resize and position your video window so the person you’re most likely to look at is right under the camera.
Pay Attention and Don’t Multitask
Look, we get it—a lot of meetings are boring. But it’s both rude and distracting to the speakers if you are clearly doing something else or worse, leaving and coming back. Focus on the screen, and show that you’re paying attention by nodding your head, smiling, and all the other little things you’d do if the meeting were taking place in person. If you truly can’t stay engaged, turn off your audio and video so no one has to see and hear you. If you need an excuse for that, say that your Internet connection is being a little wonky, so you want to cut down on bandwidth usage.
Mute Your Mic When Not Talking
The more people on a call, the more important this tip is. All videoconferencing apps have a Mute button you can click so others in the call aren’t distracted by you coughing or sneezing, your children playing in the other room, or other extraneous noise. Just remember to unmute before you start talking. It’s hard to remember at first, but you’ll get good at it.
All this may seem like a lot to think about, but once you get your environment set up properly, you’ll be a bright spot in the video grid at your regular meetings. And then maybe you can forward this article to your family, friends, and colleagues so they can up their video game too.
(Featured image by Marcus Aurelius from Pexels)
Social Media: On your video calls, do you look like a shifty character in a low-budget horror flick? With our audiovisual tips, you can level up and make your calls more pleasant, less embarrassing, and more productive.
https://f11photo.com/wp-content/uploads/sites/13/2020/05/Videoconferencing-tips-photo.jpg8001280F-11 Photohttps://f11photo.com/wp-content/uploads/sites/13/2023/06/PR-F11Photo-logo.jpgF-11 Photo2020-05-01 11:04:002023-06-27 20:33:00Audiovisual Tips for Better Videoconferencing
In partnership with the US Centers for Disease Control, Apple has released a free COVID-19 Screening Tool iOS app and nearly identical Web site. The interactive screening tool poses a series of questions about symptoms, risk factors, and recent exposure. Then it offers customized CDC recommendations, including guidance on social distancing and self-isolating, how to monitor symptoms, whether or not a test is recommended, and when to contact a medical provider. In addition, the app and Web site provide useful information about COVID-19, advice about how to keep yourself safe, and details on what to expect from testing. There’s nothing here that the CDC and other health agencies haven’t published elsewhere, but the screening tool can provide some peace of mind and reduce unnecessary load on overworked healthcare providers.
(Featured image by Apple)
https://f11photo.com/wp-content/uploads/sites/13/2020/04/Apple-COVID-19-app-photo.jpg8001280F-11 Photohttps://f11photo.com/wp-content/uploads/sites/13/2023/06/PR-F11Photo-logo.jpgF-11 Photo2020-04-01 12:08:002024-09-13 09:40:33Apple Releases COVID-19 Screening Tool App and Web Site
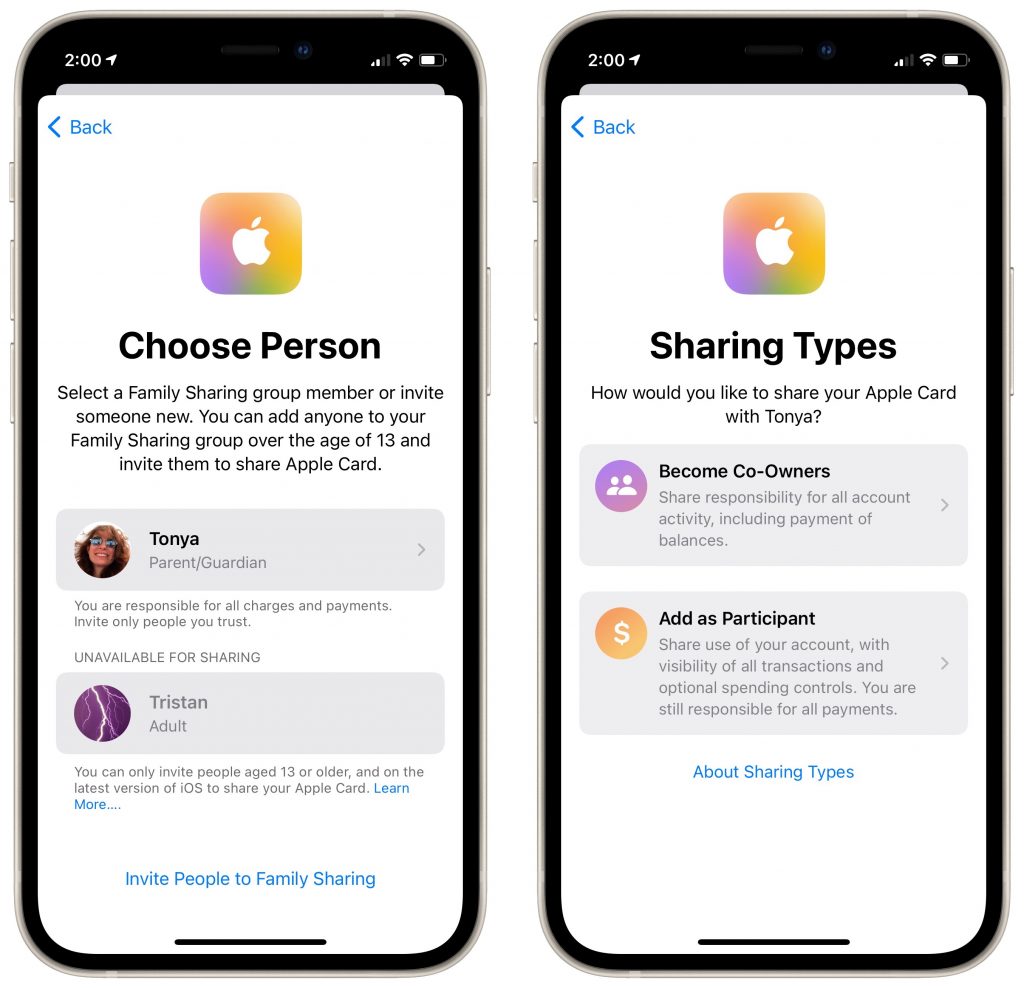
Apple’s credit card, the Apple Card, offers a nice mix of integration with Apple Pay, daily cash back, and an elegant interface in the Wallet app on your iPhone. Until recently, however, it was impossible to get your transaction data out of Wallet except in PDF form. Apple has now added exports in either CSV or OFX format. CSV is appropriate for importing into a spreadsheet, whereas many financial apps can import OFX files. To export your data from Wallet, tap your Apple Card and then tap Card Balance. Under Statements, tap the statement you want to export, tap Export Transactions at the bottom, and choose a format. For CSV, tap the Share icon in the file preview, and for OFX, Wallet automatically opens a share sheet. Use AirDrop, Messages, or Mail to send the file to your Mac, where you can work with it in whatever you use to track your finances.
https://f11photo.com/wp-content/uploads/sites/13/2020/04/Apple-Card-statements-photo.jpg8001280F-11 Photohttps://f11photo.com/wp-content/uploads/sites/13/2023/06/PR-F11Photo-logo.jpgF-11 Photo2020-04-01 12:07:002023-06-27 20:11:55You Can Now Export and Download Apple Card Statements
When Apple released iPadOS 13.4 recently, it came with an unexpected feature: trackpad and mouse support. Apple plans to release a Magic Keyboard for iPad Pro that has a built-in trackpad in May as well, but in the meantime, you can control an iPad entirely via a Magic Trackpad 2 (the wedge-like one that recharges via a Lightning port). Pair it in Settings > Bluetooth, and look for settings in Settings > General > Trackpad. Apple did an impressive job with integrating a cursor into the iPadOS experience: the small, circular cursor shifts colors subtly depending on the background, becomes a highlighted selection rectangle when over objects, expands icons on the Home screen, and morphs into a thin insertion point when in text. Plus, Apple built in oodles of two- and three-finger gestures to mimic what you can do directly on the iPad screen—see the full list at TidBITS.
(Featured image by Adam Engst)
https://f11photo.com/wp-content/uploads/sites/13/2020/04/iPad-trackpad-photo.jpg8001280F-11 Photohttps://f11photo.com/wp-content/uploads/sites/13/2023/06/PR-F11Photo-logo.jpgF-11 Photo2020-04-01 12:06:002023-06-27 20:11:58Try Using a Magic Trackpad 2 with Your iPad Running iPadOS 13.4
In a widely expected update, Apple has introduced a new MacBook Air that replaces the much-maligned butterfly keyboard with the new Magic Keyboard. The MacBook Air also gains faster processors, enhanced graphics, and more storage options, all for $200 less than before.
Apple also threw back the curtains on an updated iPad Pro that will be compatible with a new iPad Pro-specific Magic Keyboard that includes a trackpad. The iPad Pro is available now, but the Magic Keyboard won’t ship until May.
MacBook Air Gains Magic Keyboard, Faster Performance, and Other Enhancements
In an effort to eliminate the hated butterfly keyboard from the Mac line, Apple has released an updated MacBook Air that features the scissor-key Magic Keyboard introduced last year in the 16-inch MacBook Pro. That keyboard has received highly positive reviews, and we’re happy to see it appear in the MacBook Air. (Look for a new model to replace the current 13-inch MacBook Pro soon as well.) The Magic Keyboard includes 12 function keys as well as a Touch ID sensor, but no Touch Bar.
Apple significantly improved the MacBook Air’s performance by providing a choice of 10th-generation Intel Core processors, including the model’s first quad-core processor option. The base level 1.1 GHz dual-core Intel Core i3 is probably pretty slow, but upgrading to a 1.1 GHz quad-core i5 is only $100 and a 1.2 GHz quad-core i7 is just $250.
Graphics should be noticeably speedier as well, thanks to the switch to Intel Iris Plus Graphics. The MacBook Air can now drive a 6K display too, if you have a Pro Display XDR.
Apple also doubled the base level of storage to 256 GB, and you can increase that to 512 GB ($200), 1 TB ($400), or 2 TB ($800).
Minor enhancements include True Tone technology for more natural images on the 13-inch Retina display, “wide stereo sound” for the speakers, and support for Bluetooth 5.0.
As welcome as all these changes are, the best news is that Apple simultaneously dropped the MacBook Air’s price. The entry-level model now starts at $999, and it’s available to the education market for just $899.
iPad Pro
We were waiting for the Magic Keyboard to come to the MacBook Air, but we had no inkling that Apple was going to add a trackpad option to the iPad Pro. It will come in the form of the new Magic Keyboard, due in May, and will require iPadOS 13.4, slated for late March. Apple says it will be easy to use, with the pointer transforming to highlight user elements appropriately as the user moves their finger across the trackpad. What it won’t be is cheap, at $299 for the 11-inch model and $349 for the 12.9-inch model. (The second-generation Apple Pencil and an updated Smart Keyboard Folio remain available.)
The other unexpected change in the new iPad Pro is the addition of the new LiDAR Scanner. LiDAR (light detection and ranging) is a way of measuring distance with reflected laser light. It’s commonly used in self-driving cars, but Apple is instead using it to beef up the iPad Pro’s augmented reality (AR) capabilities. It offers existing ARKit apps instant AR placement, improved motion capture, and people occlusion. Apple also uses it to improve the Measure app. We can’t help but think Apple is testing the technology for future AR goggles.
Less surprising improvements include a new processor—Apple’s custom A12Z Bionic chip—and a dual-camera system that combines a 12-megapixel wide camera and a 10-megapixel ultra-wide camera that zooms out two times to capture a much wider field of view. The iPad Pro also now boasts five microphones for capturing audio and four speakers that automatically adjust to any orientation.
Pricing for the iPad Pro itself hasn’t changed. The 11-inch model starts at $799, with the 12.9-inch model at $999. Both come with 128 GB of flash storage, up from 64 GB in the previous models, and you can buy more storage: 256 GB (add $100), 512 GB ($300), or 1 TB ($500). Cellular connectivity costs an extra $150.
Mac mini
Last and indeed least, Apple announced that the standard configurations of the Mac mini now have twice as much storage as before. That means the $799 configuration comes with 256 GB and the $1099 configuration comes with 512 GB. 1 TB and 2TB configurations remain available, and there are no other changes.
(Featured image by Apple)
Social Media: Here’s some good news! Apple has introduced a new MacBook Air with a better keyboard and faster processor for $200 less. And there’s a new iPad Pro with trackpad support. Seriously! Check out the news at:
https://f11photo.com/wp-content/uploads/sites/13/2020/03/MacBook-Air-photo.jpg8001280F-11 Photohttps://f11photo.com/wp-content/uploads/sites/13/2023/06/PR-F11Photo-logo.jpgF-11 Photo2020-03-18 15:32:002023-06-27 20:11:51MacBook Air Update Features Magic Keyboard, iPad Pro Gets a Trackpad
Are you overwhelmed by email? Is your Inbox filled with promotions, special offers, and the like? These messages aren’t spam—you almost always bought something from the company or have some sort of relationship with the sender—but that doesn’t mean you want to hear from them repeatedly. Luckily, it’s easy to get off the lists of legitimate senders. Just scroll to the bottom of each message and look for an unsubscribe link. Often it will be the word “Unsubscribe” or an instruction to “click here to remove yourself.” Click the link and, if necessary, click an Unsubscribe button on the resulting Web page. Then delete the message and move on to the next one. After a week or so of doing this regularly, you should start to notice a marked decrease in unwanted messages.
https://f11photo.com/wp-content/uploads/sites/13/2020/03/Unsubscribe-email-photo.jpg8001280F-11 Photohttps://f11photo.com/wp-content/uploads/sites/13/2023/06/PR-F11Photo-logo.jpgF-11 Photo2020-03-02 12:08:002023-06-27 20:11:38Unsubscribe from Marketing Email to Lighten Your Inbox Load
Split View on the Mac helps you focus on your work in one app—perhaps a word processor—while providing access to one other app, like a Web browser. (Make sure “Displays have separate Spaces” is selected in System Preferences > Mission Control.) Before macOS 10.15 Catalina, you had to click and hold on the green full-screen button in the upper-left corner of any window, drag that window to one side of the screen, and click a window on the other side to put them side by side. Catalina makes this easier to discover: hover over the green full-screen button briefly and then choose Tile Window to Left of Screen or Tile Window to Right of Screen before selecting a window on the other side of the screen. If you don’t want a 50-50 split, drag the black divider bar between the windows to adjust the proportions. To leave Split View, move your pointer to the top of the screen to reveal the menu bar and then click the green full-screen button.
(Featured image by Adam Engst)
https://f11photo.com/wp-content/uploads/sites/13/2020/03/Split-View-Cataline-photo.jpg8011280F-11 Photohttps://f11photo.com/wp-content/uploads/sites/13/2023/06/PR-F11Photo-logo.jpgF-11 Photo2020-03-02 12:07:002023-06-27 20:11:40Invoke Split View More Easily in Catalina
In your list of conversations in Messages, you probably have lots of people who have generic icons next to their names or numbers. You likely look like that to other people as well, but a new feature in iOS 13 lets you share your preferred name and avatar picture with other iMessage users (blue-bubble friends). In Messages, first tap the ••• button and then Edit Name and Photo. Then, in the activity view that appears, tap Edit under your photo to select a new photo and set your name as you want it. Make sure Name and Photo Sharing is enabled before tapping Done. From now on, for any iMessage conversations, you’ll see a little banner at the top that asks if you want to share your name and photo. Do so and your recipient will get a prompt to replace whatever they’re seeing for you. (And if, as a recipient, you don’t want to accept the new photo, tap the X button at the right of the prompt.)
(Featured image by Daniel Frese from Pexels)
https://f11photo.com/wp-content/uploads/sites/13/2020/03/Photo-selfie-in-snow-photo.jpg8001280F-11 Photohttps://f11photo.com/wp-content/uploads/sites/13/2023/06/PR-F11Photo-logo.jpgF-11 Photo2020-03-02 12:06:002023-06-27 20:32:45Set Your Preferred Name and Photo for Messages in iOS 13
As you undoubtedly know, TYPING IN ALL CAPS is considered shouting on the Internet. Doesn’t it bug you when you accidentally tap the Caps Lock key and start writing in uppercase? The Caps Lock key is vestigial—it was invented as a “Shift lock” key to make it easier to type the second characters on the keys of a mechanical typewriter without also holding down the Shift key the entire time. It’s seldom useful on a computer; Google replaced it with a Search key on Chromebook keyboards. It still appears on all of Apple’s keyboards, but macOS lets you disable or remap it. In System Preferences > Keyboard > Keyboard, click the Modifier Keys button. In the dialog that appears, choose No Action (or another key) from the pop-up menu next to Caps Lock. Click OK and you’re free from accidental capitalizations.
(Featured image based on an original by Scott Webb from Pexels)
https://f11photo.com/wp-content/uploads/sites/13/2020/03/Disable-Caps-Lock-photo.jpg8001280F-11 Photohttps://f11photo.com/wp-content/uploads/sites/13/2023/06/PR-F11Photo-logo.jpgF-11 Photo2020-03-02 12:05:002023-06-27 20:32:49Disable or Remap the Caps Lock Key to Avoid Accidental ALL CAPS