Posts

Concerned by the Privacy or Results of Google Search? Try These Other Search Engines

Google is big. Google Search generated $225 billion in revenue in 2022, thanks in part to being the default search engine on all Apple devices. To retain that position—and continue to reap the ad revenue that it generates—Google pays Apple about $18 billion every year. Along with Apple, Google pays billions to phone manufacturers like Samsung, LG, and Motorola; major wireless carriers such as AT&T, T-Mobile, and Verizon; and browser developers like Mozilla and Opera.

So is Google Search’s 90% market share because it’s the best search engine or because Google has enough money to pay distributors for top placement?

Along with concerns about whether Google is the best search engine, some people worry about Google collecting information about them to show targeted ads alongside search results. The more information Google has on users, the argument goes, the better that ads can be targeted, and the more likely it is that users will click the ads, which generates money for Google from advertisers. Others worry that Google’s results may reflect certain types of bias.

If you’re perturbed by the privacy implications of Google knowing everything you search for, or if you’ve found Google’s search results less helpful than you’d like, you can easily switch to another search engine to see if you prefer its results and privacy stance.

How to Switch Search Engines

For many Apple users, the main place to choose a preferred search engine is in Safari’s settings. On the Mac, choose Safari > Settings > Search and choose the desired search engine from the Search Engine pop-up menu. You can choose a different one for Private Browsing windows if you want.

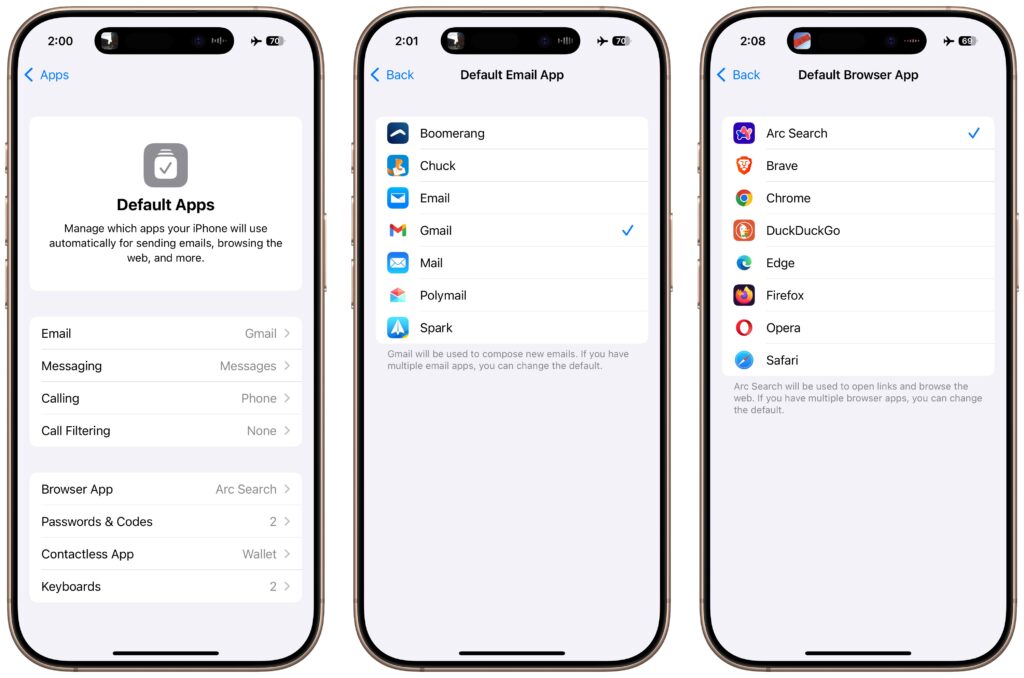
In Chrome-based browsers like Google Chrome, Arc, Brave, Microsoft Edge, and Opera on the Mac, open the settings and look for Search Engine. A pop-up menu lets you choose from some standard options, and additional choices let you add search engines like Brave Search that are too new (or not paying) to appear. Firefox offers similar options when you choose Firefox > Settings > Search.

On the iPhone and iPad, go to Settings > Safari >  Search Engine. Again, if you want a different search engine in Private Browsing tabs, turn off Also Use in Private Browsing and choose another option.

Top Alternative Search Engines

Conceptually, what search engines do is simple—they search a set of Web pages for matching keywords and return a list of them in order of relevance to the user. The hard part is dealing with the number of pages—estimates suggest Google indexes 50 billion pages and Bing 4.5 billion—and scaling the service to respond instantly to tens or hundreds of millions of queries per day. (Google processes 8.5 billion searches per day; Bing handles 400 million.) Beyond Google, here are the main search engines and what sets them apart. (You will also likely see Yandex, sometimes called “the Google of Russia.” Avoid it. For so many reasons.)

  • Bing: The second-most popular (though far, far behind Google) search engine in the world, Microsoft’s Bing sets itself apart with a busy, highly designed search results page that mixes a variety of results. It may work well for you, or you may find it overwhelming and difficult to parse. Microsoft is also putting a lot of effort into chat-based AI-powered results. Bing claims to offer more user privacy than Google, but it’s still tracking users to target ads better. If Bing has better privacy than Google, it may mostly be due to not being part of the larger Google data-collection empire.
  • Yahoo: Though it was the first Web search engine, Yahoo hasn’t run its own index since 2009. Today, Yahoo’s search results are powered by Microsoft Bing, so while the look of the search results page may differ, the results should be identical to Bing’s. Yahoo’s privacy stance is also similar to Bing’s.
  • DuckDuckGo: If privacy is paramount, DuckDuckGo is worth a look because it does not track or store user information at all. Instead, it chooses ads to display only by matching with search keywords. Although it uses Bing for some of its results, DuckDuckGo also incorporates information from numerous other sources, so it won’t seem like an exact clone of Bing.
  • Ecosia: The main reason to use the Berlin-based Ecosia is if you like Bing’s results (but not its layout) and want to support a “social business” that claims to be carbon-negative, offers full financial transparency, and protects users’ privacy. Founded in 2009, Ecosia today relies entirely on Bing’s search results and ads (clicks on which are how Ecosia earns money), and it claims to have planted over 188 million trees in 35 countries since its inception. It’s hard to argue with Ecosia’s environmental results, but as a search engine, it doesn’t feel special.
  • Brave Search: A truly independent search engine, Brave Search relies on its own created-from-scratch index (it leaned on Google and Bing for some results early on, but ceased in August 2023). It also emphasizes user privacy and doesn’t track users, searches, or clicks. Although Brave Search displays keyword-based ads by default, users can pay $3 per month for Brave Search Premium, which provides ad-free results pages. You’ll have to set Brave as the default search engine for most browsers manually; for Safari, all you can do is make a favorite to search.brave.com.
  • Kagi: Speaking of paid search engines, if you really want to avoid ads, Kagi is another independent search engine that rolls its own index and provides access only to subscribers, eschewing ads entirely. You can sign up for a 100-search test account, and if you like it, pay $5 per month for 300 searches or $10 per month for unlimited searches. As with Brave Search, you must manually set Kagi as the default search engine (there’s an extension for Safari).

The “best” search engine is the one that gives you the answers you want without triggering privacy worries or concerns about bias. If you want to see if something other than Google will work better for you, set it as your default search engine and try it for a few weeks.

(Featured image by iStock.com/Prykhodov)


Social Media: Have you become disillusioned by Google due to its search quality or how it tracks your activity to serve targeted ads? You can try other search engines that promise to protect your privacy and provide independent search results.

Use This Hidden Setting to Stop Triggering Caps Lock Accidentally

There’s little more annoying than accidentally touching the Caps Lock key while typing and having your text suddenly TURN INTO CAPITAL LETTERS, which we all know is seen as shouting. Unless you have some reason to type in capital letters regularly, you can prevent this mistake by disabling the Caps Lock key or remapping it to another modifier key. In macOS 13 Ventura and later, choose System Settings > Keyboard > Keyboard Shortcuts > Modifier Keys, and choose from the pop-up menu next to Caps Lock. (In earlier versions of macOS, open System Preferences > Keyboard > Modifier Keys.)

(Featured image by Adam Engst)


Social Media: If you very seldom want to type in all caps, disable or remap the Caps Lock key so an errant key press doesn’t turn it on accidentally.

Locate a Featured Lock Screen Image in Photos

iOS’s Photo Shuffle wallpaper does a great job of identifying attractive photos for your Lock Screen. However, if you’re like us, you’ll sometimes wonder when or where you took a Lock Screen photo. Here’s how to figure that out. Touch and hold the Lock Screen when it’s displaying the photo in question, tap Customize, tap the Lock Screen wallpaper, tap the ••• button in the lower-right corner, and tap Show Photo in Library. Then you can swipe up to reveal more information about the photo, swipe left and right to see the photos on either side, or pinch to see it in the context of your entire photo library.

(Featured image by Apple)


Social Media: Do you sometimes wonder when or where you took a photo that iOS’s Photo Shuffle wallpaper is displaying on your Lock Screen? Us too, and here’s how to find out more.

In Your Face App Guarantees That You Notice Appointment Alerts

It’s easy to get caught up in what you’re doing and miss an alert for a Zoom meeting or a reminder to leave for an appointment. The Mac app In Your Face ensures that will never happen again by taking over the entire screen for notifications and requiring that you click a button to dismiss or snooze it. It can also play sounds repeatedly, lets you pick which calendars and reminder lists to use, gives you single-click access to videoconference links in events, and shows ongoing and upcoming events in the menu bar. In Your Face costs $1.99 per month or $19.99 per year, or it’s available in the $9.99 per month Setapp bundle of over 230 Mac apps.

(Featured image by Blue Banana Software)


Social Media: Are you often late to online meetings or in-person appointments because you were too focused on your work to notice the time? The In Your Face app ensures you’ll never miss an important meeting again.

The “Hey” Part of “Hey Siri” Is Now Optional

If you use Siri, particularly on a HomePod, you’re probably accustomed to saying “Hey Siri” as the trigger phrase before your requests. In Apple’s new operating systems for 2023, you can now choose to invoke Siri using the traditional “Hey Siri” or just “Siri” (at least in Australia, Canada, the UK, and the US). You might appreciate being able to stop saying “Hey” every time, or you might find that using just “Siri” generates incorrect activations. (And if someone in your family’s name sounds like Siri, you may want to turn the feature off entirely!) There are four places to look:

  • iOS 17 and iPadOS 17: Settings > Siri & Search > Listen For
  • macOS 14 Sonoma: System Settings > Siri & Spotlight > Listen For
  • watchOS 10: Watch app > My Watch > Siri > Listen For
  • HomePod Software 17: Home app > long-press HomePod > Accessory Settings > Listen For “Siri” or “Hey Siri”

(Featured image based on an original by Apple)


Social Media: In Apple’s new operating systems for 2023, you can choose to invoke Siri with just “Siri” or the old “Hey Siri”—or turn the feature off entirely. We explain where to find the feature for each of your Apple devices.

Clean Up Your Mac’s Desktop with Sort Options

When we help someone with their Mac for the first time, we often notice that their desktop is a disaster. Icons are scattered willy-nilly and often piled on top of one another, making it hard to locate anything. For most people, the solution is easy—sort the contents of the desktop. In the Finder, choose View > Show View Options. We recommend choosing Date Modified from the Sort By pop-up menu to put your most recently used files in the upper-right, but other criteria might work better for you. If you have so many icons that they overlap, try reducing the icon size or grid spacing. You could also choose Date Modified from the Stack By pop-up menu to collect icons into stacks by date.

(Featured image by iStock.com/Liudmila Chernetska)


Social Media: We can’t help with a messy office desk, but if your Mac’s desktop is a confusing mess of randomly placed icons, using the Finder’s sort options will make it nice and orderly.

How to Protect Your Child’s Hearing from Too-Loud Headphone Audio

Loud sounds are harmful to everyone, and many parents worry that their children are at risk for hearing loss due to too-loud headphone audio from iPhones and iPads. To lower the likelihood of this happening, Apple provides a Reduce Loud Sounds option in Settings > Sounds & Haptics > Headphone Safety for both iOS and iPadOS. Select it and set a limit, with 80–85 decibels generally considered safe. To keep kids from increasing the limit, go to Settings > Screen Time and set a Screen Time passcode. Then navigate into Content & Privacy Restrictions, enable the switch at the top, and then scroll down and set Reduce Loud Sounds to Don’t Allow. After that, the headphone output from all apps will be capped at the decibel level you specified.

(Featured image by iStock.com/Ivan Zhdanov)


Social Media: Too-loud headphone volume causes hearing loss, but Apple makes it easy to reduce loud sounds played through headphones and prevent kids from bypassing the volume limits.

Use the Hidden Album in Photos to Hide Private Images

We’ve recently heard from people who have been embarrassed when they gave their iPhone to someone to swipe through some innocuous photos of a vacation, only to have the person swipe too far and end up at some NSFW (not safe for work) images. Ouch.

Embarrassment might be low on the list of problems such photos could cause. It’s not hard to imagine a male supervisor innocently sharing photos with a female employee but ending up embroiled in a sexual harassment situation if she were to stumble across the kinds of NSFW photos that regularly land politicians in hot water.

It’s safest to avoid taking NSFW photos to start, especially if the iPhone is a work-managed device. If that’s unrealistic, we recommend deleting any NSFW images from the iPhone as soon as feasible. A third option may be the best solution in the modern world—the Hidden album Apple provides in the Photos app on the iPhone, iPad, and Mac. On the iPhone and iPad, you’ll find it with other albums in the Utilities collection. On the Mac, it appears in the sidebar under Photos. (If you don’t see it, you may have hidden it—we explain how to unhide it below.)

There are four essential things to know about the Hidden album:

  • You don’t add photos to the Hidden album by dragging or using an Add to Album option. Instead, you choose Hide from a contextual menu. On the iPhone and iPad, touch and hold a photo (or a set of selected photos) and tap Hide in the menu that appears. Or tap the ••• button and choose Hide. On the Mac, select one or more photos, Control-click them, and choose Hide X Photos. To remove a photo from the Hidden album, use the same approach with the Unhide command.
  • Unlike regular albums, whose photos also appear in All Photos, photos in the Hidden album won’t appear anywhere else, including in searches. That’s the point of the feature.
  • You can hide or show the Hidden album on each of your devices independently. On the iPhone and iPad, control whether it shows up in the Utilities album collection with Settings > Photos > Show Hidden Album. In the Photos app on the Mac, control whether it appears in the sidebar using View > Show/Hide Hidden Photo Album. Obviously, if you’ve hidden the Hidden album, you must show it to look inside.
  • If you use the Hidden album, we strongly recommend protecting it (and the Recently Deleted album) with Face ID or Touch ID so only those with biometric access to your device can view it. On the iPhone and iPad, enable Settings > Photos > Use Face/Touch ID (see above). On the Mac, go to Photos > Settings > General and select “Use Touch ID or password.” Again, these settings are per-device, so what you set on the iPhone won’t automatically carry over to other devices. But really, turn it on everywhere.

Overall, the Hidden album is a welcome feature, and if you have any photos that could embarrass you if someone were to stumble across them, put them in the Hidden album and turn on the biometric protection.

(Featured image based on an original by iStock.com/AlexZabusik)


Social Media: Although it’s safest to keep all NSFW images off your iPhone entirely, if you have photos that could be embarrassing or legally troublesome if the wrong person were to stumble across them, protect them using the Hidden album in Photos.

AirNow and Paku: Two Helpful Apps for Monitoring Air Quality

Smoke from wildfires is causing significant air quality problems for much of Canada and the US. It’s important to check the Air Quality Index (AQI) before spending a long time outside, and that’s especially true for sensitive populations (children, the elderly, anyone with asthma or other breathing issues) and for those exercising outdoors. Although numerous weather apps report air quality, their data can vary widely. Instead, turn to the official AirNow app published by the US Environmental Protection Agency. It provides the canonical AQI readings, and its Fire & Smoke Map lets you see where the smoke is and how that relates to air quality. (The AirNow website provides the same tools on a Mac, plus a lot of helpful background information.) For hyperlocal readings, check the PurpleAir network of inexpensive air monitors. PurpleAir’s website works in Safari on the iPhone, but the Paku app also provides iPhone widgets and Apple Watch complications showing the AQI from nearby monitors.

(Featured image by iStock.com/Daniiielc)


Social Media: With wildfire smoke causing air quality problems throughout North America, it’s important to check the Air Quality Index before spending a long time outside, particularly for exercise. We recommend the AirNow and Paku apps for the iPhone.

Need to Mask Nearby Noise? Try Ventura’s Background Sounds

Do you have trouble concentrating at work because of a loud office environment? Or do you work at home and want to block out the sounds of kids or appliances? In macOS 13 Ventura, Apple added background sounds you can play to mask what’s going on around you. Go to System Settings > Accessibility > Audio and enable Background Sounds. You can pick a sound, set the volume, and select an option to turn the sound off when your Mac is inactive. Next time you’re mentally stewing over it being too loud to work, try this feature. A pair of AirPods (Pro or Max, in particular) might be helpful, too. If you find background sounds helpful but want more variety, look for websites like A Soft Murmur or apps like Noizio.

(Featured image by iStock.com/Apiwan Borrikonratchata)


Social Media: It can be hard to concentrate on your work in a loud office environment or with kids playing in the next room. In macOS 13 Ventura, Apple added background sounds that can help mask the noise around you—give them a try!