Posts

Clean Up Your Mac’s Desktop with Sort Options

When we help someone with their Mac for the first time, we often notice that their desktop is a disaster. Icons are scattered willy-nilly and often piled on top of one another, making it hard to locate anything. For most people, the solution is easy—sort the contents of the desktop. In the Finder, choose View > Show View Options. We recommend choosing Date Modified from the Sort By pop-up menu to put your most recently used files in the upper-right, but other criteria might work better for you. If you have so many icons that they overlap, try reducing the icon size or grid spacing. You could also choose Date Modified from the Stack By pop-up menu to collect icons into stacks by date.

(Featured image by iStock.com/Liudmila Chernetska)


Social Media: We can’t help with a messy office desk, but if your Mac’s desktop is a confusing mess of randomly placed icons, using the Finder’s sort options will make it nice and orderly.

Reveal Your Desktop Quickly with a Keyboard Shortcut

The Mac’s Desktop is a remarkably useful place. It’s a good spot for in-progress documents, screenshots, images dragged out of Web pages, and more. However, app windows tend to obscure the Desktop, making it harder to use. There are two quick ways you can temporarily hide windows, making it easy to access icons on the Desktop. In macOS 13 Ventura, in System Settings > Desktop & Dock, click the Shortcuts button at the bottom and assign a keyboard shortcut to Show Desktop (we like the Right Option key). Or click Hot Corners and choose Desktop for one of the corners. (In macOS 12 Monterey and earlier, look in System Preferences > Mission Control.) Then, press that keyboard shortcut or put your pointer in that corner to move your windows aside temporarily. When you’re done, press the key or move the pointer there again to put the windows back.

(Featured image based on an original by iStock.com/AmnajKhetsamtip)


Social Media: The Mac’s Desktop is a great place for in-progress documents, screenshots, and other things you’re working on, but only if you can get to it easily. Read on for two little-known tricks for temporarily pushing windows aside.

How to Avoid Embarrassment During Online Presentations or Screen Sharing

Along with the now-ubiquitous videoconferencing, screen sharing and online presentations have become vastly more common during the pandemic. This isn’t yet another article about how to give a better presentation or feel more confident. (Although those might happen too.) The goal of this article is to help you avoid situations that could embarrass you in front of clients, colleagues, or bosses. Follow this advice and you could avoid an unfortunate happenstance that might even cause you to be fired.

Here’s the problem. Even more so than before the pandemic, our Macs feel like personal spaces. Just as you’d add a houseplant and a special photo to your desk at work, you’ve probably personalized your Mac in a variety of ways. Custom desktop wallpaper, for instance, or a screensaver that displays favorite photos. Plus, you may carry on personal conversations, possibly even intimate ones, if you catch our drift, using the same Mac that you use for communicating with those aforementioned clients, colleagues, and bosses.

We’re not here to admonish you or nag about inappropriate behavior. (Though we will encourage you to consider some sage advice from a friend’s mother, who noted drily that you should never put anything on the Internet that you don’t want to appear on the front page of the New York Times. And that was before Twitter.)

No, as we said, the goal here is to help you avoid the embarrassment caused by people who are viewing your screen seeing things they shouldn’t see, something that the New York Times has also covered. Some areas of concern include:

  • Desktop & Screen Saver: Jobs have been lost by inappropriate selections for desktop wallpaper and photo screen savers. Make sure, if you’re ever going to share your screen, that randomly chosen desktop pictures and folders of screen saver photos don’t contain anything that could be problematic. To be safe, choose an Apple-provided desktop picture and a pattern-based screen saver in System Preferences > Desktop & Screen Saver.
  • Icons on the Desktop: We all toss files on the desktop, but if preview icons or even filenames could cause trouble—you might not want your boss seeing Resumé.doc—corral them in another folder before you share your screen. Also note that many videoconferencing apps can limit their screen sharing to particular windows rather than the entire screen, which prevents people from seeing your desktop.
  • Web browser tabs: Limiting screen sharing to a particular window won’t help if it’s a Web browser window with multiple tabs. Even if you avoid accidentally navigating to a tab with NSFW content, its title alone might be problematic. For safety, always start a new browser window when sharing Web content.
  • Open apps and documents: As with icons on the desktop when sharing your entire screen, you may not want just anyone seeing what other apps and documents you have open. Again, stick to sharing a specific window. To avoid mistakes when selecting the window to share, we recommend hiding or quitting all unrelated apps before sharing your screen.
  • Document comments: When collaborating on a document, some people are less than politic with their in-document comments. If comments are visible when you’re sharing a document with people who wouldn’t otherwise see them, hard feelings could ensue. Make sure to hide or resolve such comments before sharing.
  • Notifications: Even if you have hidden or quit Calendar, Messages, Mail, and similar apps, their notifications could still appear at an inopportune time. You might not want colleagues to know about an ob-gyn appointment, meeting with a potential employer, or racy conversations with a coworker. The solution is Do Not Disturb, easily enabled from Control Center in macOS 11 Big Sur and by scrolling up in Today view in Notification Center in earlier versions of macOS. Also, although it won’t help with online screen sharing, it’s a good idea to enable the “When mirroring to TVs and projectors” option in System Preferences > Notifications > Do Not Disturb.

This may all sound a little overwhelming, but there is one trick that will help you avoid most of these problems at once. In System Preferences > Users & Groups, create a new user account dedicated to screen sharing and presentations. In that user account, you can be sure to have innocuous desktop pictures, screen savers, clean Web browser windows, and permanent Do Not Disturb. The hardest part will be figuring out the best way to share documents you use in presentations between your accounts (try the /Users/Shared folder or an online file sharing solution like Dropbox). Then, before you start a call when you’ll need to share your screen, choose your new account from the Fast User Switching menu from the right side of the menu bar (set up that menu in System Preferences > Users & Groups > Login Options).

One final piece of advice. When you’ve accomplished what you need to by sharing your screen, stop sharing it and switch back to video. That way, you can’t accidentally do something in the shared window that might be embarrassing. Similarly, when a meeting is over or you’re dropping off for a while, it’s best to leave the call. Stopping video and muting audio are good tools, but it’s easy to click in the wrong spot accidentally and think you’re safe when, in fact, your mic or camera is still live.

(Featured image by Andrea Piacquadio from Pexels)


Social Media: When sharing your screen online, would you be embarrassed if your clients, colleagues, or bosses saw what’s on your Mac—your desktop picture, screen saver, browser tabs, email notifications, or Messages conversations? Here’s what to watch out for.

Understanding Dark Mode in macOS 10.14 Mojave

The feature Apple is promoting most heavily with macOS 10.14 Mojave is Dark mode, which the company advertises as “a dramatic new look that helps you focus on your work… as toolbars and menus recede into the background.” Let’s look at what Apple has done with Dark mode, after which you’ll have a better idea of what to think about while trying it.

Enable Dark Mode

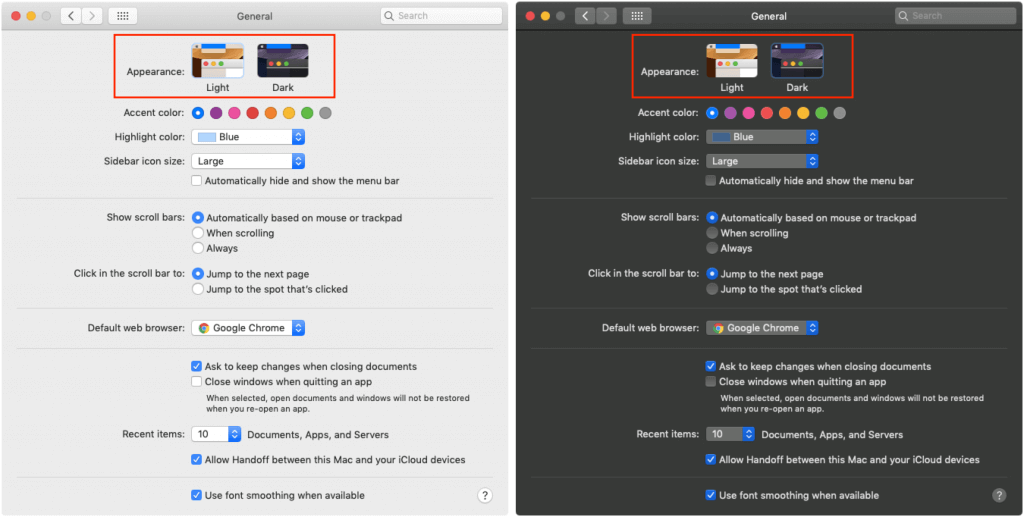
First, to turn Dark mode on, go to System Preferences > General and click the Dark thumbnail to the right of Appearance. Mojave immediately switches to Dark mode, turning light backgrounds dark and swapping the text color from dark to light.

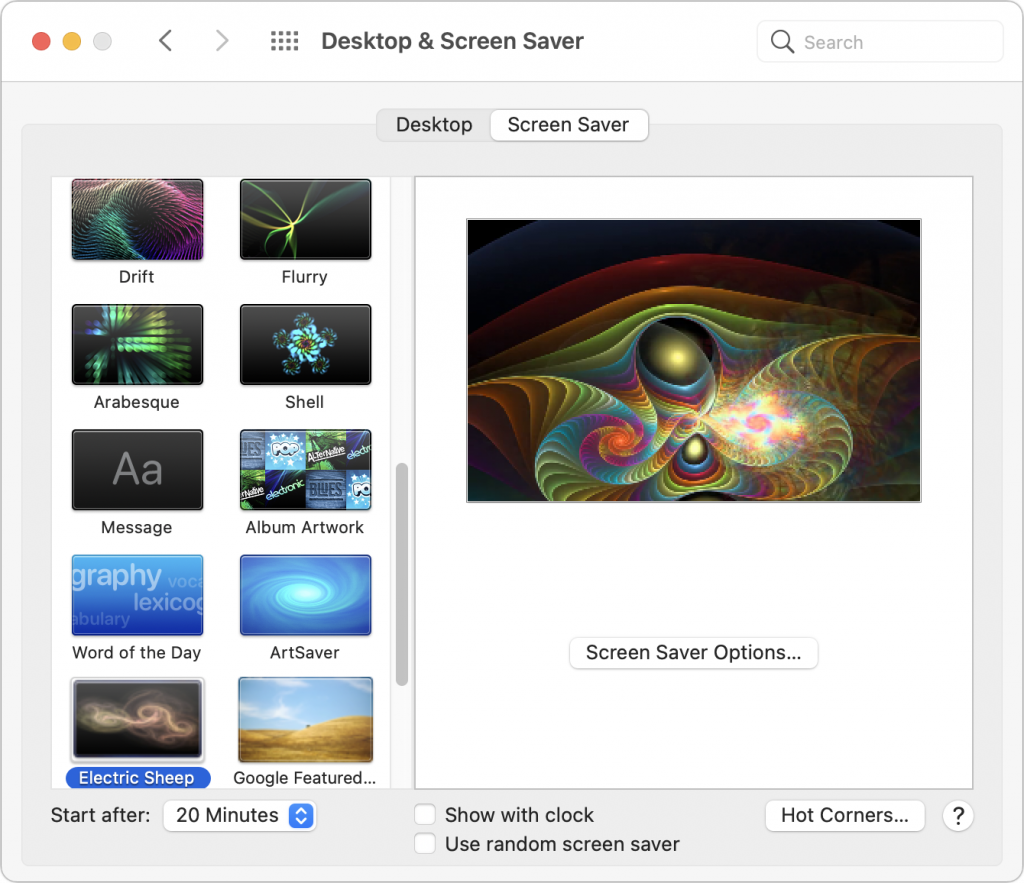
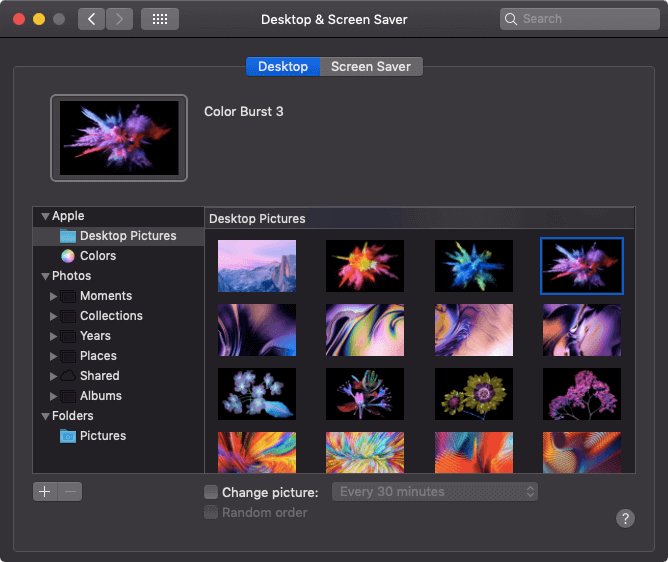
While you’re in System Preferences, click over to the Desktop & Screen Saver preference pane. If you scroll down in the Desktop Pictures list, you’ll discover a bunch of new wallpapers that blend well with Dark mode.

Dark Mode Support and Controls

You’ll notice that the color change takes place instantly not just in the Finder, but also in any apps that support Dark mode. Most of Apple’s apps support Dark mode and third-party developers are rapidly adding support to their apps as well. However, Dark mode requires explicit support from apps, so older apps that aren’t being updated will maintain their standard dark-on-light color schemes.

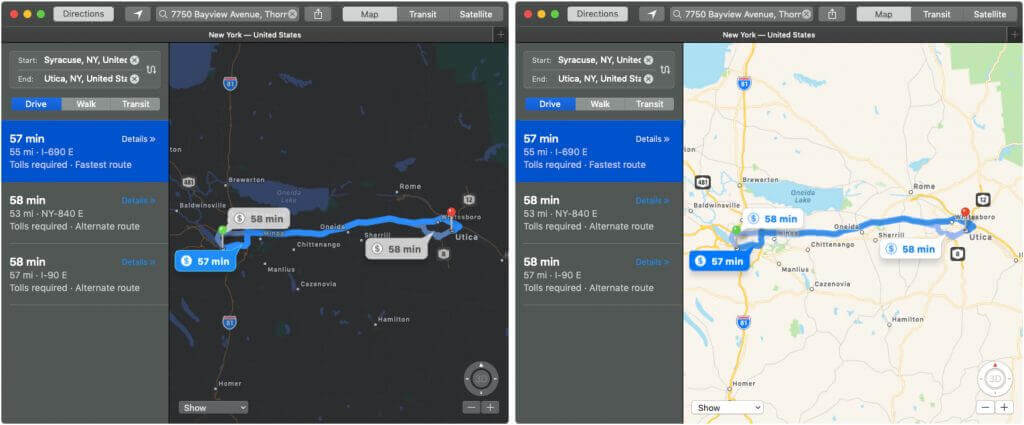
Some apps, such as Maps and Mail, give you additional options that change just how dark they get. In Maps, choose View > Use Dark Map to toggle between a dark map style and the familiar map style that mimics a paper map. Similarly, in Mail, go to Mail > Preferences > Viewing and deselect “Use dark backgrounds for messages” to return to a white background.

If you generally like Dark mode but have trouble reading light text on a dark background due to the reduced contrast, you may be able to choose a different font or style in the app’s preferences that makes the text more readable. Apps like Mail give you a fair amount of that sort of control.

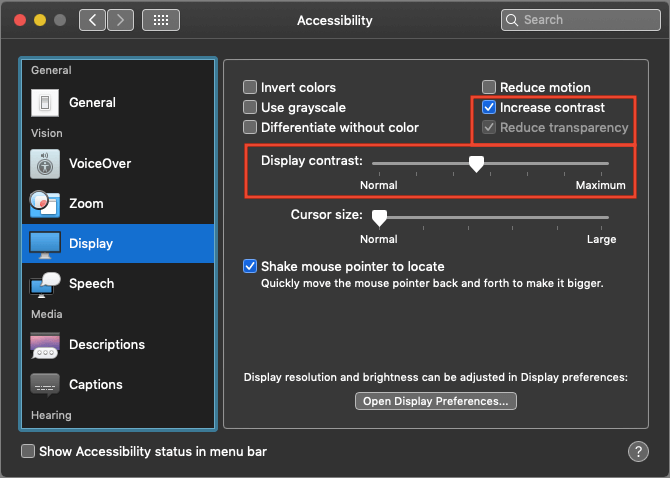
For even more control over contrast, open System Preferences > Accessibility > Display. There you’ll find a Display Contrast slider that lets you make text lighter and backgrounds darker. You can also select Reduce Transparency to make it so items like the Dock and menu bar are solid colors, rather than allowing the background to bleed through. To separate dark and light further, select Increase Contrast, which increases the brightness of divider lines as well.

The Dark Side of Dark Mode

Contrast is necessary for pulling out fine details, but too much contrast can be uncomfortable or even painful—think about how you feel when someone turns on a bright light in a previously dark room. For visual comfort, it’s usually best to match your screen with the lighting of your surroundings. That’s why people who often work at night or with the window blinds down like dark modes—a bright screen seems brighter in a dimly lit room. That’s the theory behind the traditional dark text on a light background too, since the room will be quite light during the day.

So Dark mode can run into two problems. First is that using it during the day or in a brightly lit room may create an uncomfortable contrast between the screen and its surroundings. Controlling your room lighting can eliminate this as an issue. Second and more troubling, even apps that support Dark mode may have large content areas that are bright white, creating a strong contrast between the content area and the rest of the app. Many Web sites in Safari have this effect, as do documents in apps like Pages and Numbers. There’s no way around this scenario.

Even if Dark mode isn’t perfect, it’s worth a try if you have trouble looking at bright screens. Regardless, if it goes too far for you, one of the new dark wallpapers may be easier on your eyes. While most people aren’t overly light sensitive, a non-trivial percentage of the population is, particularly those who suffer from migraines or who have endured concussions, and those with a variety of ocular conditions. And if you’re on the other end of the spectrum—if Dark mode looks dirty and is hard to read—just stick with the traditional Light mode.


Social Media: Apple is promoting macOS 10.14 Mojave’s new Dark mode heavily. Read on to learn if it might be for you, how you can tweak its contrast settings, and what problems you might encounter.

Here’s How to Hide All Windows on Your Mac So You Can Work on the Desktop

If your Mac is anything like ours, you end up with lots of apps open, each with one or more windows that obscure the Desktop. For those people who like to save in-progress documents to the Desktop and keep current project folders there, all those windows get in the way. macOS has a solution. Open System Preferences > Mission Control, and in the Keyboard and Mouse Shortcuts section, from the Show Desktop pop-up menu, choose a keyboard shortcut. Try the right-hand modifier keys—we’re fond of Right Option—because they’re easy to press and aren’t likely to be used for other purposes. Then, whenever you want to see and work with the icons on your Desktop, hit that key, and do what you want. If you like, you can press that key again to bring the windows back.