Convert Image Formats Directly in the Finder
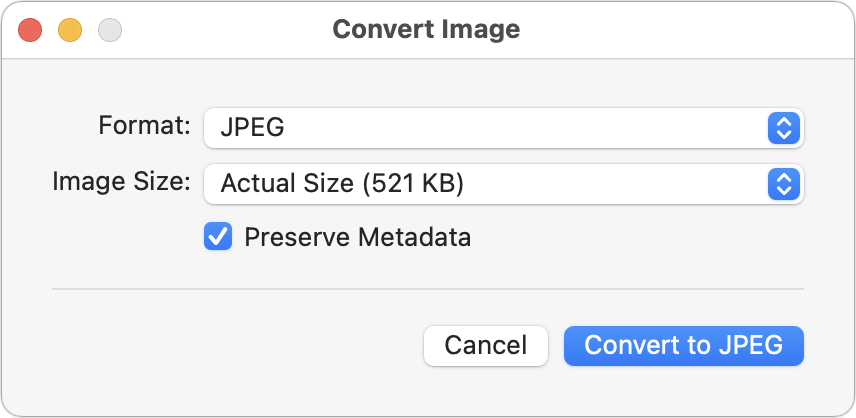
If you need to convert images to JPEG, PNG, or (unlikely) HEIF, try this hidden Finder feature: Control-click an image in one of those formats or other common image formats like TIFF, GIF, or PSD, and choose Quick Actions > Convert Image. A dialog lets you choose the destination format, the image size, and whether you want to preserve metadata. For straight conversions, stick with Actual Size, but if your goal is to shrink the file as well, you can choose a smaller image size. Leave Preserve Metadata selected unless you want to remove things like location metadata for privacy reasons. You can even select multiple files to convert them all at once.
(Featured image based on an original by iStock.com/marekuliasz)
Social Media: A hidden feature of the macOS Finder lets you quickly convert selected images from their original format to JPEG, PNG, or HEIF. If you regularly need to convert images between formats, it could save you some time.