Posts

Use iOS 17.3’s Stolen Device Protection to Reduce Harm from iPhone Passcode Thefts

Last year, a series of articles by Wall Street Journal reporters Joanna Stern and Nicole Nguyen highlighted a troubling form of crime targeting iPhone users. A thief would discover the victim’s iPhone passcode, swipe the iPhone, and run. With just the passcode, the thief could quickly change the victim’s Apple ID password, lock them out of their iCloud account, and use apps and data on the iPhone to steal money, buy things, and wreak digital havoc.

In essence, Apple allowed the passcode, which could be determined by shoulder surfing, surreptitious filming, or social engineering, to be too powerful, and criminals took advantage of the vulnerability. It’s best to use Face ID or Touch ID, especially in public, but some people continue to rely solely on the passcode.

Apple has now addressed the problem for iPhone users with the new Stolen Device Protection feature in iOS 17.3. It protects critical security and financial actions by requiring biometric authentication—Face ID or Touch ID—when you’re not in a familiar location like home or work. The most critical actions also trigger an hour-long security delay before a second biometric authentication. We recommend everyone who uses Face ID and Touch ID turn on Stolen Device Protection. The feature is not available for the iPad or Mac, but neither is as likely to be used in places like the crowded bars where many iPhones have been snatched.

How Stolen Device Protection Works

The location aspect of Stolen Device Protection is key. When you’re in a “significant location,” a place your iPhone has determined you frequent, you can do everything related to security and financial details just as you have been able to in the past, including using the passcode as an alternative or fallback.

However, when you’re in an unfamiliar location, as you would likely be if you were out in public where someone might steal your iPhone, Stolen Device Protection requires biometric authentication to:

  • Use passwords or passkeys saved in Keychain
  • Use payment methods saved in Safari (autofill)
  • Turn off Lost Mode
  • Erase all content and settings
  • Apply for a new Apple Card
  • View an Apple Card virtual card number
  • Take certain Apple Cash and Savings actions in Wallet (for example, Apple Cash or Savings transfers)
  • Use your iPhone to set up a new device (for example, Quick Start)

Some actions have even more serious consequences, so for them, Stolen Device Protection requires biometric authentication, an hour security delay—shown with a countdown timer—and then a second biometric authentication. The delay reduces the chances of an attacker forcing you to authenticate with the threat of violence. You’ll need to go through the double authentication plus delay when you want to:

  • Change your Apple ID password (Apple notes this may prevent the location of your devices from appearing on iCloud.com for a while)
  • Sign out of your Apple ID
  • Update Apple ID account security settings (such as adding or removing a trusted device, Recovery Key, or Recovery Contact)
  • Add or remove Face ID or Touch ID
  • Change your iPhone passcode
  • Reset All Settings
  • Turn off Find My
  • Turn off Stolen Device Protection

There are a few caveats to keep in mind:

  • The iPhone passcode still works for purchases made with Apple Pay, so a thief could steal your passcode and iPhone and buy things.
  • Although Apple says it’s required, you can turn off Significant Locations to require the extra biometric authentication and security delay everywhere. That would eliminate the worry about a thief using Significant Locations to go to your most recent familiar spot in an attempt to sidestep the extra authentication.
  • If you plan to sell, give away, or trade in your iPhone, make sure to turn off Stolen Device Protection first. Once it’s out of your physical control, no one else will be able to reset it.

Turn On Stolen Device Protection

Before you get started, note that Apple says you must be using two-factor authentication for your Apple ID (everyone should be anyway), have a passcode set up for your iPhone (ditto), turn on Face ID or Touch ID, enable Find My, and turn on Significant Locations (Settings > Privacy & Security > Location Services > System Services > Significant Locations), although this last one doesn’t actually seem to be required.

Then, go to Settings > Face ID/Touch ID & Passcode, enter your passcode, and tap Turn On Protection. (If it’s enabled, tap Turn Off Protection to remove its additional safeguards.)

Once Stolen Device Protection is on and you’re in an unfamiliar location, the actions listed above will require either biometric authentication or two biometric authentications separated by the hour-long security delay.

There is one group of people who should not turn on Stolen Device Protection: those for whom Face ID or Touch ID don’t work. Most people have no trouble with Apple’s biometric technologies, but some people have worn off their fingerprints or have other physical features that confuse Touch ID or, less commonly, Face ID.

If that’s you, stick with our general recommendation for discouraging possible iPhone thefts: Never enter your iPhone passcode in public where it could be observed.

(Featured image by iStock.com/AntonioGuillem)


Social Media: In iOS 17.3, Apple has introduced Stolen Device Protection to discourage iPhone thefts enabled by a revealed passcode. It requires additional biometric authentication, and we recommend that everyone who uses Face ID or Touch ID enable it.

How to Share a Contact Card without Sharing Everything in iOS 16

Apple makes it easy to share contact cards on the iPhone or iPad—just scroll down in a contact and tap Share Contact. But what if you don’t want to share every piece of data on that card? To avoid oversharing in iOS 16 or iPadOS 16, tap Filter Fields at the top of the Share sheet and deselect the private items. If the card has a lot of data and you want to share only a few items, tap Deselect All Fields at the bottom of the sheet and select only what you want to share. Unfortunately, your selections aren’t remembered if you share the same card again later, so be sure to reset your selections each time you share.

(Featured image by iStock.com/diane39)

Protect Your Hidden and Recently Deleted Albums in Photos

Photos has long provided a hidden album you could use to hold images you wanted to keep a little more private. Until this year, however, it was security through obscurity: anyone who knew to reveal the album in Settings > Photos on an iPhone or iPad or by choosing View > Show Hidden Album on the Mac could see its contents. Now you can protect it—and the Recently Deleted album—with Face ID or Touch ID on an iPhone or iPad, or Touch ID or your password on a Mac. You can enable this feature in iOS 16 or iPadOS 16 using Settings > Photos > Use Face ID/Touch ID; in macOS 13 Ventura, choose Photos > Settings > General and select “Use Touch ID or password.” From then on, opening those albums will require authentication.

(Featured image by iStock.com/Kenishirotie)

If Your Holiday Gift Was a Tech Device, It’s Time to Change the Password!

Whatever consumer electronics product you can name, there’s probably a “smart” version that you configure via an app or Internet-connected interface once you’ve connected it to your Wi-Fi network. For ease of setup and to keep costs down, many such devices come pre-configured with not just a default username and password, but the same default username and password as all other units. That’s bad enough, but worse, most people never change those defaults, which is just asking hackers and malicious bots to break in and take over. This risk is real—it has happened to security cameras, baby monitors, light bulbs, DVRs, toasters, refrigerators, and even fish tanks. So, if you received any so-called “Internet of Things” devices for the holidays—or have one or more already installed on your home network—immediately change the usernames (if possible) and passwords to something more secure. Store the new usernames and passwords in your password manager for future reference.

(Featured image by iStock.com/EvgeniyShkolenko)

Don’t Trust an App Fully? Hide Your Precise Location from It

Most of the time, having your iPhone know precisely where you are is good. You want Maps to tell you exactly when to turn, not after you’ve passed an intersection. But too many apps abuse their users’ privacy. We strongly encourage you to stop using such apps entirely, but we acknowledge that it can be hard to give up apps that seem necessary for modern life. Barring that, you could prevent such apps from seeing your location at all, but even that isn’t always feasible. Since iOS 14, Apple has provided another compromise—you can prevent an app from seeing your precise location while still giving it your approximate whereabouts. Go to Settings > Privacy > Location Services, scroll down and tap the app in question, and disable Precise Location.

(Featured image by iStock.com/Melpomenem)

What’s That Little Orange Dot by Control Center in macOS 12 Monterey?

Have you noticed a little orange dot next to the icon for Control Center on the menu bar in macOS 12 Monterey? (And if not, you can’t miss it now.) Apple added that dot to alert you that something is using the Mac’s microphone to listen to the room. Click the Control Center icon to see which apps are using the mic. In nearly all situations, it will be entirely innocuous: Siri needs to listen for the “Hey, Siri” trigger, as in the screenshot below, and the Zoom app needs microphone access to provide audio in a video call. But if you don’t recognize the app that’s listening, you’ll want to look into it to make sure there’s nothing creepy going on.

(Featured image by iStock.com/Mihajlo Maricic)

What Should I Do If I Get an “AirTag Found Moving With You” Message?

First, don’t panic. Most likely, you’re borrowing something with an Apple AirTag location tracker attached to it, or someone left something with an attached AirTag in your car. Second, tap the alert to open the Find My app, which displays a map showing where the AirTag has been with you, which might shed some light on where it started traveling with you. Third, in the Find My app, tap Play Sound to try to locate the AirTag by its audible alert. Fourth, if you find the AirTag, hold it near your iPhone until a notification appears, and tap that for more information, including the last four digits of the owner’s phone number (search for it in the Contacts app to see if it’s anyone you know). We’re being intentionally brief here—for significantly more detail, including advice on contacting local law enforcement—read Apple’s support article.

(Featured image by iStock.com/BackyardProduction)

Apple Works to Improve Safety in the Wake of AirTag Stalking Reports

Over the past few months, there has been a spate of media reports about how people may have been tracked without their knowledge using AirTags, Apple’s elegant location trackers. Like many mainstream media forays into the tech world, the reports are often short on detail and sometimes unclear on the reality of how the AirTags work. Nor is it clear that there have been many successful cases of AirTag abuse, but the mere fact that people are trying to use AirTags to stalk others is concerning.

Apple put significant effort into preventing such abuses, revolving around three features:

  • Safety alerts: If you have an iPhone or iPad running iOS 14.5 or later and an unknown AirTag is traveling with you, your device will alert you to that fact. Although safety alerts aren’t available for those using Android smartphones, Android users can download Apple’s Tracker Detect app to scan manually.
  • Safety sounds: After an AirTag has been separated from its owner for several days, it will make a sound the next time it moves.
  • NFC identification: If you find an AirTag, you can hold it up to an iPhone or other NFC-capable smartphone to load a website that reveals the AirTag’s serial number and the last four digits of the owner’s phone number. The police can use this information to learn the owner’s identity from Apple.

Sadly, those precautions haven’t been sufficient either to dissuade all would-be stalkers or to educate potential stalking victims (and let’s be real—dissuading stalkers is also a matter of educating people that it’s unethical, likely dangerous, and often illegal to abuse an AirTag in this way). Apple has responded in two ways, one general, the other specific to AirTags.

Personal Safety User Guide

Apple documents its products and services quite well, but the company tends to generate many focused pages without much high-level organization. It’s all too easy to flail around within Apple’s support documentation looking for help if you don’t know what search terms are likely to work. In an effort to mitigate that problem for issues surrounding personal safety, Apple has created the Personal Safety User Guide website, also available as a downloadable 56-page PDF.

The Personal Safety User Guide brings together numerous Apple support articles in two main sections:

  • Review and take action: The first section helps you review how your devices and apps are set up, with a focus on settings that could expose you to harm. It helps you manage sharing settings, look at location sharing, control your Home accessories, and more. You’ll also learn how to block unknown sign-in attempts, document suspicious activity, delete suspicious content, and avoid fraudulent requests to share information, among much else. The main criticism here is that the section on AirTag safety doesn’t explain or link to all the features Apple provides.
  • Safety and privacy tools: The second section is a bit more generic, providing support documentation that encourages you to take advantage of the features Apple has provided to protect your safety and privacy. Among other topics, it discusses passcodes, setting up Face ID and Touch ID, using two-factor authentication, seeing which apps are accessing your data, blocking unwanted calls and messages, and using Emergency SOS.

The Personal Safety Guide ends with three checklists, each of which walks you through a series of steps. These are extremely useful because almost no one would necessarily know or remember all the places to check. The checklists help you:

  • See who has access to your device or accounts
  • Stop sharing with someone
  • Control how someone else can see your location

The Personal Safety User Guide website is best when you want an answer to a specific question, but it doesn’t lend itself to reading front to back. For that, we recommend downloading the PDF, which you can read at whatever depth you desire. But do at least scan the entire thing to get a sense of what it contains should you need that information later.

Apple AirTag Announcement

Shortly after releasing the Personal Safety Guide, Apple also posted a short but detailed statement on its website. In it, the company makes it clear that it is actively working with law enforcement on all cases involving AirTag abuse. Apple also says that it has updated its unwanted tracking documentation to explain AirTag safety features more clearly to users and to include resources for those who feel their safety is at risk.

Apple also outlined important advancements that will be coming to the AirTag and Find My network systems via software updates later this year:

  • New privacy warnings during AirTag setup: To ensure that everyone understands the utility of AirTags and the implications of abuse, people setting up an AirTag for the first time will see a message that clearly states that AirTags are meant to track their own belongings, that tracking people without their consent is a crime in many places, that AirTags are designed to alert victims to their presence, and that law enforcement can request identifying information about the owner of an AirTag.
  • Better alerts for AirPods: Instead of an “Unknown Accessory Detected” alert when your iPhone detects Find My network-compatible AirPods traveling with you, the alert will specify that AirPods are involved, not an AirTag. (There are third-party Find My network accessories that will still generate this alert, such as the Chipolo ONE Spot.)
  • Refined unwanted tracking logic: Apple will be updating its unwanted tracking alert system to notify users sooner that an unknown AirTag or Find My network accessory is traveling with them.
  • Precision Finding for unknown AirTags: Those with an iPhone 11, iPhone 12, or iPhone 13 will be able to take advantage of Find My’s Precision Finding feature to home in on the location of an unknown AirTag. Previously, this capability was limited to your own AirTags.
  • Display alerts with unknown AirTag sound: When an unknown AirTag emits a sound to alert anyone nearby to its presence, and it’s detected moving with your iPhone or iPad, an alert will also appear to help you play the sound again or use Precision Finding, if available. This should help when an unknown AirTag is in a place that blocks sound or if its speaker has been disabled.
  • More obvious AirTag alert sound: Apple will be adjusting the tone sequences to make an unknown AirTag’s alert sound easier to hear and find.

Overall, these changes are welcome, and it’s a testament to the care Apple took when designing the AirTag and Find My network systems that it can make such enhancements through software updates—no hardware changes are necessary. It’s also good to see Apple taking the problem—however small it might actually be—seriously and working to reduce it even further.

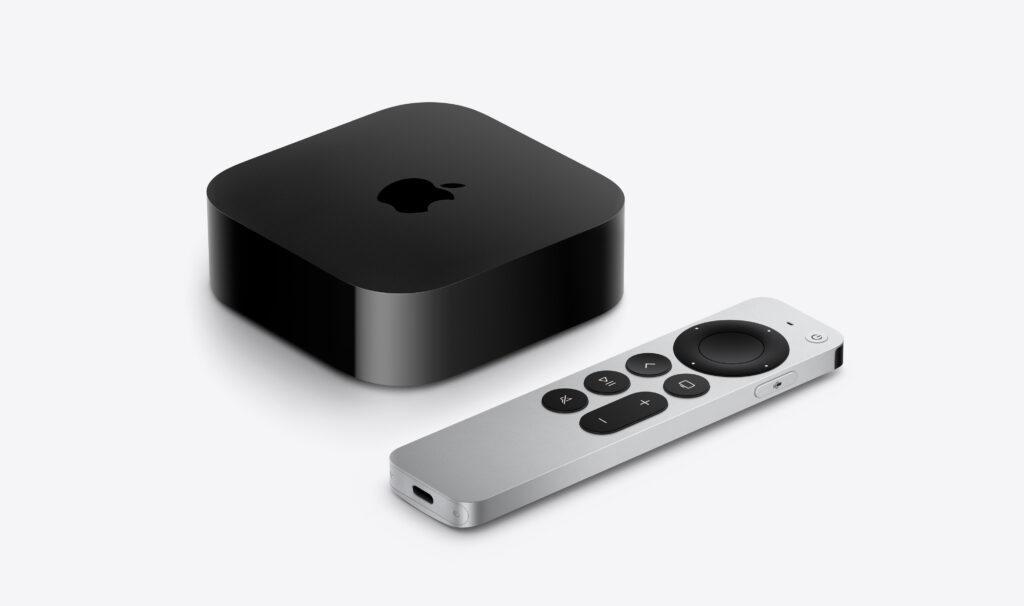
(Featured image by Apple)


Social Media: Media reports suggest that miscreants are trying to use Apple’s AirTag location trackers to stalk people. Apple has responded with personal safety advice and promised AirTag safety enhancements.

Giving Away a Mac Running macOS 12 Monterey? Try Erase All Content and Settings

Before macOS 12 Monterey, if you wanted to sell, trade in, or give away your Mac, you had to boot into Recovery, erase the internal drive with Disk Utility, and reinstall macOS to ensure that the new owner would get a fresh start and couldn’t see any of your data. In Monterey, Apple has made the process much easier for newer Macs that use Apple silicon or that are Intel-based with a T2 security chip. Open System Preferences, and from the System Preferences menu (yes, it has menus), choose Erase All Content and Settings. You’ll have to enter an administrator username and password to enter the Erase Assistant. It suggests you back up to Time Machine before erasing, and if you’ve already done that or don’t want to, click Continue. Verify everything that will be erased on the next screen and click Continue. Finally, log out of your Apple ID when prompted to complete the erasure.

(Featured image by iStock.com/wildpixel)

Disable Unused Sharing Options on Your Mac If You’re Not Using Them

Many security breaches—even high-profile ones—stem from simple oversight. There’s one spot in macOS that has long been particularly susceptible to such lapse: the Sharing pane of System Preferences. In it, you can enable a wide variety of sharing services, some of which could allow another user to access your Mac remotely. They all let you limit access to particular users, but passwords can be stolen, accounts can be compromised, and server software can have bugs. For safety’s sake, if you’re not actively using a sharing service, turn it off. The most important ones to disable when not in use are Screen Sharing, File Sharing, Remote Login, Remote Management, and Remote Apple Events. We also caution against leaving Printer Sharing and Internet Sharing on unnecessarily.

(Featured image by Morgane Perraud on Unsplash)