Posts

A Quick Trick to Turn Your iPhone into a Magnifying Glass

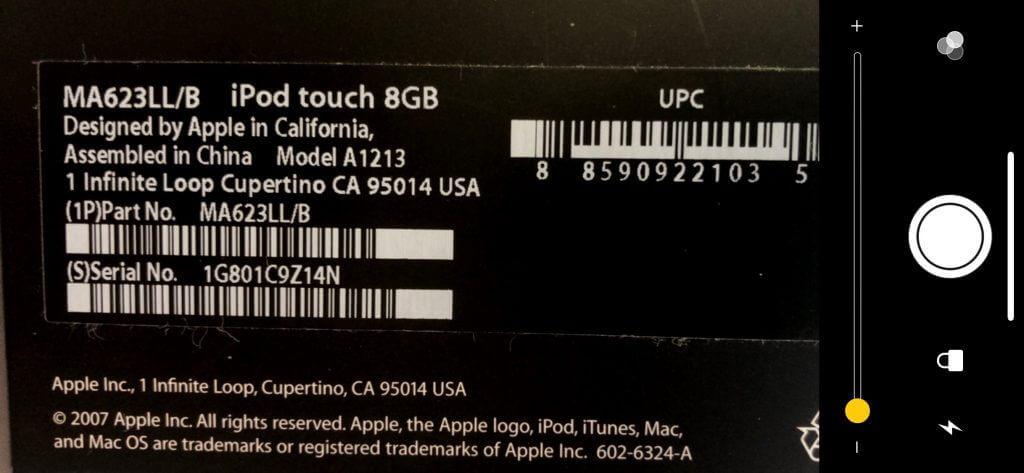
It’s maddening to want to read a serial number or other bit of fine print that you can barely see. But fret no longer—your iPhone or iPad makes a fabulous magnifying glass! Assuming Magnifier is enabled in Settings > General > Accessibility > Magnifier, you can bring it up by pressing the Home button (for Touch ID devices) or side button (for Face ID devices) three times quickly. If that’s too hard to remember, you can also add a Magnifier button to Control Center in Settings > Control Center > Customize Controls. The special camera viewfinder is zoomed automatically, but you can change the zoom level with the slider, tap the flash icon to turn on the LED light (if available on your device), enable a filter to change the color or contrast, or lock the focus by tapping the lock icon. You can also freeze the image by tapping the white shutter button, which is great for grabbing a picture of a tiny serial number on the back of some device (tap that button again to resume using Magnifier). To leave Magnifier, press the Home button or swipe up from the bottom of the screen.

What’s with All These Dialogs Saying, “SomeApp is not optimized for your Mac”?

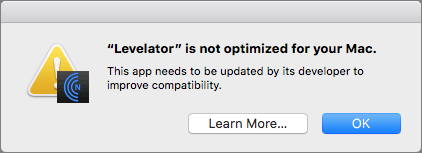
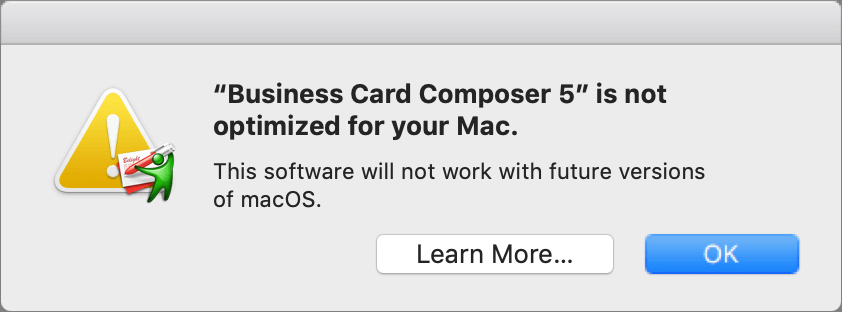
If you’re running macOS 10.13.4 High Sierra or macOS 10.14 Mojave, you may have seen a dialog that says an app isn’t optimized for your Mac. The message differs slightly between High Sierra and Mojave, with the High Sierra version telling you the developer needs to update the app to improve compatibility whereas Mojave saying bluntly that the app won’t work with future versions of macOS.

What’s going on here, what should you do, and when should you do it?

What’s Going On: 32-bit and 64-bit Apps

Over a decade ago, Apple started to transition all the chips used in Macs, along with macOS itself, from a 32-bit architecture to a 64-bit architecture. Without getting into technical details, 64-bit systems and apps can access dramatically more memory and enjoy significantly faster performance.

Apple knew it would take years before most people were running 64-bit hardware and 64-bit-savvy versions of macOS, so it allowed macOS to continue running older 32-bit apps. However, maintaining that backward compatibility has a cost, in terms of both performance and testing, so at its Worldwide Developer Conference in 2017, Apple warned developers that High Sierra would be the last version of macOS to support 32-bit apps “without compromise.” At the next WWDC in June 2018, Apple announced that macOS 10.14 Mojave would be the last version of macOS to run 32-bit apps.

Happily, the only “compromise” for 32-bit apps in Mojave is the warning dialog, which appears every 30 days when you launch an older app. But the writing is on the wall: 32-bits apps will cease working in macOS 10.15.

How Do You Identify 32-bit Apps?

Apple provides a tool to help you find 32-bit apps. Follow these steps:

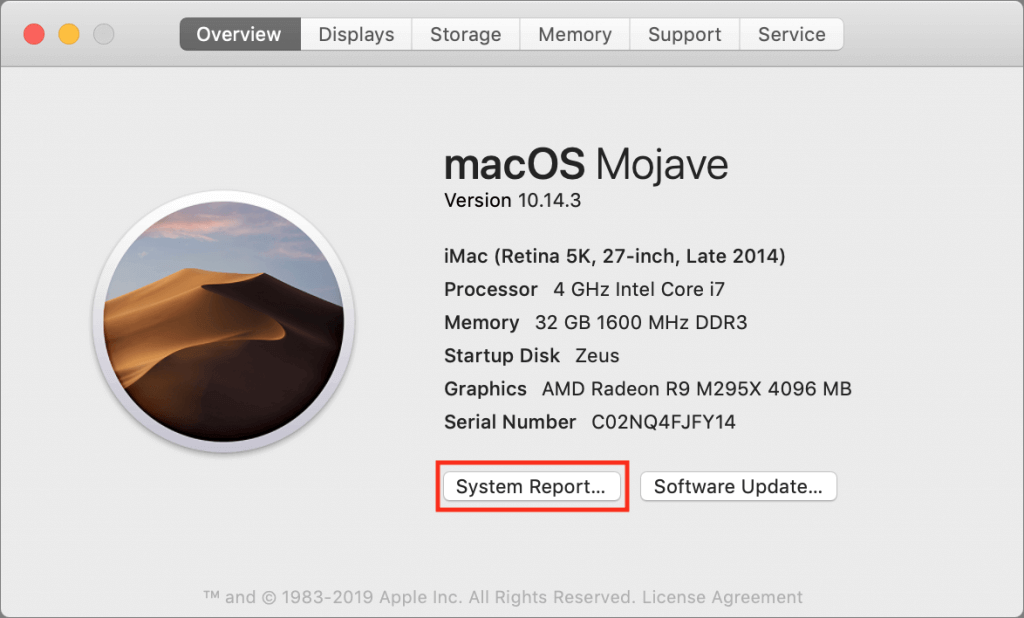
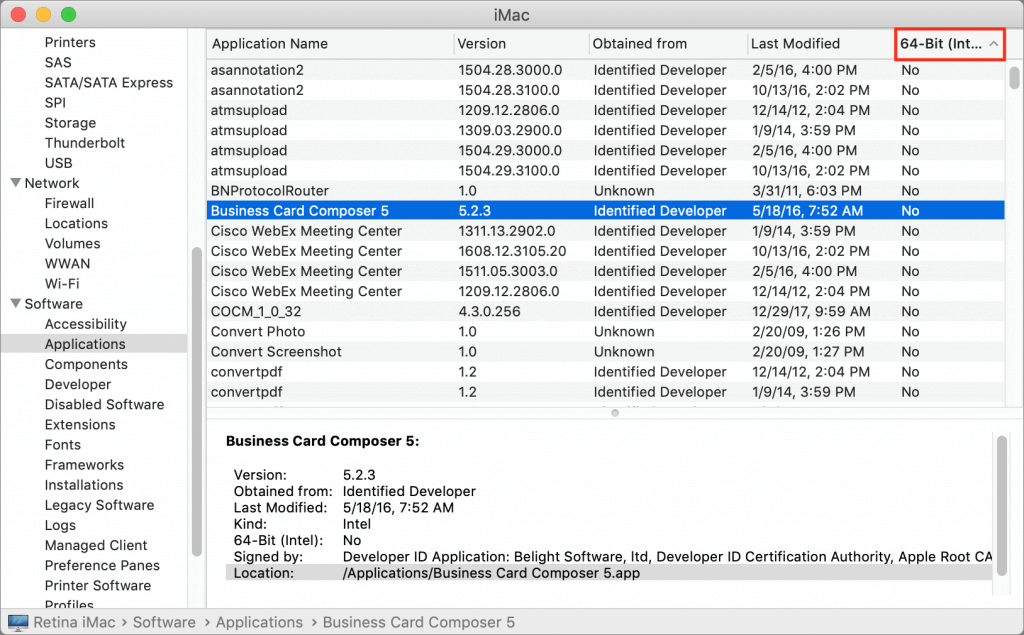
  1. From the Apple menu, choose About This Mac and then click the System Report button.
  2. In the System Information utility that opens, scroll down to Software in the sidebar and select Applications. It may take a few minutes to build the list of every app on all mounted drives.
  3. When it finishes, click the 64-bit column header (No means 32-bit; Yes means 64-bit) to sort the list, and select an app to see its details in the bottom pane.

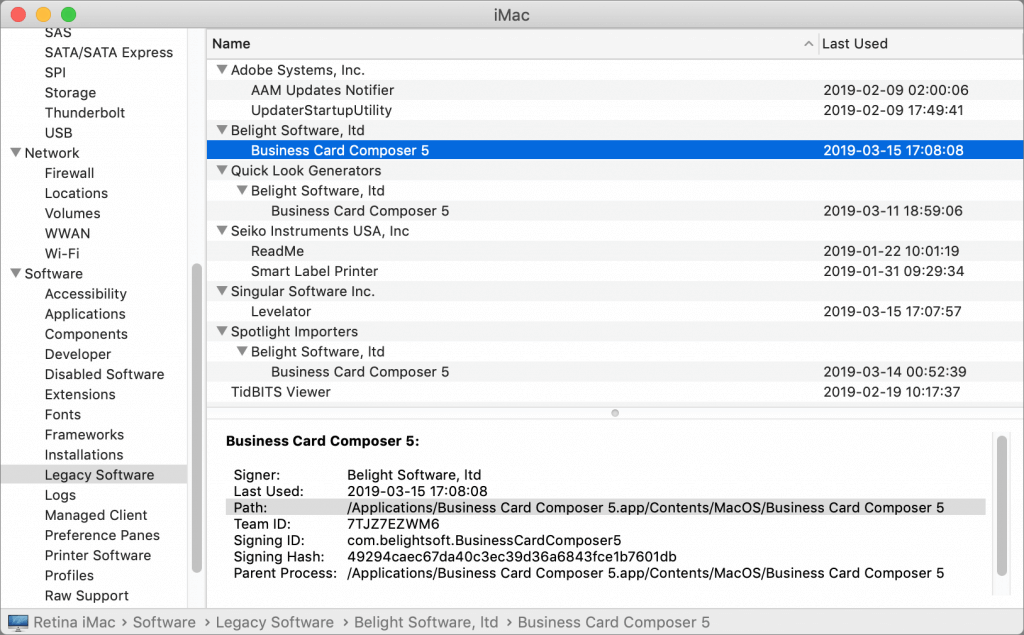
This technique works in both High Sierra and Mojave, but in Mojave, System Information includes a better-formatted section, called Legacy Software, that also provides a list of 32-bit apps. However, this list may be smaller because it includes only those apps that you’ve launched. Since it’s likely that you open old 32-bit apps only occasionally, you can’t trust the Legacy Software list to be complete.

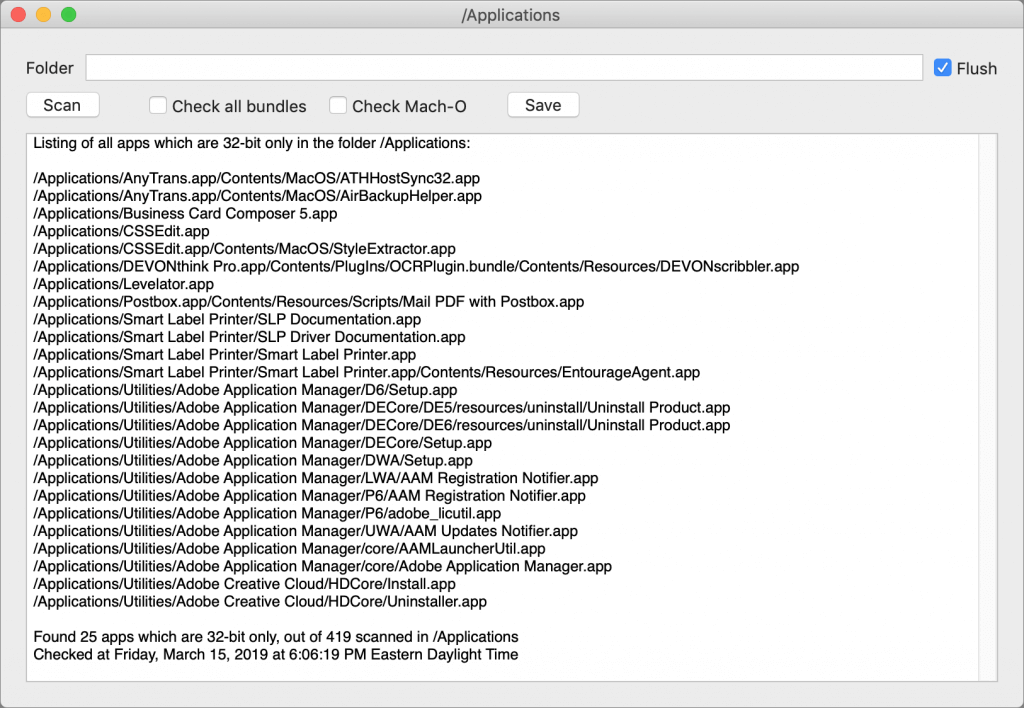
If you find System Information’s Applications list overwhelming, check out the free 32-bitCheck utility from Howard Oakley. It performs exactly the same task but lets you focus on a particular folder and save the results to a text file for later reference.

What’s Your Next Step?

Once you know which apps won’t work in macOS 10.15, you can ponder your options. Luckily, you have some time. We expect Apple to release macOS 10.15 in September 2019, but you don’t need to upgrade right away—in fact, we recommend that you wait a few months after that to allow Apple time to fix bugs.

That said, we do encourage upgrading eventually, and if you buy a new Mac after September 2019, it will come with macOS 10.15. So you need to establish a plan—it’s better to know what you’re going to do than to be forced into action if you have to replace your Mac on short notice. For each 32-bit app on your Mac, you have three options:

  • Delete it: It’s not uncommon to have old apps that you haven’t used in years and won’t miss. There’s no need to waste drive space on them in macOS 10.15.
  • Upgrade it: Apps in active development will likely have a new version available. The main questions are how much the upgrade will cost and if there are compatibility issues associated with upgrading. You can upgrade at any time, although it’s likely worth waiting until you’re ready to move to macOS 10.15 to minimize costs. The apps that cause the most irritation here are things like the Adobe Creative Suite—Photoshop, Illustrator, and InDesign—that require switching to a monthly subscription.
  • Replace it: If no upgrade is available, the cost of upgrading is too high, or upgrading comes with other negatives, it’s time to look for an alternative. This can take some time, so it’s worth starting soon to ensure that the replacement will provide the features you need before macOS 10.15 forces the decision.

Needless to say, if you’d like recommendations about how to proceed with any particular app or workflow, get in touch with us!


Social Media: Have you seen dialogs warning that an app isn’t optimized for your Mac? Here’s what’s going on, what you should do, and when you should do it:

Apple’s New AirPods Add “Hey Siri,” More Talk Time, and Optional Wireless Charging

If you use Apple’s AirPods, you’re probably a fan. But if you haven’t tried them, you may not realize what you’re missing. They pair quickly and reliably with all your Apple devices, provide excellent audio quality, and sit comfortably in most people’s ears (more so than the wired EarPods). The AirPods are Apple’s most popular accessory—the company sold 35 million in 2018.

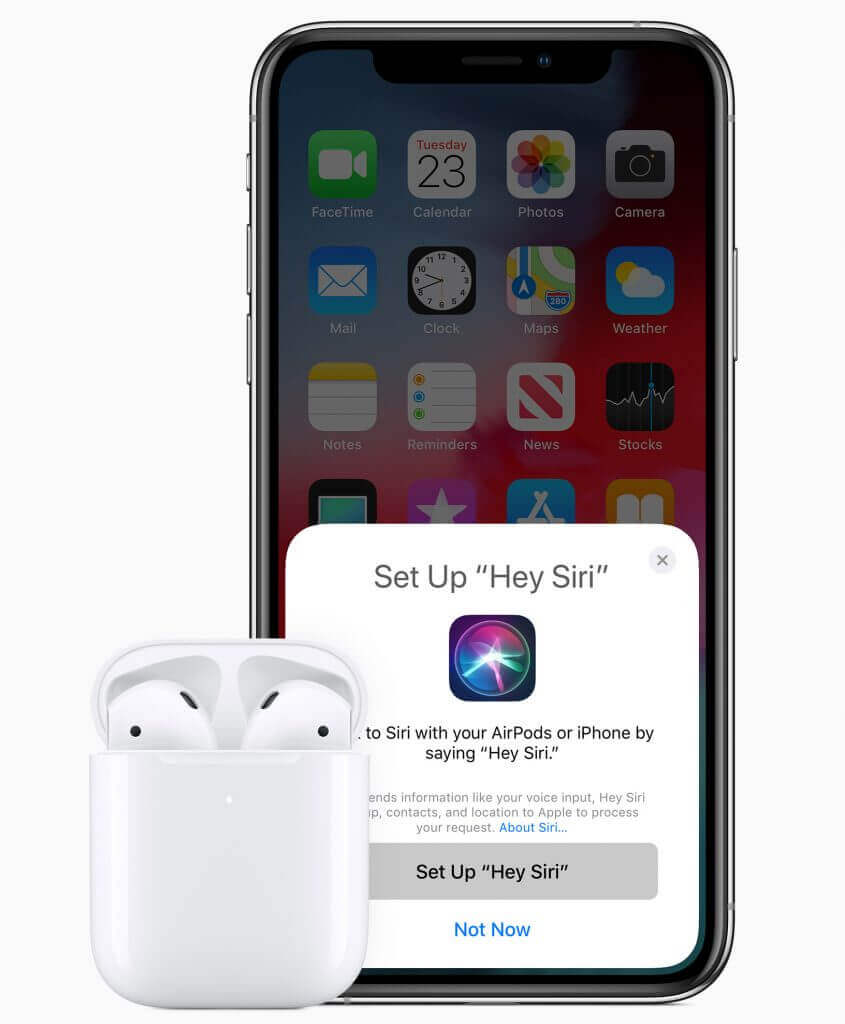
Apple has now unveiled the second-generation AirPods, the first hardware update since their initial release in December 2016. A new Apple-designed H1 chip designed for headphones provides faster connections, more talk time (up to 3 hours), and the convenience invoking Siri with “Hey Siri.” (With the first-generation AirPods, you can configure a double-tap to bring up Siri—when the AirPods are active, look in Settings > Bluetooth > AirPods.)

The new AirPods still cost $159 with a standard Lightning-based charging case, but Apple has also introduced the Wireless Charging Case, which is bundled with the new AirPods for $199 or available separately for both the first- and second-generation AirPods for $79. The Wireless Charging Case works with any Qi-compatible charging mat. It features a tiny LED indicator light on the front of the case to show the case’s charge status, and if you buy from Apple online, you can now get 19 characters of personalized engraving on the front of the case.


Social Media: Apple just released the second-generation AirPods with faster connections, more talk time, “Hey Siri,” and an optional Wireless Charging Case. The AirPods were great before, and now they’re better than ever. Details at:

Considering a New iMac? Wait No Longer—Updates Are Here!

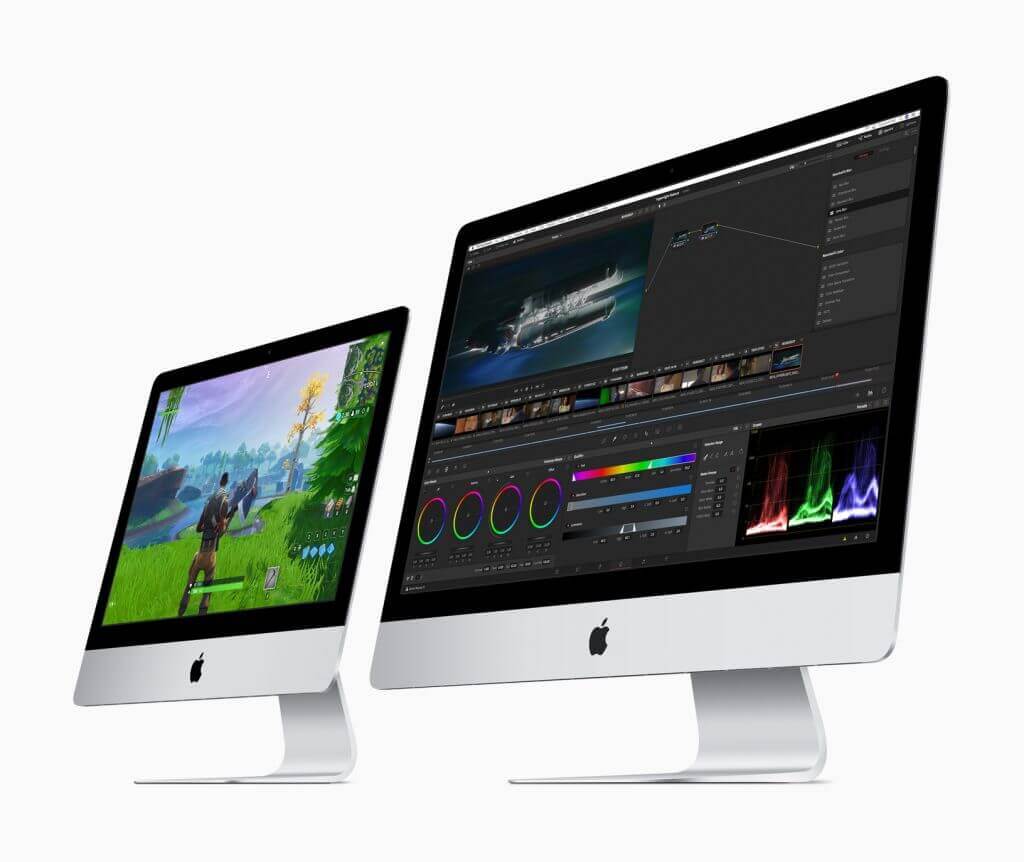
The iMac has long been the core of Apple’s desktop lineup, but it hasn’t received any updates since June 2017. Now, however, Apple has quietly updated the 21.5-inch iMac with Retina 4K display and the 27-inch iMac with 5K Retina display while keeping prices the same. The bargain-basement non-Retina 21.5-inch iMac remains for sale, but received no changes.

These updates are targeted at improving performance, so you won’t see any changes to the case, screen, or even networking capabilities. But if faster CPUs, GPUs, and memory are what you want, now’s a good time to buy.

The new 21.5-inch iMac boasts speedier 8th-generation Intel quad-core processors and an optional 6-core processor at the top of the line that deliver up to 60% faster performance than previous models. For even greater speed boosts—Apple claims up to 2.4 times faster performance—look to the 27-inch iMac, which now offers 9th-generation 6-core Intel Core i5 processors running at 3.0, 3.1, or 3.7 GHz. If that’s not enough, you can choose an 8-core 3.6 GHz Intel Core i9 processor for the best performance short of an iMac Pro.

Modern computers rely heavily on graphics processors for both silky smooth screen drawing and computationally intensive tasks. By default, both new iMac models have updated versions the previous Radeon Pro graphics chips, but anyone who needs more power can instead choose a blazingly fast Radeon Pro Vega. For the 21.5-inch model, Apple says the Radeon Pro Vega is up to 80% faster; for the 27-inch iMac, it’s up to 50% faster.

Note that both iMacs now use 2666 MHz RAM instead of the previous 2400 MHz RAM. It probably won’t make much of a performance difference, but it’s worth keeping the speed in mind if you’re buying RAM separately from the iMac.

For those ordering an iMac from the online Apple store, if the options you want are in the top-level configuration, start there rather than in the next configuration down. It’s possible to configure two Macs to have the same options for the same price but get a better Radeon Pro graphics processor if you start from the top-level configuration.

For storage, we generally recommend SSDs over Fusion Drives—add external storage if you need more space. Whatever you do, don’t buy an iMac with an internal hard drive because it will destroy the performance.

For those looking for the ultimate power in an iMac Pro, Apple also quietly added options for 256 GB of RAM (for a whopping $5200) and a Radeon Pro Vega 64X GPU ($700) while simultaneously dropping the prices on some other RAM and storage options.


Social Media: After a nearly two-year gap, Apple has updated the 21.5-inch and 27-inch iMacs with faster processors, more capable graphics chips, and faster memory—all for the same prices as before. Read more at:

Apple Updates iPad Lineup with new iPad mini and iPad Air

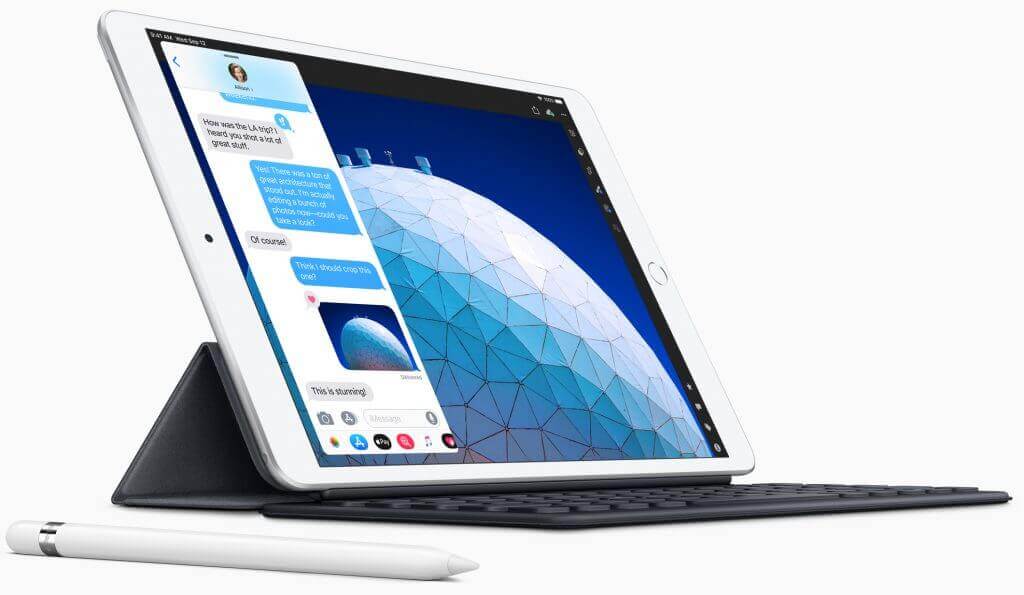
iPad mini lovers, rejoice! If you’ve been holding onto an aging iPad mini because of its small size, you’ll be happy to learn that Apple has at long last released a new 7.9-inch iPad mini with modern-day technologies. Joining it in the lineup is a new 10.5-inch iPad Air that turns out to be a retooled iPad Pro for a lot less money.

iPad mini Gains A12 Bionic Chip and Apple Pencil Support

It has been hard to recommend the iPad mini 4—last updated in September 2015—for several years now because its hardware was increasingly long in the tooth, and Apple hadn’t seemed enthused about updating it.

That has all changed with the fifth-generation iPad mini, which boasts the same speedy A12 Bionic chip that powers today’s iPhone XR, XS, and XS Max. It provides over three times the performance as the iPad mini 4’s A8 chip and graphics that are nine times faster. The other huge change is that the iPad mini now lets you use the $99 Apple Pencil for drawing, taking notes, and more. Note that the iPad mini supports only with the first-generation Apple Pencil, not the second-generation model that’s specific to last year’s iPad Pro models.

Other welcome, but less notable, changes include a screen that is 25% brighter, displays more colors, and supports Apple’s True Tone technology for matching the color temperature of the screen to the light in your surroundings. The Wi-Fi + Cellular model of the iPad mini also now supports faster gigabit-class LTE connections and the improved Bluetooth 5.0.

The basic specs of the rear-facing camera on the new iPad mini haven’t changed—it’s still an 8-megapixel camera—but it likely takes better photos and videos thanks to the A12 Bionic chip’s computational photography capabilities. Plus, the front-facing FaceTime HD camera can now capture 1080p video at 30 frames per second for better FaceTime calls.

You can order the iPad mini now in silver, space gray, and gold. For 64 GB of storage, a Wi-Fi–only model costs $399, whereas a 256 GB model is $549. Adding cellular connectivity bumps the prices to $529 and $679.

iPad Air Lowers the 10.5-inch iPad Pro Price with a Less-Capable Camera

Despite its name, the new 10.5-inch iPad Air has far more in common with the now-discontinued 10.5-inch iPad Pro from 2017 than it does with the 9.7-inch iPad Air 2 from 2014.

Apple has clearly taken the iPad Pro and modernized it with the current A12 Bionic chip, gigabit-class LTE, eSIM, and Bluetooth 5.0. But to cut $150 from the iPad Pro’s $649 starting price, Apple replaced the iPad Pro’s rear-facing camera with a less-capable model and traded the quad speaker system for stereo speakers. That’s not to say that the iPad Air’s rear-facing camera is a problem—it’s the same 8-megapixel camera as in the iPad mini—it’s just not at the level of the 12-megapixel camera that was in the 10.5-inch iPad Pro.

Like the old iPad Pro, the iPad Air supports the first-generation Apple Pencil and the original $159 Smart Keyboard (again, not the Smart Keyboard Folio for the 2018 iPad Pro models).

As with the iPad mini, Apple offers only two tiers of storage, 64 GB for $499 and 256 GB for $649, and the cellular option increases the pricing to $629 and $779. The color choices are again silver, space gray, and gold.

Other iPads

Apple’s slate of iPads makes a lot of sense now, with this new fifth-generation iPad mini and third-generation iPad Air joining the sixth-generation iPad and the 11-inch iPad Pro and third-generation 12.9-inch iPad Pro.

If you want small, get an iPad mini. If you want cheap, buy the iPad. If you’re looking for a bigger screen or Apple keyboard (the Smart Keyboard is excellent), go for the iPad Air. And if you have the budget, the 11-inch and 12.9-inch iPad Pro models are fabulous. Apple has a helpful online comparison tool, or feel free to ask us what we’d recommend for you.


Social Media: After more than three years, Apple has updated the beloved iPad mini with modern-day specs and Apple Pencil support, and the company also released an iPad Air that’s essentially a retooled iPad Pro. Learn more at:

Did You Know Families Can Share Mac and iOS Apps Purchased from the App Store?

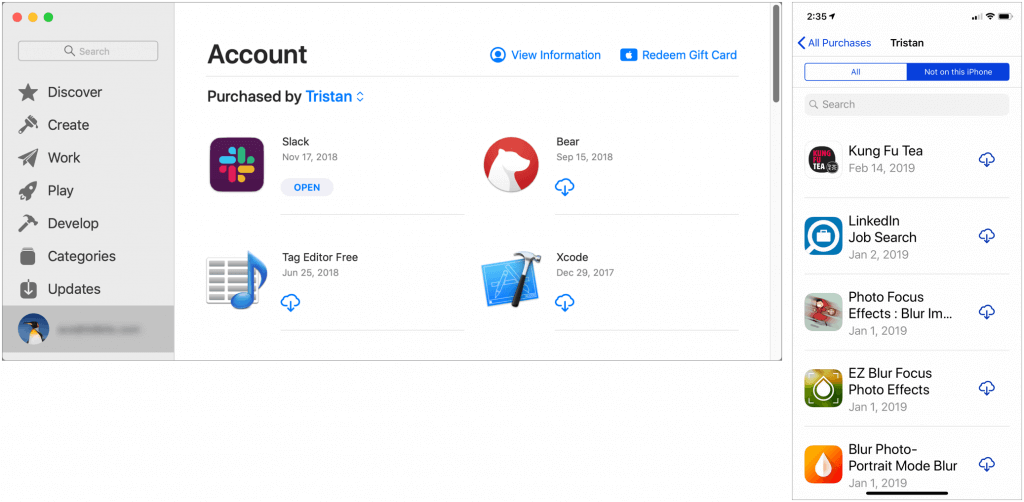
Have you ever looked over your spouse’s shoulder and thought, “Hey, that’s a cool app.”? If you set up Family Sharing (in System Preferences > iCloud on the Mac, and in Settings > Your Name in iOS), you can download almost any app that someone else in your family has purchased on either the Mac App Store or the iOS App Store. How you find these shared apps depends on the platform. On a Mac running macOS 10.14 Mojave, open the App Store app, click your email address at the bottom of the sidebar, and then click the name next to “Purchased by” to see another family member’s purchases. In iOS 12’s App Store app, tap your icon at the upper right, tap Purchased, and then tap a family member to see their purchases (note that you can select Not on this iPhone/iPad to narrow the choices). Click or tap the cloud icon to download a purchased app.

Choose between Archiving and Deleting Messages in iOS Mail

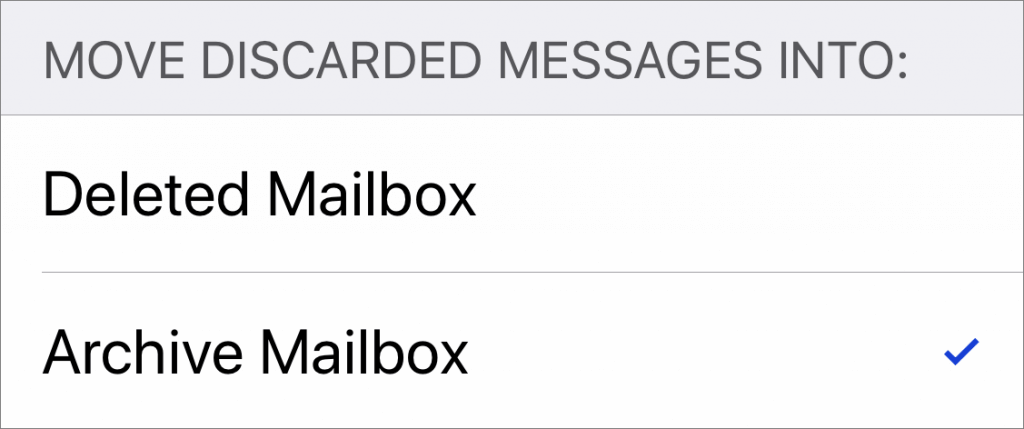
When you’re viewing a message in Mail on an iPhone or iPad, you get five buttons: Flag, Move, Archive or Delete, Reply/Forward/Print, and New Message. But what determines whether that third button is Archive or Delete? iOS hides that option in Settings > Passwords & Accounts > YourEmailAccount—the details then vary by account type before you see the Move Discarded Messages Into options.

  • iCloud as your primary address: Mail (under Advanced) > Advanced
  • iCloud as a secondary address: Account > Mail > Advanced
  • Gmail or other email provider: Account > Advanced

But what if you want to archive a message when you have Deleted Mailbox selected, or vice versa? Simply tap and hold on the Archive or Delete icon, and a popover appears, giving you both choices.

Here’s How to Capture a Full-Screen Screenshot of a Web Page

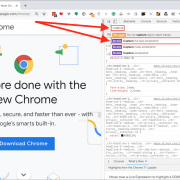
You know that Command-Shift-3 takes a screenshot of the entire screen and Command-Shift-4 lets you pick a window, menu, or arbitrary selection for your screenshot. And Mojave introduced Command-Shift-5 to give you an interface to screenshots and screen recordings. But how would you capture a screenshot of a long Web page that requires scrolling? Rather than stitching multiple screenshots together, try this trick in the Google Chrome Web browser. Control-click anywhere on a page you want to capture and choose Inspect. Press Command-Shift-P to open Chrome’s Developer Tools command menu. Type “capture” and then click “Capture full size screenshot” to download a screenshot of the page as a PNG file. (When you’re done, close the Developer Tools by clicking the X in the upper-right corner.)

Apple Music Can Be Your Personal DJ

If you’re an Apple Music subscriber, you probably know that it can play music that’s related to a particular artist or track—just tell Siri, “Play a radio station based on the Beatles” to get a bunch of songs from the likes of the Rolling Stones, Simon & Garfunkel, and Elton John. That radio station will show up in the Radio screen in the iOS Music app and in iTunes on the Mac. But you may not have realized that Apple Music can create a special radio station just for you, based on tracks you’ve played before, added to your library, or “loved.” To create it, just tell Siri, “Play my radio station.” Once made, it shows up with all the other radio stations, with your name underneath—it may not appear immediately. This can be a great way to get a selection of songs you’re almost certain to like, and the more you use Apple Music, the more it should adjust to your listening habits.


Ever Wanted to Get a Custom Email Address? Here’s How (and Why)

Some facts about ourselves are difficult or impossible to change, but your email address doesn’t have to be one of them. Switching to a custom email address might seem overwhelming, and it will take some time, but it’s not that hard or expensive (and we’re always happy to help if you get stuck).

Why Consider Switching to a Custom Address?

Why would you want to take on such a task? Independence. If you’re using the email address that came from your Internet service provider, you could end up in an awkward situation if you have to move and switch ISPs. Any address that ends in @comcast.net, @anything.rr.com, @verizon.net, @earthlink.net, or the like could be problematic. You also don’t want to rely entirely on a work email address—there’s no guarantee that your employer will forward email for you indefinitely if you take a different job.

Also, an email address says something about you, much as a postal address does—there’s a difference between an address on Central Park versus one in the Bronx. If you’re not happy with what your email address implies, you might want to switch.

What can an email address reveal? Those with a free Juno, Hotmail, or Yahoo account likely signed up years ago and don’t take email very seriously. People who use an @icloud.com, @me.com, or @mac.com address are clearly Apple users, and those with an address ending in @live.com, @msn.com, or @outlook.com are probably Windows users. .edu addresses identify students, teachers, and school employees—but if you’re not one anymore, your email looks like you’re wearing a varsity jacket in your 40s. The big kahuna of email is Gmail, which boasts about 1.5 billion users worldwide now—as a result, using a Gmail address is fairly generic.

The ultimate in independence comes when you register your own domain name, which usually costs less than $20 per year at sites like 1&1 Ionos, Domain.com, easyDNS, Directnic, and Register.com. Then your address can be anything you want at your new custom domain, and you never again have to worry about being tied to your ISP or associated with a free email host.

How to Change to a Custom Address

Step 1: Register a new domain name. The hard part here is thinking of a name that hasn’t already been taken. It’s best to stick with the traditional top-level domains like .com, .net, and .org—if you get into the new ones like .beer (yes, that’s available), your email is a bit more likely to be marked as spam. Most domain registrars will also host your email for you, and if you go this route, you can skip Step 2.

Step 2: If you’re already using Gmail or another independent email provider that isn’t tied to your ISP, log in to your account at your domain registrar and configure it to forward all email to your existing email address. In this case, you can skip Steps 3 and 4.

However, if you aren’t happy with your current email provider, you’ll need to set up an account with a new one. There are lots, but many people use a paid email provider like FastMail or easyMail that usually charges less than $50 per year and supports multiple mailboxes. When you set up the account, you’ll need to create one or more new email addresses at the provider and configure MX (mail exchange) records with your domain registrar—the service will provide instructions for this.

Step 3: If you’re changing email providers as part of this process, you’ll need to configure Mail—or whatever email client you’re using—to connect to your new email account with the login credentials you set up. That’s not hard, but being able to send email that comes from your custom address can require some effort with the free email providers. Gmail provides instructions, and others that support this feature will as well. Unfortunately, iCloud won’t let you send email using a custom address.

Step 4: If you’re moving to a new email provider, you’ll need to forward your mail from your old provider to your new custom address. Most email providers and ISPs have a screen somewhere in the account settings of their Web sites that lets you enter a forwarding address.

Step 5: Tell your family, friends, and colleagues about your new email address, and update mailing lists and accounts at sites like Amazon that send you email. The forwarding you set up in the previous step will ensure you don’t miss anything during the transition, but remember that if you cancel your old ISP account, that forwarding may end immediately, so it’s important to start the process well in advance.

The details will vary depending on your choice of domain registrar and email provider, so again, if you would like additional recommendations or assistance in setting all this up, just let us know.


Social Media: Setting up a custom email address with your own domain isn’t that hard or expensive, and it gives you independence from your ISP, employer, or the sketchy email provider you signed up with after college. Here’s how you can switch.