Pay Attention to the iPhone’s Emergency SOS Auto Call Feature
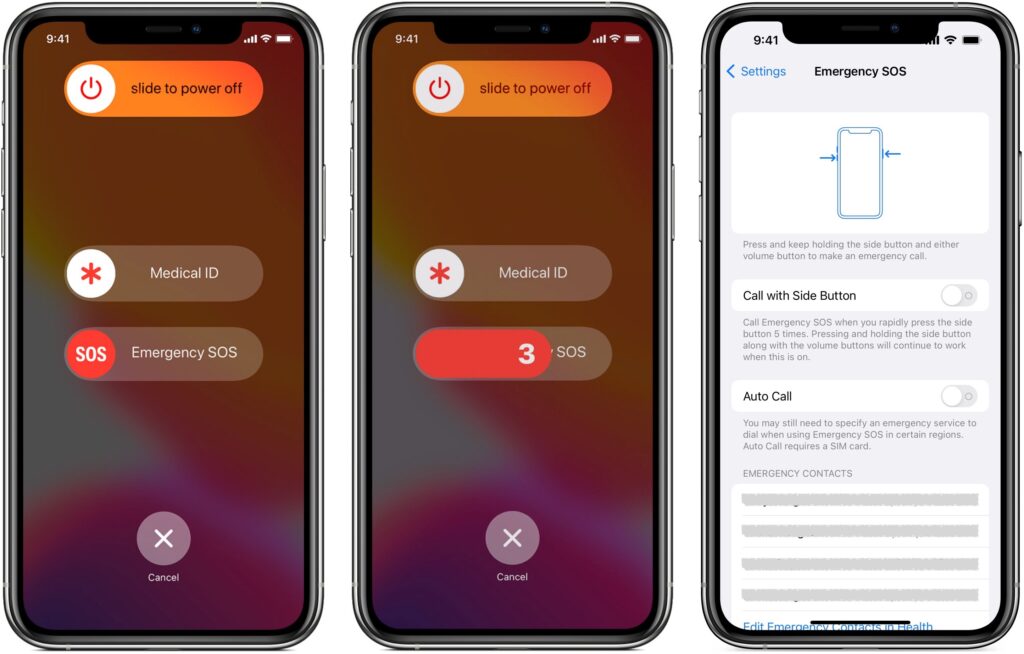
Did you know that pressing and holding the side button and one of the volume buttons on an iPhone 8 or later brings up a screen that lets you power your iPhone off, show your medical ID, and invoke Emergency SOS? (On earlier iPhones, press the side or top button five times.) Slide Emergency SOS, and your iPhone will immediately call emergency services, which could be lifesaving in a real emergency. Even without touching that slider, if you continue to hold the side button and volume button, after a 5-second countdown, the iPhone automatically calls emergency services, which may not be what you want. At least in the US, even if you hang up, that will likely cause the 911 dispatcher to send police to your location. To ensure that you can’t accidentally trigger Emergency SOS to call automatically, go to Settings > Emergency SOS and turn off Auto Call. We won’t say how we know this can happen.
(Featured image by iStock.com/LightFieldStudios)