At Apple’s Worldwide Developer Conference on June 3rd, the company unveiled the next versions of all its operating systems—macOS 10.15 Catalina, iOS 13 (and a new iPadOS), watchOS 6, and tvOS 13–along with the much-anticipated new Mac Pro and Pro Display XDR.
Nothing that was announced will ship until later this year—probably September—but we wanted to give you a quick overview of what’s coming down the pike.
macOS 10.15 Catalina
With macOS 10.15, which Apple is calling “Catalina,” the company is working to bring macOS and iOS ever closer while preserving what makes the Mac special.
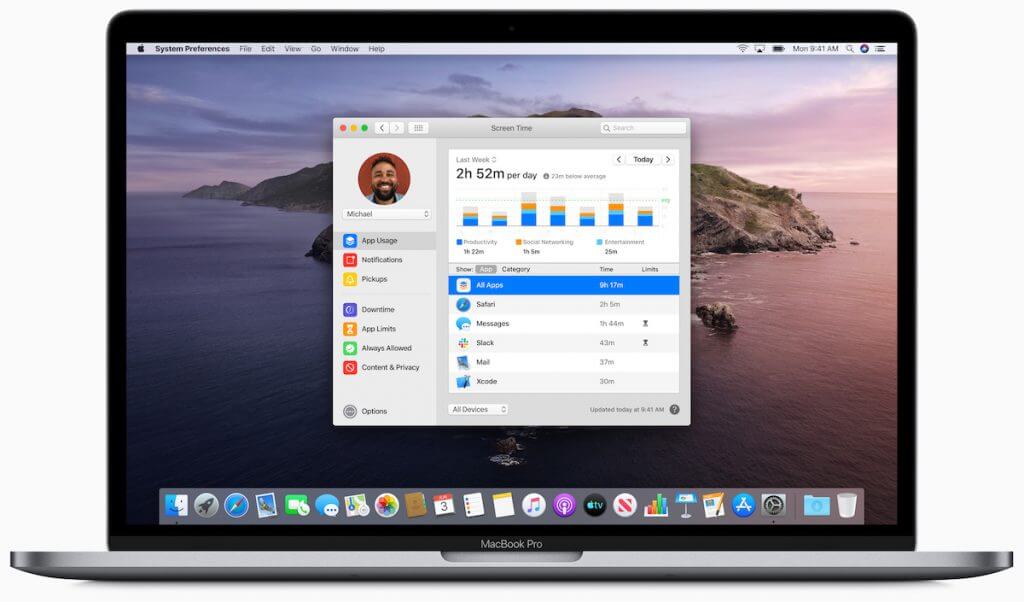
For instance, Catalina replaces the increasingly overloaded iTunes with three new apps that mimic those in iOS: Music, Apple Podcasts, and Apple TV. Reminders, Notes, and Photos also see significant enhancements that are mirrored on the iOS side, and a new Find My app on both platforms combines the capabilities of Find My iPhone and Find My Friends. Apple is even bringing Screen Time from iOS to the Mac to help you track and control your usage—and that of your kids—across all your Apple devices.

Some of these apps exist on the Mac thanks to Project Catalyst, an Apple technology that makes it easy for developers to convert iOS apps to the Mac. Apple used Catalyst internally last year to bring Home, News, Stocks, and Voice Memos to macOS 10.14 Mojave. This year, Apple is letting third-party developers use Catalyst, so once Catalina ships, we’ll see a flowering of new Mac apps coming over from iOS.
Another new technology, Sidecar, lets you use an iPad as a second screen for a Mac, either wired or wirelessly. Sidecar even enables you to use the iPad and Apple Pencil as a graphics tablet with apps that support such an input method. Two other new features will let you use a Sidecar-connected iPad to mark up any PDF or insert a sketch into a Mac document.

Catalina promises many more features, including some that will increase macOS security and others that will make the Mac much easier to use for people with disabilities. For instance, the new Voice Control capability lets you run a Mac (or an iOS device) entirely with your voice—it’s amazing.
If you’re running Mojave now, you’ll be able to run Catalina too since the system requirements remain the same.
iOS 13
With iOS 13, Apple appears to be focusing once again on performance and refinements. The company claimed we’ll see faster Face ID recognition, smaller app downloads and updates, and quicker app launches.
The most apparent new feature will be Dark Mode, which Apple is bringing over from Mojave. It displays light text on a dark background, which can be welcome when using an iOS device in a dark room without bothering others. It also may increase battery life on OLED-based iPhones like the iPhone X, XS, and XS Max. But keep in mind that research shows the human eye and brain prefer dark text on light backgrounds, so you may read more slowly and with less recall in Dark Mode.
Along with the apps mentioned previously that also improve in iOS, Apple said it has rebuilt Maps and its underlying database from the ground up, so you’ll see far more detailed maps, and you can zoom in for a street-level photographic view called Look Around.

Camera and Photos received attention as well, giving you faster access to effects and letting you apply effects to videos as well. You can even crop and rotate videos taken in the wrong orientation—finally!
Other improvements include a new Sign In with Apple option for signing in to apps using your Apple ID, full text formatting in Mail, shared folders in Notes, SMB sharing in Files, iCloud Drive folder sharing, and support for USB thumb drives.
In terms of system requirements, iOS 13 drops support for some older devices, leaving the iPhone 6s, 6s Plus, and SE as the oldest iPhones supported, along with just the newest iPod touch.
iPadOS
Joining Apple’s other operating systems this year is iPadOS, a superset of iOS 13 that provides additional iPad-only features. In some ways, it’s nothing new, since the iPad has always had unique features, but it shows how Apple wants to differentiate the iPad from the iPhone.
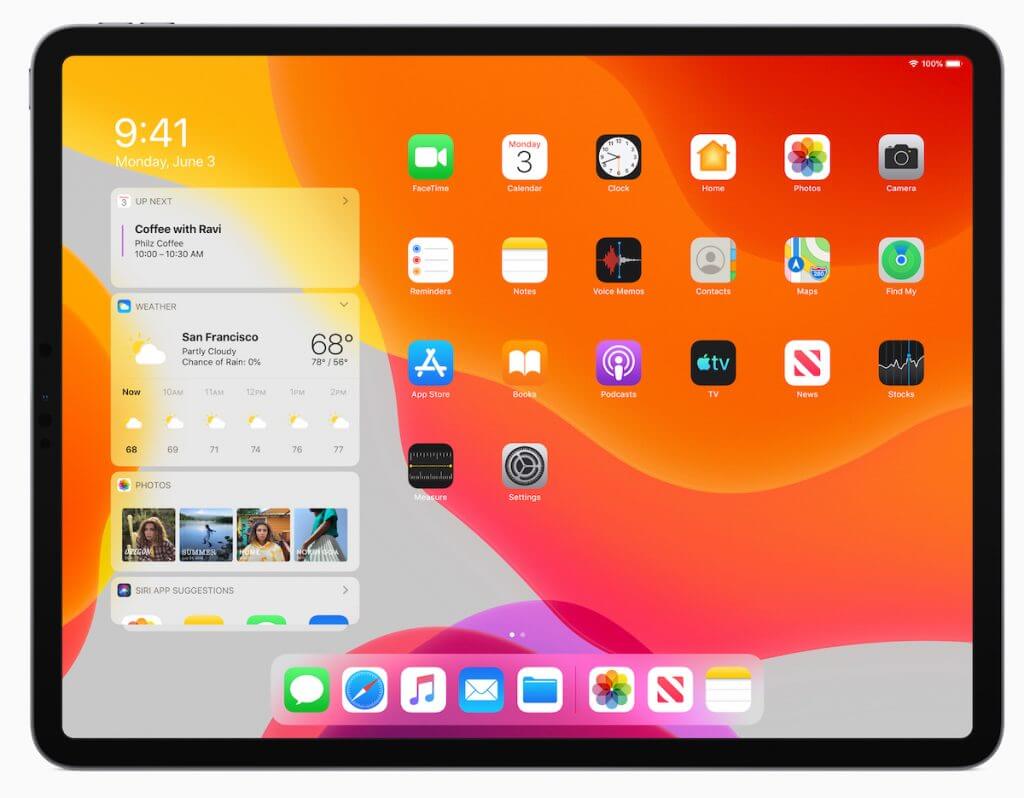
In iPadOS, the Home screen holds more icons in a tighter grid, and you can pin the Today View widgets on the side of the screen. Safari will be able to support complex Web apps like Google Docs, Squarespace, and WordPress, and it gains a download manager that lets you download files into the Files app.

Apple enhanced iPad multitasking so you can switch between apps in a Slide Over view, open multiple windows from the same app in Split View, and use App Exposé to navigate among your app combinations. Plus, text editing improves significantly, with direct access to the cursor and easier text selection, as well as new three-finger gestures for cut, copy, paste, and undo. The iPad even gets full-featured font management, and you’ll be able to buy fonts from the App Store.
iPadOS won’t work on many older iPad models, though it is compatible with all iPad Pro models, the fifth- and sixth-generation iPad, the iPad mini 4 and fifth-generation iPad mini, and the iPad Air 2 and third-generation iPad Air.
watchOS 6
With watchOS 6, Apple is working hard on health and fitness capabilities for the Apple Watch. The company has added a Noise app that can warn you when sounds approach dangerous levels and a Cycle Tracking app that helps women monitor their periods and predict windows of optimal fertility. And, the Activity app has picked up trending features so you can see how you’re doing across time in a number of health metrics.

Apple has also untethered the Apple Watch from the iPhone to an extent, allowing developers to create standalone watch apps that don’t require a companion iPhone app and opening an App Store for such apps that you can browse and search from your wrist.
Other new watchOS 6 apps include Audiobooks, Calculator, and Voice Memos. Plus, once you upgrade to watchOS 6, you’ll be able to choose from more faces and additional complications.
As with watchOS 5, watchOS 6 will work on all Apple Watch models other than the original unit, but not all features are available on all models.
tvOS 13
The big news for tvOS 13 is that it finally gets multi-user support, so everyone in a household will be able to have their own personalized experience. (Speaking of which, the HomePod will also support multiple users with iOS 13.)
Apple has redesigned the tvOS Home screen to show previews, added a slide-in Control Center like in iOS and watchOS, and updated the Music app to show lyrics in sync with the currently playing song. The screensaver also goes under the ocean so your cat can be entertained by all the fish.

Finally, in a move that will significantly enhance the forthcoming Apple Arcade game subscription service, both tvOS and iOS will support the Xbox One S and PlayStation DualShock 4 game controllers.
Mac Pro and Pro Display XDR
Although the Worldwide Developer Conference is mostly about Apple’s operating systems, the company took advantage of the keynote to show off the completely redesigned Mac Pro and its companion screen, the Pro Display XDR. The technical specs of both are astonishing—Apple has done what looks like a fabulous job of designing the most modular, flexible, and powerful Mac ever, combined with a display that competes against reference monitors costing tens of thousands of dollars.

The Mac Pro will rely on Intel Xeon W processors with 8 to 28 cores, and you’ll be able to configure it with up to 1.5 TB (that’s terabytes!) of RAM. It has eight PCI Express expansion slots, into which you can install MPX modules that contain up to four AMD Radeon Pro graphics cards for massive number crunching performance. Another slot can hold Apple’s new Afterburner accelerator card for ProRes and ProRes RAW video acceleration, and a half-length slot contains Apple’s I/O card with two USB-3 ports, two Thunderbolt 3 ports, and to 10 Gb Ethernet ports; there are two more Thunderbolt 3 ports on the top of the case. Storage starts at 256 GB of SSD and goes up to 4 TB.
All this fits into a stainless steel frame with an aluminum case that lifts off to provide access to all sides of the Mac Pro. It has a massive 1.4-kilowatt power supply and relies on three fans and a blower to keep the unit cool. It even has handles on the top and optional wheels in case you need to move it around regularly.

Accompanying the Mac Pro will be Apple’s first monitor in years, the Pro Display XDR. It’s a 32-inch 6K screen that supports P3 wide and 10-bit color that can display more than 1 billion colors accurately. It’s also incredibly bright and can sustain 1000 nits of full-screen brightness or peak at up to 1600 nits.

If your eyes glazed over reading those specs, this new hardware isn’t for you. Apple is aiming it at high-end professionals, the sort of people who happily spend many thousands of dollars on new hardware to enable faster video editing, data processing, or other performance-intensive tasks. The base-level Mac Pro will start at $6000, and the Pro Display adds another $5000. Even the Pro Stand (which provides tilt and height adjustment, plus rotates to portrait orientation) for the Pro Display costs $1000, so a tricked-out Mac Pro setup could easily exceed $20,000. So no, this is not a Mac for “the rest of us,” but it’s great to see Apple ensuring that the most demanding Mac users can stay on the platform.
(All images courtesy of Apple)
Social Media: Apple has previewed what’s coming with macOS 10.15 Catalina, iOS 13, watchOS 6, and tvOS 13 at its Worldwide Developer Conference, along with unveiling a new Mac Pro and the Pro Display XDR. Read on for what to expect in September!


