Posts

The Ten Upcoming Mac/iPhone/iPad Features We Think You’ll Most Like

At its Worldwide Developer Conference keynote on June 7th, Apple shared details about what we can expect to see later this year in macOS 12 Monterey, iOS 15, iPadOS 15, watchOS 8, tvOS 15, and HomePod Software 15. It was a firehose of announcements, but one thing became clear: Apple wants to spread its technologies across its entire ecosystem of devices. Although each platform—Mac, iPhone, iPad, Apple Watch, Apple TV, and HomePod—retains its unique qualities, nearly every feature that the company announced works across as many platforms as make sense.

Before we get into the ten features that we think you’ll most like when everything ships in September or October, we should note that Apple was surprisingly silent on one topic: future Apple silicon chips. Many observers had expected Apple to announce an M1X or M2 chip that would power professional laptop and desktop Macs. We’ll have to satisfy ourselves with the impressive performance of the M1-based Macs we have now and wait a little longer for whatever comes next.

On to the hot new features!

Account Recovery and Legacy Contacts Simplify Recovering Account Data

It’s all too common that people forget their Apple ID passwords and can’t access their accounts. Apple hopes to make that a little less stressful with Account Recovery Contacts. Specify someone as your Account Recovery Contact, and they’ll be able to help you reset your password and regain access to your account, with no need to call us or Apple for assistance.

Also welcome will be the addition of Legacy Contacts. Once this feature is available, everyone should make sure they have appropriate family members or friends set as Legacy Contacts. Then, in the event of your untimely death, your Legacy Contacts can access your account and personal information. Using Legacy Contacts will be far easier than having to provide the legal paperwork to Apple to request access to a deceased family member’s accounts.

FaceTime Gains Features That Make It Competitive with Zoom

During the last year, we’ve all spent vastly more time in videoconferencing apps for work, school, and socializing. Alas, Apple’s FaceTime has been a weak entry in that market. With the features Apple is now promising, however, it should compete well with the likes of Zoom, Skype, and Google Meet. FaceTime will finally get a standard grid view, blur your backgrounds with Portrait mode, and offer two microphone modes: Voice Isolation to cut down on background noise (for standard meetings) and Wide Spectrum to leave ambient sound unfiltered (for performances, say). FaceTime will even be able to alert you when you’re talking but muted.

More important yet is the fact that you’ll finally be able to invite Windows and Android users to FaceTime calls using standard Web links. Non-Apple users will have to use a Chrome-based browser like Google Chrome, Microsoft Edge, or Brave. Plus, when you create an event in Calendar, you’ll be able to make a Web link for the call that you can share. And when it’s time for the call, a Join button makes it easy to get in.

Universal Control Lets Macs and iPads Share a Keyboard and Pointing Device

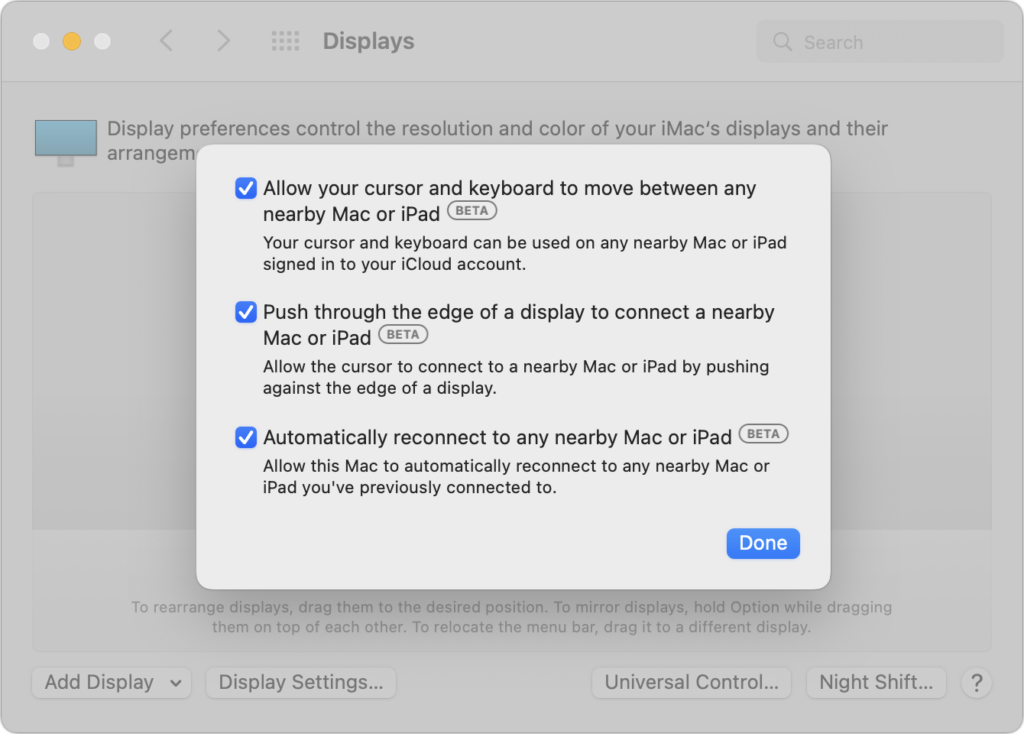
With Sidecar in macOS 10.15 Catalina and iOS 13, Apple made it so you could use an iPad as a secondary screen for a Mac. In macOS 12 Monterey and iPadOS 15, Apple is taking that concept further. With Universal Control, if you merely set a Mac and an iPad next to each other, you’ll be able to use the Mac’s keyboard and mouse or trackpad to work between the two devices (in fact, Universal Control supports up to three). No setup is required—just move your pointer to the edge of the Mac screen and push it “through” the edge to move it to the iPad screen. You can even drag and drop content between devices.

Live Text Lets You Work with Text in Images

Have you ever taken a photo of something just to capture a phone number or address? We have, for sure. Apple’s new Live Text feature treats text in images just like text you type, so you can use functions like copy and paste, lookup, and translate. Live Text will work in Photos, of course, but also in Quick Look, Safari, and Screenshot, and in live Camera previews on the iPhone. It’s an impressive use of image recognition technologies.

Along the same lines, in Photos, you’ll also be able to use the information button on any photo to highlight recognized objects and scenes and get additional information about them. Apple says you’ll be able to learn more about popular art and landmarks, plants and flowers, books, and pet breeds.

Siri Gets Faster, More Reliable, More Private, and More Useful

Thanks to the ever-increasing power of the Neural Engine in Apple devices, Apple says it will bring all processing of Siri requests onto your device. That may not sound like a big deal, but it means that Siri should work faster, more reliably, and more privately. It will be faster because there’s no need to send speech to and from Apple’s servers for processing. It will make Siri work more reliably when your iPhone doesn’t have strong cell service and enable offline support for many types of requests. And Apple won’t know what you’re saying at all.

Other Siri improvements will include the capability to announce reminders when you’re wearing AirPods, improved conversation context so you can refer to what you just asked, and support for controlling HomeKit devices at specific times. HomeKit developers will even be able to add Siri support to their products through a HomePod.

Improved Multitasking Controls Come to the iPad

The big problem with Apple’s multitasking options on the iPad has been remembering how to use them. With iPadOS 15, Apple hopes to solve that with a new menu that will appear at the top of apps, with buttons for entering full screen, Split View, or Slide Over.

Apple also added a new multiwindow shelf that appears at the bottom of the screen at launch and provides a Dock-like view of all the open windows in that app. If you ignore it, it fades away quickly, but it should help you remember which windows you have open and access them quickly.

The iPad Finally Gets the App Library and Home Screen Widgets

Last year, in iOS 14, Apple introduced the App Library and Home Screen widgets. The App Library holds all your apps so you can declutter your life by removing them from the Home Screen. And Home Screen widgets let you add app-specific widgets that provide at-a-glance information. Sadly, iPadOS 14 didn’t include those features.

iPadOS 15 rectifies that oversight, adding both the App Library and Home Screen widgets, complete with some larger widget sizes for the larger iPad screen. They’ll work just like on the iPhone. It’s about time!

Locate Lost AirPods Pro and AirPods Max with Find My Network Support

As it stands now, you can theoretically find AirPods using the Find My app. However, it shows only the last position of the AirPods at a general level, and you have to get within range of them to play a sound. In the future, however, the AirPods Pro and AirPods Max will support the Find My network, so other people’s devices can report their location generally, and once you get within Bluetooth range, you can play a sound to locate them.

Hopefully, that will happen less often thanks to new separation alerts that, when enabled, will alert you when you leave an Apple device, AirTag, or Find My-compatible item behind.

Private Relay Protects Safari Traffic for iCloud+ Subscribers

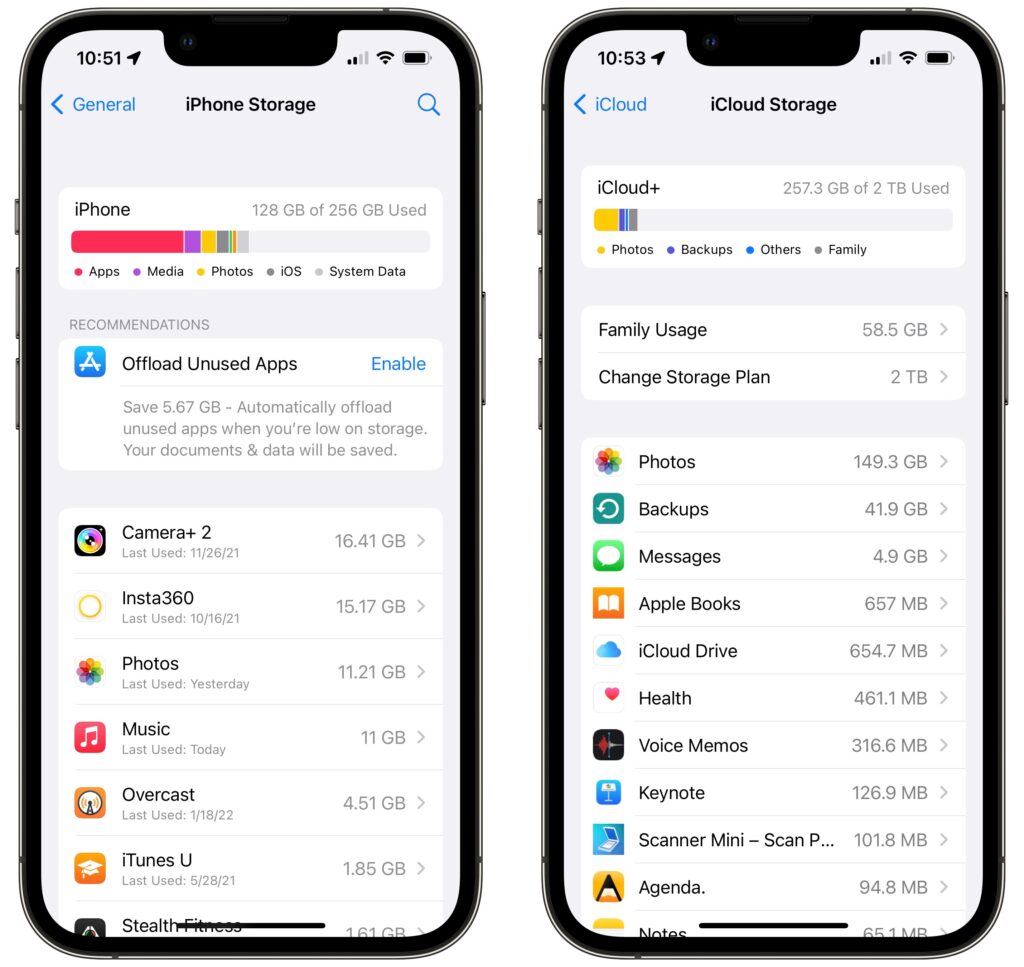
Apple has been adding lots of privacy-protecting features over the past few years, but Private Relay goes even further to ensure that even your ISP can’t track where you go on the Web and sell that data to advertisers. Private Relay encrypts your Safari traffic and passes it through two Internet relays. No one—not even Apple—can then use your IP address, location, and browsing activity to create a detailed profile of you. Everyone who pays for extra iCloud storage will transition to the new iCloud+ for the same cost and will get Private Relay for no additional fee.

While we’re talking about iCloud, Apple also says that you’ll be able to get custom domain names for iCloud Mail addresses and invite family members to use the same domain with their iCloud Mail accounts.

Use AirPlay to Send Audio or Video to Your Mac

Many people have discovered how neat it is to use AirPlay to display photos or videos from an iPhone or iPad on a TV attached to an Apple TV. Macs could also broadcast their displays to an Apple TV. But what you couldn’t do is use AirPlay to send audio or video from another Apple device to a Mac. With macOS 12 Monterey, that will become possible, enabling you to use a Mac’s large screen to play a video, share a Keynote presentation, and more.

Apple’s upcoming operating system releases boast many other new features, and we plan to explore more of them once everything ships in a few months. We’ll let you know when it’s time to update!

(Featured image by Apple)


Social Media: At its Worldwide Developer Conference keynote, Apple announced a boatload of new features that we’ll see in macOS 12 Monterey, iOS 15, iPadOS 15, and watchOS 8 later this year. Here are the ten features we think you’ll most like:

Four Ways to Reduce Zoom Fatigue

After a long day of video calls, you might feel like your brain has been wrung out like a wet washcloth—we certainly do. It’s exhausting to stare into a computer for hours every day while participating in meetings or classes. This condition is called Zoom fatigue, and it’s a recent affliction for most of us because the pandemic has dramatically increased the popularity of video calls. We don’t mean to beat on Zoom here—this condition plagues people who use Cisco WebEx, FaceTime, Google Hangouts, Google Meet, Microsoft Teams, Skype, and other videoconferencing software too.

But there are techniques you can employ to reduce Zoom fatigue. Researchers at Stanford University have identified four reasons why video calls are so tiring and offer suggestions on making them less so. They include:

  • Close-up eye contact is overwhelming. You usually sit about an arm’s length from your computer display, and if one person is on screen at a time, their head may be close to life-size. You’d never be that near someone’s face in real life unless they were a close family member, and even then, you wouldn’t hold that position for long. Shrink your window or switch to gallery view so you’re talking to postage stamps rather than feeling like someone is up in your face.
  • Looking at yourself is psychologically harmful. We all have mirrors, but can you imagine staring into one for hours every day? Only a pathological narcissist would do that. Worse, constantly seeing your own image can make you worry about your appearance and what others think of you. Once you’ve verified that you’re properly framed and don’t have salad in your teeth, hide your preview or switch to a view that doesn’t include you.
  • Sitting perfectly still is difficult. This is hardest on kids, but even adults have trouble staying sufficiently still to remain perfectly framed in a video window. When you’re on a standard phone call or in an in-person meeting, you might pace around the room or at least adjust your position in your chair. Try turning off your camera when possible—most calls work just as well without video—or position it so you can fidget or pace in person. Another solution is Apple’s Center Stage technology on the new M1-based iPad Pros, which automatically pans and zooms to keep you in the picture as you move around.
  • Video calls make you constantly think about call mechanics. There’s nothing natural about interacting with multiple people on a screen, so we’ve all come up with behaviors (some of which we just recommended!) to smooth over the cracks in the system. For instance, your brain has to expend extra effort to help you stay framed in the video window, worry about how you look, use exaggerated facial expressions so people know you’re paying attention, and use techniques like a thumbs-up to indicate approval without unmuting. The solution is to turn off your camera and hide the video window so your brain can take a break and focus on just the audio content of the call.

You’ll notice that most of the recommendations for reducing the mental strain of video calls come down to eliminating video. It shouldn’t be surprising because talking on the phone isn’t nearly as tiring, even when you’re on a conference call with a couple of people. There’s no question that video can help convey information that would be lost in a phone call, and it’s nice to see far-flung friends and family, but there’s no rule that video calls are the best form of communication for all situations.

We’ve started to put these recommendations into practice ourselves, and we encourage you to do so as well. And if you need support for why you’re turning off your camera or asking for audio-only calls, send people a link to this article.

(Featured image by Anna Shvets from Pexels)


Social Media: Why are video calls so exhausting when all you’re doing is sitting around and talking? Here’s the word from Stanford University researchers, along with advice on making those non-stop calls less tiring.

Don’t Store Confidential Files in Online File Sharing Services

Given their integration into the Mac’s Finder, it can be easy to forget that online file sharing services like Dropbox, Google Drive, iCloud Drive, and Microsoft OneDrive can be accessed using a Web browser by anyone with your username and password. Obviously, you should always have strong, unique passwords, but to be safe, it’s best not to use services designed for public file sharing to store unencrypted files containing sensitive information like credit card numbers, Social Security numbers, passport scans, privileged legal documents, financial data, and so on. Keep such data secure on your Mac—outside of any synced folders—where accessing it requires physical access to the machine.

(Featured image based on an original by Kenaz Nepomuceno from Pexels)

What Are Those Orange and Green Dots in Your iPhone’s Status Bar?

In iOS 14 and iPadOS 14, Apple added two new status indicators to the right side of the status bar at the top of the screen. They’re designed to give you feedback about what an app is doing. An orange dot indicates that an app is using the microphone, and a green dot means that an app is using the camera (and possibly the microphone as well). They’re subtle and shouldn’t be distracting, but if you ever notice them when you don’t think the camera or microphone should be in use, look for apps that might be using them in the background.

(Featured image by Bruno Massao from Pexels)

Try Using a Magic Trackpad 2 with Your iPad Running iPadOS 13.4

When Apple released iPadOS 13.4 recently, it came with an unexpected feature: trackpad and mouse support. Apple plans to release a Magic Keyboard for iPad Pro that has a built-in trackpad in May as well, but in the meantime, you can control an iPad entirely via a Magic Trackpad 2 (the wedge-like one that recharges via a Lightning port). Pair it in Settings > Bluetooth, and look for settings in Settings > General > Trackpad. Apple did an impressive job with integrating a cursor into the iPadOS experience: the small, circular cursor shifts colors subtly depending on the background, becomes a highlighted selection rectangle when over objects, expands icons on the Home screen, and morphs into a thin insertion point when in text. Plus, Apple built in oodles of two- and three-finger gestures to mimic what you can do directly on the iPad screen—see the full list at TidBITS.

(Featured image by Adam Engst)

MacBook Air Update Features Magic Keyboard, iPad Pro Gets a Trackpad

In a widely expected update, Apple has introduced a new MacBook Air that replaces the much-maligned butterfly keyboard with the new Magic Keyboard. The MacBook Air also gains faster processors, enhanced graphics, and more storage options, all for $200 less than before.

Apple also threw back the curtains on an updated iPad Pro that will be compatible with a new iPad Pro-specific Magic Keyboard that includes a trackpad. The iPad Pro is available now, but the Magic Keyboard won’t ship until May.

MacBook Air Gains Magic Keyboard, Faster Performance, and Other Enhancements

In an effort to eliminate the hated butterfly keyboard from the Mac line, Apple has released an updated MacBook Air that features the scissor-key Magic Keyboard introduced last year in the 16-inch MacBook Pro. That keyboard has received highly positive reviews, and we’re happy to see it appear in the MacBook Air. (Look for a new model to replace the current 13-inch MacBook Pro soon as well.) The Magic Keyboard includes 12 function keys as well as a Touch ID sensor, but no Touch Bar.

Apple significantly improved the MacBook Air’s performance by providing a choice of 10th-generation Intel Core processors, including the model’s first quad-core processor option. The base level 1.1 GHz dual-core Intel Core i3 is probably pretty slow, but upgrading to a 1.1 GHz quad-core i5 is only $100 and a 1.2 GHz quad-core i7 is just $250.

Graphics should be noticeably speedier as well, thanks to the switch to Intel Iris Plus Graphics. The MacBook Air can now drive a 6K display too, if you have a Pro Display XDR.

Apple also doubled the base level of storage to 256 GB, and you can increase that to 512 GB ($200), 1 TB ($400), or 2 TB ($800).

Minor enhancements include True Tone technology for more natural images on the 13-inch Retina display, “wide stereo sound” for the speakers, and support for Bluetooth 5.0.

As welcome as all these changes are, the best news is that Apple simultaneously dropped the MacBook Air’s price. The entry-level model now starts at $999, and it’s available to the education market for just $899.

iPad Pro

We were waiting for the Magic Keyboard to come to the MacBook Air, but we had no inkling that Apple was going to add a trackpad option to the iPad Pro. It will come in the form of the new Magic Keyboard, due in May, and will require iPadOS 13.4, slated for late March. Apple says it will be easy to use, with the pointer transforming to highlight user elements appropriately as the user moves their finger across the trackpad. What it won’t be is cheap, at $299 for the 11-inch model and $349 for the 12.9-inch model. (The second-generation Apple Pencil and an updated Smart Keyboard Folio remain available.)

The other unexpected change in the new iPad Pro is the addition of the new LiDAR Scanner. LiDAR (light detection and ranging) is a way of measuring distance with reflected laser light. It’s commonly used in self-driving cars, but Apple is instead using it to beef up the iPad Pro’s augmented reality (AR) capabilities. It offers existing ARKit apps instant AR placement, improved motion capture, and people occlusion. Apple also uses it to improve the Measure app. We can’t help but think Apple is testing the technology for future AR goggles.

Less surprising improvements include a new processor—Apple’s custom A12Z Bionic chip—and a dual-camera system that combines a 12-megapixel wide camera and a 10-megapixel ultra-wide camera that zooms out two times to capture a much wider field of view. The iPad Pro also now boasts five microphones for capturing audio and four speakers that automatically adjust to any orientation.

Pricing for the iPad Pro itself hasn’t changed. The 11-inch model starts at $799, with the 12.9-inch model at $999. Both come with 128 GB of flash storage, up from 64 GB in the previous models, and you can buy more storage: 256 GB (add $100), 512 GB ($300), or 1 TB ($500). Cellular connectivity costs an extra $150.

Mac mini

Last and indeed least, Apple announced that the standard configurations of the Mac mini now have twice as much storage as before. That means the $799 configuration comes with 256 GB and the $1099 configuration comes with 512 GB. 1 TB and 2TB configurations remain available, and there are no other changes.

(Featured image by Apple)


Social Media: Here’s some good news! Apple has introduced a new MacBook Air with a better keyboard and faster processor for $200 less. And there’s a new iPad Pro with trackpad support. Seriously! Check out the news at:


The Fastest Way to Change Wi-Fi Networks in iOS 13

Historically, picking a new Wi-Fi network has required you to open the Settings app and tap Wi-Fi, forcing you to unlock your iPhone or switch away from what you were doing. In iOS 13, however, Apple added a better way to connect to a new Wi-Fi network. Open Control Center (swipe down from the upper-right corner on an iPhone X or later or an iPad; or up from the bottom on an earlier iPhone), press and hold on the network settings card in the upper-left corner to expand it, and then press and hold on the Wi-Fi icon to reveal a list of Wi-Fi networks. Tap one to switch to it.

(Featured image by Paul Hanaoka on Unsplash)

Use Guided Access to Let Kids and Others Use Your iPhone Temporarily

Let’s get one thing straight. You know that you should never, ever share your iPhone or iPad passcode with anyone you don’t trust implicitly, like a spouse or adult child, right? That’s because, with your iOS passcode, someone could change your Apple ID password, and if you use iCloud for email, completely steal or otherwise abuse your online identity. (Scared? Good. If you’ve given anyone your passcode, go change it right now. We’ll wait.)

So if sharing your passcode is such a terrible idea, how do you let someone else use your iPhone or iPad temporarily? Perhaps you want to let your kid play a game in the car while you focus on tricky winter driving. Or maybe you time running races with an iPhone app and want someone to do the timing without giving them full access to your iPhone. Whatever the reason you want to give someone limited access to a single app in iOS 13, the solution is Guided Access.

Enabling and Configuring Guided Access

To turn Guided Access on, navigate to Settings > Accessibility > Guided Access (it’s near the bottom), and flick the switch. While you’re here, check out the remaining settings:

  • Passcode Settings: Create a passcode for getting out of Guided Access here (it can be different than your normal one), and choose whether you can use Touch ID or Face ID to exit as well.
  • Time Limits: You don’t set time limits here, but you can set audio and spoken warnings before the time runs out.
  • Accessibility Shortcut: Enable this if you also use triple-click for another Accessibility Shortcut like Magnifier.
  • Display Auto-Lock: Choose how long the device can be inactive before the screen turns off. If the Guided Access user wakes up the device, they’ll still be in Guided Access.

With those settings configured, switch to the desired app and triple-click the side or Home button, and if necessary, tap Guided Access in the Accessibility Shortcut list. You can do five things:

  • Set session-specific options: Tap Options in the lower-right corner to access various switches. If they’re disabled:
    • Side Button or Sleep/Wake Button: The user can’t put the device to sleep.
    • Volume Buttons: The user can’t change the volume.
    • Motion: The screen doesn’t change from the orientation (portrait or landscape) it was in when you started Guided Access.
    • Touch: The user can’t do anything with the screen at all—probably most appropriate for letting a young child watch a video.
    • Dictionary Lookup: Prevents word lookups in some apps.
  • Set time limits: At the bottom of the Options list, tap Time Limit and set an amount of time after which the device can’t be used until you enter the Guided Access passcode.
  • Disable specific areas on the screen: Draw circles around parts of the screen you want to make off-limits to the user. After making a circle, you can move it by dragging it, resize it by dragging any of its handles, or remove it by tapping its X button.
  • Start/Resume Guided Access: In the upper-right corner, tap Start. If you haven’t yet set a passcode, you’ll be prompted to do that.
  • Exit the setup screen: In the upper-left corner, tap End.

Using Guided Access

Once you tap Start, iOS tells you it’s entering Guided Access and lets you use the current app with the restrictions you’ve applied. If you decide that the restrictions aren’t right, triple-click the side or Home button to return to the setup screen. When you’re done, tap Resume in the upper-right corner.

To leave Guided Access, triple-click the side or Home button, enter the passcode, and in the setup screen, tap End in the upper-left corner.

That’s it! Once you understand the various limitations of Guided Access, you’ll be able to turn it on and off quickly whenever you need to let someone use your iPhone or iPad for a while.

(Featured image by mohamed Abdelgaffar from Pexels)


Social Media: Never, ever share your iPhone or iPad passcode with anyone who you don’t trust implicitly. Instead, you can give people limited access to a single app with Guided Access. Learn more here:

Need to Charge Your iPhone or iPad More Quickly? Get a Higher Wattage Power Adapter

By default, most iPhones and iPads ship with Apple’s tiny 5-watt power adapters. They work, but not quickly. However, the iPhone 8 and later, all models of the iPad Pro, and the most recent iPad Air and iPad mini models support fast charging when connected to higher wattage power adapters. You may have an older one of these around, or you can buy a new one. Apple has bundled with iOS devices or sold 10-watt, 12-watt ($19), and 18-watt ($29, USB-C) power adapters, and the company has also produced 29-watt, 30-watt ($49), 61-watt ($69), and 87-watt ($79) USB-C power adapters for Mac laptops. Plug your compatible iPhone or iPad into one of these chargers with an appropriate cable (for a USB-C charger, you’ll need a USB-C to Lightning Cable, $19), and it will charge significantly more quickly. Look for a wattage rating on the adapter itself, or multiply the output volts and amps together to get watts.

(Featured image by Matthew Henry on Unsplash)

iOS 13 Makes Editing Text Easier

Let’s be honest—text editing in iOS has never been anywhere near as good as it is on the Mac. We may be more accustomed to our mice and keyboards, but the Multi-Touch interface has always been clumsy when it comes to text. Apple keeps trying to improve iOS’s text editing features, and iOS 13 (and iPadOS 13) brings some welcome changes in how we go about positioning the text insertion point, selecting text, and performing the familiar options in the Mac’s Edit menu: Cut, Copy, Paste, and Undo/Redo. Has it caught up with the Mac yet? You’ll have to decide that for yourself, once you’ve learned the new techniques.

Note that these changes apply only to spots in iOS where you’re entering and editing text, not selecting and copying static, read-only text such as a Web page in Safari. And even when you are working on a Web page where you can enter and edit text, the site may override iOS’s text handling.

Insertion Point Positioning

Positioning the insertion point on the Mac is easy—you move the cursor to the right spot and click. In previous versions of iOS, you could tap to put the insertion point at the start or end of a word, or press and hold briefly to bring up a magnifying glass that let you put the insertion point anywhere, including within a word. It was slow and awkward, and made better mostly by trackpad mode, which you could invoke by long-pressing the Space bar.

iOS 13 improves positioning by letting you press and hold the insertion point to pick it up and then drag it to where you want it. This approach is much easier and more sensible than the previous method.

Selecting Text

On the Mac, you can select text with multiple clicks, by clicking and dragging, or by using the keyboard. In iOS, however, text selection has always been tough—you could double-tap to select a word, but anything else required subsequent moving of start and end markers. (On an iPad with a keyboard, you could hold Shift and use the arrow keys too.)

Happily, iOS 13 improves text selection. To start, you can still double-tap to select a word, but you can also triple-tap to select a sentence (shown below) and even tap four times in quick succession to select an entire paragraph. Unfortunately, these selection shortcuts may not work in all apps, but you can always fall back on the previous approach.

For selections of an arbitrary length, just press, pause ever so briefly to start selecting, and then drag to extend the selection. In other words, it’s as close to the Mac approach as is possible with the Multi-Touch interface. If the selection isn’t quite right, you can adjust the start and end markers.

Cut, Copy, Paste, and Undo Gestures

Everyone knows Command-X for Cut, Command-C for Copy, Command-V for Paste, and Command-Z for Undo on the Mac. In previous versions of iOS, those commands were available only from a popover that appeared when text was selected, or (for Paste) when you pressed and held in a text area. The only command with a gesture, so to speak, was Undo. At the risk of dropping it, you could shake your iOS device to undo your last action. Not good.

iOS 13 introduces a variety of three-finger gestures to make these commands quick and easy to invoke. Note that you can use the entire screen for these gestures—it’s OK to make them with one finger over the keyboard.

  • Copy: To copy selected text, pinch in with three fingers, or, more likely, your thumb, index finger, and middle finger.
  • Cut: To cut (copy and then delete) selected text, perform the copy gesture twice in quick succession.
  • Paste: To paste the text you’ve copied at the insertion point, reverse the action—pinching out (spreading) with three fingers.
  • Undo: To undo a mistake, immediately swipe left or tap twice with three fingers. You can keep swiping or double-tapping to undo more actions.
  • Redo: To redo the action that you just undid, swipe right with three fingers.

Whenever you use one of these gestures, a little feedback badge appears at the top of the screen to reinforce what you just did.

If you can’t remember which direction to pinch or swipe, press and hold with three fingers anywhere for a second to see a shortcut bar at the top of the screen with icons for Undo, Cut, Copy, Paste, and Redo.

Finally, instead of using Cut and Paste to move a swath of selected text, try dragging it to the new position.

Slide to Type

Various third-party keyboards have provided “slide-to-type” over the years, letting you type a word by sliding your finger from letter to letter on the keyboard without lifting it up in between. But switching to a third-party keyboard meant that you often gave up useful other features, like Siri dictation, so most people stuck with Apple’s default keyboard.

On the iPhone, iOS 13 now lets you slide to type on its default keyboard, and it works surprisingly well. In iPadOS 13, slide-to-type works only on the new floating keyboard you can get by pinching with two fingers on the default keyboard (pinch out with two fingers to restore the default keyboard). When you get to the end of a word, lift your finger to insert it, and then start sliding again for the next word. If you make a mistake, the suggestions above the keyboard often provide the word you want. You can switch between tapping (best for unusual words) and sliding on a word-by-word basis.

Make a mistake with sliding? By default, tap Delete after inserting a slide-to-type word to delete the whole word, not just the final letter. If you don’t like that behavior, turn off Delete Slide-to-Type by Word in Settings > General > Keyboard.

(Featured image by Lorenzo Cafaro from Pixabay)


Social Media: Today’s article will make text editing in iOS 13 faster and more fun. Read about important new and improved techniques for selecting, copying, and moving text, plus a new slide-to-type option.