Adjust AirPods Options in the Settings App
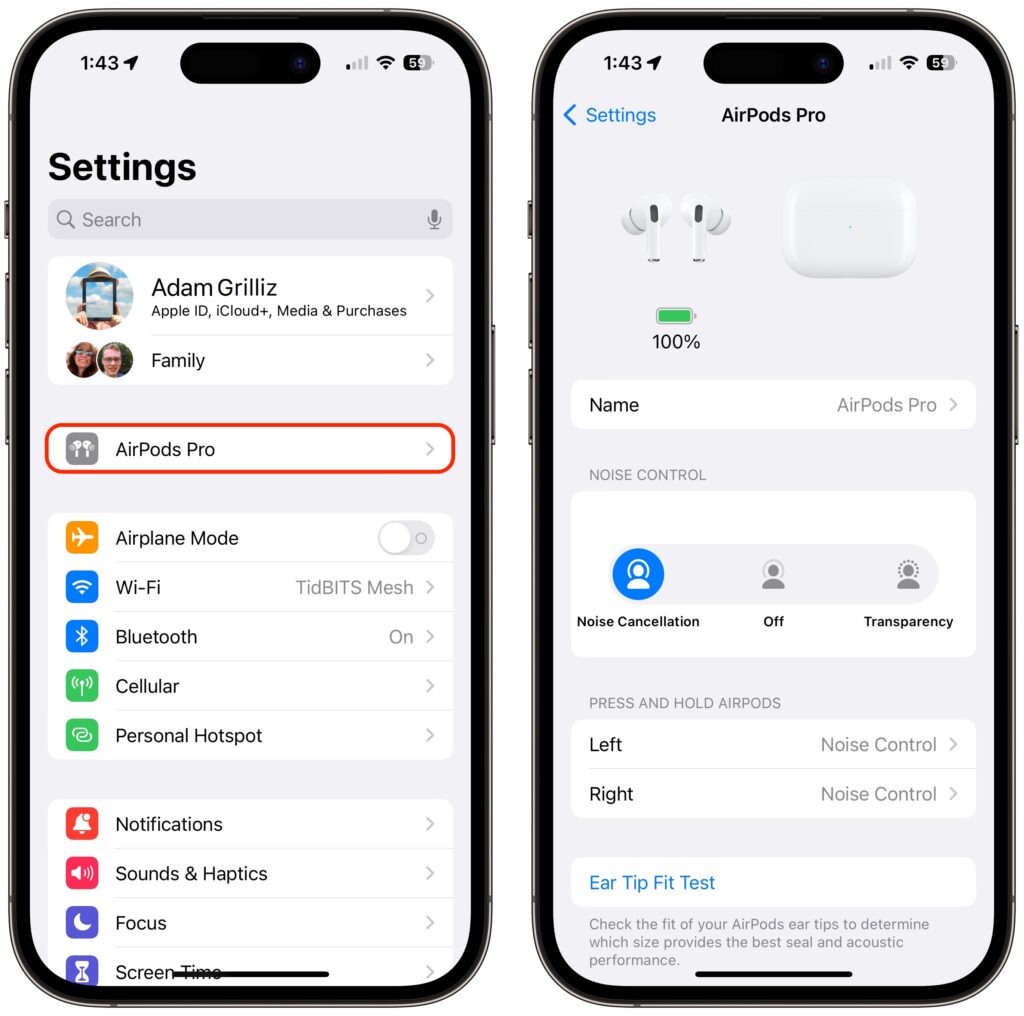
If you sometimes have trouble configuring your AirPods, here’s the trick. The AirPods settings screen is available only when the AirPods are connected to your iPhone, so you must open their case or put them in your ears. Once you do that, a new item with the name of the AirPods appears at the top of the Settings app. Tap it to switch between Noise Cancellation and Transparency, configure what the press-and-hold action does, and start ear tip tests.
(Featured image by iStock.com/Vasily Makarov)
Social Media: Baffled about where the AirPods settings screen is hiding? To find it, start by opening their case or putting them in your ears, and then look for an option near the top of the iPhone Settings app.