What’s the Difference between Removing and Deleting an App?
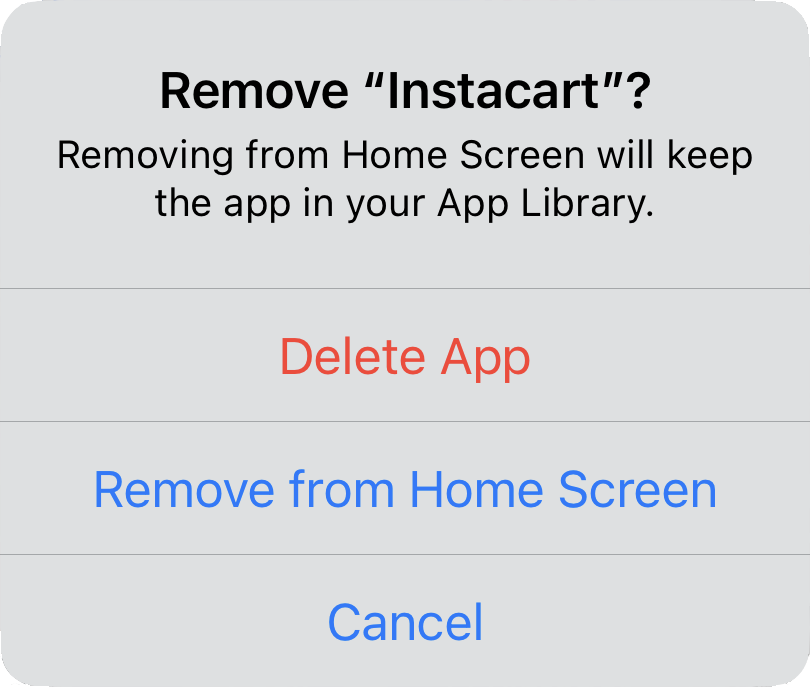
There are many reasons you might want to get rid of apps from your iPhone or iPad. To begin, touch and hold on a blank spot on a Home Screen to enter “jiggle mode.” Then tap the ⊝ icon for any app to see the question about whether to delete the app entirely or merely remove it from the Home Screen. Delete the app if you don’t want to use it anymore or need to reclaim the space it occupies. (You can download it from the App Store again.) Remove the app from the Home Screen if you want to reduce clutter, keep the app on your device, and don’t mind opening it from the App Library (swipe left past all the Home Screens) or from Search (swipe down from the middle of the screen).
(Featured image based on an original by iStock.com/Photosbypatrik)