What You Can Do with the December Wave of Apple Intelligence Features
The first set of Apple Intelligence features appeared in macOS, iOS, and iPadOS in October. Apple has now debuted the second set in the December releases of macOS 15.2 Sequoia, iOS 18.2, and iPadOS 18.2. Apple still considers them to be in beta, which is a nice way of saying that they may not work perfectly. However, they usually do what they promise.
Remember, Apple Intelligence features work only on a Mac with Apple silicon, an iPad with an A17 Pro or M-series chip, or an iPhone 15 Pro or any iPhone 16. Intel-based Macs and older iPhones and iPads can’t play. If you’ve been holding off on upgrading, this is a fine time to make the jump. Regardless, you must turn on Apple Intelligence, which you do on the Mac in System Settings > Apple Intelligence & Siri and in Settings > Apple Intelligence & Siri on the iPhone and iPad.
What can you look forward to with this second set of Apple Intelligence features?
Image Playground Helps Make Fun Images
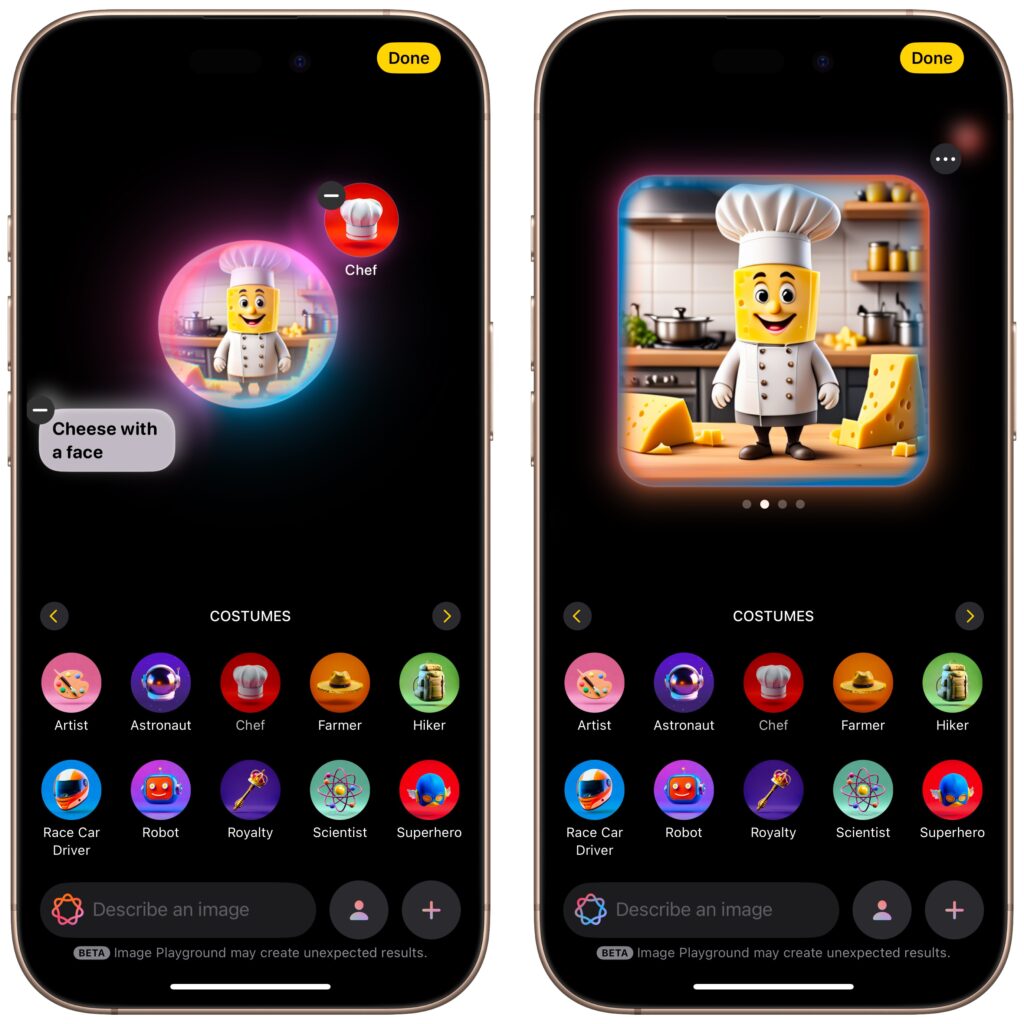
With Image Playground, Apple is dipping its toe into AI-driven image generation. The standalone Image Playground app lets you create amusing images with text descriptions, either starting from scratch or from a photo. You can choose from two styles: Animation, which Apple describes as “a modern 3-D animated look,” and Illustration, which “offers images with simple shapes, clear lines, and colorblocking.” (A third Sketch style will appear in a future release, and you can use ChatGPT in Writing Tools to create images in many other styles.) You can also create images directly in Messages, Freeform, Keynote, and other apps.
Once you’ve entered a few words of description or selected a person, you can embellish the image by tapping the buttons for suggested themes, costumes, accessories, and places. Each addition causes Image Playground to generate a new image, and swiping left on that image pushes it to try again. Tap the ••• button to save or share an image you like. Saved images become available on all your devices.
Genmoji Spice Up Chats on the iPhone
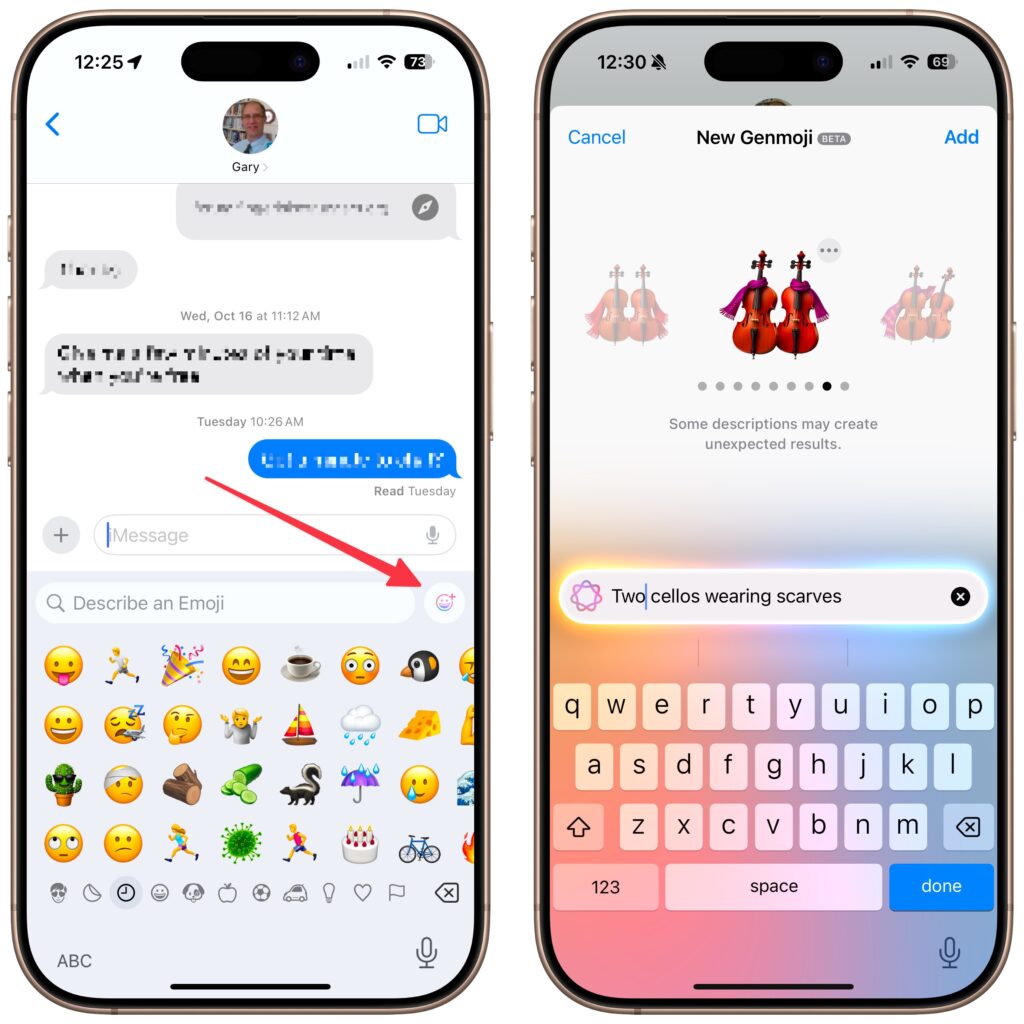
Less ambitious but potentially more fun are Genmoji, which are custom emoji that you create with text descriptions. Want to emote about the cold to a fellow musician? Create an emoji featuring two cellos wearing scarves.
To do this, switch to the emoji keyboard, tap the Genmoji button to the right of the search field, and describe your desired emoji. As with Image Playground, you can keep swiping left on the generated image to create more variations. When you get what you like, tap it to insert it into your chat or document.
Remember that a single emoji sent by itself in Messages is quite large; two or three emoji are medium-sized, and inserting any more than that or adding text causes them to display at the smallest size.
Created Genmoji are added to your emoji collection on all your devices, but they’re actually stickers. You can remove them by tapping the ⊕ button in Messages, tapping Stickers, and using touch-and-hold on a Genmoji to access the Remove button. You can’t create Genmoji in macOS right now, but Apple has promised that feature for a future release.
Image Wand Cleans Up Apple Pencil Sketches
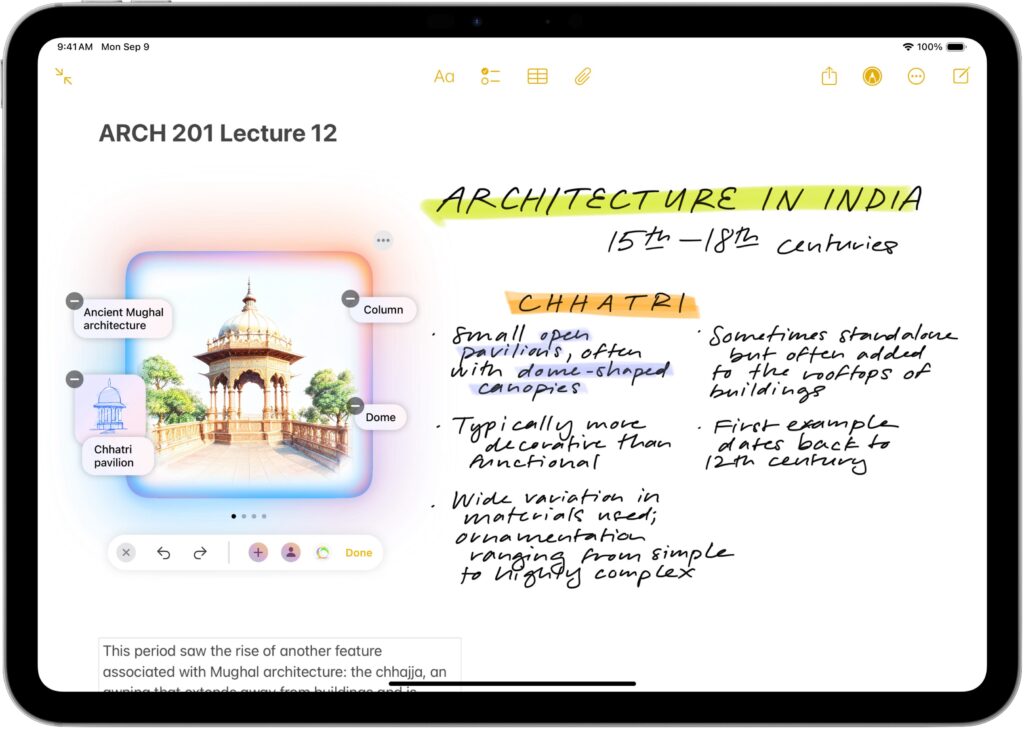
In iPadOS 18.2, the Notes app now offers an Apple Intelligence-powered Image Wand tool for those taking notes with an Apple Pencil. Make a rough sketch with your Apple Pencil, select Image Wand, draw a circle around your sketch, and Image Wand will turn it into a polished image. If your circle also contains text, Image Wand considers it when building the final image.
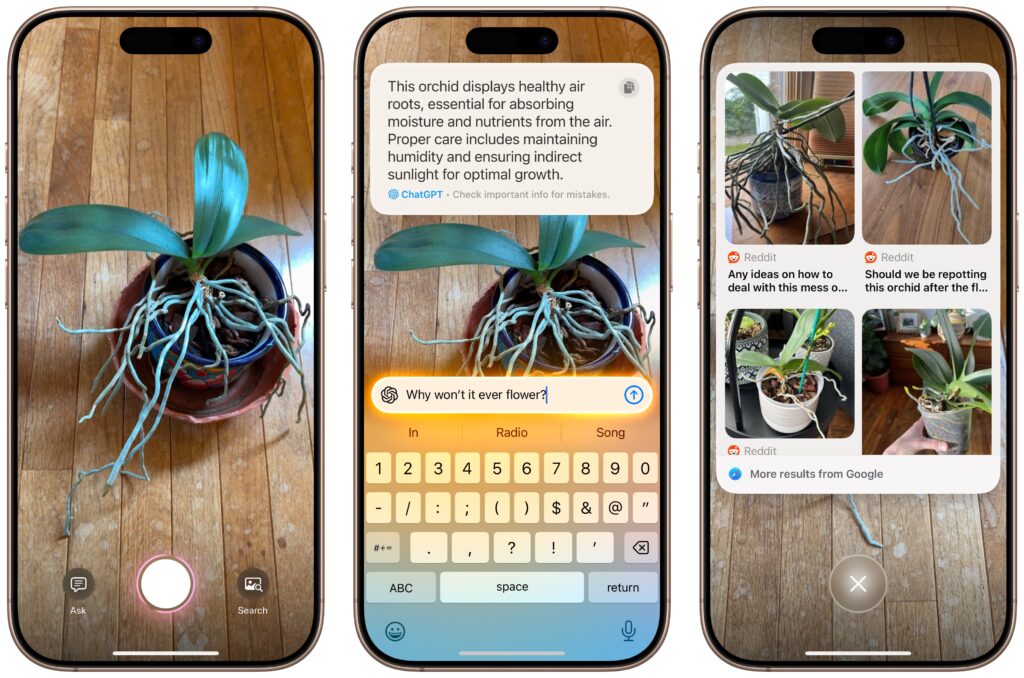
Visual Intelligence Explains What You See
When you upgrade to iOS 18.2 on an iPhone 16, the Camera Control button gains a new capability: Visual Intelligence. Press and hold it (whenever the Camera app isn’t already open, since that will trigger video recording), and Visual Intelligence presents Ask and Search buttons on either side of the shutter button. Tapping Ask causes ChatGPT to describe the image and lets you pose follow-up queries, and tapping Search performs a Google reverse image search; tap any of the results to load it. (If you can’t immediately tap Ask or Search, press the Camera Control button again or tap the shutter button to freeze the image temporarily.)
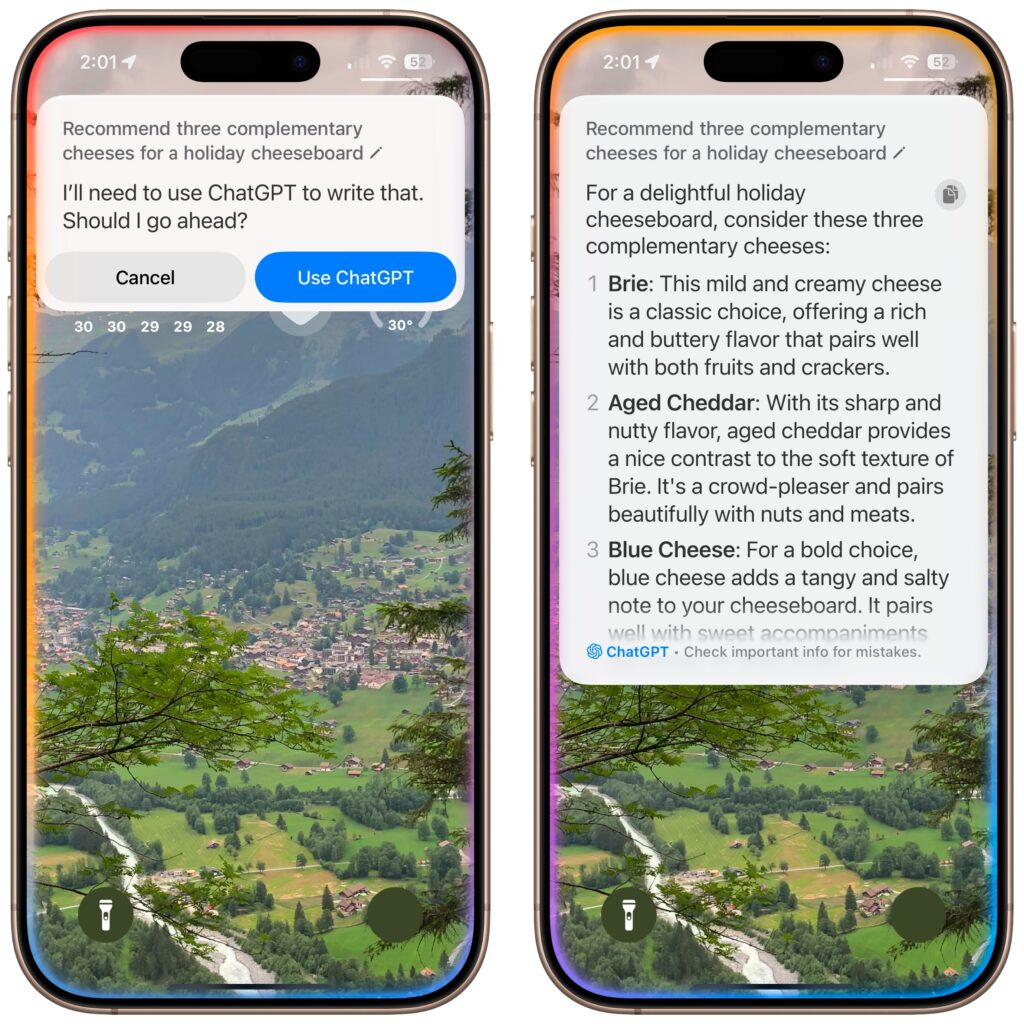
Siri Channels ChatGPT
Perhaps the most anticipated enhancement to Apple Intelligence is the integration of ChatGPT into Siri. Unfortunately, if your goal is to converse fluidly with ChatGPT, you may be better off using OpenAI’s ChatGPT app, perhaps triggered by the Action button or a widget. The problem is that unless you explicitly direct a Siri query by starting with “Ask ChatGPT,” Siri may try to answer with its own Web search or trigger a command, leading to inexplicable and unhelpful responses. Even when you get Siri to ask ChatGPT for a response, there’s no option to have it read back to you aloud, as with ChatGPT’s Advanced Voice Mode.
If you want to use ChatGPT through Siri, turn the feature on in Settings > Apple Intelligence & Siri > ChatGPT. While you’re there, you’ll probably want to turn off Confirm ChatGPT requests, which otherwise ask if you want to use ChatGPT every time it comes up. Although it may not be obvious, once you’re in a conversation with ChatGPT, you can keep talking as long as the Siri animation continues around the edge of the screen. Unfortunately, you cannot scroll back to any previous response while Siri is channeling ChatGPT; for full transcripts, you must revert to the ChatGPT app or website.
ChatGPT Enhances Writing Tools
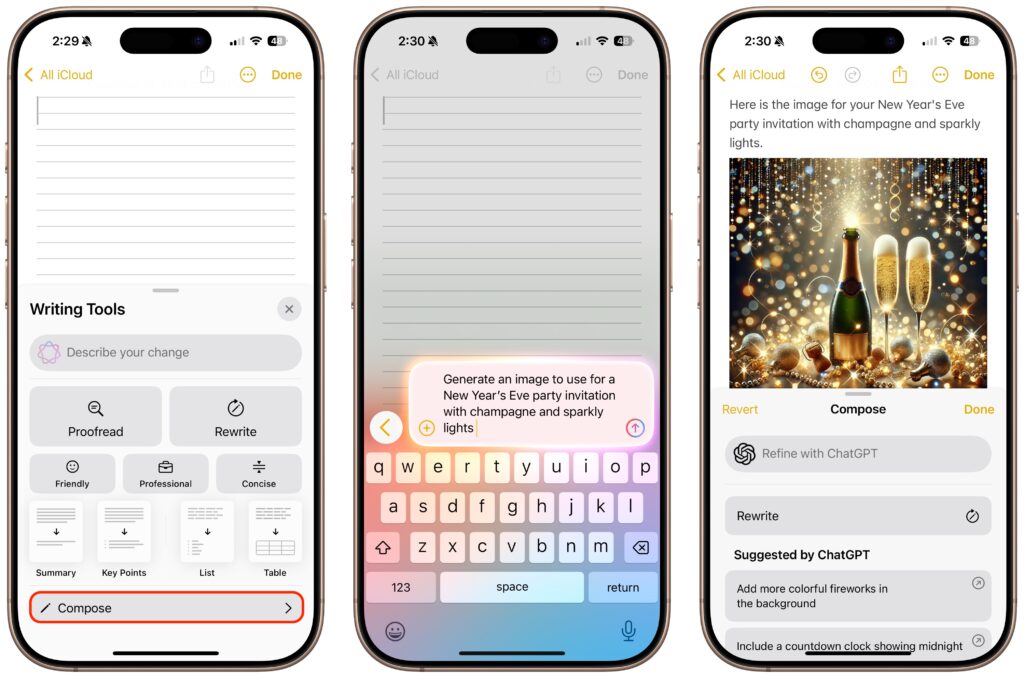
The final place ChatGPT appears in Apple Intelligence is in Writing Tools, which may be more useful than its Siri integration. The new Compose option leverages ChatGPT to generate content wherever you’re writing, and you can also use it to create images using ChatGPT’s image-generation capabilities. Writing Tools also now allows users to request their own changes to selected text (including recasting it as a haiku, for example) instead of relying solely on the canned options to make the text friendlier, more professional, or more concise.
To do this, bring up Writing Tools in any app (by choosing Edit > Writing Tools > Show Writing Tools or Control-clicking selected text and choosing from the Writing Tools menu). Tap Compose and describe what you want ChatGPT to create. If it’s not quite what you want, which is likely, keep asking for refinements or go in a different direction.
What’s Next for Apple Intelligence?
Although this second wave of Apple Intelligence features largely fulfills Apple’s main promises, a few major additions remain for 2025. Most notable are significant changes to Siri that will enable it to take your personal context—your email, messages, and photos, for instance—into account. Siri will also gain onscreen awareness to include what you see in its responses. Finally, Apple is giving Siri access to hundreds of new actions in Apple and third-party apps, which should make it more capable of acting on your behalf. The other notable upcoming change is Priority Notifications, which will evaluate the notifications from all your apps and help you focus on the most important ones.
We also hope Apple will continue to refine and improve the existing Apple Intelligence features. While they’re well integrated into the overall Apple experience, they seldom measure up to ChatGPT, Claude, Gemini, and other leading AI systems.
(Featured image by Apple)
Social Media: We look at the latest wave of Apple’s AI features and help you start using them for discussions with ChatGPT, creating images, making custom emoji, learning about your environment, and more.